How to restrict access to EventLog Analyzer user interface
Objective
This document will guide you through configuring access restrictions for the EventLog Analyzer user interface. You can choose to either block specific IP addresses or allow access only from designated IPs or Hosts. EventLog Analyzer ensures you can allow traffic only from trusted sources and block the rest.
Prerequisites
- You will need to have admin access to the EventLog Analyzer console.
Steps to follow
Step 1: Open EventLog Analyzer console/UI and navigate to the below path
Settings → Admin Settings → Logon Settings.
Settings → Admin Settings → Logon Settings.
Step 2: Navigate to the Allow/Restrict IPs tab.
Step 3: Click on the Enable Allow/Restrict IPs Checkbox to enable IP restriction.
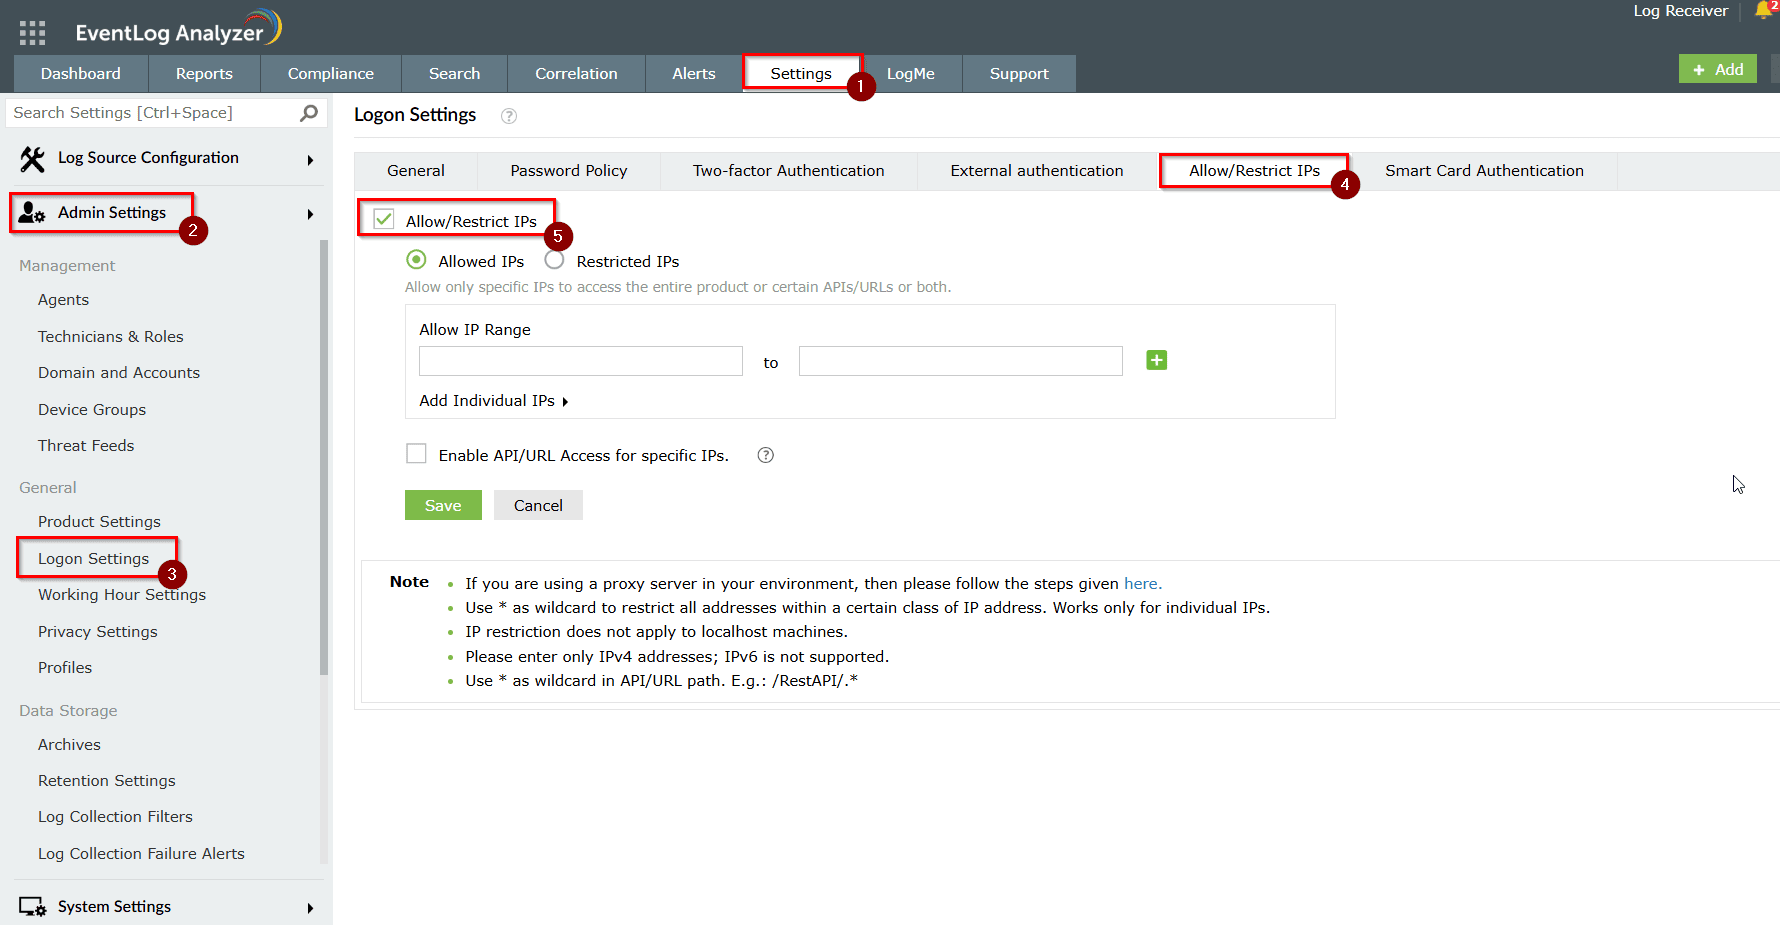
Step 4: To restrict certain IP addresses, click on the Restricted IPs. Also, you can consider allowing the EventLog Analyzer console access only to certain IPs by selecting the Allowed IPs.
Step 5: Restricted IPs:
Follow these steps to restrict UI access by certain IP addresses.
Follow these steps to restrict UI access by certain IP addresses.
- Enter the desired IP range in the provided field.
- To add multiple IP ranges, click the "+" icon.
- You can also specify individual IP addresses and hostname under the "Add Individual IPs" section.
- When accessed via Restricted IPs, you will receive an Access Denied error.
Step 6: Allowed IPs
Follow the below steps to allow UI access to certain IP/IP ranges.
Follow the below steps to allow UI access to certain IP/IP ranges.
- Enter the desired IP range in the Allow IP range field.
- To add multiple IP ranges, click the "+" icon.
- You can also specify individual IP addresses under the "Add Individual IPs" section.
Tips
- You can use the asterisk (*) as a wildcard in individual IP addresses to restrict entire address ranges.
- For example, entering 192.168.29.* will deny access to all IPs within that subnet.
- Hostname can be added under individual entries to offer access control based on hostname.
Related topics and articles

New to ADSelfService Plus?
Related Articles
How to restrict access to EventLog Analyzer user interface
Objective This document will guide you through configuring access restrictions for the EventLog Analyzer user interface. You can choose to either block specific IP addresses or allow access only from designated IPs. EventLog Analyzer ensures you can ...Troubleshooting: Unable to Access EventLog Analyzer User Interface
Issue description You may not be able to access EventLog Analyzer user interface or web console in your browser or over multiple machines thou EventLog Analyzer is running as service/console mode. This article offers possible cause and step by step ...How to enable CAPCHA in EventLog Analyzer
Objective CAPTCHA stands for Completely Automated Public Turing test to tell Computers and Humans Apart. Login CAPTCHA serves as a security measure against bot-based brute- force attacks. You can configure whether to show CAPTCHA always or after a ...Unable to start EventLog Analyzer
Issue description This issue occurs when the EventLog Analyzer service fails to start, or when users are unable to access the web client through the browser (typically on ports 8400 or 8445). Users may experience one or more of the following ...How to track the activities performed by technician (user audit) in EventLog Analyzer
Objective This article focuses on step by step instructions for tracking the activities performed by a technician in EventLog Analyzer user interface. Auditing the user activities in the EventLog Analyzer user interface offers a complete visibility ...