How to configure report mode for scheduled reports in EventLog Analyzer
Objective
Automate the delivery of scheduled reports in EventLog Analyzer by configuring the desired reporting mode. You can choose to send the report via email, save it to a file location, or both—helping ensure flexible and timely distribution with minimal manual effort.
Prerequisite
- Email server settings must be configured under Settings → Admin Settings → Notification → Mail Settings.
- Refer to the Email Settings configuration for more information.
- When saving files to a network storage location:
- EventLog Analyzer should be running with a service account.
- The same account must have read and write access to the network location.
Steps to follow
Step 1: Navigate to Settings → Admin Settings → Product Settings → Product Configurations tab.
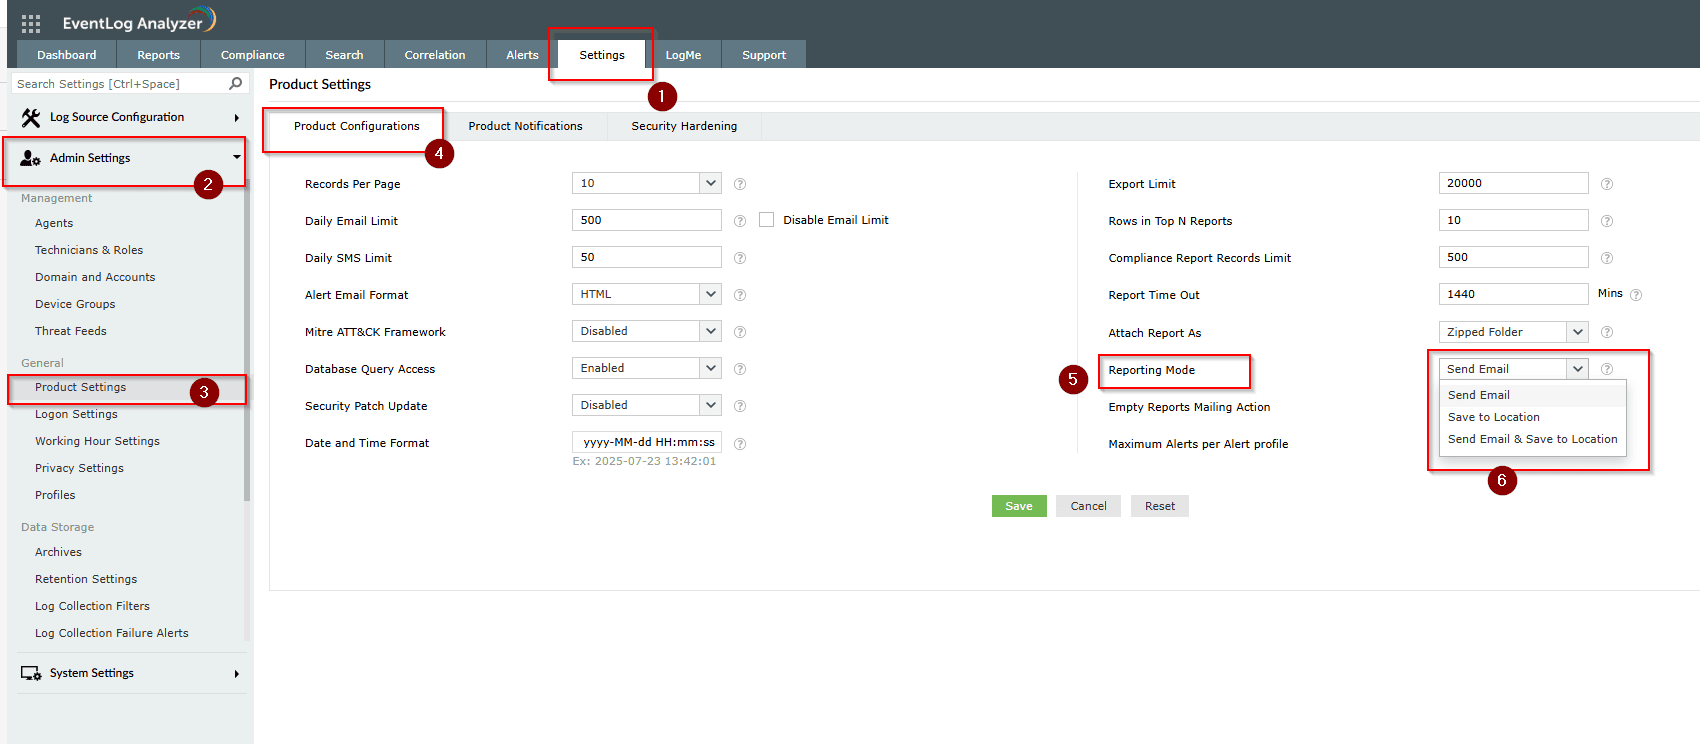
Step 2: Under the Reporting Mode section, choose one of the following options:
- Send Email: The scheduled report will be sent as an attachment via email.
- Save to Location: The scheduled report will be saved to the specified file system location.
- Send Email and Save to Location: Both actions are performed—an email is sent and the report is saved to a location.
- If the attachment option is unchecked, the email will contain the Report Name(Name of the scheduled report), Report generated time, From and To time.
- This helps:
- Reduce load on the mail server by avoiding large attachments.
- Notify users via email without sending bulky files.
- Let users access the exported report directly from the server.
- This setup balances efficient communication and secure report access.
- Note: Users should have access to the location where the reports are saved.
Step 3: Click Save to apply the reporting mode settings globally.
Tips
- Use CSV format for large reports—it’s faster to generate and easier to open.
- Make sure the folder path used in Save to Location is accessible and has proper read/write permissions for the EventLog Analyzer service.
- Before relying on email delivery, test the SMTP email settings to confirm that emails are sent successfully.
- Give your scheduled reports clear and meaningful names to help you quickly identify them later.