Shared Mailbox for Support Groups
In the support group mail configuration, some are using an alias email as the "Sender's Email" and encounter an issue where, upon sending emails from the application support groups, the recipient sees the primary address associated with the alias, not the alias itself, as the sender.
This behaviour is due to how Microsoft handles email address. To address this, we recommend creating a shared mailbox for the support group.
This article provides the steps to create a shared mailbox and outlines the necessary configurations to ensure correct sender behaviour for the application support group.
Step 1: Create a Shared Mailbox
2. Navigate to Teams & Groups > Shared Mailboxes
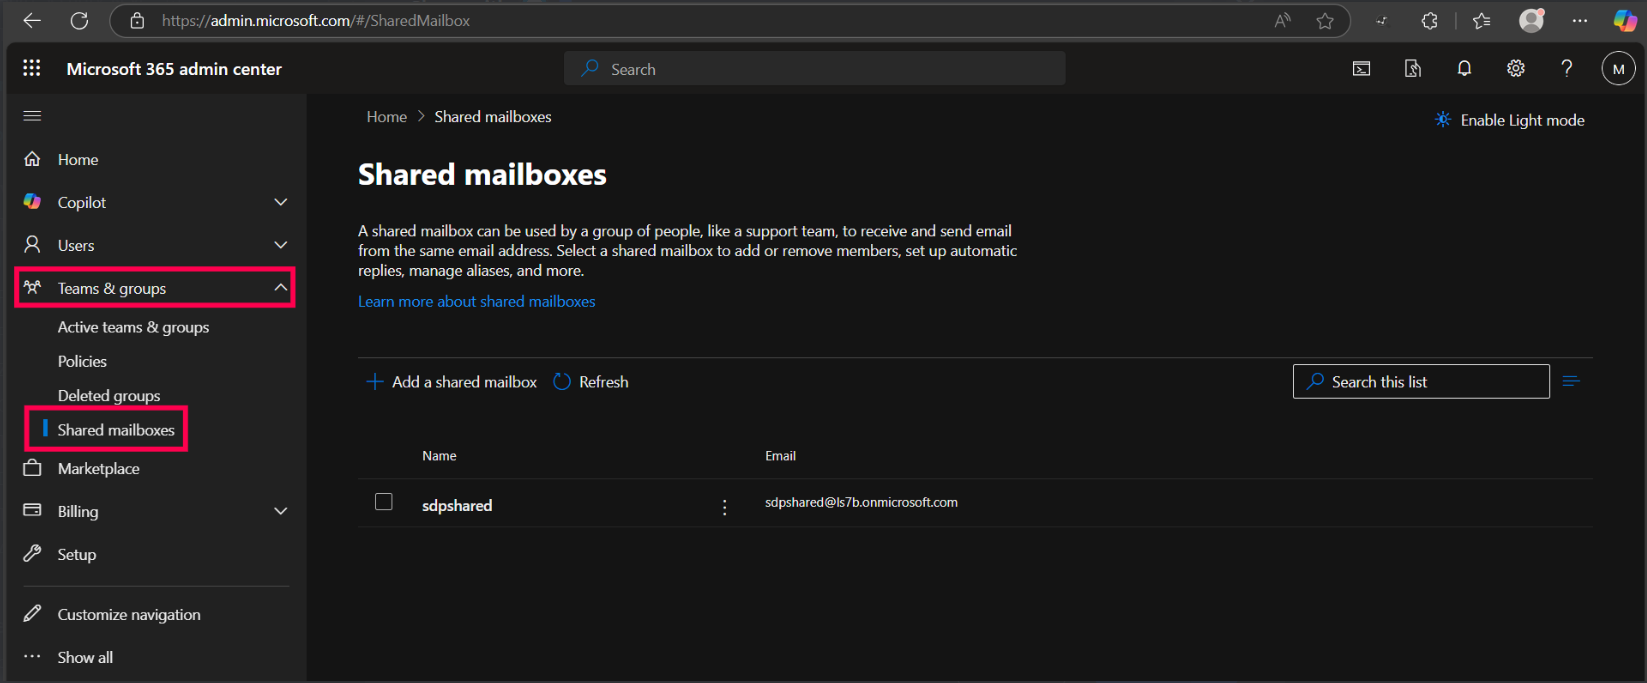
3. Click + Add a shared mailbox
4. Enter:
Name (e.g., Support Team)
5. After clicking "Save Changes", the mailbox will be successfully created.
6. Configure the newly created shared mailbox within the SDP Support Group settings.
Step 2: Add Delegate
After creating the mailbox:
1. On the same Shared mailboxes page, click the shared mailbox you created.
2. Under "Manage mailbox permissions", configure the following steps:
- Click "Send as permissions".
- Click "Add permissions".
- Add the mailbox configured for outgoing emails in SDP, then click "Add".
This configuration allows the mailbox set in SDP for outgoing emails to send messages that appear to come from the support group’s shared mailbox address.
Step 3: Create an Exchange Transport Rule to copy emails from the shared mailbox (Group Mailbox) to the incoming mailbox.
This configuration ensures that all emails sent to the shared mailbox are also forwarded to the mailbox configured in the SDP incoming settings, making those emails available for the application to fetch.
- Go to https://admin.exchange.microsoft.com
- In the left pane, go to Mail flow > Rules.
- Click + Add a rule > Create a new rule.
Fill in:
Name: (e.g., Copy Shared Mail to User)
Apply this rule if... → "The recipient is" → Select Shared mailbox
Do the following → "Redirect the message to" → Select the mailbox configured under Incoming Settings in SDP.
Click Next, then check the "Set rule settings" section (the default settings are sufficient). Click Next again to proceed to the "Review and finish" section, verify the details, and click Finish.
4. Make sure the created rule is enabled; if not, use the toggle switch to enable it.

Please note that Microsoft configurations may take some time to take effect. If the changes don’t appear to be working immediately, wait for a while and then try again.
For any further clarification, feel free to contact our support team. (support@servicedeskplus.com)

New to ADSelfService Plus?
Related Articles
Support Groups
This Report is used to export the list of Support groups configured in the application with the complete details. MSSQL SELECT qd.QUEUENAME "Support group", ci.DESCRIPTION "Description", su.first_name "Owned By", STUFF( (SELECT ',' + au.first_name ...Support Groups configuration
1) The support groups that we are configuring in a template is always based on the sites. When we have more than one account assigned in the template, only the support groups added under “Default Settings” will get displayed in the template. Refer ...Query to show technicians associated accounts, sites and Support groups - (MSSQL & PGSQL)
Tested in Build PGSQL (14300) or MSSQL (14306) 1.Technicians and associated Accounts/Sites: select aau.User_id, aau.first_name "First Name", sdu.lastname "Last Name", aal.name "Login Name", AaaContactInfo.EMAILID "Email Address",sdu.jobtitle "Job ...Select site for available groups drop down
Drop down shown in the screenshot will be appeared when there are more than 2500 support groups. This is shown to make it easier for the user to select and associate groups when the count is more.Script to AutoShare Request to Groups
Please follow the below link to setup python on the server https://pitstop.manageengine.com/portal/en/kb/articles/how-to-setup-python-on-the-server-11-11-2019 Steps to configure 1. Extract the attached zip file in <Home>/integration/custom_scripts ...