How to upgrade OpManager using the upgrade manager option?
Upgrade manager simplifies the upgrade process into three stages:
1. Upload service packs
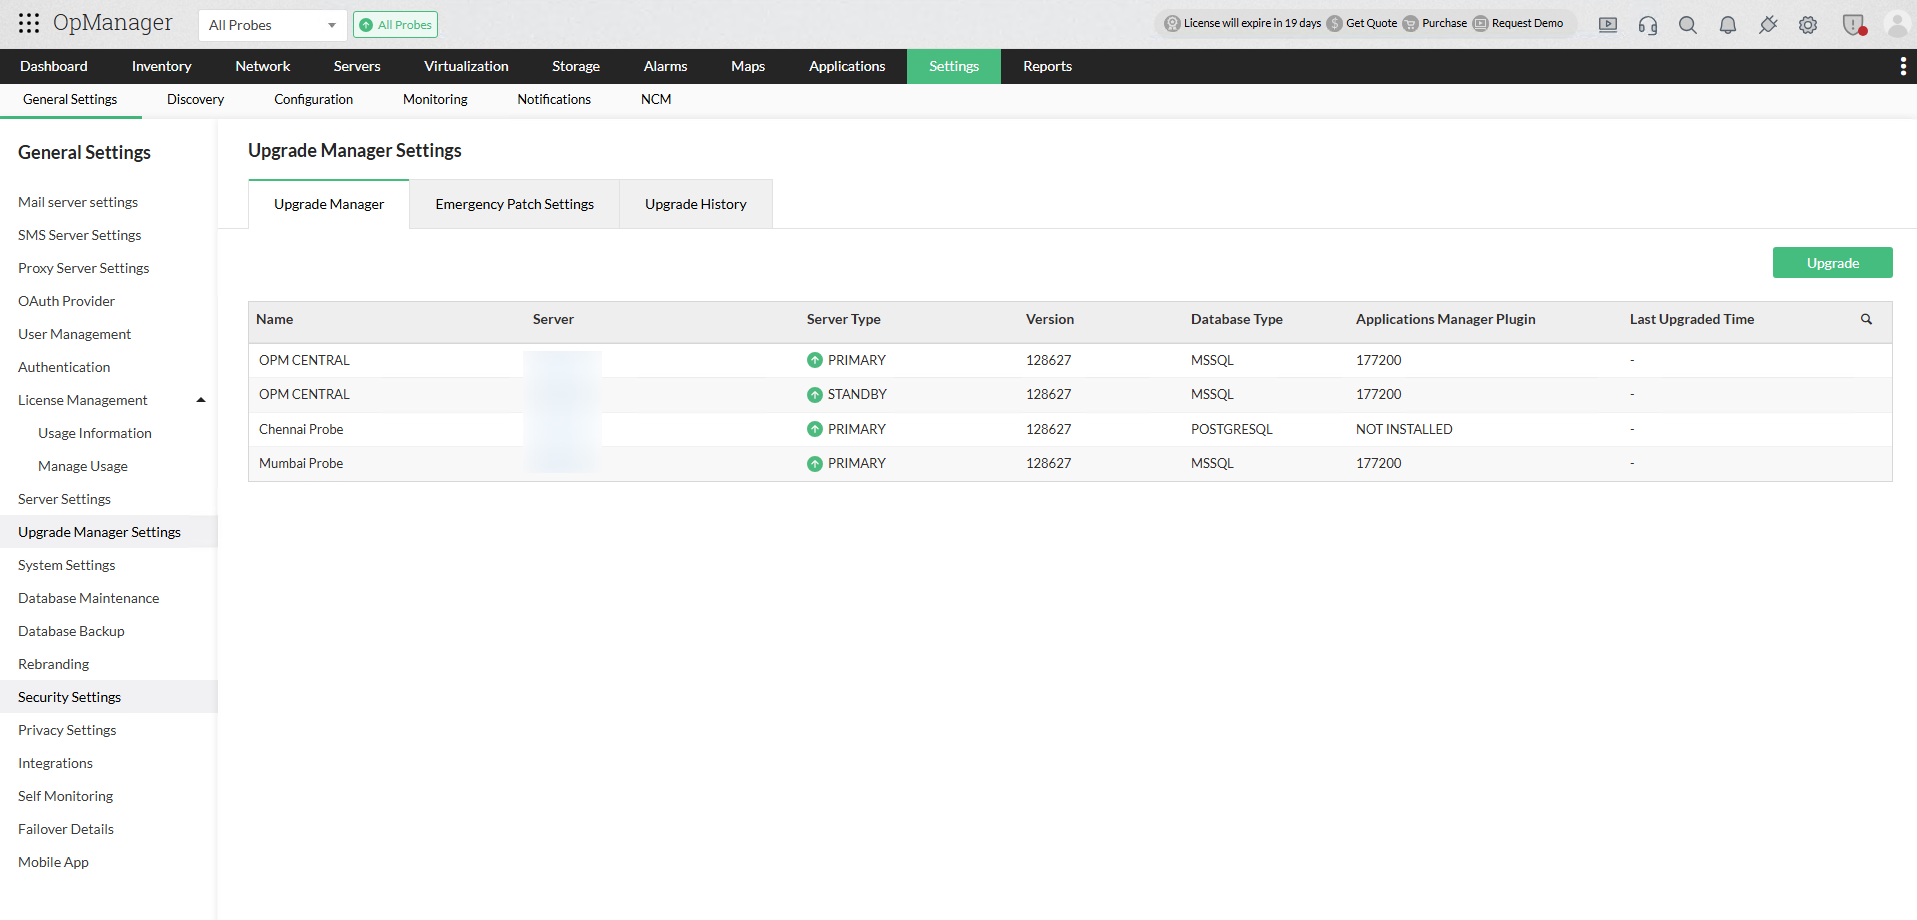
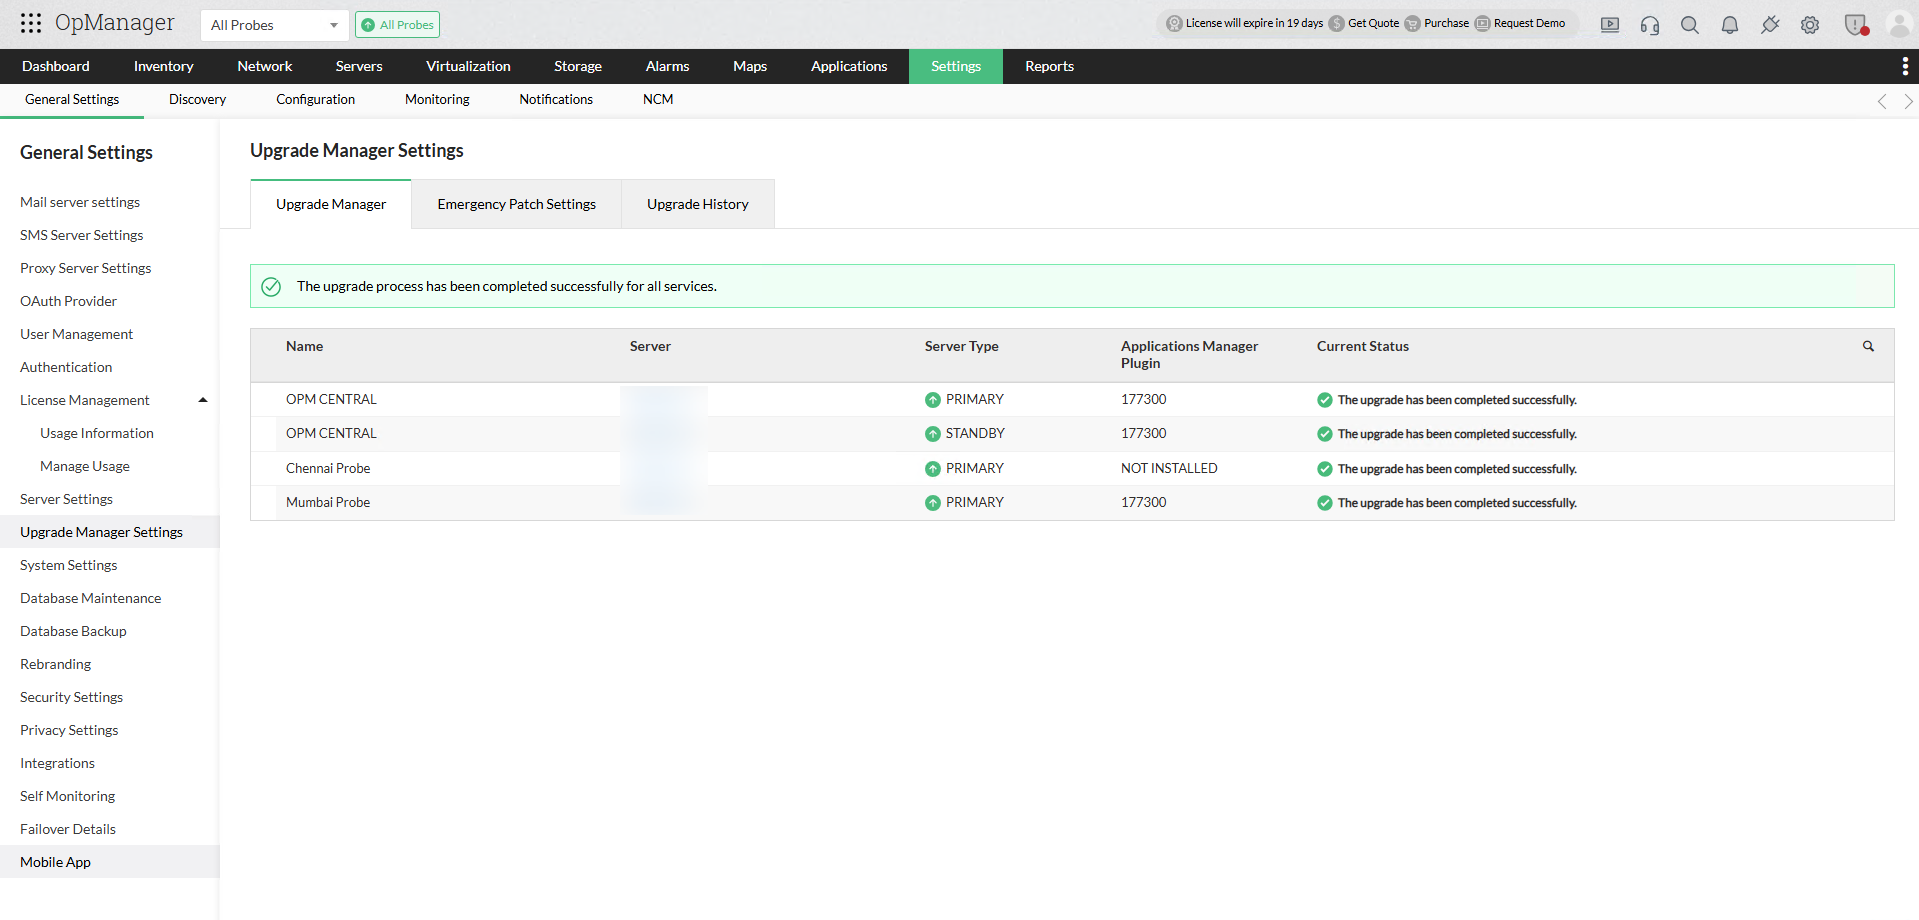
- Go to Settings > General Settings > Upgrade Manager.
- The upgrade manager page provides comprehensive installation details about the servers.
- Click the Upgrade option at the top right.
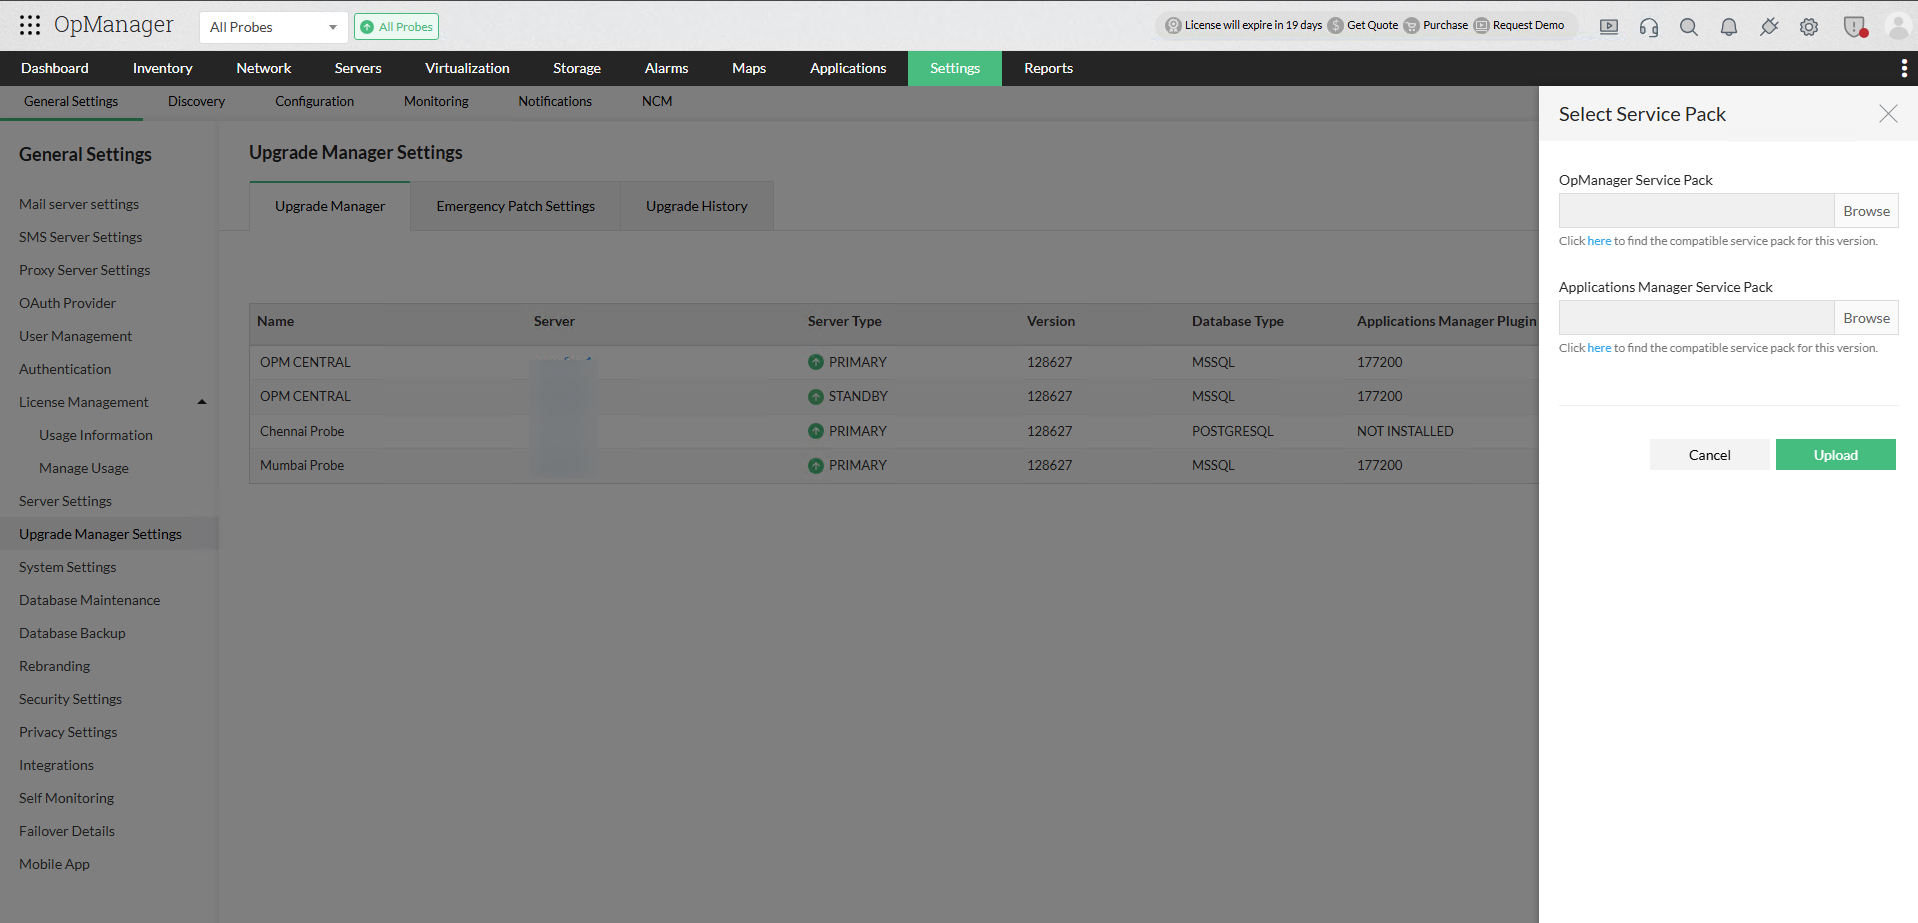
- Download the relevant service pack from the click here option provided below the OpManager Service Pack field, and click Upload.
- The service pack will be automatically downloaded by the probes. The service pack's version number, type will be displayed.
- The service pack's download speed for individual probes will be displayed under the Current Status column.
- If a probe goes offline or loses communication with the central while the service pack is downloading, the download will automatically resume once communication is reestablished with the central service.
Note: If the service pack validation fails, you will be prompted to download and import an Integrity Certificate file to retry the validation process and proceed with the upgrade.
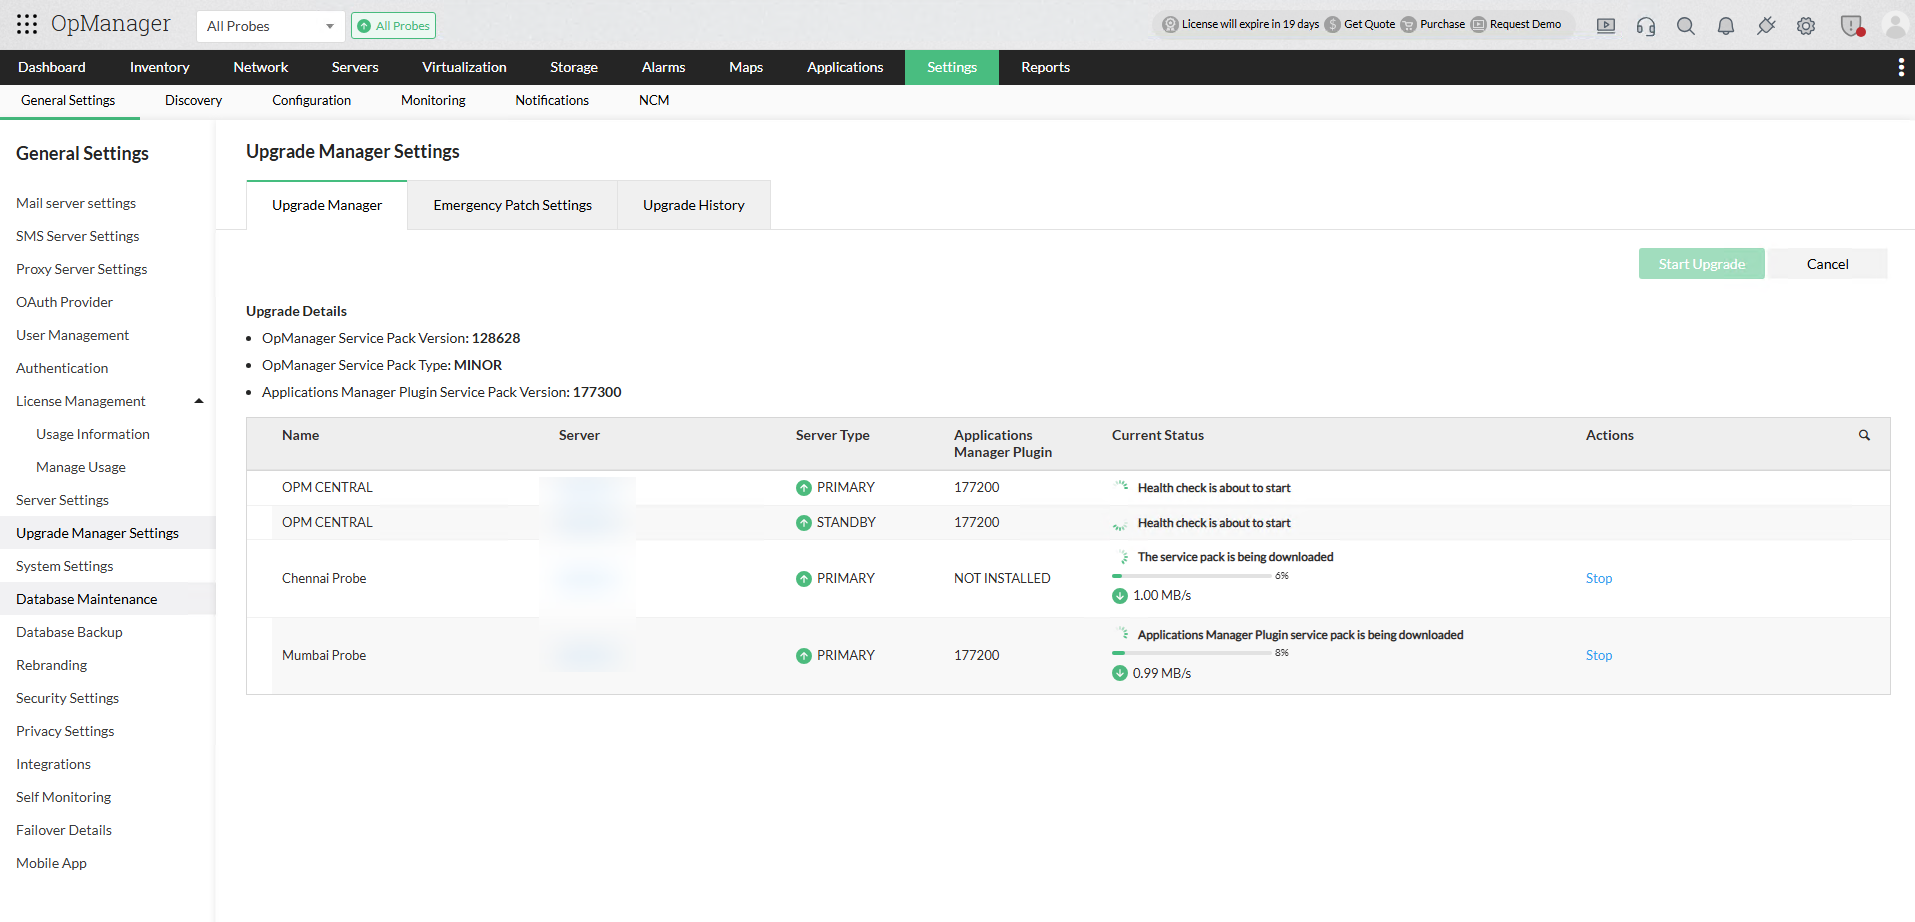
While downloading the service pack, if slowness or network issues is encountered, you can manually stop the download using the Stop button in the Actions column. In that case, manually copy the service pack to the <OpManagerProbe>\UpgradeManager directory for OpManager service packs, and <OpManagerProbe>\AppManager\UpgradeManager for APM Plugin service packs. Use the Refresh button to fetch the latest status of the respective probe service.
2. Health check
- The health check(service pack prerequisites) will automatically commence when the service pack is downloaded to verify the prerequisites for upgrade.
- If the health check fails, you can view the specific failure details by clicking the "Details" button.
- Once the health check conditions are met, you can use the "Retry" button to reattempt the health check.
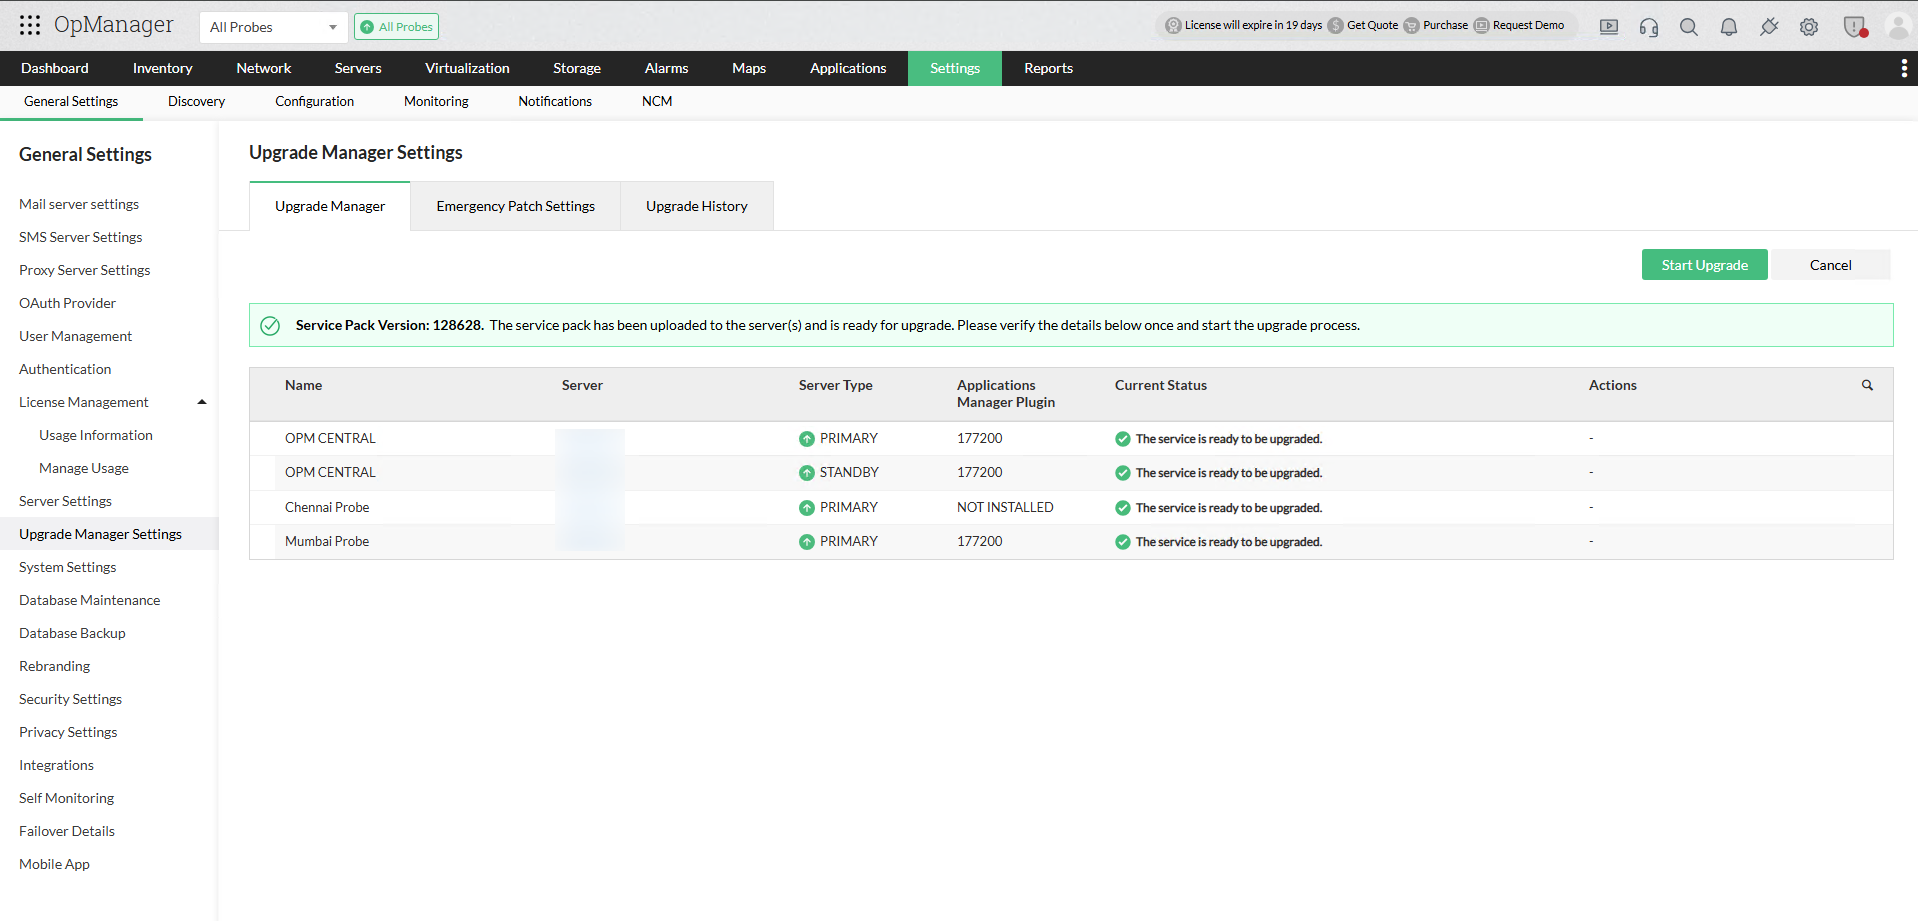
- With a successful health check for both the central and all probes, the product is now ready for the upgrade.
- Click the Start Upgrade button to proceed with the upgrade.

3. Upgrade process
- The upgrade will start, and the progress will be displayed automatically on the service URL.
- The APM plugin upgrade will automatically start once OpManager has been successfully upgraded on the server.
- For failover servers, the upgrade will start automatically for both the active and the standby server .
- All probes will automatically begin upgrading simultaneously once the central upgrade is successfully completed.
- Upgrade details for individual servers will be automatically updated under the Current Status column in central.


New to ADSelfService Plus?
Related Articles
Upgrading OpManager
Before proceeding with the below upgrade steps, Take backup of OpManager using this link 1. Stop OpManager service. 2. Open the command prompt with administrative privilege and run the script UpdateManager.bat under \\opmanager home\\bin folder. ...Installing OpManager agent on devices using Windows GPO Scheduler
You can also install the OpManager agent in your devices using the Scheduler option of your Active Directory server. With the scheduler, you can deploy the agent instantly or at a specified time, unlike the Startup-based script where the installation ...OpManager Scalability recommendations
If your organization is expanding and looking to introduce additional elements and monitors, follow this guide on scalability recommendations. We've outlined the maximum counts and limits for resources and metrics in OpManager to maintain optimal ...Enabling SSL for opmanager web console using pfx or keystore or truststore
Discover devices using a CSV or text file in OpManager
Devices can be imported from a csv file and discovered in OpManager. To perform this, For OpManager versions 125174 and above: Go to Settings -> Network Discovery -> New Discovery. Select the CSV File Import option. Browse and select the CSV file ...