Installing OpManager agent on devices using Windows GPO Scheduler
You can also install the OpManager agent in your devices using the Scheduler option of your Active Directory server. With the scheduler, you can deploy the agent instantly or at a specified time, unlike the Startup-based script where the installation is performed when the device is restarted.
To initiate the scheduler-based installation, follow the steps below:
- Creating or provisioning network share
- Create a GPO to identify targets for deployment
- Creating a scheduled task to execute deployment and installation of our Agent
Creating or provisioning network share
- Login to your Windows Server as an Administrator user.
- Open the Server Manager Console from the Administrative Tools menu.
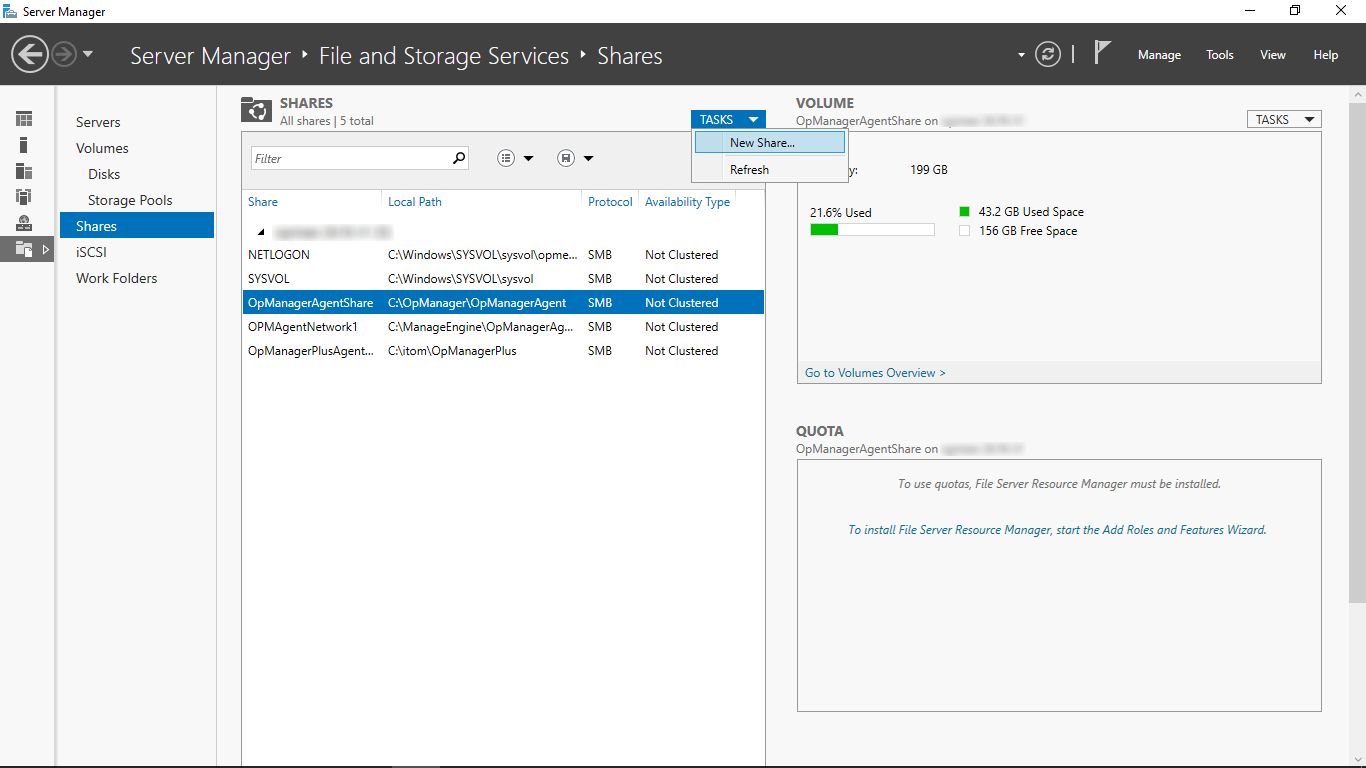
- From the Server Manager Dashboard, select File and Storage Services.
- Open the Shares tab, click on Tasks and select New Share.
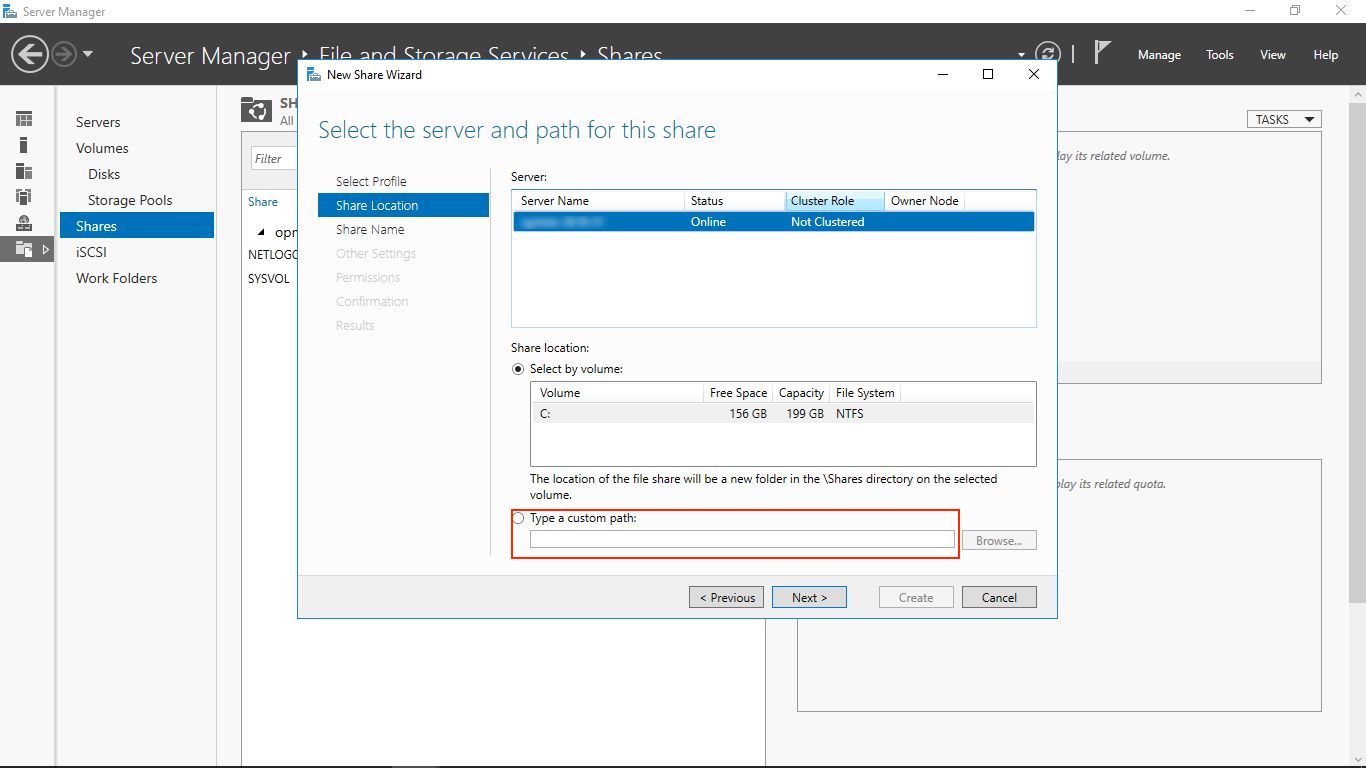
- On clicking, a "New Share Wizard" opens up. In the wizard, click on "Select Profile", select the option "SMB Share - Quick", then click Next.
- In the Shared Location tab, enter the file path to the shared folder for deploying the agent installer, and then click "Next".
- On the Specify share name tab, enter a name for your share. Enter a share description, if needed. The wizard will now automatically create the local and remote file paths in the share.
- After this, click Next to configure the settings.
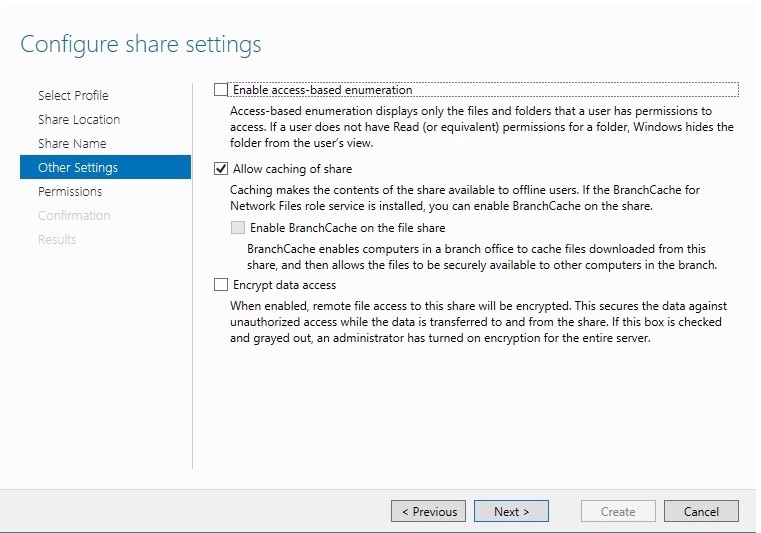
- On the Configure Share Settings wizard page, accept the default options in Other Settings (Allow caching of share) and click "Next".
- On the "Specify Permission to control access" page, accept the default permissions and click Next.
- On the Confirm Selections page, review your selections, and then click Create. The new public share is now visible in the Shares pane.
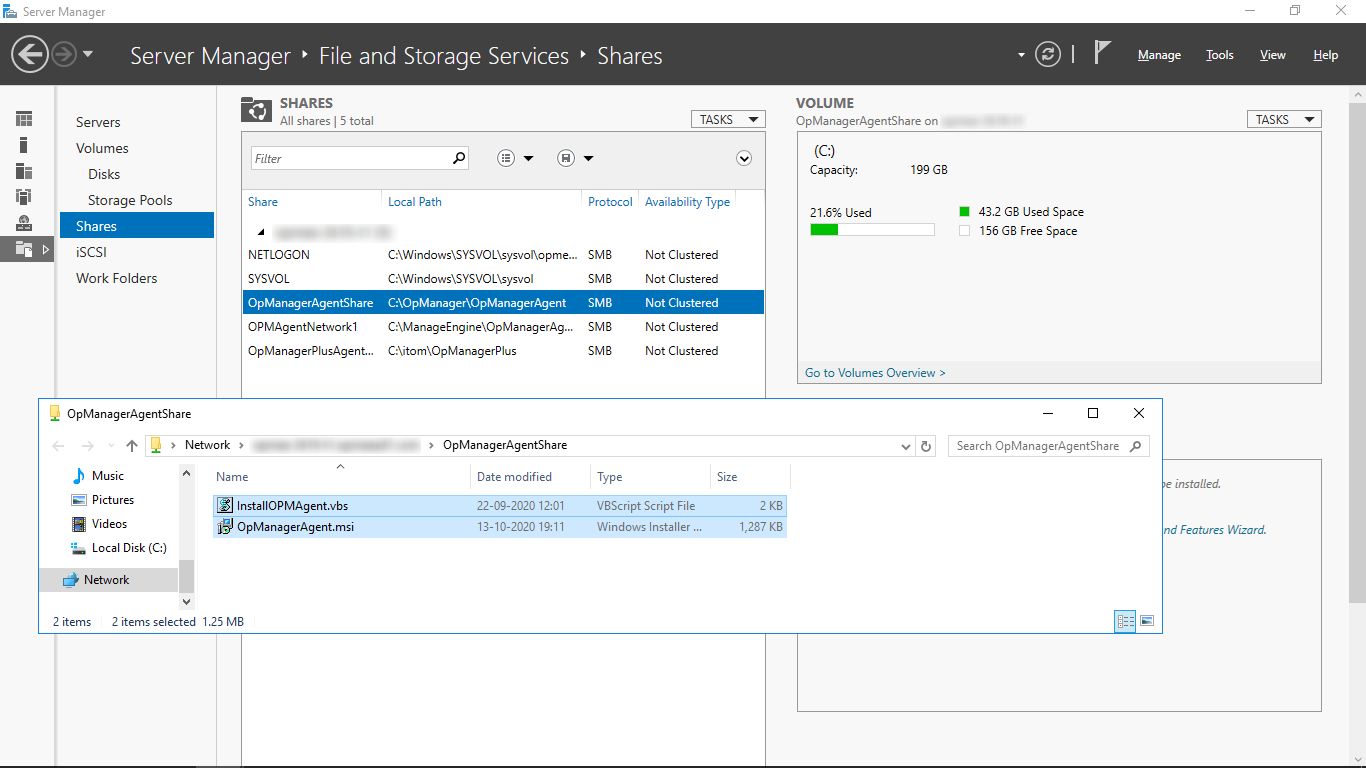
- Now, right-click on the share and select Open Share.
- Download the OpManager Agent zip file from OpManager web console by navigating to Settings > Discovery > Deploy Agent. Extract the OpManagerAgent.msi and OPMAgentServerInfo.json files from the zip file and place them in the local directory.
- Also, download the script from this page Copy SHA256 and save it as InstallOPMAgent.vbs.
- Place OpManagerAgent.msi, OPMAgentServerInfo.json and InstallOPMAgent.vbs file in the share.
NOTE: It is mandatory to download a fresh copy of the OpManagerAgent.zip file and use the files within it for the installation process.
Note: Take a note of the full network path (not just the local path) as we will be using this later in the installation process.
Create a GPO to identify targets for deployment
- Open the Group Policy Management Console (GPMC) by opening the Run window (Windows key + R) and typing gpmc.msc.
- After opening the GPMC, right-click on your target organizational unit (in our case, a domain), and select Create a GPO in this domain, and link it here option.
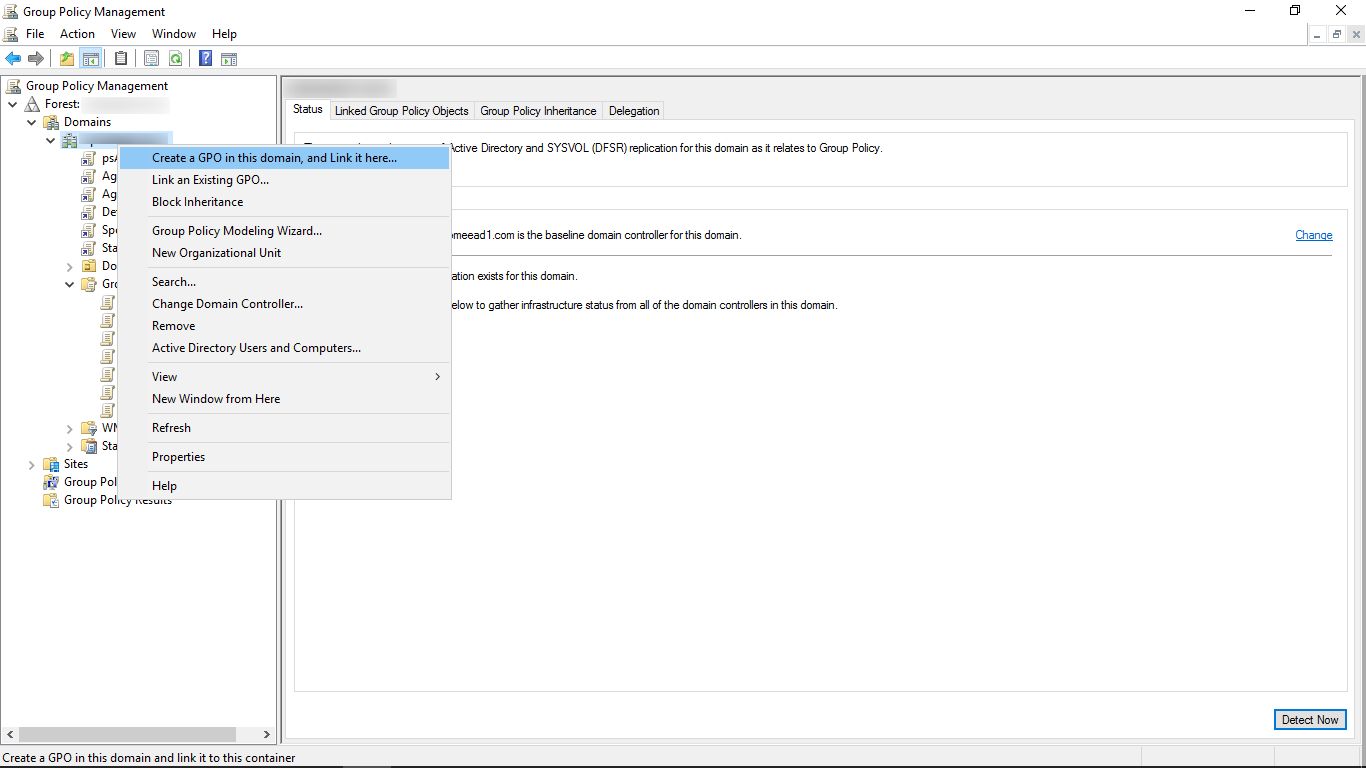
- Enter a name for the new GPO. For example, "OpManager_agent_install".Note: By default, the GPO applies to all users and computers that successfully authenticate to the Active Directory domain that you selected.
- Once the new GPO is created, you can see it in the GPMC in the left navigation pane, under Group Policy Objects.
Note: You can modify the scope of computers to which the agent is deployed and installed by changing the Security Filtering values of the new GPO.
Creating a scheduled task to execute deployment and installation of our Agent
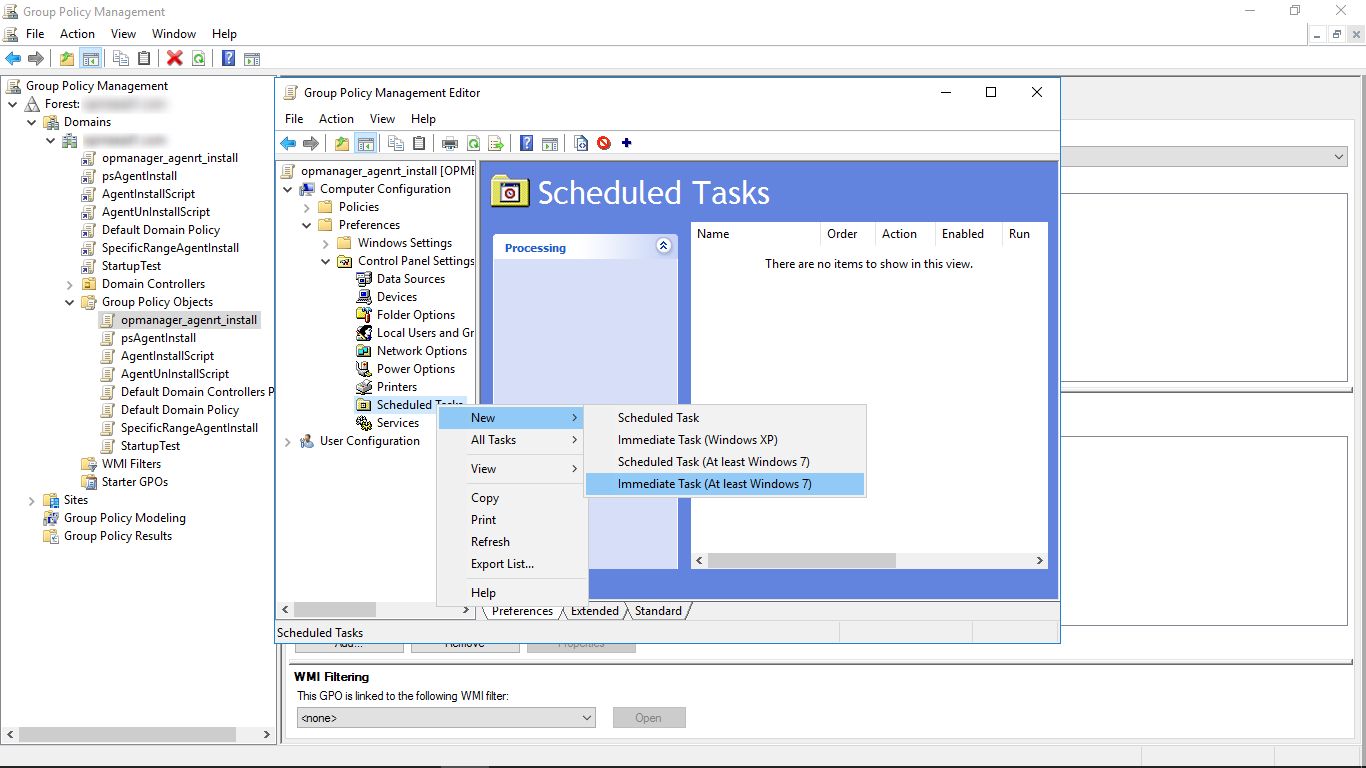
- Open the Group Policy Management Editor by right-clicking on the new GPO you created, and select Edit.
- In the editor navigation tree, under Computer Configuration, click Preferences → Control Panel Settings and then right-click on Scheduled Tasks.
- Now, click on New and select Immediate Task (At least Windows 7).
- This opens the New Task dialog box. Enter a name and a description (if needed).
- Under Security options, click the Change User or Group button.
- In the following dialog box, enter "system" in the text box, then click Check Names. Confirm that you have the correct values and click OK.
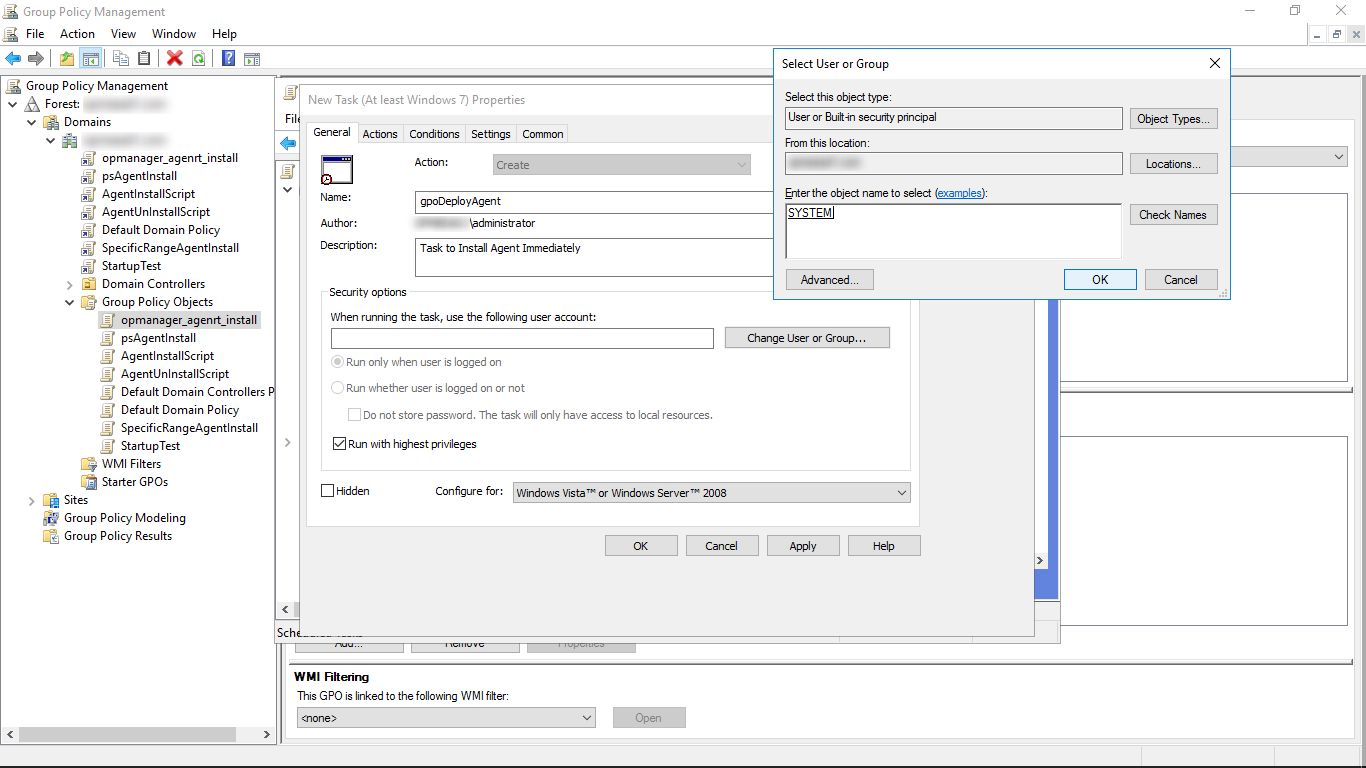
- Make sure that the system object resolves to the value "NT Authority\System," as shown in the Security Options group.
- Also ensure:
- that "Run whether user is logged on or not" is selected.
- that "Run with highest privileges" is selected.
- that "Configure for:" is set to Windows Vista or Windows Server 2008.
- Click on the Actions tab and then click New.
- In the New Action dialog box, set the action drop-down to Start a program. In the Program/script text box enter the network file path of the shared folder that you just created, along with the name of the script file.
- Provide the arguments, and provide the folder details in the 'Start in' field and click OK.
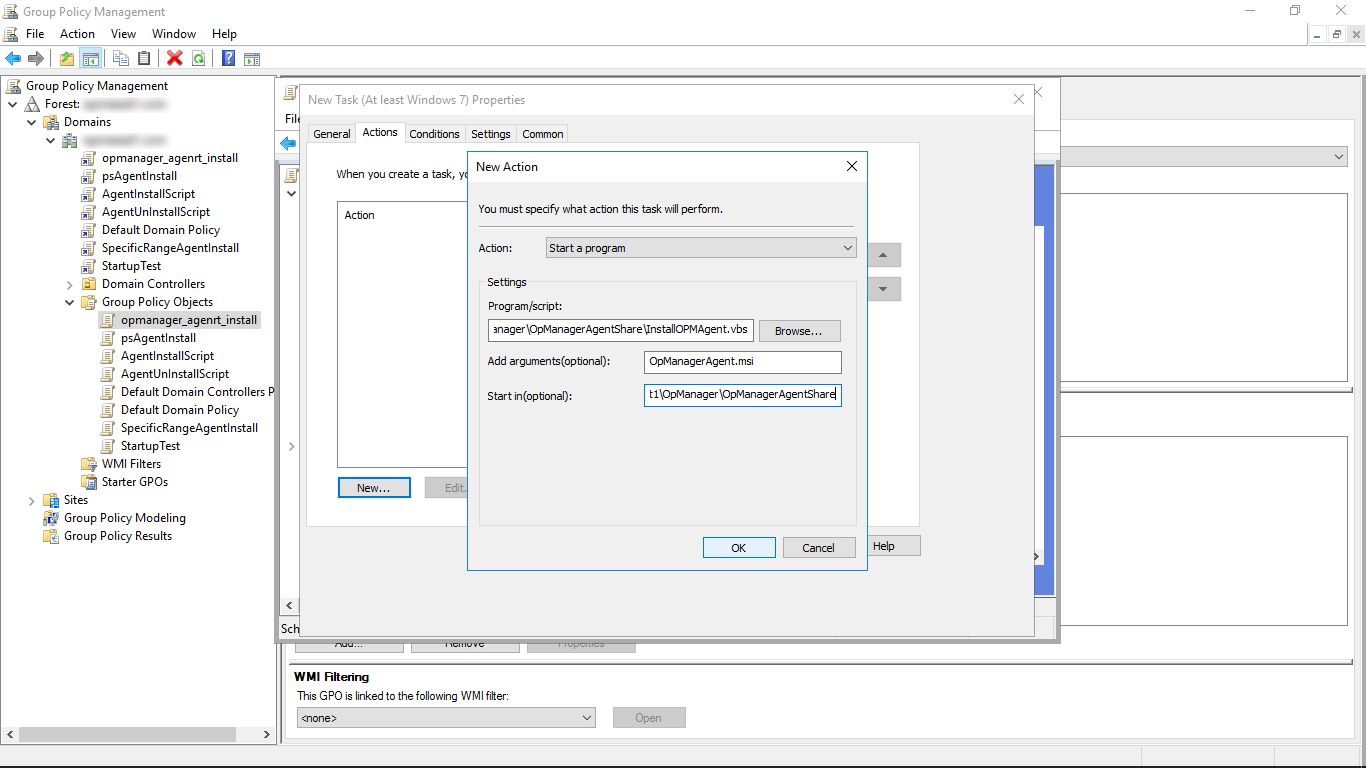
Program/script:
\\computer_name\<Shared_folder_name>\InstallOPMAgent.vbs
Add arguments:
OpManagerAgent.msi
Start in:\\computer_name\<Shared_folder_name>\ - In the "Conditions" tab, select the checkbox for Start only if the following network connection is available, then select Any connection.
- Finally, click OK to initiate the agent installation. It might take some time to install the agent in all your devices.
- Finally, open the Inventory page and check if the selected devices have been added in OpManager.

New to ADSelfService Plus?
Related Articles
Installing OpManager agent in your devices
You can install the OpManager agent in your network devices in 3 different ways. Before you proceed with the installation, make sure that all the prerequisites for agent installation have been taken care of. 1. From OpManager's web console: To ...Installing OpManager agent on devices using Startup script
Windows GPO can be used to install the OpManager agent in multiple devices, even when other methods of installation fail. Various reasons behind agent installation failure are as follows: Access denied Network path not found Unknown username or ...Adding devices using SSH Key based authentication in OpManager
A SSH key is an access credential used in SSH protocol. It provides the same functionality as the user name & password except that it is much more reliable and cant be easily cracked. OpManager supports SSH key based authentication. To use a SSH key, ...Installing OpManager on Windows
Steps to install Step 1: Download OpManager for Windows. Step 2: Execute the downloaded "ManageEngine_OpManager_64bit.exe" file to install and follow the instructions in the installation wizard. Step 3: Click 'Next' to start the installation process. ...Installing OpManager in Microsoft Azure
OpManager installation in Microsoft Azure: 1. Creating a VM in Azure: Log in/ Sign up to the Microsoft Azure portal link. Create a new Virtual machine. For a detailed guide on VM creation, click here. Resources group: Under this option, enter a value ...