Managing DHCP clients with Client class
DHCP Fingerprinting With Client Classes
Client Classes and Sub Classes
Client classes and Sub Classes are powerful features used to group clients (DHCP clients) and apply specific DHCP options or behaviors to those groups. These classes and subclasses enable more granular control over how DHCP services are delivered to different types of clients on the network.
Client Classes
- A client class in ISC DHCP is a grouping of DHCP clients that share common characteristics. These characteristics are usually defined by matching specific criteria in the DHCP discovery or request messages that the clients send.
- Classes are used to apply different DHCP configurations to different groups of clients. For example, you might have different classes for different types of devices (like printers, laptops, and phones) or different operating systems.
-
Example of a Client Class:
class "Printers" { match if substring(hardware, 1, 3) = 00:11:22; } subnet 192.168.1.0 netmask 255.255.255.0 { pool { allow members of "Printers"; range 192.168.1.50 192.168.1.60; } } - In this example, a class named "Printers" is defined, which includes any client whose MAC address starts with 00:11:22. Printers are then assigned IP addresses from a specific range.
Subclasses
- A subclass in ISC DHCP is a more specific grouping within a class. Subclasses are defined based on a subclass-specific value, such as a MAC address or a client identifier.
- Subclasses allow for even more specific targeting of DHCP options and configurations. They are useful in scenarios where a broad class needs to be divided into finer groups.
Example of Subclasses:
Applications and Benefits
Configuring Classes and Sub Classes in DDI Central
To create a client class:
- Go to DHCP-> Network-> Client Clas
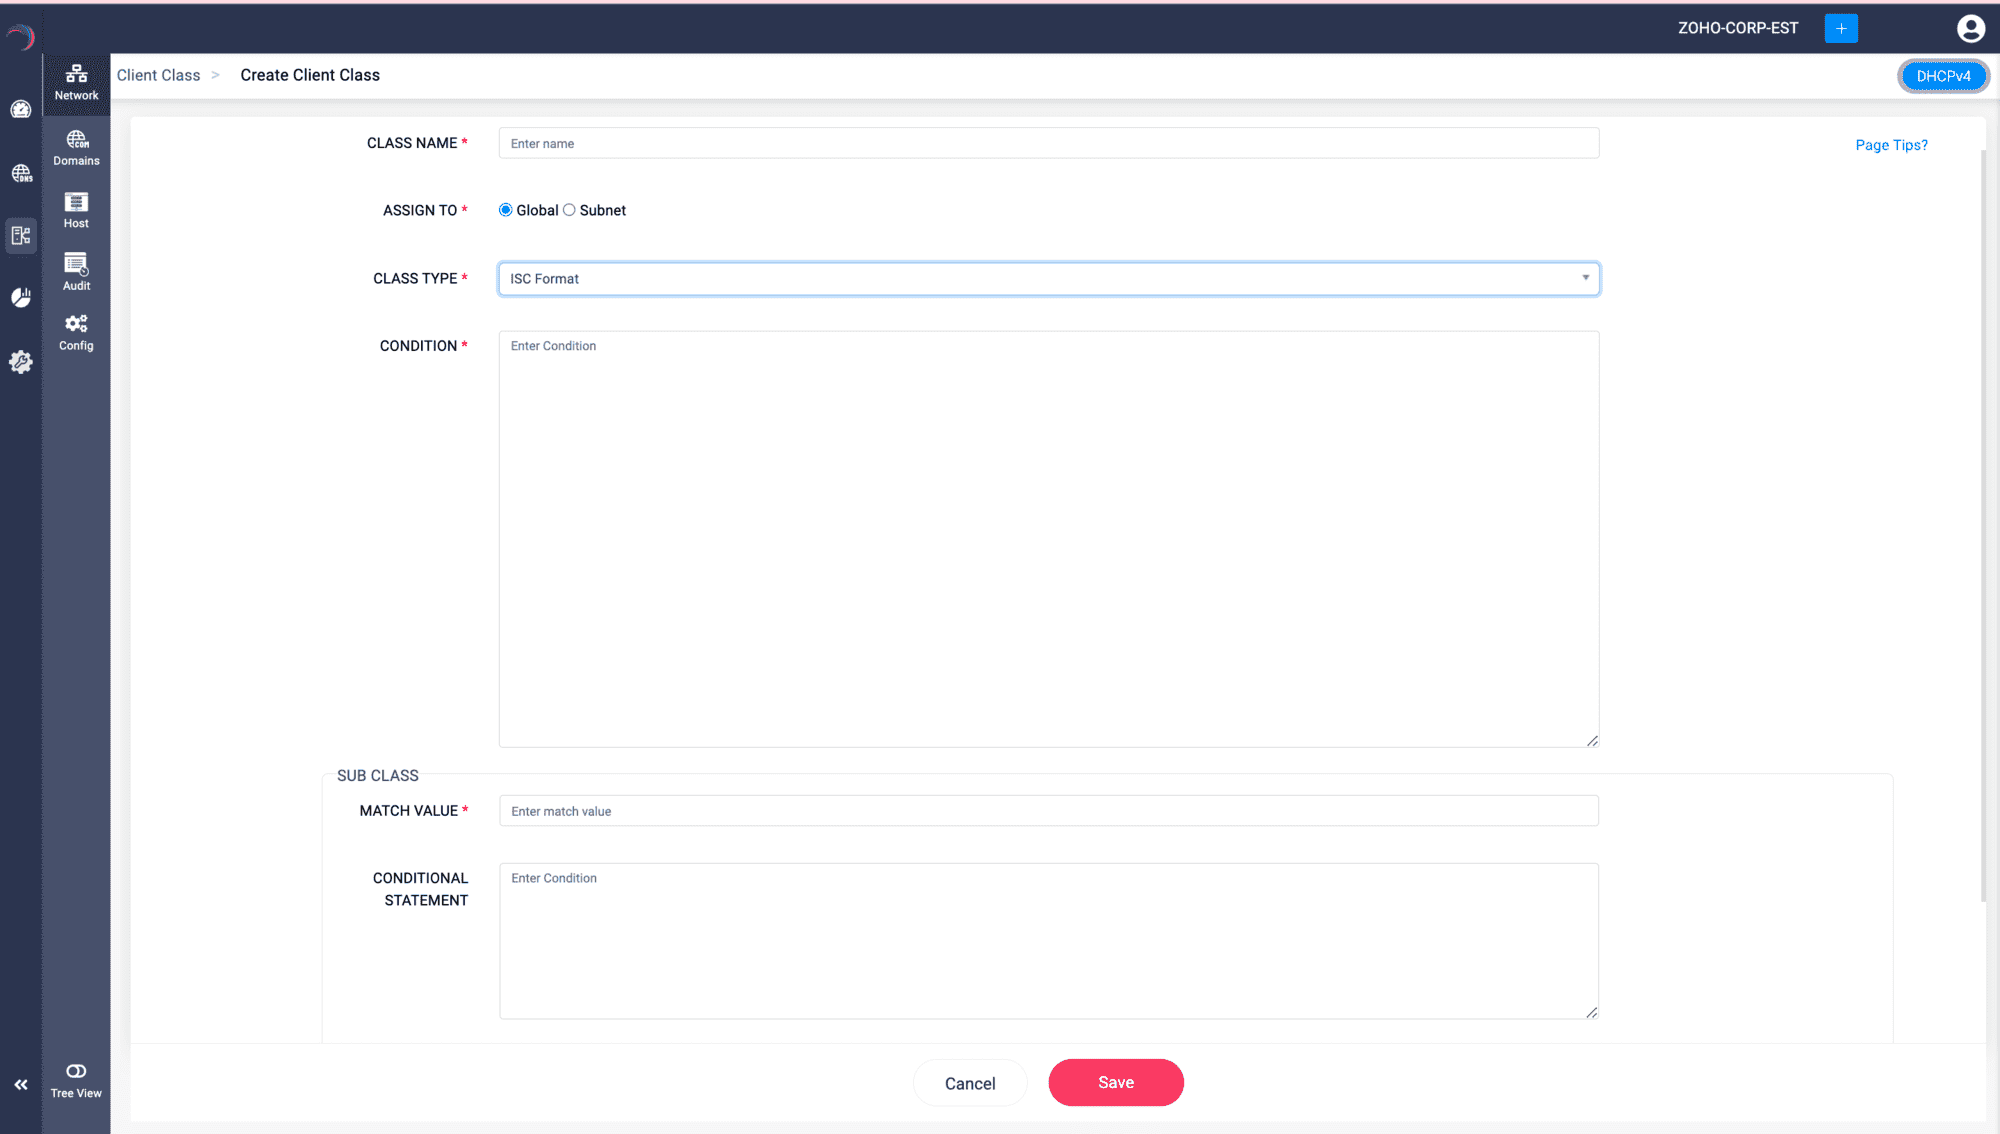
- The Create Client Class page appears on the screen.
- Assign the Client class a unique name.
- ASSIGN TO: Assign the scope level for the client class, whether its configurations should be applied for the matching client on a specific subnet level or global level. The Global option suggests it could be applied across all subnets, whereas a specific Subnet could be chosen to restrict the class to a particular network segment.
- CLASS TYPE: The class type field refers to your approach towards defining these classes. If you have certain complex configurations specific to your network you can define Client Classes using the traditional ISC Code type of class definition. Templates serves as a user-friendly quick option to define client classes with just a few fields. They are:
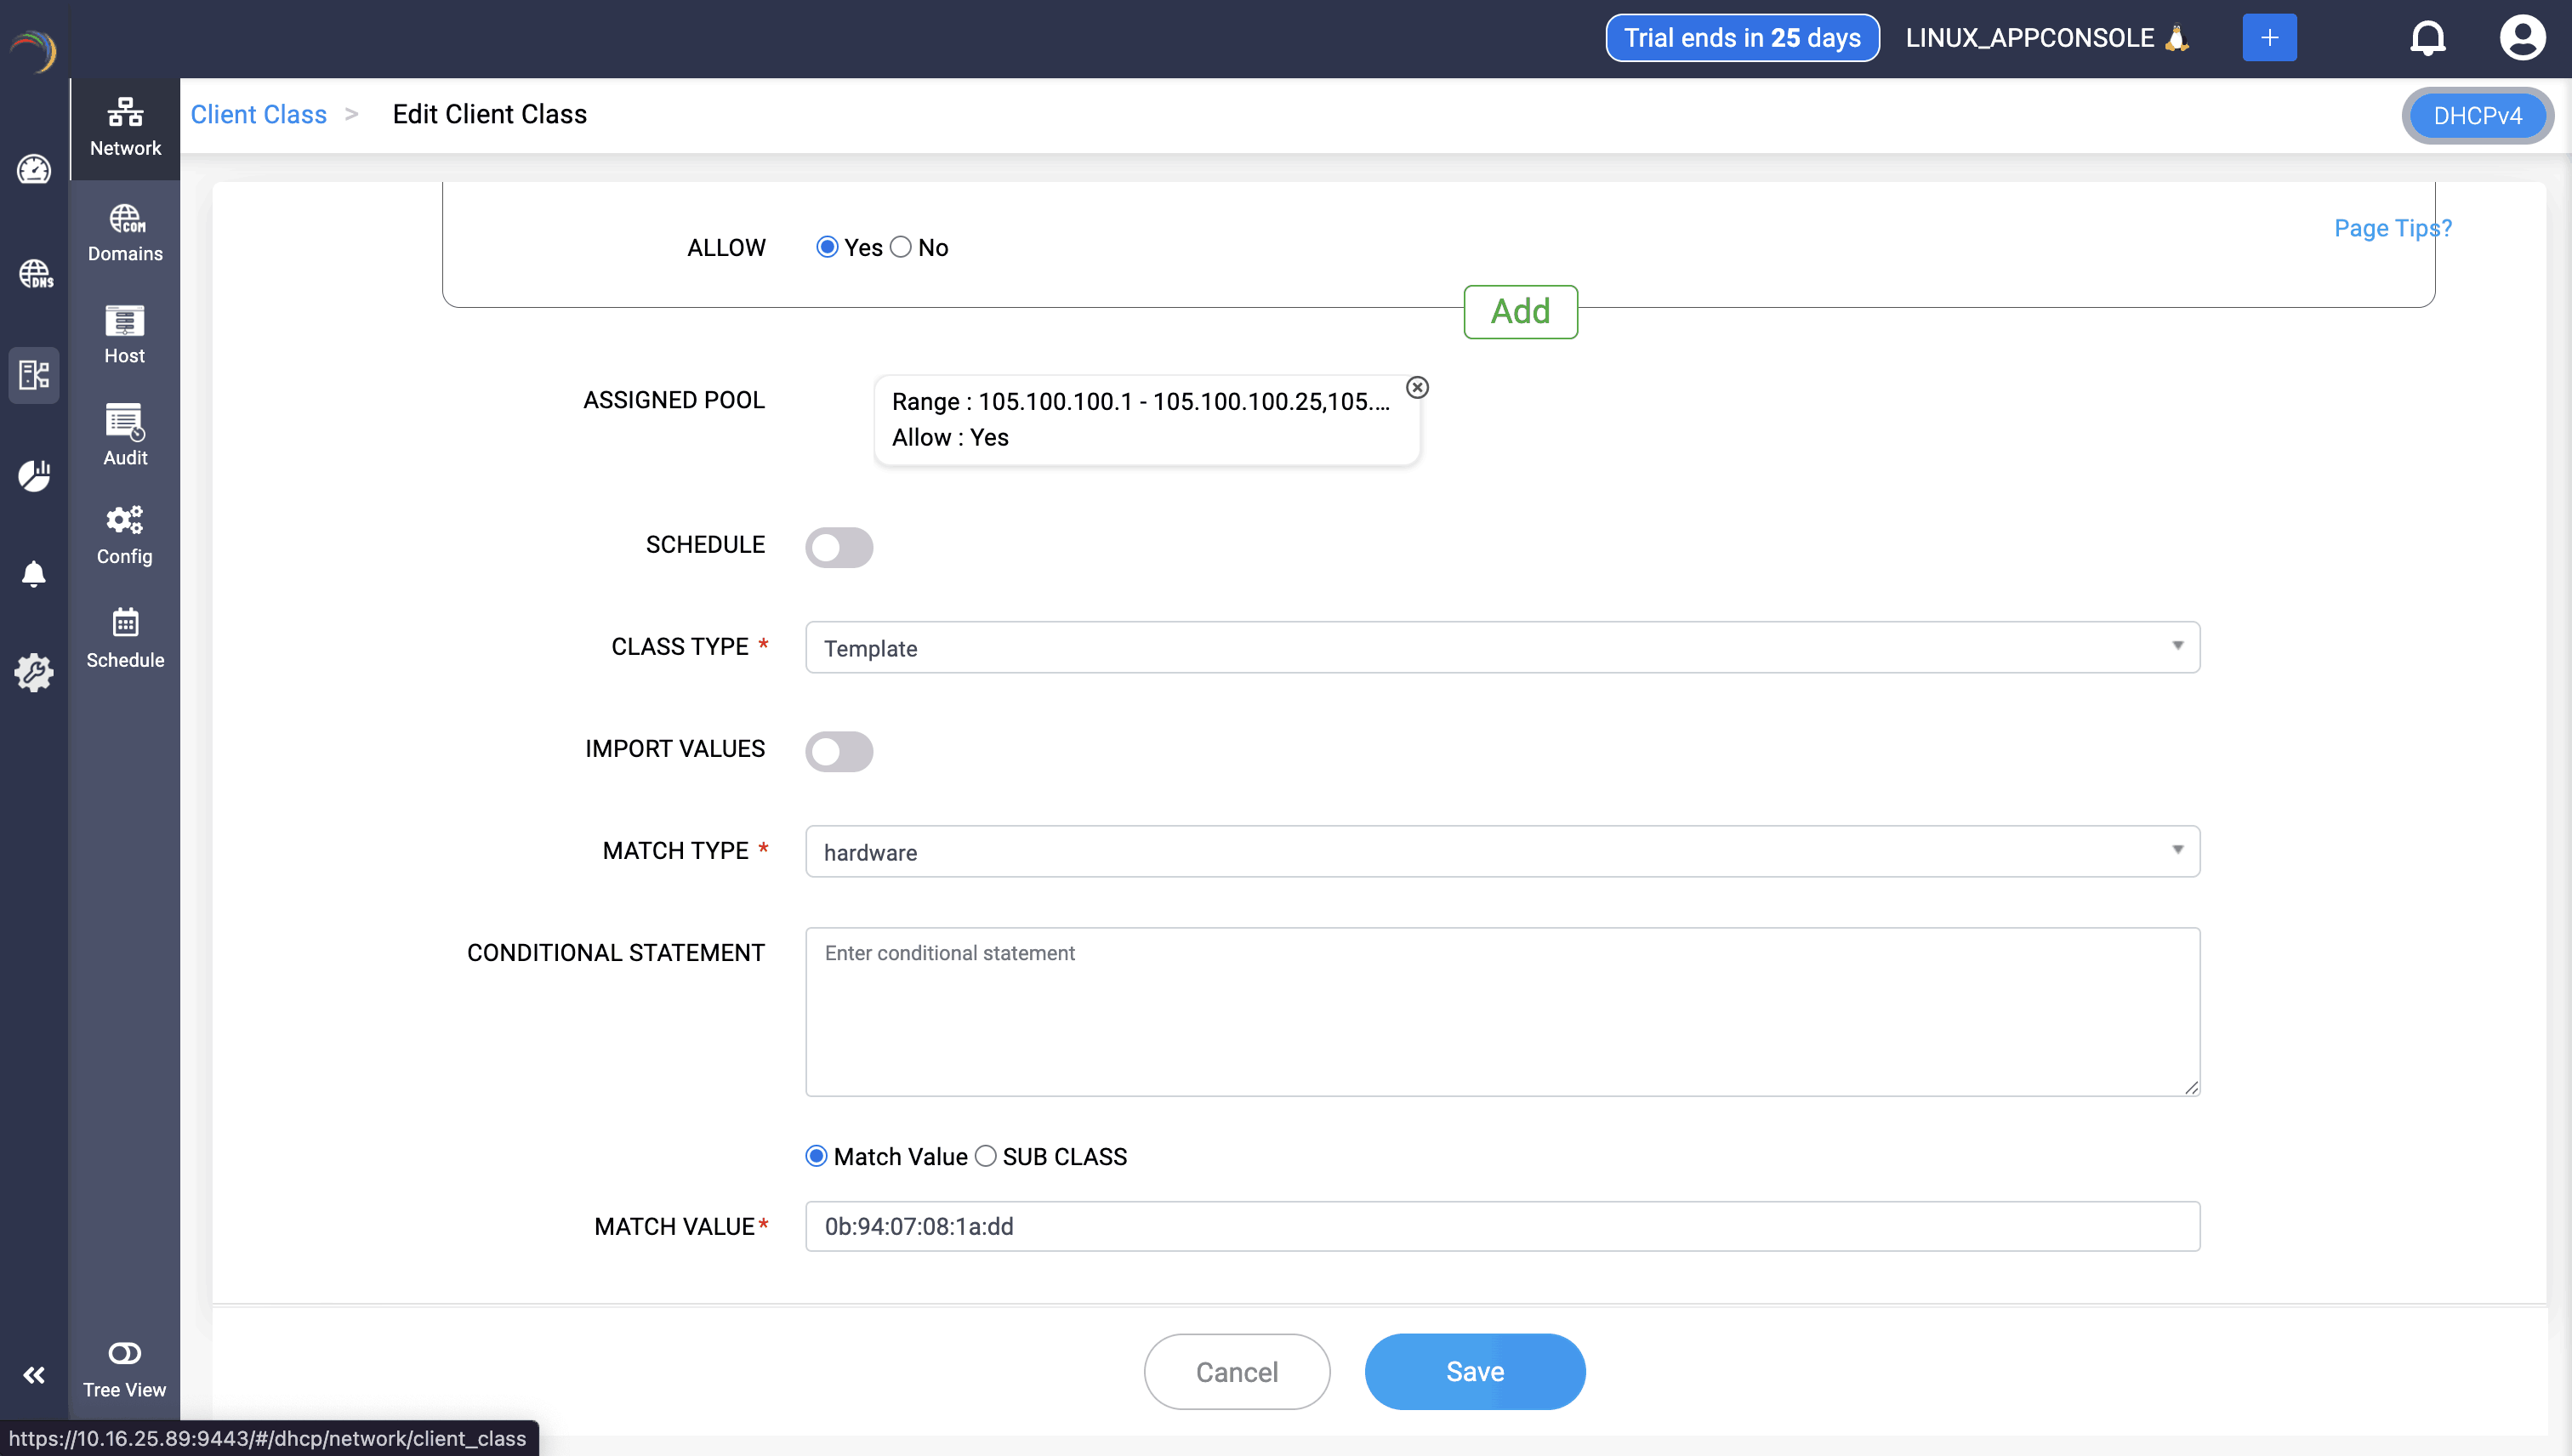
- MATCH TYPE: This defines the method by which the DHCP server will match clients to this class. Example: Substring indicates that the server will look for a matching string of characters within the client's DHCP messages.
- OFFSET: In the context of matching by substring, this defines the starting position in the client's DHCP message where the matching should begin.
- LENGTH: This specifies the length of the substring that the DHCP server should match against the client's DHCP message.
- MATCH STRING: The actual string of characters the DHCP server should look for in the client's DHCP message to determine if it belongs to a specific client class.
- CONDITIONAL STATEMENT: This field allows for more complex matching rules, incorporating multiple logical or comparison operators to evaluate whether clients meet the criteria for a specific client class.
- Match Value / Sub Class: This section helps you extend the match values, by defining a subclass for each new match value. This way you can extend your conditional criteria to various levels to further refine the classification of the clients interacting with the DHCP server.
-
MATCH VALUE: If subclasses are being defined, this field would be where you specify the value that differentiates each subclass.
Note: To further simplify these Client Class templates for similar use cases, define a Template available for specific usecases from DHCP-> Config-> Templates page and import it into the client class of your choice by enabling Import Values and select the template of your choice. Immediately, after this selection, the values from the chosen template will autofill the values of the client class template making you to easily navigate through building client classes for your network requirements. - DHCP OPTIONS: Specify any DHCP options that should be applied to clients within this class. These could include options like DNS servers, domain name, lease time, etc.
- CUSTOM OPTIONS: Define complex custom DHCP options that are not part of the standard set, specific to the requirements of your network.
- Click Save.
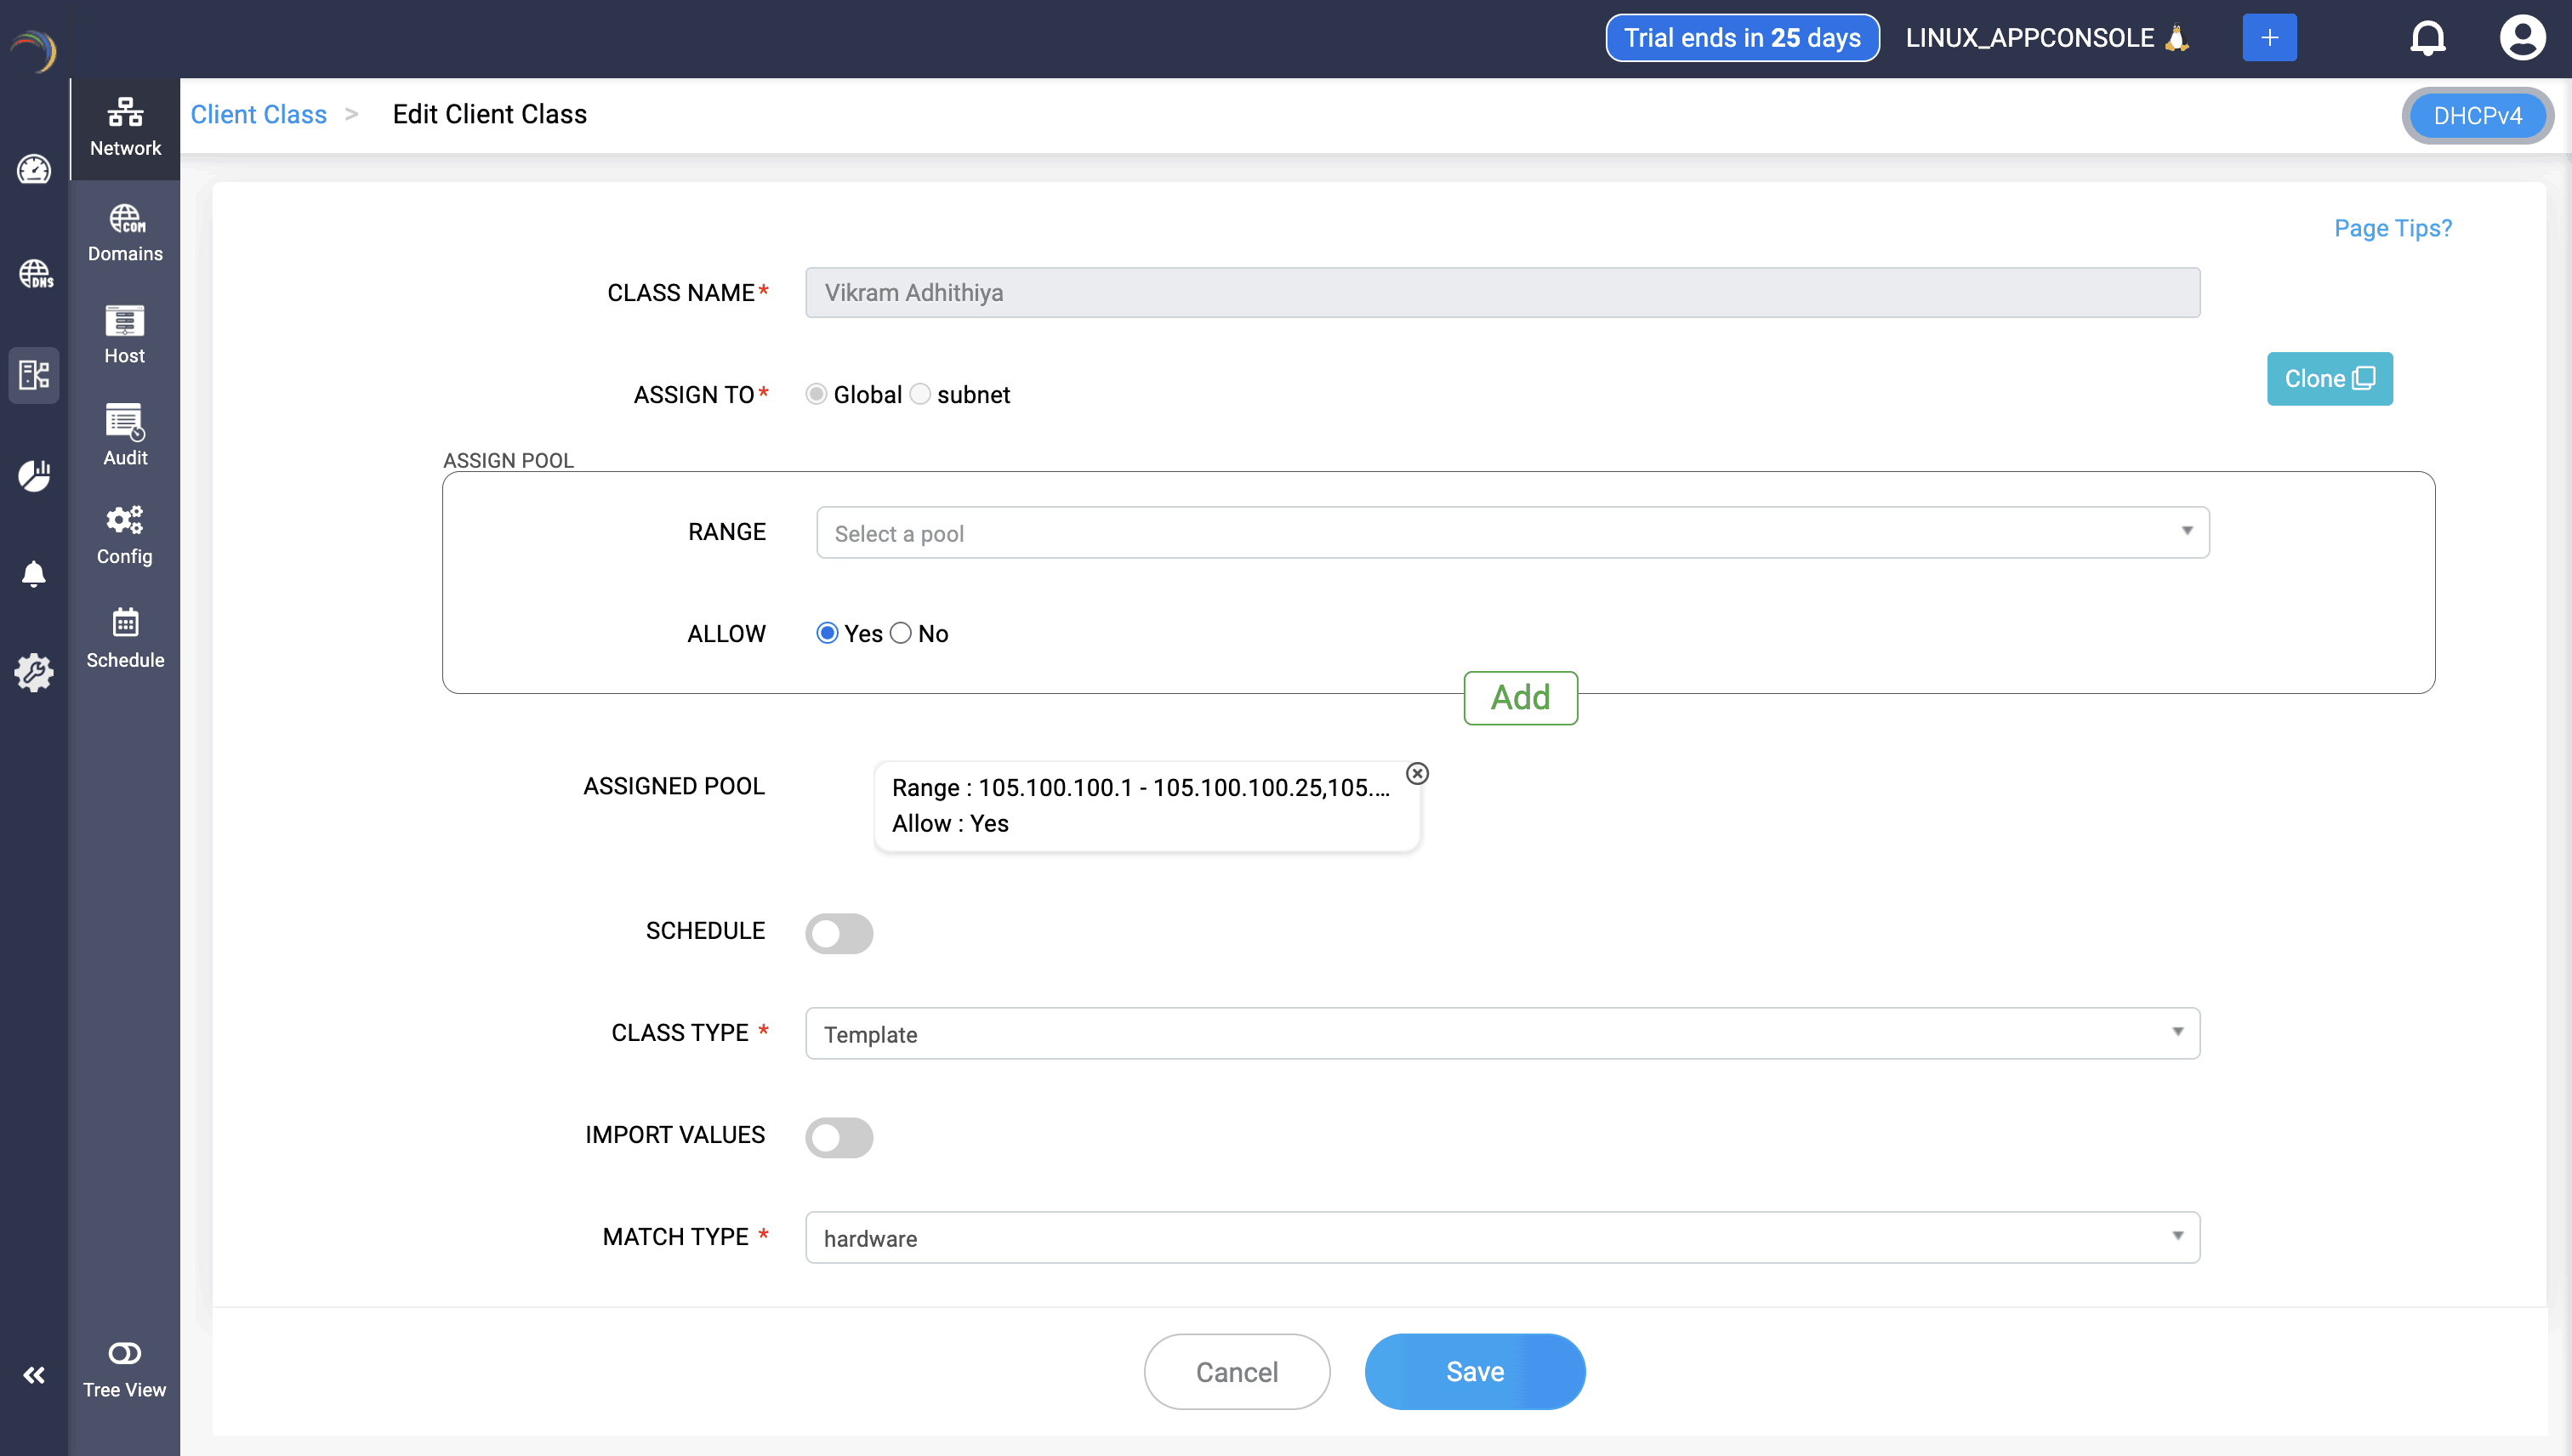
To quicken the configuration process, DDI Central now allows network admins to configure the address pool range of a subnet within the Client Class created. After selecting the specific pool range, you need to select Yes option if you need the pool range to be included for the DHCP fingerprinting purpose, or No option if you want to exclude them.
Classes and subclasses in DDI Central add flexibility and precision to DHCP management, enabling complex scenarios and specific requirements to be met efficiently. This is particularly useful in large or diverse network environments. You can also clone an existing client class, rename it and adjust its attributes as required. This expedites the process of creation of client class for similar use cases. To clone an existing client class, open a client class in Edit mode and just click on the Clone button in the right end of the page.
DHCP Fingerprinting with Client Classes
DHCP fingerprinting, a method of device identification through DHCP, leverages client class parameters to provide a means for more granular network management and resource allocation. This process involves the DHCP client sending additional information to the DHCP server, which in turn uses this information to identify the type of client and assign IP addresses or parameters accordingly. This technique is especially useful in environments where different types of devices require distinct network configurations or policies.
How DHCP Fingerprinting Works:
- Client Class Parameters: When a DHCP client requests an IP address, it can provide additional information in the form of vendor class identifiers (VCI) or user class identifiers (UCI). These identifiers are part of the DHCP discovery or request packets.
- Server Recognition: The DHCP server is configured to recognize these identifiers and categorize clients into different classes based on the provided information.
Applications of DHCP Fingerprinting:
- Differentiated Resource Allocation: You can dedicate one address pool for specific types of devices, like VoIP devices, and a separate pool for data devices. This is useful in networks where different device types have different network requirements.
- Policy Enforcement: For source routing policies, where voice and data packets are routed differently, DHCP fingerprinting helps in applying these policies right from the point of network entry.
- Administrative Segmentation: In a large organization, managing devices based on their type (like printers, workstations, mobile devices) becomes easier with DHCP fingerprinting.
Example Scenario:
Consider a network where VoIP devices and data devices need to be segregated:
In this configuration, two classes are defined based on the vendor class identifier. VoIP phones are assigned IP addresses from a specific range, separate from the range used for data devices. The same can be configured using DDI Central GUI using templates or the above can be given ISC bind format in the Condition text box and simply click Save.
Benefits of DHCP Fingerprinting:
- Efficient Network Management: Allows for the dynamic assignment of IP addresses and configurations based on device type, improving network efficiency.
- Enhanced Security: Helps in implementing security policies tailored to different device types.
- Quality of Service (QoS): Ensures that devices like VoIP phones that require higher QoS receive the necessary network configurations.
- Scalability: Makes the network more adaptable to the addition of new types of devices without requiring major configuration changes.
Considerations:
- Accuracy: The accuracy of DHCP fingerprinting depends on the uniqueness and consistency of the vendor or user class identifiers provided by the devices.
- Configuration Complexity: Implementing DHCP fingerprinting can add complexity to DHCP server configuration and requires thorough planning and testing.
DHCP fingerprinting is a powerful tool in network administration, enabling the categorization and appropriate management of different types of devices within the network. It enhances the capability to efficiently allocate network resources, enforce policies, and ensure optimal performance for all devices.

New to ADSelfService Plus?
Related Articles
Managing DHCP scopes
Managing DHCP scopes What is a DHCP Scope? A DHCP scope is a fundamental component of the DHCP server, defining a specific range of IP addresses that the server can allocate or lease to devices on a network. in DHCP defined as a pool of IP addresses ...DHCP fingerprinting with Client Classes
Client Classes and Sub Classes Client classes and Sub Classes are powerful features used to group clients (DHCP clients) and apply specific DHCP options or behaviors to those groups. These classes and subclasses enable more granular control over how ...Managing microsoft windows DHCP server
Managing Microsoft Windows DHCP Scopes Table of Contents What is a Scope in Microsoft Windows DHCP servers? Subnets (DHCPv4 and DHCPv6 Subnets) Special case for IPv6 based subnet Multicast subnets Shared Networks or Superscopes Hosts or DHCP ...Managing DHCP scopes
What is a DHCP Scope? A DHCP scope is a network topological element in DHCP defined as a pool of IP addresses that a DHCP server can dynamically assign to clients on a particular subnet. Each scope represents a range of IP addresses that are ...49. DHCP service options
Option Code Option name Description Data type Supported Is Predefined ? Grammar Example 1 default-lease-time Specify the length of time in seconds to be assigned to a lease if the client requesting the lease doesn't provide a specific expiration ...