Asset Management FAQ's

For detailed configuration steps, please refer to our help guide.
1. How can I verify the number of consumed asset license counts, and will this include non-IT assets?
You can navigate to Home → Dashboard → Asset Dashboard to find the Asset Summary widget, which displays both IT and Non-IT assets.
Additionally, by clicking on your username in the top-right corner and selecting View Plan Details, you can view the consumed license count, which applies only to IT assets.
2. Will the asset license count if the assets are moved to a disposed/expired state?
As per the design, only IT assets in states other than Disposed and Expired consume licenses. Non-IT assets do not consume licenses.
3. I see many probes added to my license. Should I add all of them to scan the entire set of assets?
No, it is not necessary to add multiple probes unless required. A single probe can scan the entire set of assets in an organization if they are connected to the same network or domain. However, the need for additional probes depends on organizational requirements, such as the division of sites or network groups.
4. How to create a separate product type for laptops/desktops?
As part of our latest enhancements, you can now create child product types under the parent product type "Computers" and name them as Laptop/Desktops. To do this, navigate to Setup → Asset Management → Product Type.

Kindly click here to know more, https://help.sdpondemand.com/configuring-product-types
5. Is it possible to generate QR codes or barcodes in bulk for all assets?
Yes, the barcodes can be generated in bulk by navigating to the asset list view and select the assets → Manage barcode/QR codes.
However, you have to select the product individually to generate codes for the assets. The barcode/QR code can generated for products individually not for based on the product types.
6. How to add custom fields specific to "Servers" or a product type?
You can now add custom fields specific to each product type by navigating to Set up → Asset Management → Product Type, now edit the product type and click on Fields to manage them.
Kindly click here to know more, https://help.sdpondemand.com/configuring-product-types
7. How can I apply the asset lifecycle to existing assets?
In order to apply the asset lifecycle to an existing asset, you can navigate to the asset list view and select the Asset → Actions → Assign lifecycle.
You can either assign lifecycle or workflow.
8. How can we customize the "In use" state to show a prompt to show more and mandated custom fields?
This can be achieved via Asset lifecyle by setting up the transitions. Under the transition moving to "In use" state, you can click on during and set up the mandatory fields.
Please refer, https://help.sdpondemand.com/asset-life-cycle
9. I am trying to import a file and getting the error "Product is not compatible with the product type." How can I resolve this?
Kindly open the CSV file, navigate to the asset, and check which product this asset is associated with.
In the application, navigate to Setup → Customization → Asset Management → Product and verify if the product name matches the product type.
10. How can I notify technicians when the in-store asset count reaches its threshold?
Asset Replenishment helps track asset inventory in store and notify technicians on the expected asset inventory exhaustion. When the inventory count crosses the configured threshold, an email is triggered every day until the asset is restocked.
Kindly refer, https://help.sdpondemand.com/replenishment
11. Unable to delete a specific Product type. An error is populated "ProductType is being used by a module. Hence cannot delete it"
To successfully delete the product type, you will first need to ensure that all associated entities are removed or disassociated. The product type would be dependent with a product and hence a product needs to be deleted first, but the product would have vendors associated and without removing the vendor association the product cannot be deleted and thereby the product type will not be deleted. First you will need to navigate to the Asset List View and choose the respective product type and check if there are any Assets. If there are any asset, you will need to delete them and then Navigate to Setup > Customization > Asset Management > Product > Click on the search option and try to search for the "affected
product type" and you can find the association. Now, click on the arrow next to the Product name to view the vendor association and remove them. Now, you will be able to delete the Product and then you can navigate to the Product Type and delete the same.
 A similar scenario would occur when you try to remove a vendor where you will need to ensure all the association with respective to the vendor should be disassociated.
12. If
importing an asset via the import option and then assigning an user to the asset, the acknowledgement notification won't get triggered.
If the asset is imported manually and the user is assigned to the asset, the Asset acknowledgement notification would not be triggered automatically. In such cases, please reach out to support team to assist you further.
13. How to allow/restrict technician access to certain assets/consumables based on criteria or product types?
Asset Fine-Grained Access (FGA) can allow/restrict technician access to certain assets/consumables based on criteria or product types. Navigate to setup > users and permission > Fine-Grained Access > Asset > Create new FGA
You can choose the technician for whom you are going to apply FGA and choose for which product type you would like the respective technician to have access. Also, you can make use of Advanced criteria if required.
14. Is it possible to group assets?
Yes, it is possible to group assets either by forming a static or a dynamic group. Navigate to the Asset > Groups > click on the plus icon to create a group.
You can either choose the static or dynamic group.
In case of static group, you will need to manually add and remove the asset to the created group, but in case of dynamic group, the asset will be added and removed based on the criteria defined.
15. How to take asset's user history report?
Navigate to the Reports module and then create a new custom report under the module as asset state history.
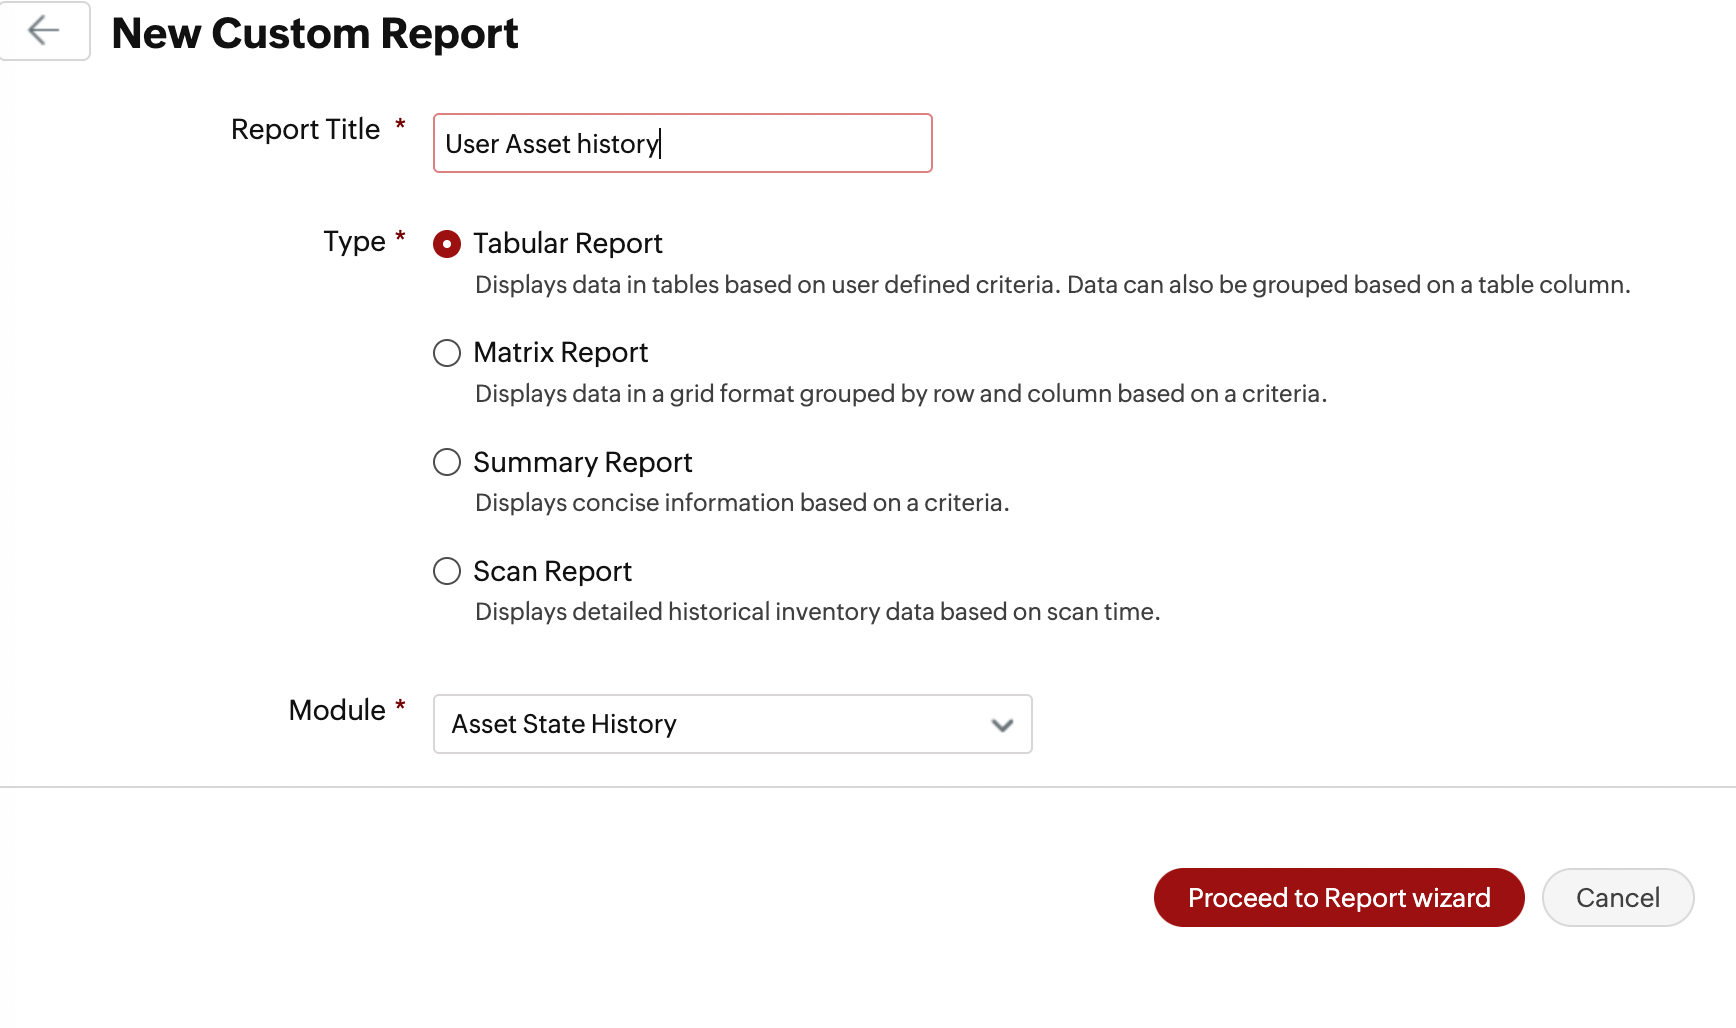
Choose the required columns and under Select column to group choose "Group by asset". Proceed to generate the report.
16. How to display the Asset Details only by scanning the QR Code?
The following steps can be followed,
a) Go to the Asset list view and select the assets for which the QR code needs to be printed.
b) Click on Actions → Reprint Barcode/QR Code. or You can select the Product and Click on Manage Barcode / QR code from the Options above the list view.
c) Once you have selected the Product and other information. Click the “+” icon to create a new Label Property of type Barcode or Edit the existing one.
d) In the Elements section, drag and drop the QR Code.
e) Under the QR Code Properties tab, enter the following in the text area:
f) Product - ${product}, Serial Number - ${serial_number}. Please note that Storage details cannot be included, but other available fields from the Data section can be added using the appropriate ${variable} format.
g) Save the label property. The system will now replace the variables with the actual values (e.g., product name and user) when generating the QR code.
h) Once printed and scanned, the QR code will display something like: Product - Dell Latitude.


17. Remote control feature using Zoho Assist
To know more about the remote control feature, please go through the below link,
18. How to generate a report of all CIs and the assets they are associated?
Kindly follow the below steps,
1. Click on the reports module -> New custom report, choose Assets from the module dropdown.
2. From the column chooser, select the Linked CI column and other required columns for the report and generate the report.

New to ADSelfService Plus?
Related Articles
Scan-to-Create Requests: Designing Barcodes and QR Codes for Assets
An Organization uses a wide range of assets — from personal devices like laptops and desktops to shared resources like printers, docking stations, projectors, and monitors. When any of these assets stop working, the traditional method of reporting — ...Software Related FAQ's
For detailed configuration steps, please refer to our help guide. 1. Why do all the found software items show as unidentified, and how can their licenses be managed effectively? Currently, all software other than operating systems will be added as ...Scan related FAQ's and Troubleshooting Procedures
For detailed configuration steps, please refer to our help guide. 1. What are the prerequisites for adding a probe? Here are the prerequisites for adding a probe: Operating System: Windows Server 2008 or higher, Windows 7 or higher. Dependent ...Probe issue
Basic Requirements There are few basic requirements for the probe to successfully scan workstations. Please make sure that the below given requirements are met for each of the target workstations. Windows Machines Remote Registry service must be ...User Import & Managment FAQ's
ESM Directory :- Role Required --> Organization Admin Enterprise Service Management (ESM) in ServiceDesk Plus Cloud enables organizations to efficiently manage multiple service desk instances while handling key administrative tasks such as ...