50. Multi vendor dns integration with DDI Central for Linux
Multi-vendor DNS integration with DDI Central
DDI Central serves as a powerful tool for organizations managing multiple domains across various hosted DNS providers. By centralizing DNS management, DDI Central becomes the single point of management for all your zones, helping your organization to reduce operational complexities, minimize the risk of configuration errors, and enhance overall efficiency. DDI Central allows you to create new domains and manage zones hosted on different multi-vendor DNS service providers directly from its user interface.
To access the multi-vendor migration wizard:
- Navigate to the DNS module.
- Select the Config menu.
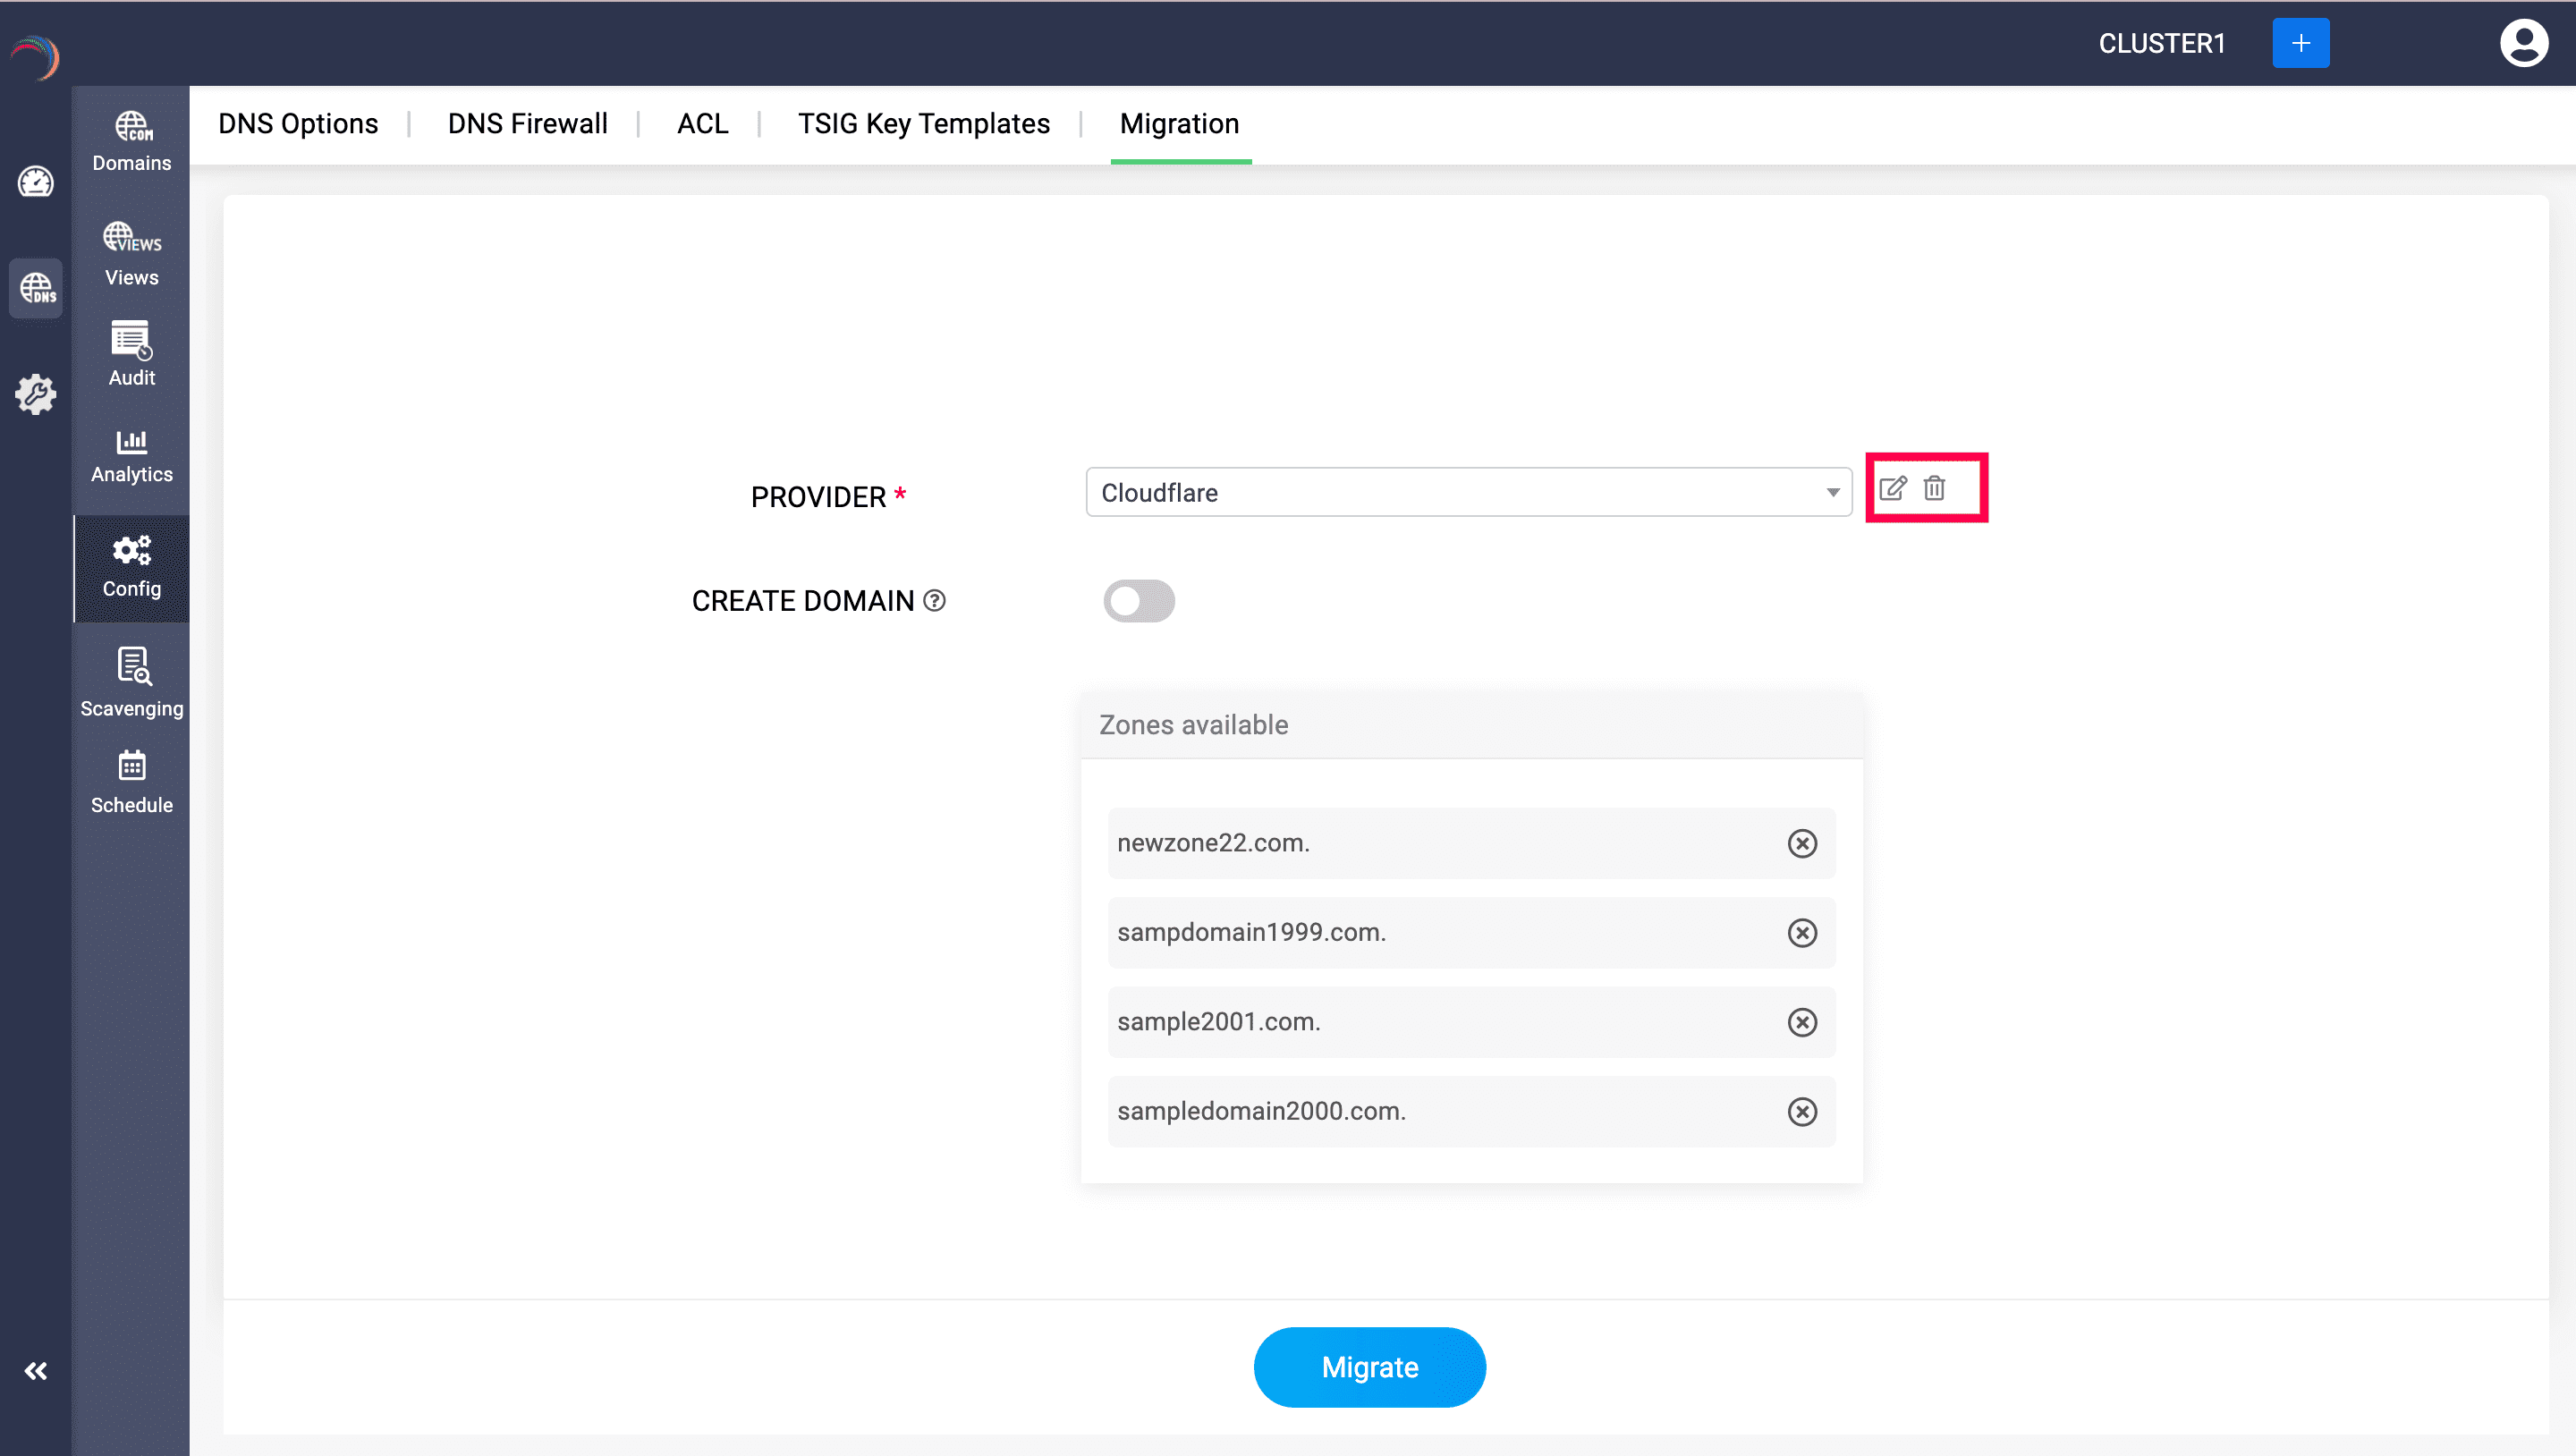
- On the Config page, navigate to the Migrations tab.
- Select your provider from the list of providers available under the Provider drop-down menu, including: Cloudflare, Google CloudDNS, AWS Route53, and Microsoft Azure.
- Follow the steps below to selectively migrate zones from each provider to DDI Central. Additionally, you can add or selectively migrate zones under each hosted DNS provider and manage them directly from within DDI Central.

Cloudflare
Step 1: Generating Auth-Code in Cloudflare
- Login into your Cloudflare account. On the dashboard, click on the User icon and select My Profile.

- Navigate to API Tokens and click on the 'View' button of 'Global API Key'.
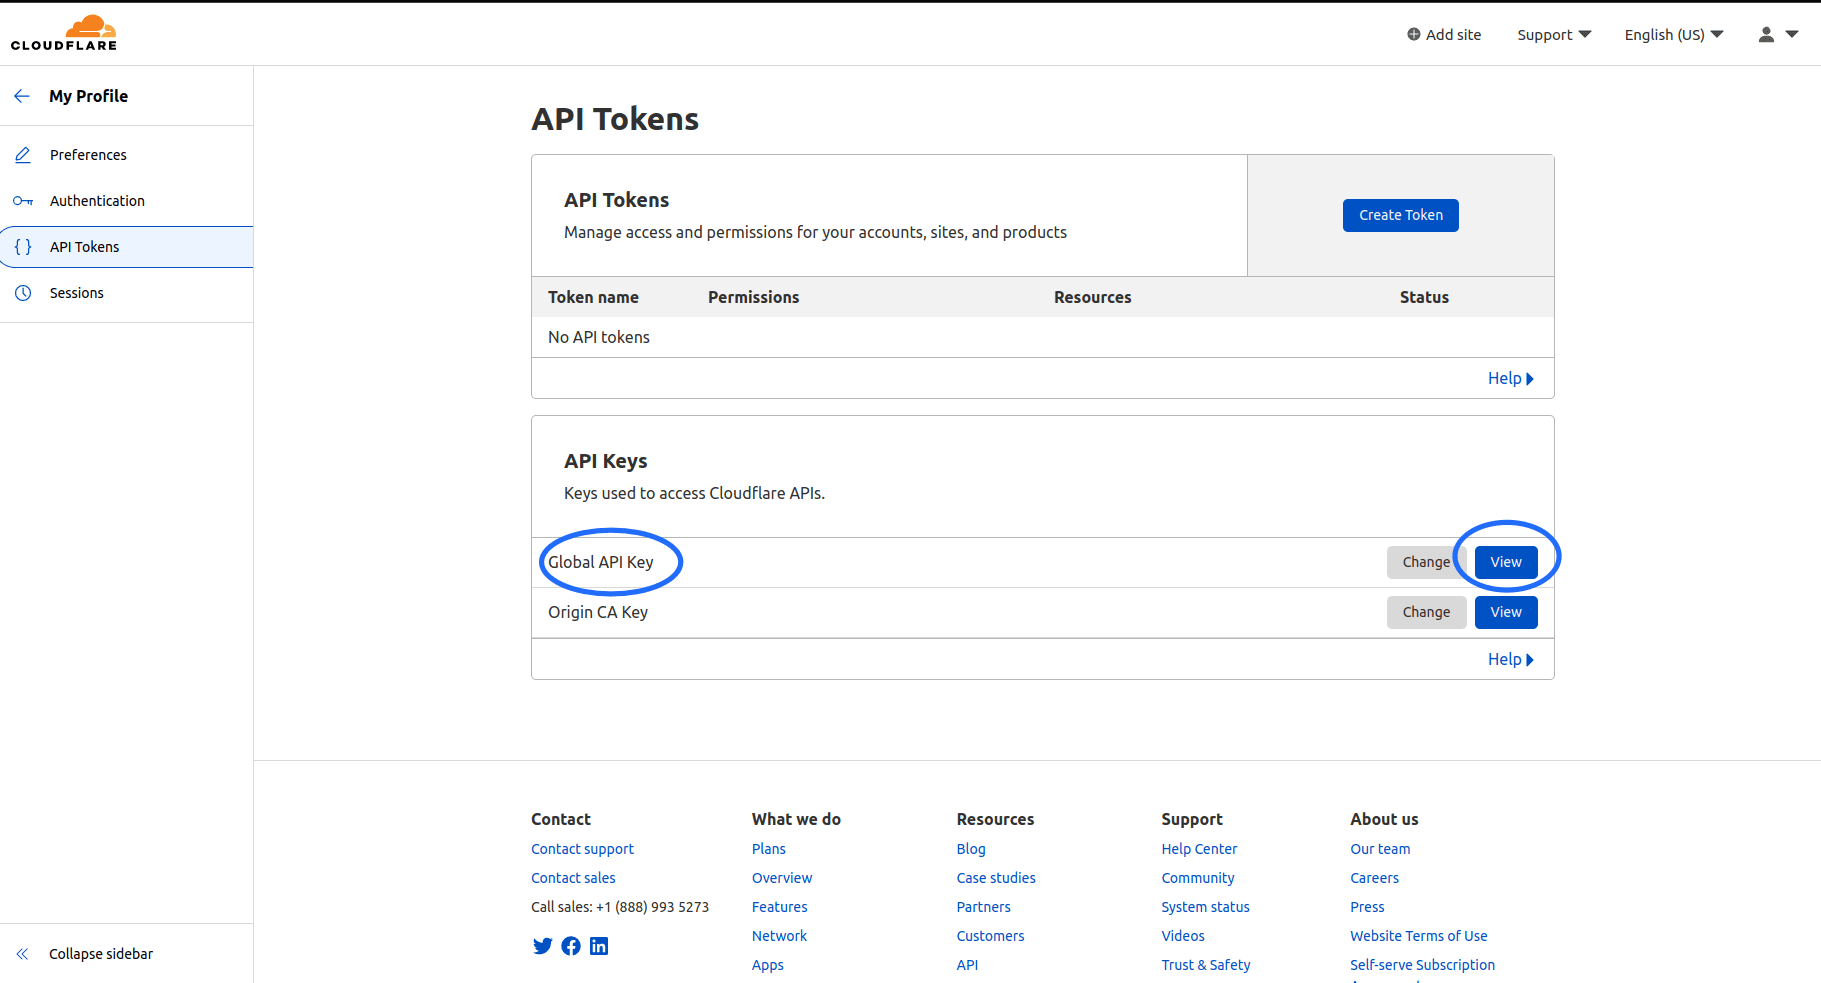
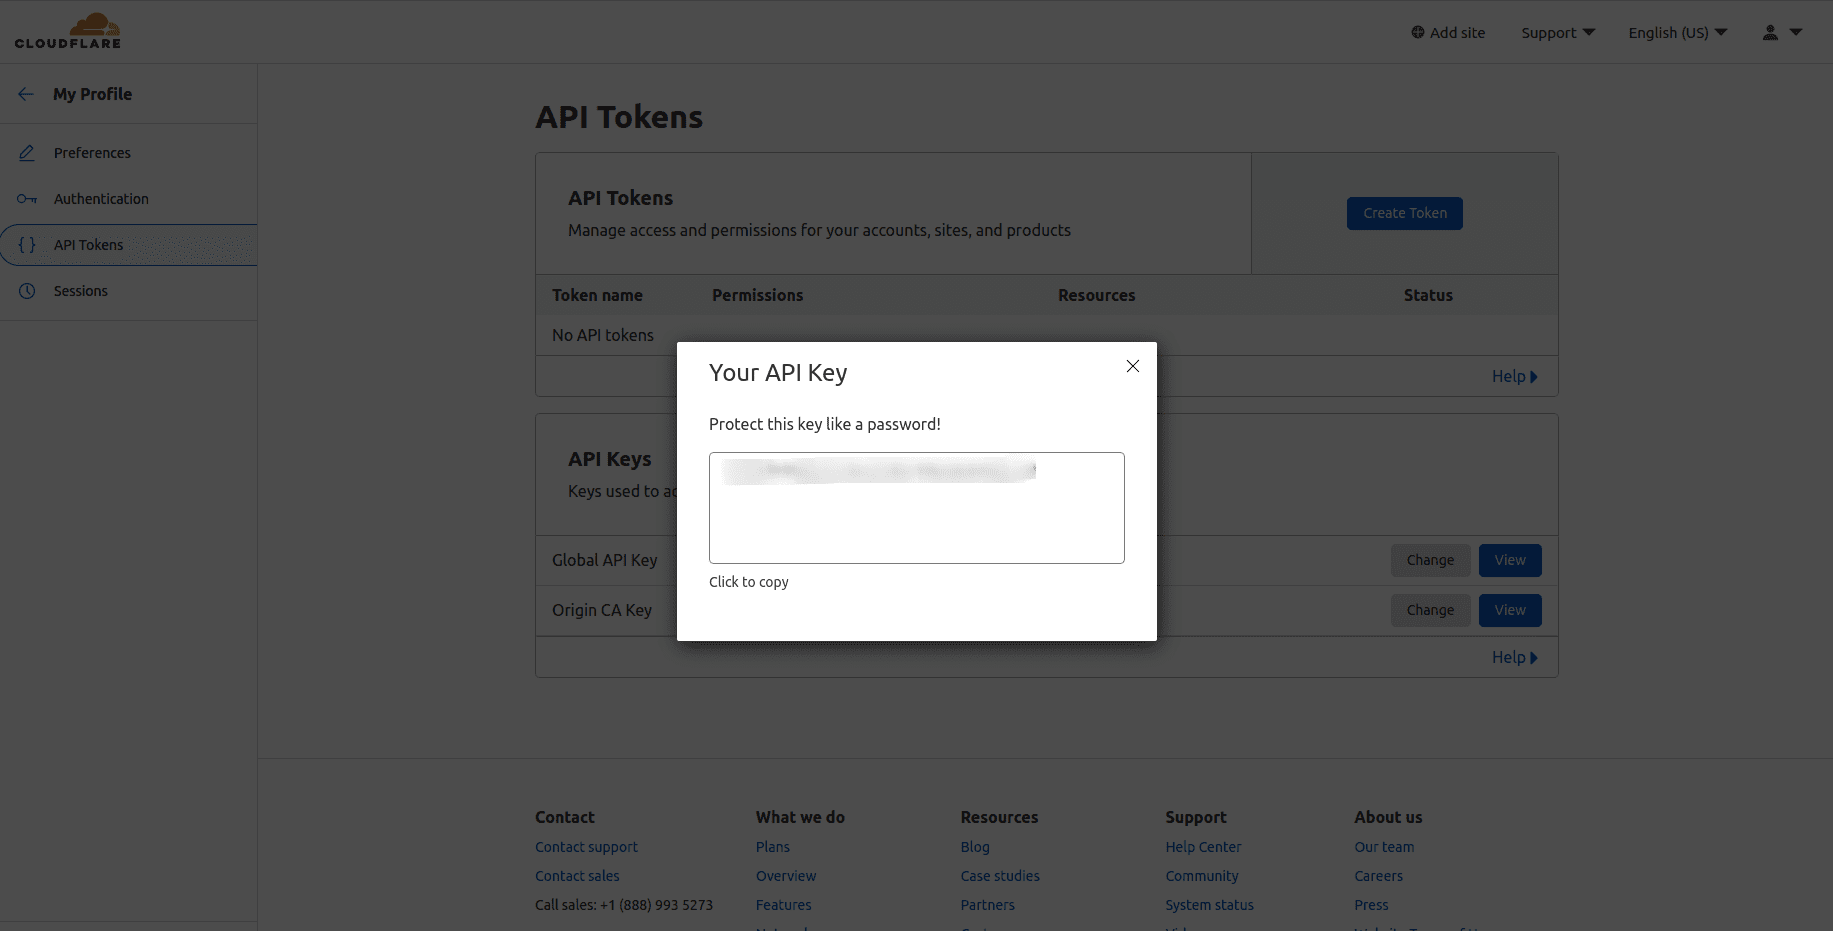
- Enter your password and complete the verification and the 'Auth-Code' will be displayed, copy the code.
Step 2: Configurations to be made in DDI Central

- Once you copied the Auth-code from Cloudflare, log into DDI Central and navigate to DNS-> Config -> Migrations. Select the provider as Cloudflare.
- On choosing Cloudflare, you can not only migrate your existing domains from Cloudflare but also create a new ones directly using DDI Central console.
- Enable the Create Domain toggle, if you want to add a new domain to the Cloudflare DNS servers already hosting your zones, directly from DDI Central user interface.
- Enabling it will only ask you to enter the domain name.
- Subsequently, enter the authentication details like your registered Email with Cloudflare and the Auth Code that you get to copy from the Cloudflare dashboard. Only with these details DDI Central will be able to open up bilateral API transactions between the DDI Console and the Managed DNS service provider and fetch the zones under your account.
- On successful authentication, you will be prompted to select the zones you would like to migrate into DDI Central. Select the relevant zones.
- Finally, click the Migrate button. The migration process takes some time. On successful migration you can find your zones hosted in Cloudflare servers listed under the Domains page within the DNS module.
- You can further easily add and manage the configurations of zones under each domain directly using DDI central controls.
- Click through a domain name and access the DNS records associated with the zones under that domain name.
Google CloudDNS
Step 1: Generating JSON Key within Google CloudDNS
- Login into your Google cloud account and Navigate to IAM & Admin -> Service Accounts

- You need a service account to generate JSON Key.
- Click on CREATE SERVICE ACCOUNT.

- Enter the required details and create a service account

- On creating a service account, Navigate to API & Services -> Credentials.

- Click on your service account and navigate to KEYS tab. Now click on ADD KEY and select Create New Key. Select Key type as JSON and click Create. The JSON Key will be downloaded.


Step 2: Configurations to be made in DDI Central
. 
- Once you have Downloaded the JSON Key from Google Cloud , Login into DDI Central console and navigate to DNS-> Config -> Migrations .
- Select Google CloudDNS as the provider from the list of providers drop-down menu.
- If you would like to add a new domain to Google DNS servers directly from DDI Central enable the Create domain toggle.
- Enter the Zone Name (as in google) and DNS Zone Name (i.e FQDN) and paste the JSON key in Credentials.
- On successful authentication, DDI Central lists all the active domains with Google CloudDNS, select the relevant ones from the list and click Migrate.
- On successful migration, you can see all your current domains with AWS as well as the new domain you added (if any) before migration under the domains Page within the DNS module.
- You can further easily add and manage the configurations of zones under each domain directly using DDI central controls.
- Click through a domain name and access the DNS records associated with the zones under that domain name.
AWS Route 53
Step 1: Generating Access Key, Key ID and Zone ID in AWS Route 53
- Login into your AWS account and click on 'user icon' and select 'Security Credentials'.
- On the Identity and Access Management(IAM) page, to generate Access Key and Key ID click on 'Create access key'

- In the subsequent page that appears, Select the Use Case as "Application running outside AWS". and click Next.

- For the Access Key pair(Access Key and Secret Access Key) to be generated, Enter a Description tag describing the purpose of the access key and where it will be used. This description will be associated with the user as a tag along with the access key. Click Create Access Key.

- The Access Key pair - Access Key and the Secret Access Key are successfully generated. Copy the values you will be required to provides these details in DDI Central console.

Step 2: Configurations to be made in DDI Central

- Once you have the required credentials from AWS , log into DDI Central and navigate to DNS-> Config -> Migrations .
- Select the provider as AWS Route53 from the list of providers in the providers drop-down menu.
- If required, With DDI Central you can also add a new domain into your AWS servers directly from DDI Central console by enabling the Create Domain toggle.
- If you'd like to create a new domain, enable Create Domain, enter the new domain name you'd like to create on your AWS's hosted DNS servers . This step is optional.
- Enter the Access Key pairs(Access Key and Secret Access Key) that you have copied or downloaded from AWS Route53 in the relevant fields for successful authentication with your AWS DNS servers on cloud.
- On successful authentication, DDI Central lists all the active domains hosted on AWS servers. Select the relevant ones or all the domains.
- Click Migrate.
- On successful migration, you can see all your current domains with AWS as well as the new domain you added (if any) before migration under the Domains page within the DNS module.
- You can further easily add and manage the configurations of zones under each domain directly using DDI central Zone editing tool.
- Click through a domain name and access the DNS records associated with the zones under that domain name.
Azure
Step 1: Getting required credentials from Azure
- Login into your Azure account and to get Subscription ID, click 'Subscription ID' and copy the 'Subscription ID' from the table.


- For Tenant ID, navigate to Microsoft Entra ID-> Overview previously known as Azure Active Directory and copy the Tenant ID


- To generate Client ID and Secret ,navigate to Azure Active Directory -> App registrations, If an app had been registered click on it or register a new application. Application (Client) ID in the table is the Client ID required to migrate.

- Now for Client Secret, navigate to 'Certificates and secrets' and click on 'Client secrets' tab and click on 'New client secret'.
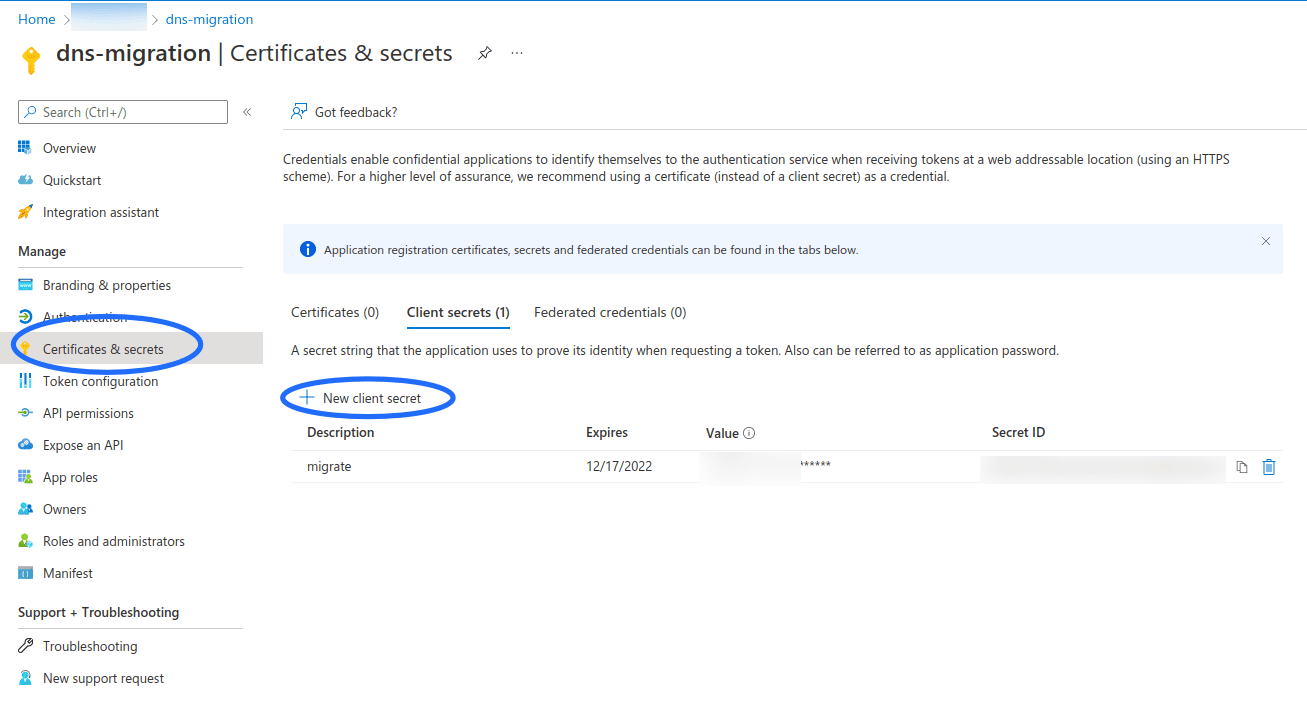

- Once the secret is created, Copy the Key in the 'Value' column, which is the required Client Secret. Once you exit this screen in the Azure interface, you will not be able to retrieve that key again.

- Now you will have to configure the correct permissions on Azure App created. To do this, navigate back to the Home page in your Azure account and click on Subscriptions. Then select your subscription and navigate to IAM & Services.
- Now click 'Add' and select 'Add Role Assignment'. Select Contributor as the role. Then type in the name of your App in the Select field and save.

Step 2: Configurations to be made in DDI Central

- Once you have the required credentials from Azure, log into DDI Central and navigate to DNS-> Config -> Migrations. Select Azure as the provider.
- Enable the Create Domain toggle to add a new domain. This step is optional.
- Enter the Domain Name, Resource group name (enter in lower case), Subscription ID, Tenant ID, Client Id and Client Secret .
- On successful authentication with Azure, DDI Central lists all the active domains with Azure. Select the relevant domains and then click Migrate.
- On successful migration, you can see all your current domains with Azure as well as the new domain you added (if any) before migration under the Domains page within the DNS module.
- You can further easily add and manage the configurations of zones under each domain directly using DDI central Zone editing tool.
- Click through a domain name and access the DNS records associated with the zones under that domain name.
General Procedures
With successful authentication in place between DDI Central and your hosted DNS service providers, you can revisit the Migration page if you'd like to directly keep migrating different active domains from your hosted DNS service provider subsequently after the first migration without the need to enter the credentials again and again for each migration. All you need is to deselect those domains that you'd like to exclude and click Migrate. You can also create a new domain and click Migrate.
Note: At any given moment, with successful authentication, you can either migrate the active domains or migrate the new domains you create using the DDI Central console.
With the one-time successful authentication, you can still come back and update the authentication credentials by clicking at the Edit icon or delete the credentials by clicking the Delete icon at the extreme right end of the provider field.
Note:
- DDI Central does not facilitate the migration of private zones from Google CloudDNS.
- Advanced routing policies and configurations provided by the four hosted DNS service providers mentioned above cannot be migrated and will be disregarded during migration by DDI Central.
- To ensure that the DNS records in DDI Central are synchronized with your cloud provider’s current configurations, click the 'Sync' button at the top of the page each time you try to access or modify your imported zones.
- DDI Central allows for basic zone management tasks such as adding, updating, and deleting the DNS resource records imported from external vendors. Additionally, it offers the ability to track audit trails for actions performed on resource records of domains imported from multi-vendor providers, thus maintaining complete visibility and management within DDI Central.
- Managing the records in DDI Central is limited to the record types it supports, regardless of the advanced DNS record types available from your hosted multi-vendor DNS providers.
- Furthermore, query analytics for records imported from external vendors are not trackable within DDI Central.

New to ADSelfService Plus?
Related Articles
Adding Windows DNS-DHCP servers
Note: PowerShell version 5.1.2 or higher is required for a successful setup. Ensure that Windows Remote Management services are running on the Windows DNS and DHCP servers you plan to onboard into DDI Central's Management UI Console. Step 1. WinRM ...DDI Central for Microsoft DNS DHCP
About ManageEngine DDI Central DDI Central is a comprehensive network management solution that unifies DNS, DHCP, and IP Address Management (IPAM) to enhance operational efficiency and network stability. It is deployed as an overlay on your existing ...DDI Central Endpoint integration
DDI Central Endpoint integration ManageEngine DDI Central's integration with Endpoint Central enables organizations to seamlessly access all the details of the devices and visualize them effectively. This helps network administrators manage and ...Cloud Observability in DDI Central
Cloud Observability in DDI Central For Unified Visibility Across Cloud Networks As enterprises expand their cloud footprint, network teams are often left grappling with fragmented visibility across platforms, resources, and services. DDI Central’s ...DDI Central system settings
DDI Central System settings DDI Central provides customizable time configurations for both DNS and DHCP services, which lets administrators can set their own time period, based on their system configurations. This helps admins automate network tasks ...