How to import logs in EventLog Analyzer from a local path
Objective
A user can import application logs in EventLog Analyzer when the logs are located in the local file system of the EventLog Analyzer instance, shared path of Windows OS and Linux OS, or S3 bucket. Learn how to import logs in EventLog Analyzer from a local path.
Prerequisites
- Ensure you have sufficient Application licenses. EventLog Analyzer consumes one Application license for each import and each unique log format identified during log file import.
Note: Importing the same file twice with different formats will consume two licenses. - The file to be imported must be plain text and non-encrypted. EventLog Analyzer archived files in ZIP, GZ, and 7Z formats are supported for import.
- You must have access to the EventLog Analyzer user interface from the machine where local import will be done.
- Ensure availability of web ports in the network. The file is accessed over HTTP or HTTPS, depending on the protocol configured for the EventLog Analyzer application, and communicates with the application through the web server port.
- The logged in user must have read access to the file.
Steps to follow
With the local import option, you can import log files from any device that you use to access the EventLog Analyzer console.
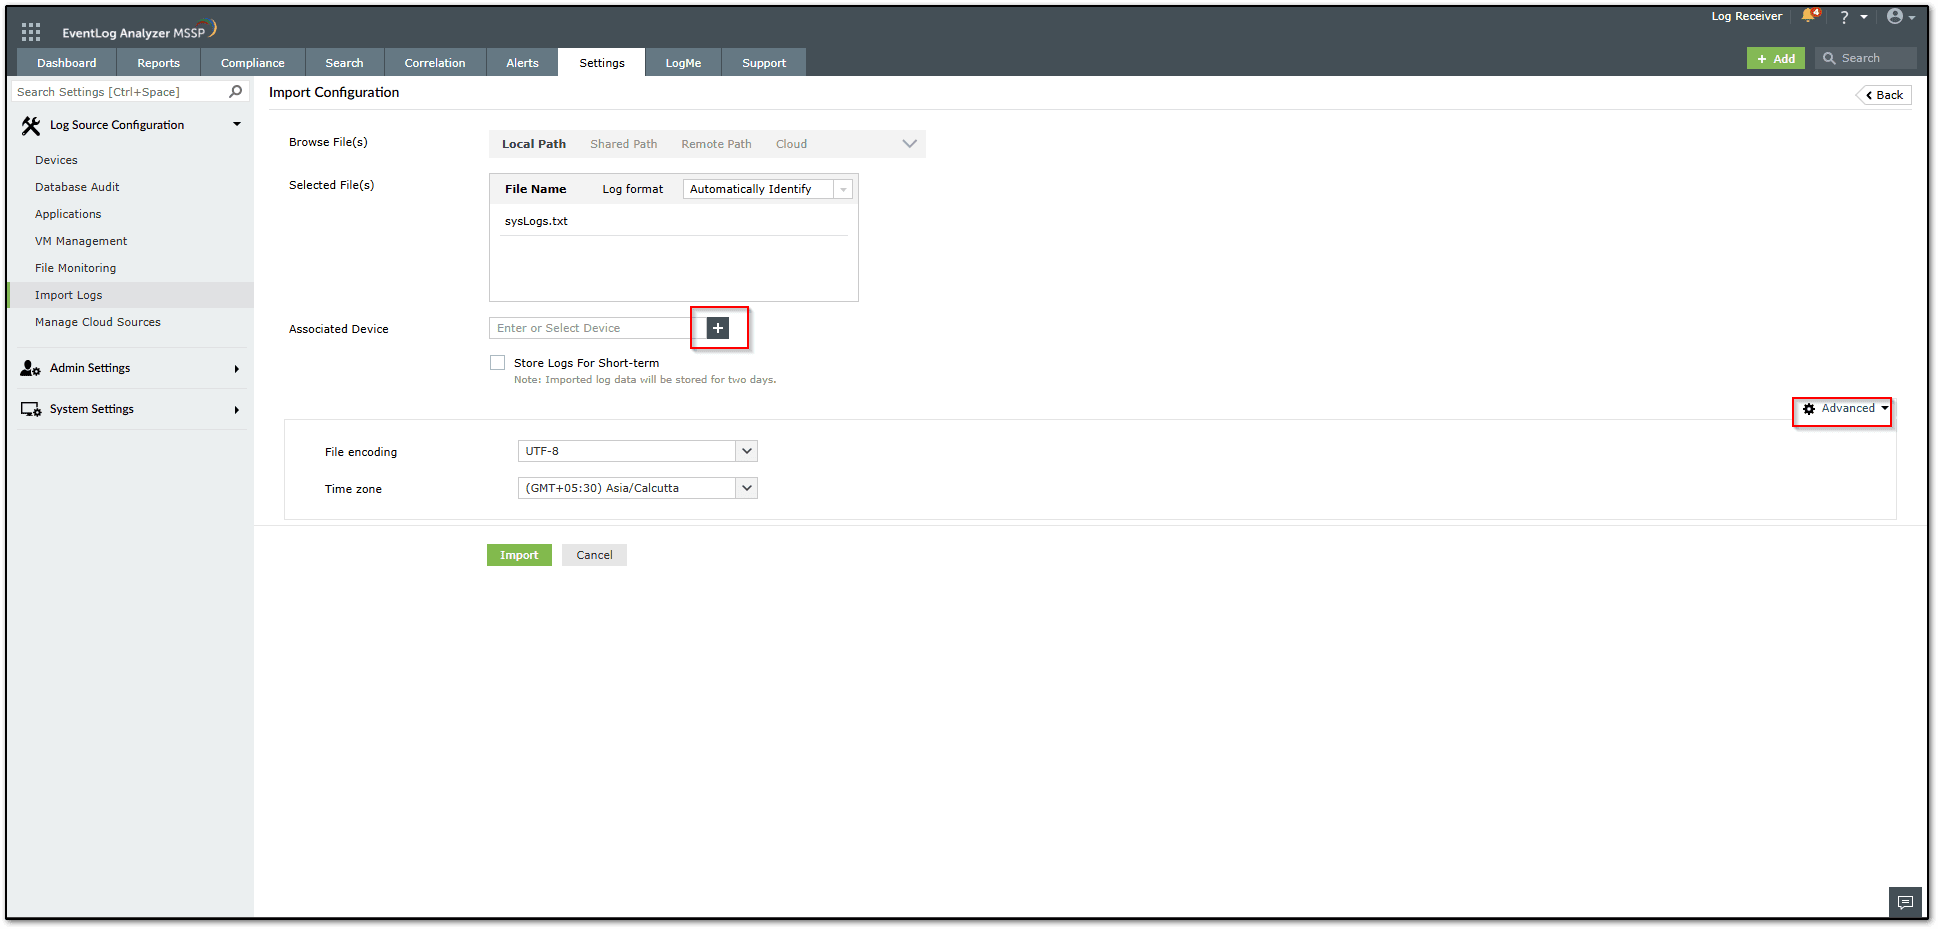
Step 1: Navigate to Settings > Log import > + Import log > Local path.
Step 2: Click Browse and select the file(s) that you would like to import.
Step 3: The log format will be auto-identified or can be selected manually.
Note: EventLog Analyzer will only process certain log formats. If it's an unsupported or custom log source, a new log format will have to be created.Click the + button, choose the device for which the log data will be associated with, and click Add. You can also enter the name of the device or select the device from the pop-up window.
Note: EventLog Analyzer will only process certain log formats. If it's an unsupported or custom log source, a new log format will have to be created.Click the + button, choose the device for which the log data will be associated with, and click Add. You can also enter the name of the device or select the device from the pop-up window.
Step 4: To store the imported logs for only two days, enable the Store logs for a short term option. By default, the log storage duration is based on the storage settings configured in EventLog Analyzer.
Step 5: Under Advanced, use the File encoding and Time zone drop-downs to specify these parameters. This ensures the logs are automatically converted to the EventLog Analyzer server's time zone for better visibility and correlation.
Step 6: Click Import to import the file.
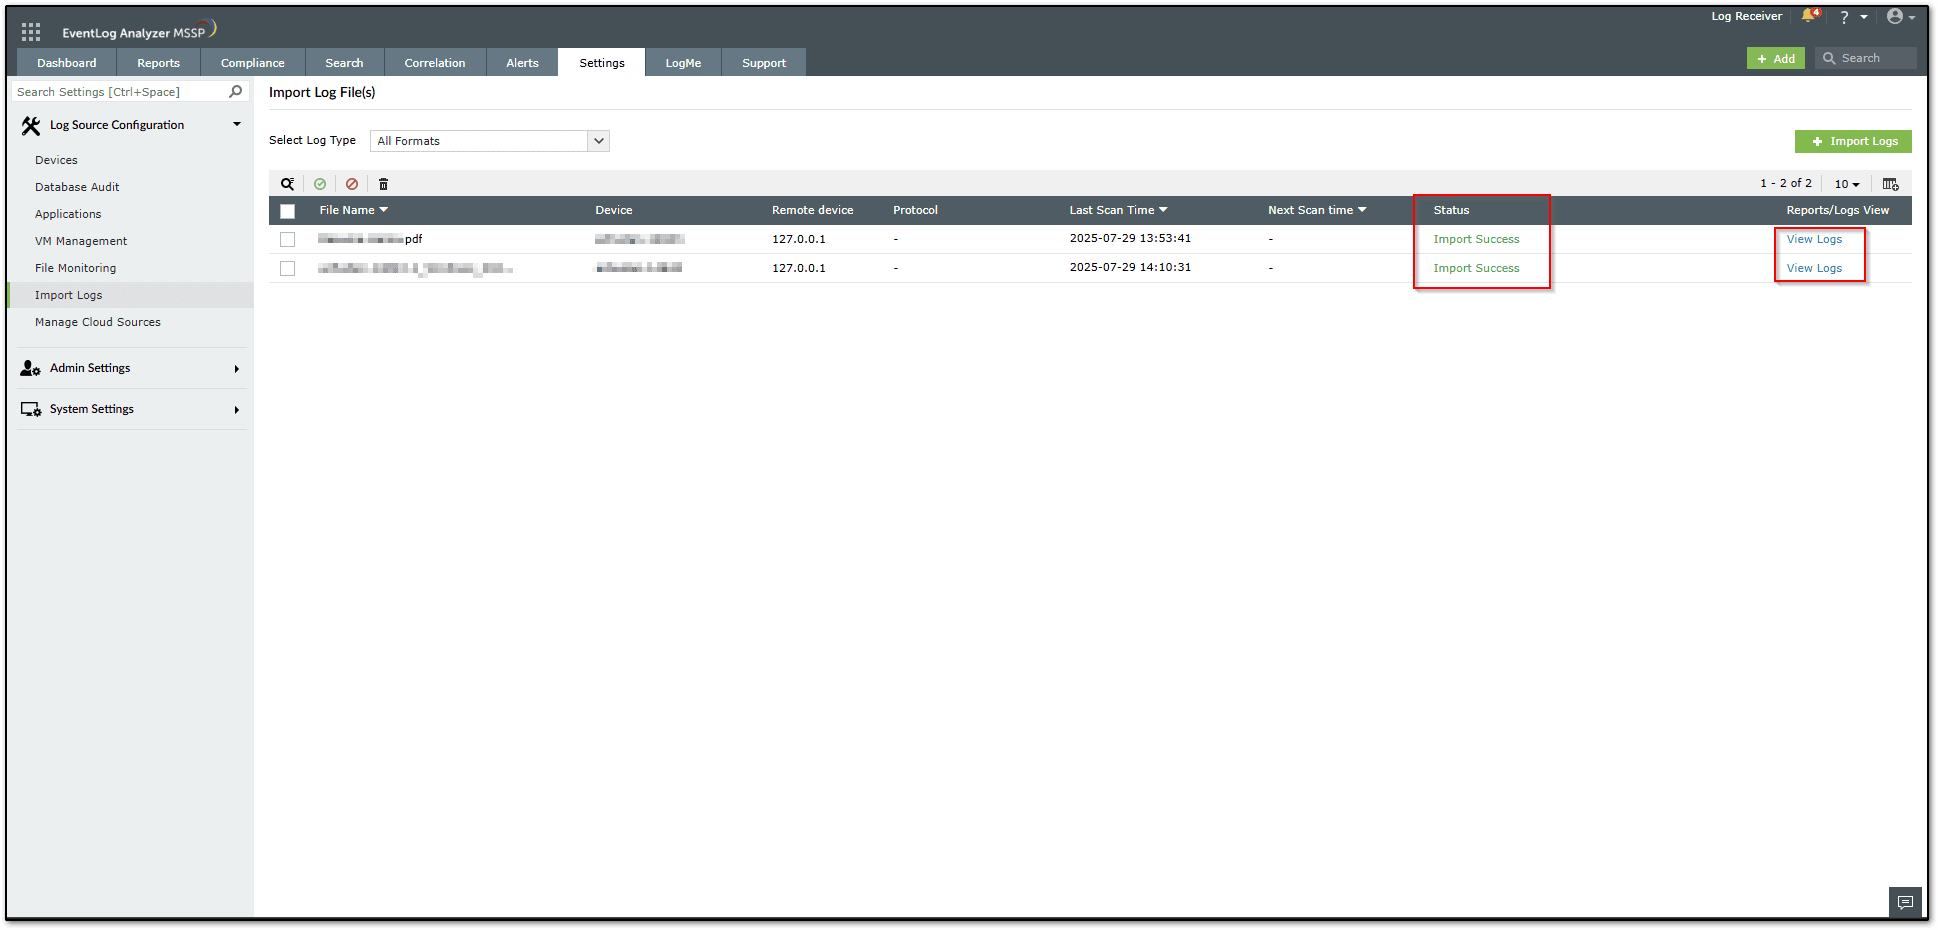
Step 7: The file will be imported and processed in the backend. Once the process is completed, you will be able to see the status as Import Success.
Step 8: You can view the log data by selecting the View Logs option or use the Search tab, select the device for which the log has been associated with, and set the calendar timestamp recorded in the log message to view the data. For more details, see How to search logs using Search tab in EventLog Analyzer.
Tips
- Local import can be done on any machine where the user interface is accessible. Using the application in HTTPS by applying a valid SSL will offer a secure transfer of data when user interface is accessed from a remote machine. Log import consumes one Application license for each import performed. If you are importing for analysis, you can select the Store Logs for Short-term option, which will store the imported log data in EventLog Analyzer for two days. If the option is left unchecked, the logs will be stored as per the data retention configuration.
- The log format will be set as Automatically Identify by default. You can create a custom log format if the log format is not available in the list or if it is from a custom application.
- Log import for EVT/EVTX is available for direct import only.
- The scheduled import option is available in both remote and S3 bucket imports.
Related topics and articles

New to ADSelfService Plus?
Related Articles
How to import logs in EventLog Analyzer from Remote path
Objective Some applications might record logs in the file system so the user can import the logs into EventLog Analyzer. These logs must be located in the Local file system of the EventLog Analyzer instance with the shared path of Windows OS and ...How to import logs in EventLog Analyzer from S3 bucket
Objective Some applications might record logs in the file system so that the user can import the logs in EventLog Analyzer. This can happen when the logs are located in Local file system of the EventLog Analyzer instance where the shared path is the ...How to enable audit for PostgreSQL logs in EventLog Analyzer
Objective EventLog Analyzer can audit PostgreSQL logs via log import feature, This article focuses on how to import the PostgreSQL logs via log import in EventLog Analyzer. Prerequisites Availability of license purchased. For build lower than 13000 - ...How to Perform Scheduled Import Log Collection in EventLog Analyzer
Objective EventLog Analyzer supports scheduled log imports from both remote paths and S3 buckets. You can enable scheduled log collection to have the application read data from the same file at regular intervals, or configure a file naming convention ...How to Perform Scheduled Import Log Collection in EventLog Analyzer
Objective EventLog Analyzer supports scheduled log imports from both remote paths and S3 buckets. You can enable scheduled log collection to have the application read data from the same file at regular intervals, or configure a file naming convention ...