Configuring SAML authentication settings in OpManager for Azure
Listed below are the steps to configure SAML authentication in OpManager (SP) for Azure (IdP) with Single Sign-On.
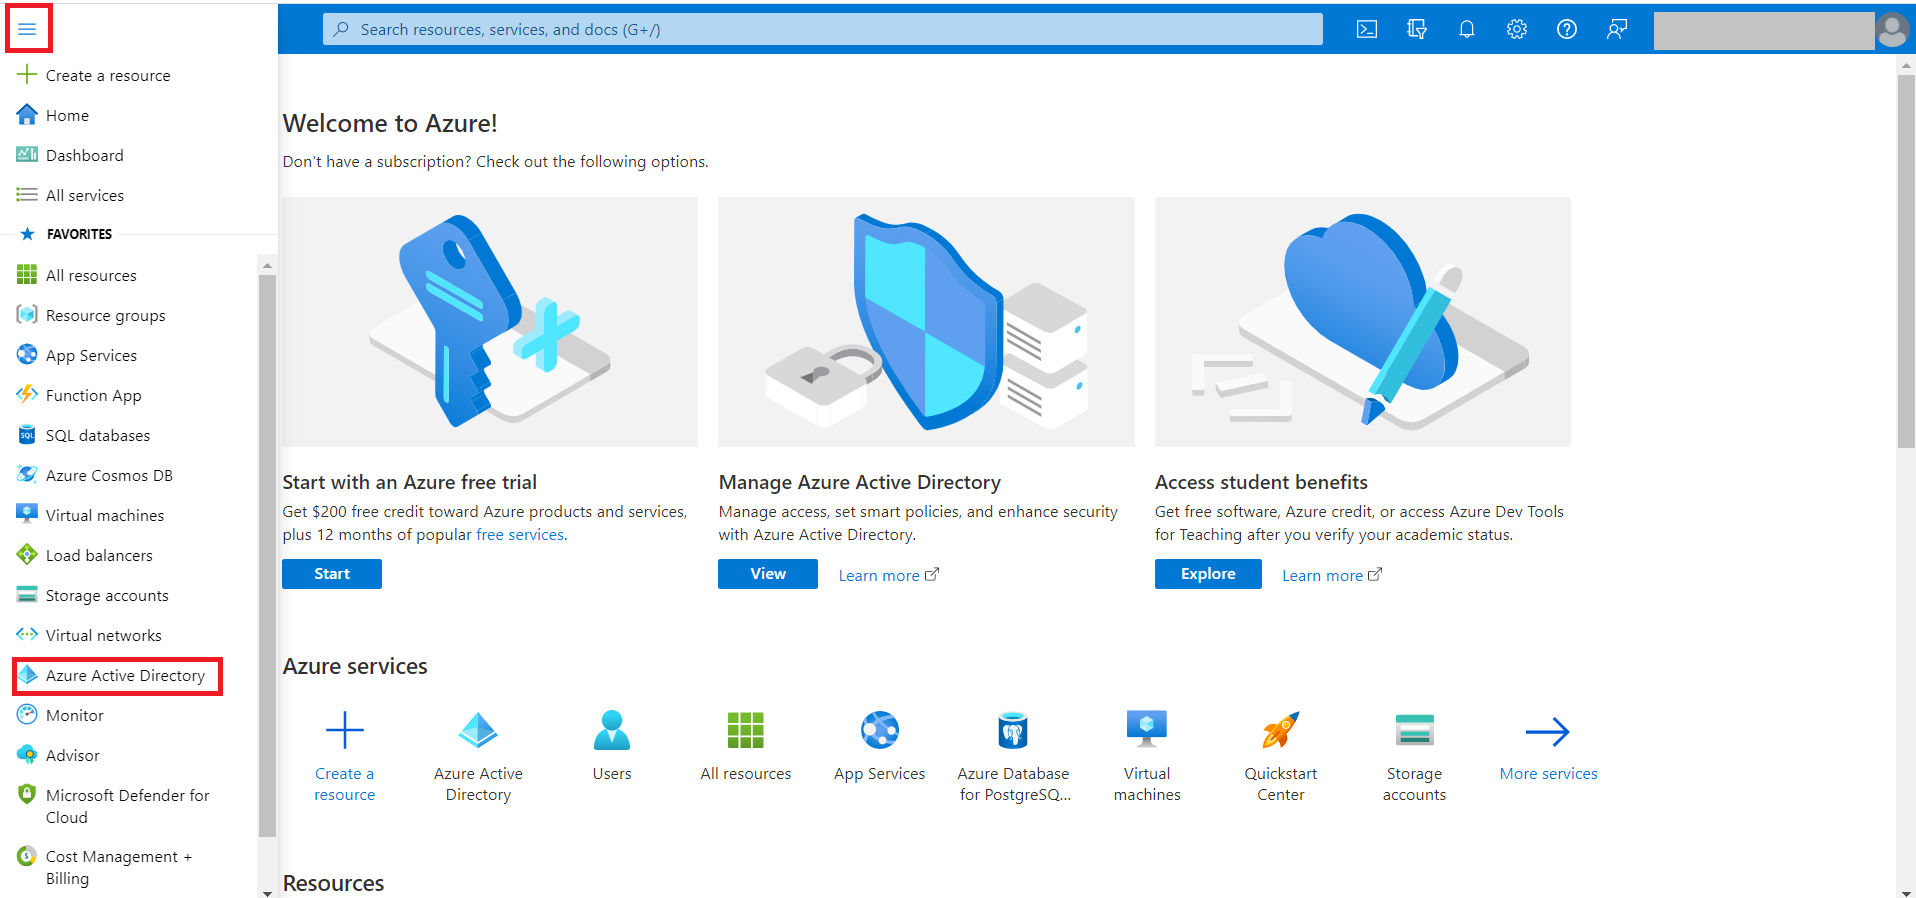
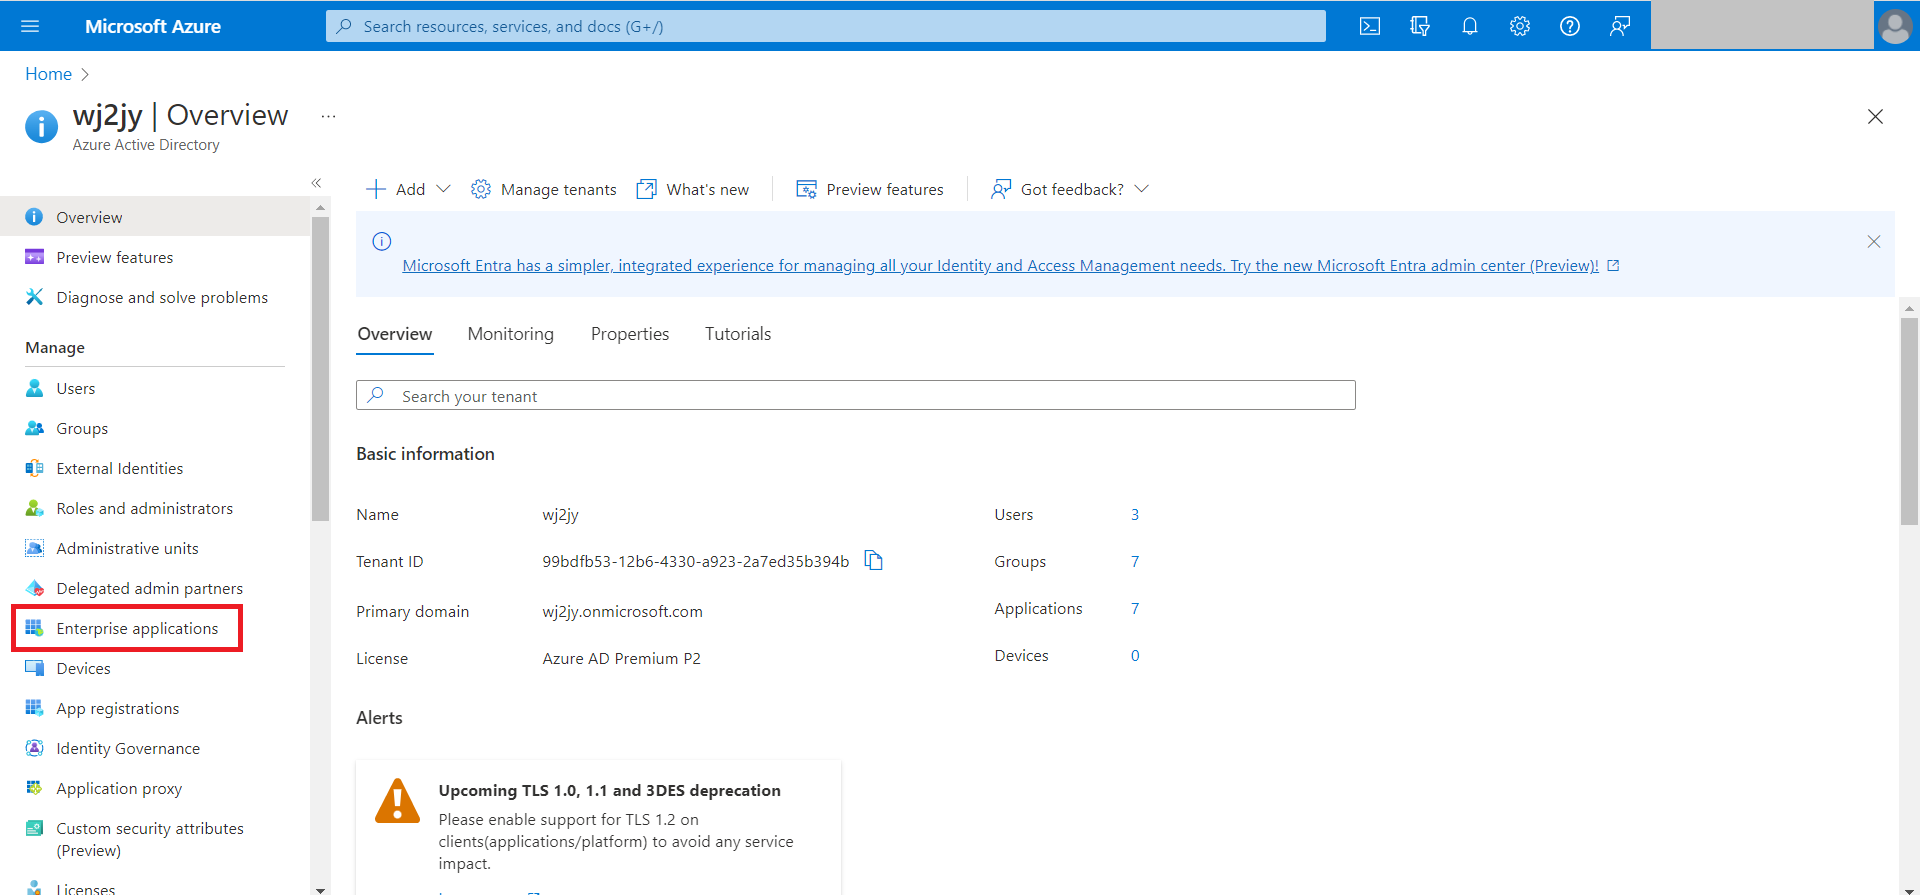
- Login to your Azure account. Expand the menu on the left hand side, and select Azure Active Directory.
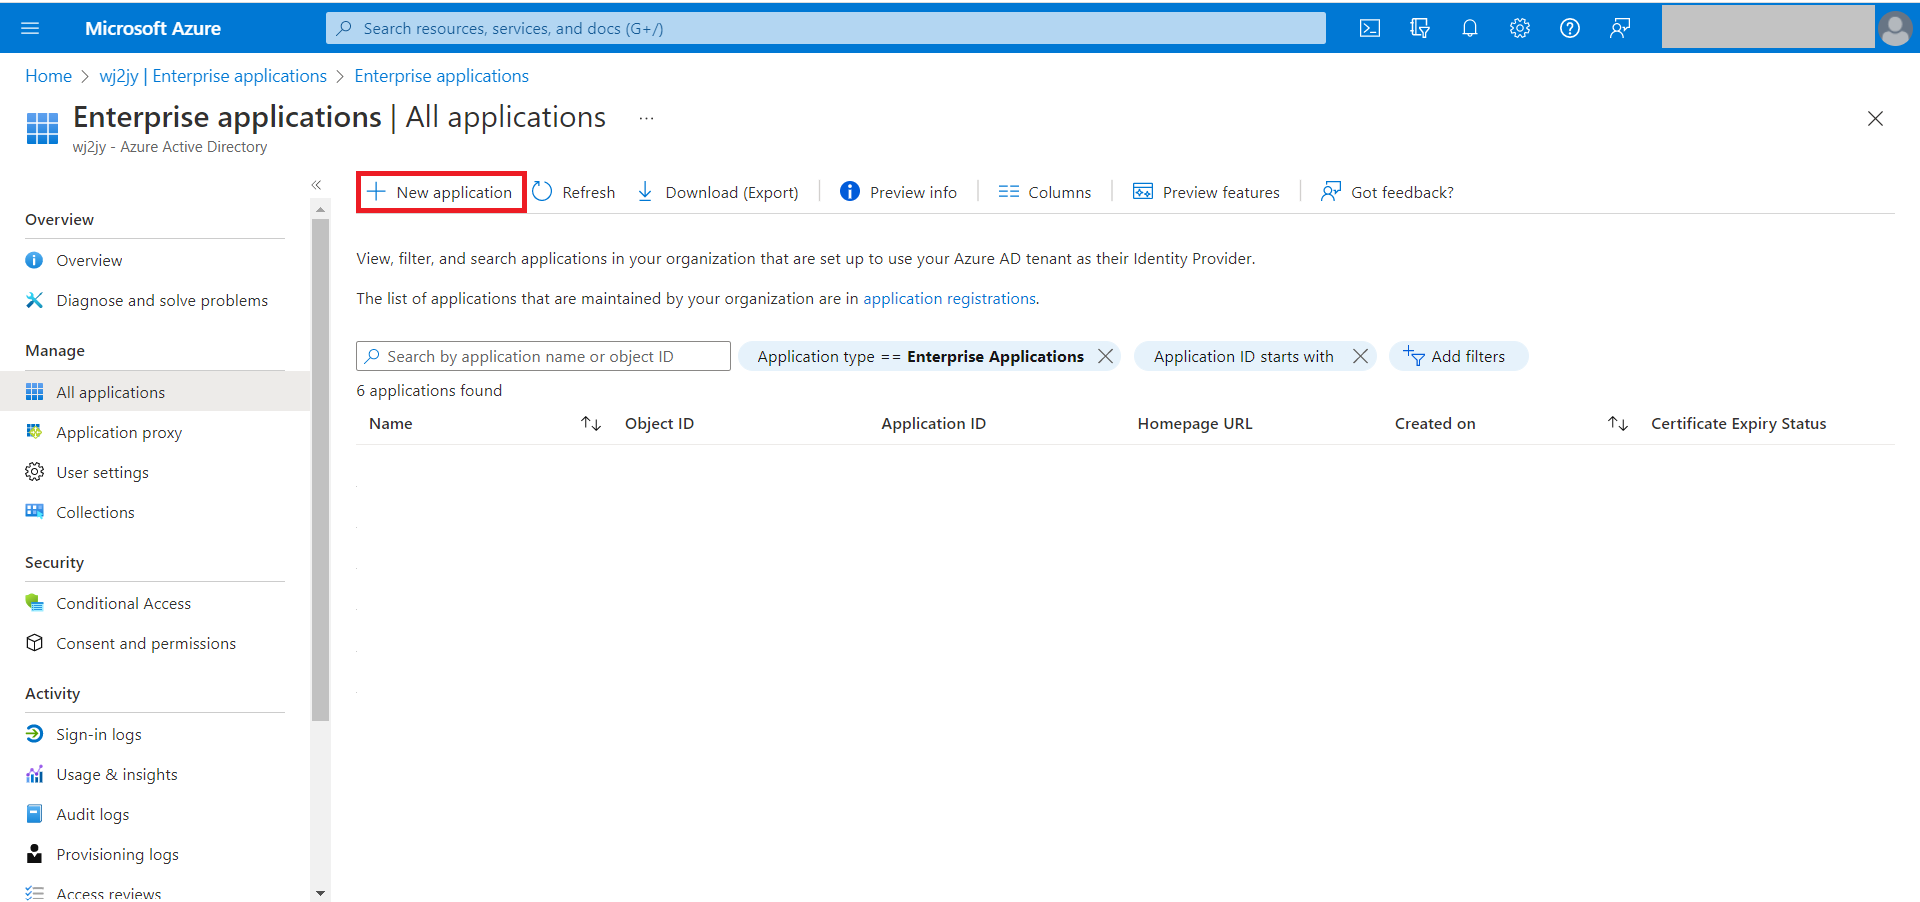
- Click on Enterprise applications.
- Select New Application.
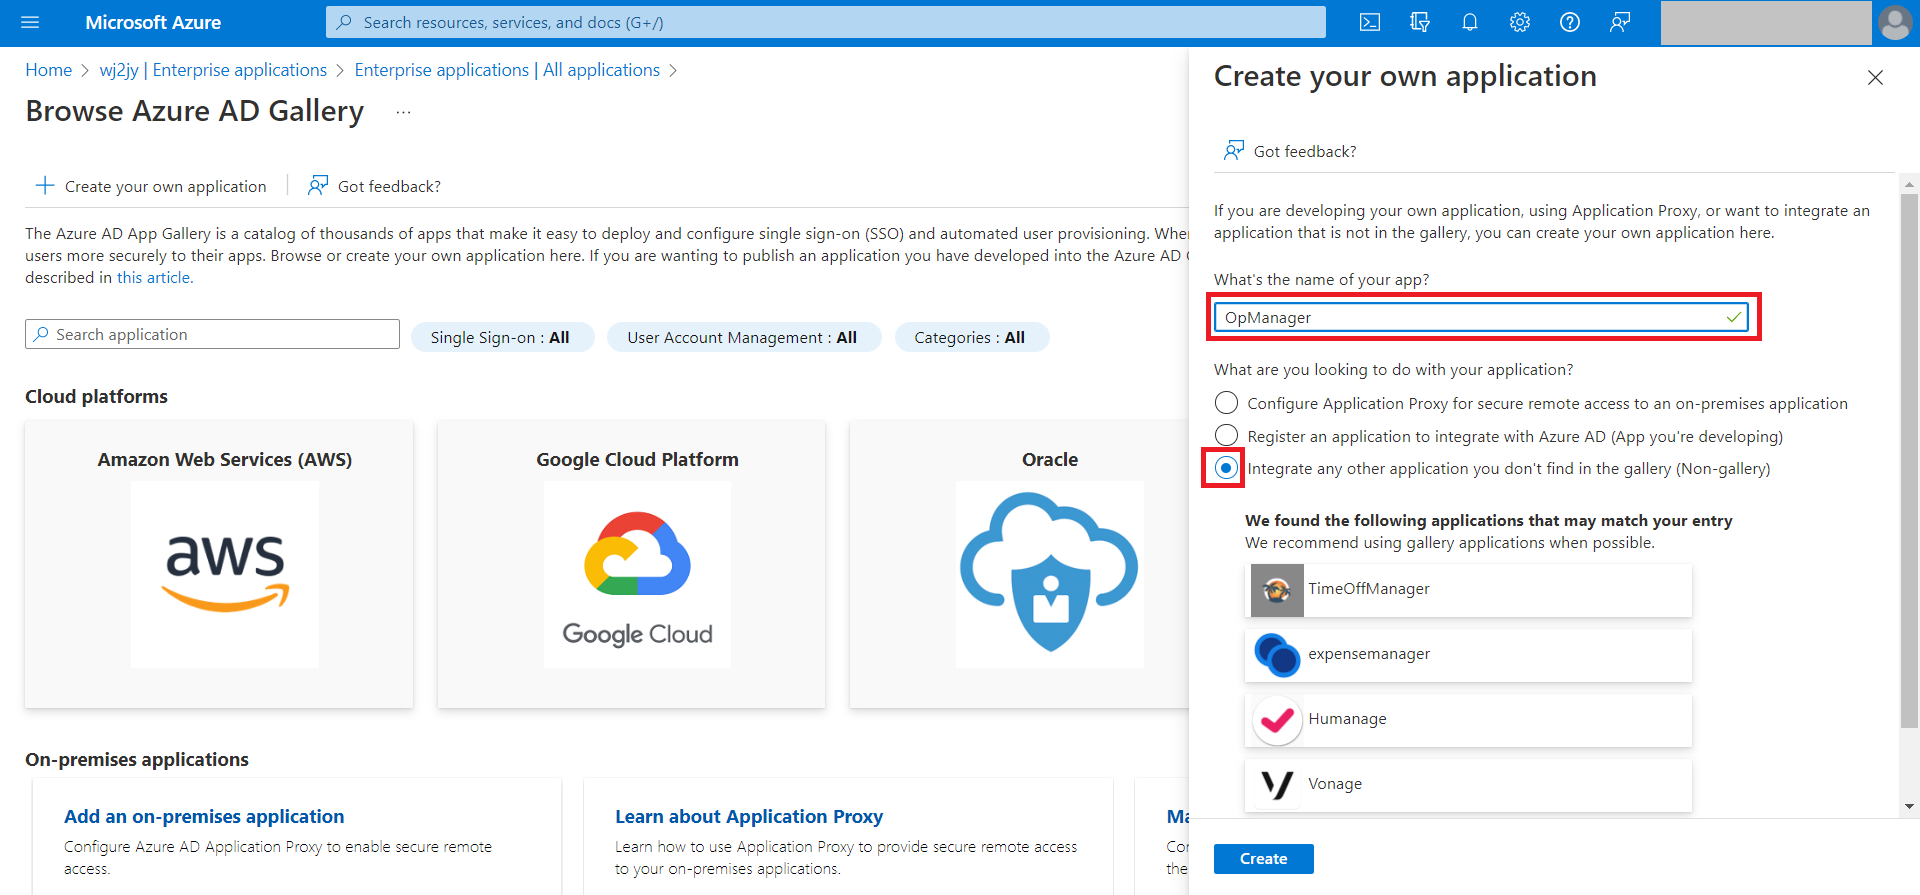
- Enter the application name in the text box under 'What's the name of your app?' and click on Create at the end of that page.
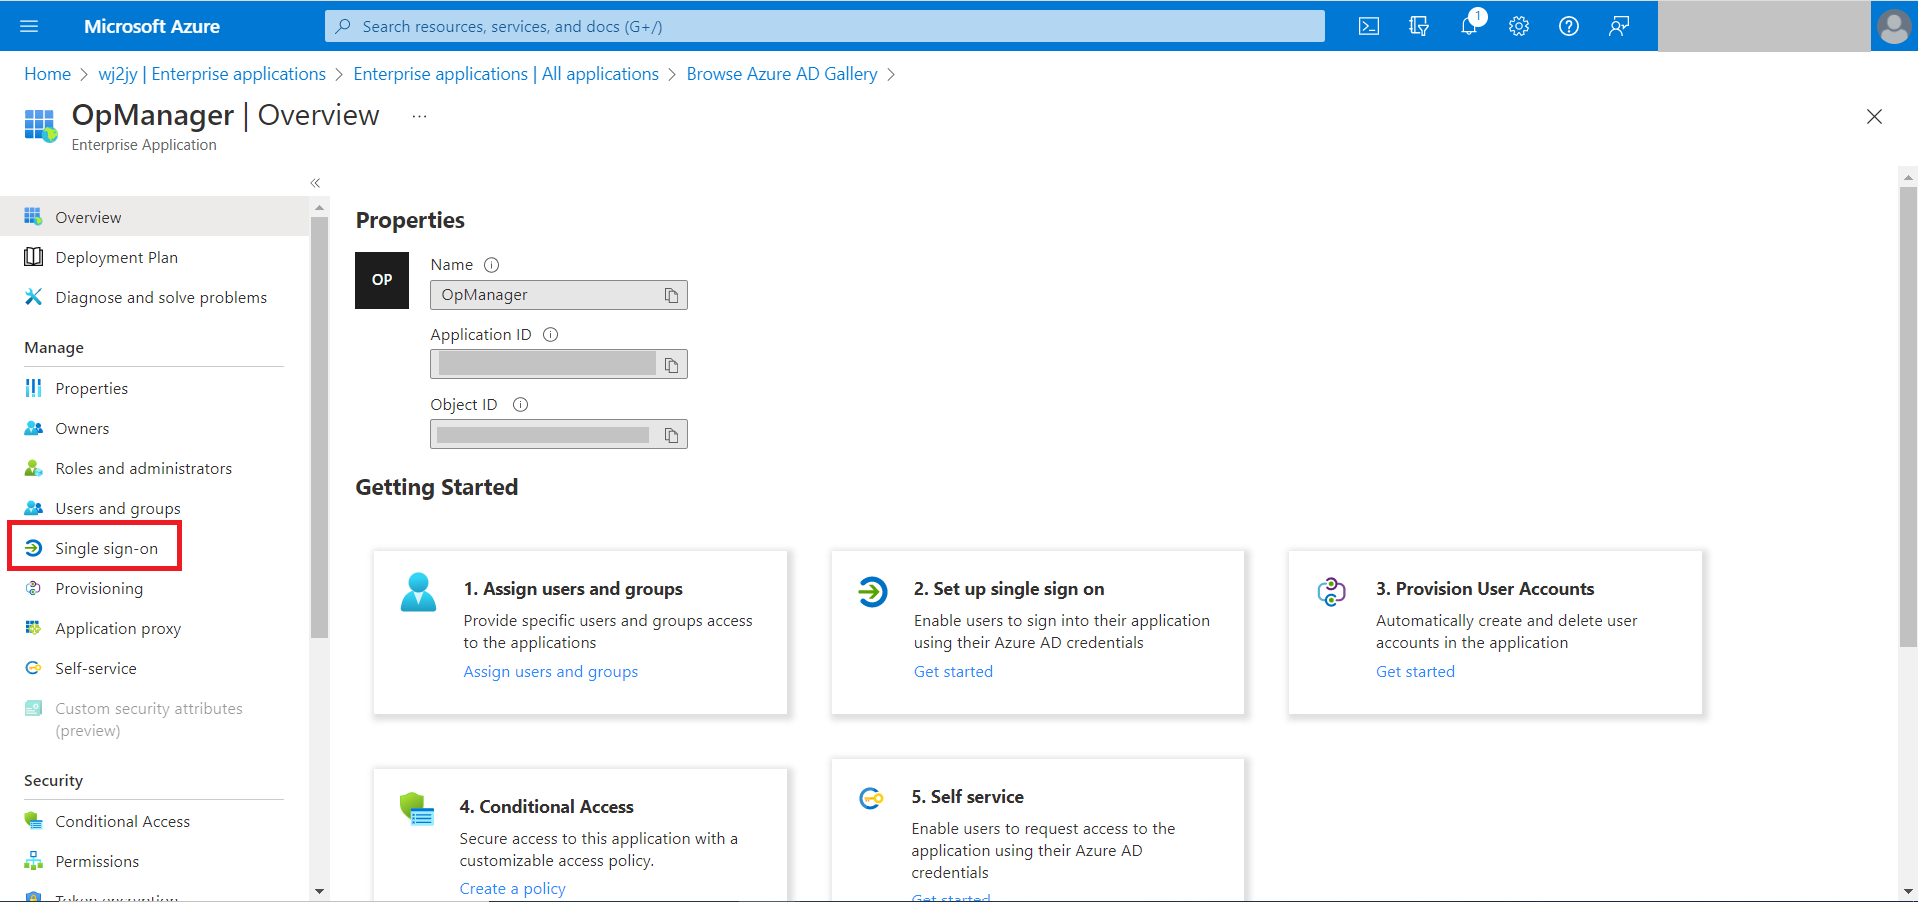
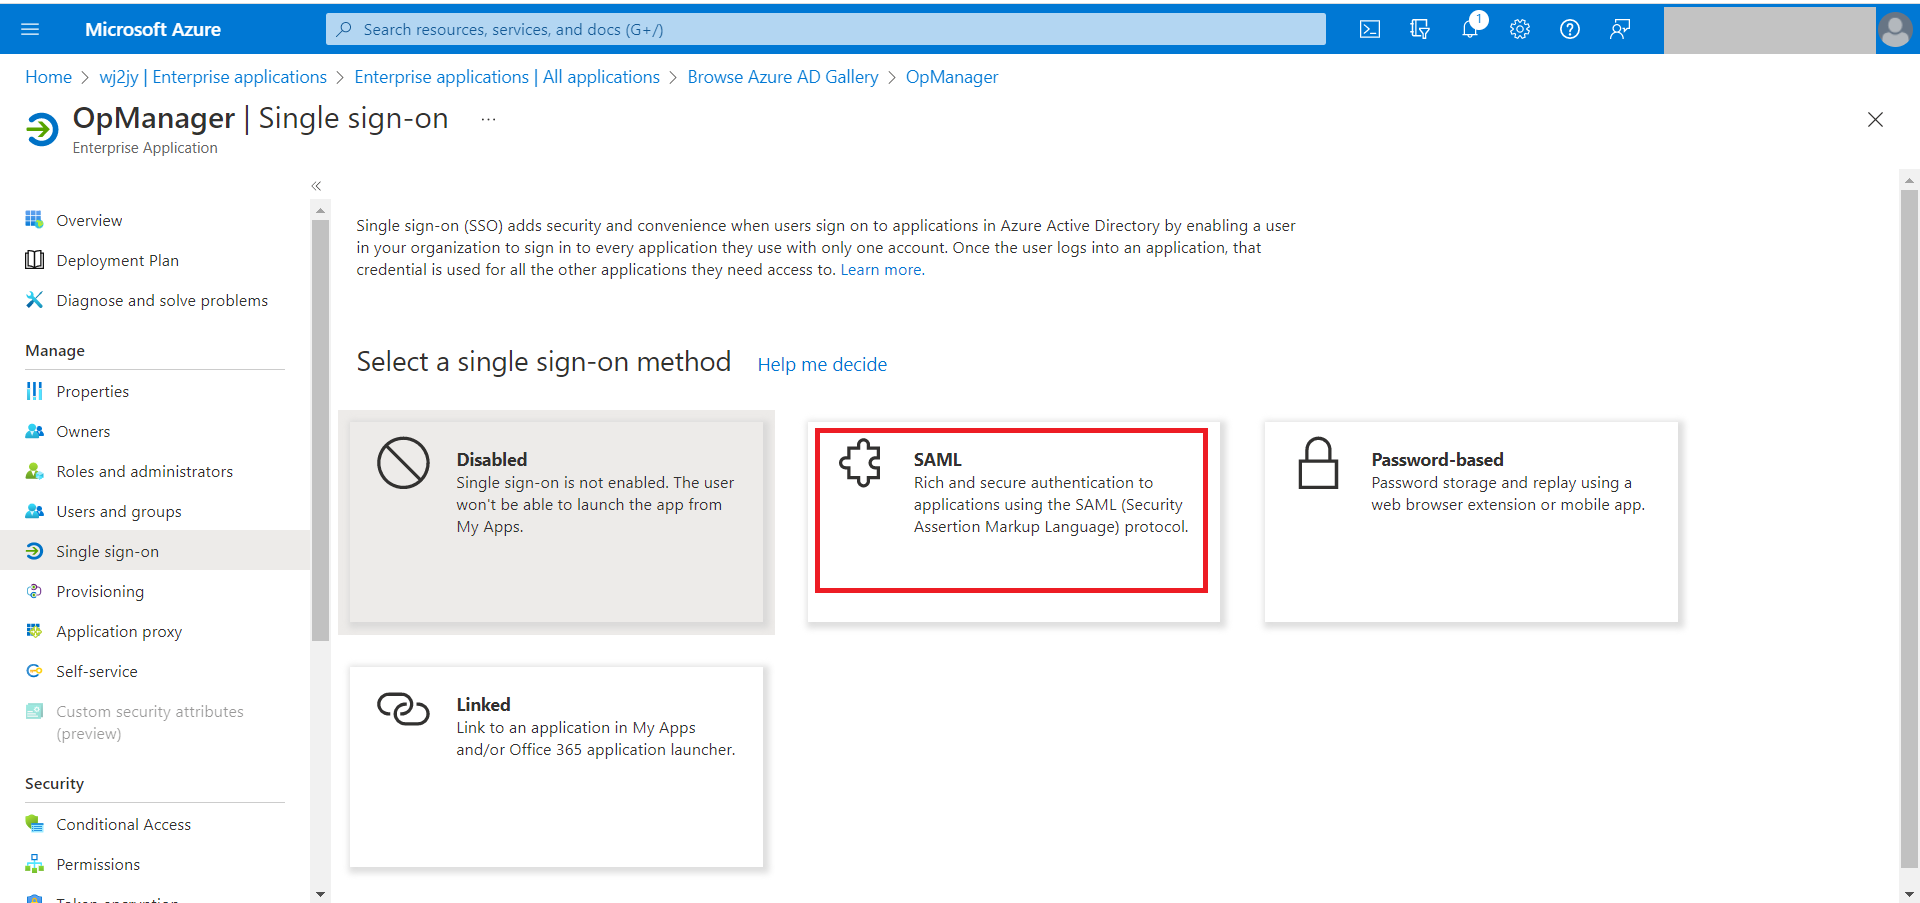
- On the left side menu, select Single sign-on and choose SAML. You will be navigated to the SAML based Sign-On page.
- In Basic SAML configuration select the edit option. (The pencil icon).
- In this window, the Entity ID, Assertion Consumer Service (ACS) URL, Sign on URL, and Logout URL from OpManager need to be specified.
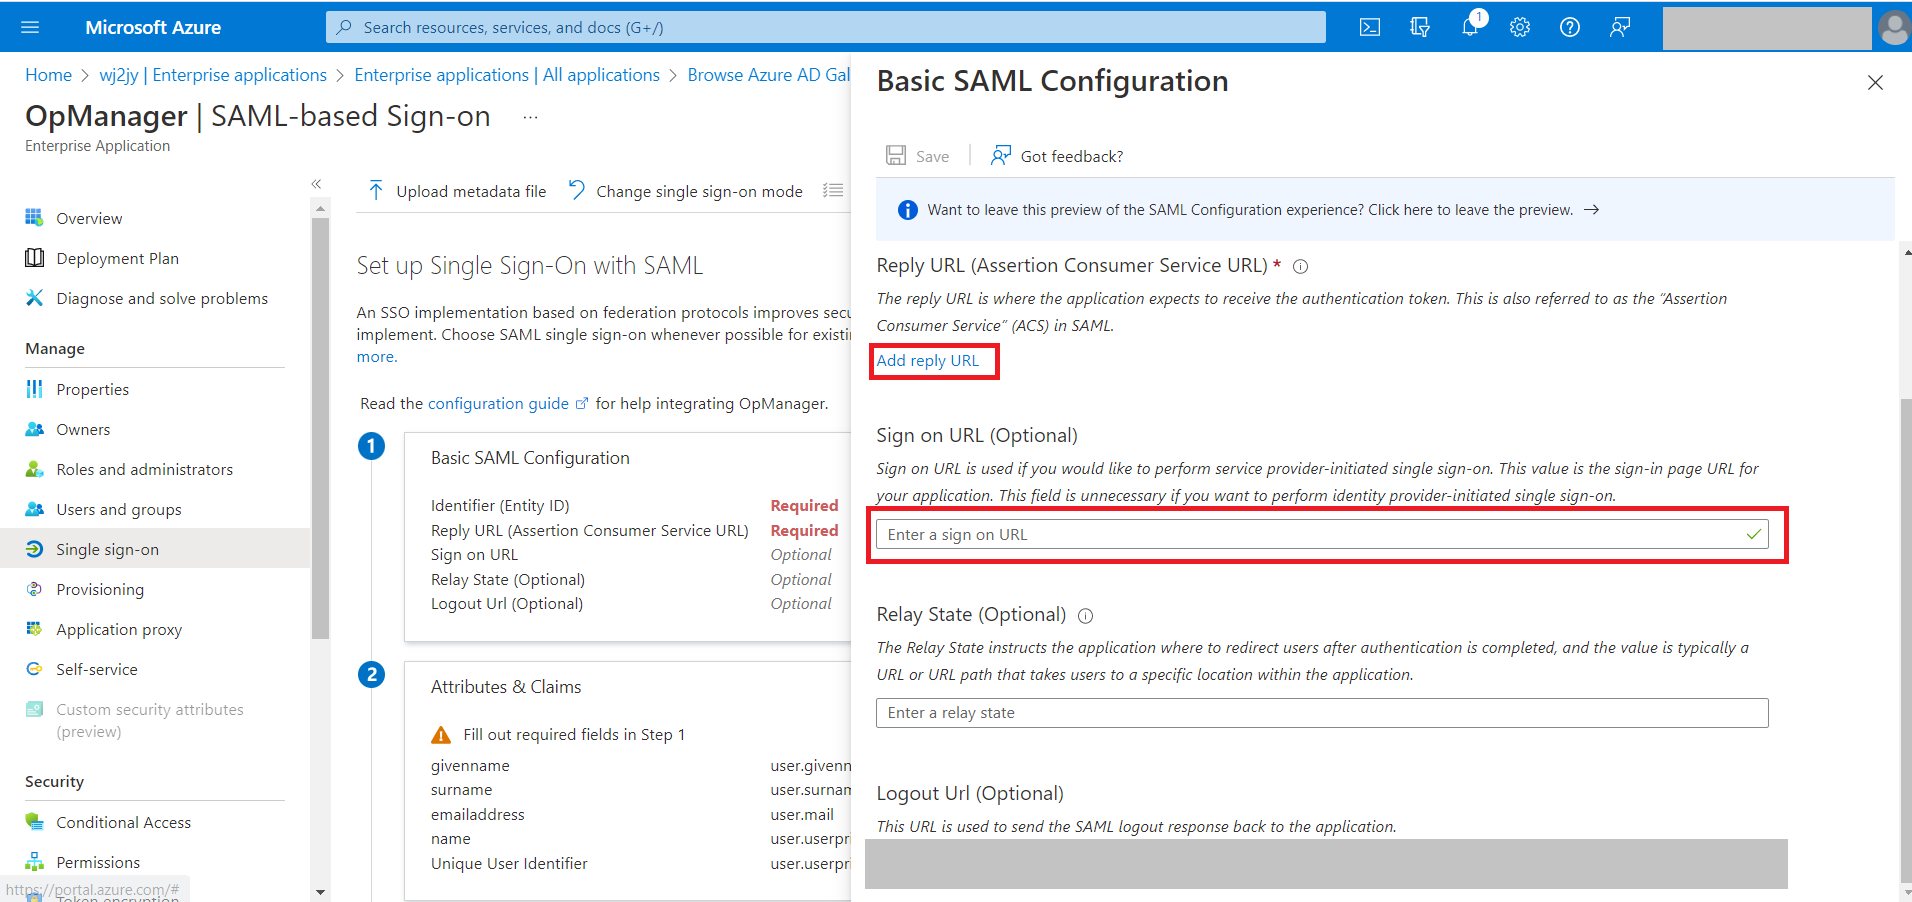
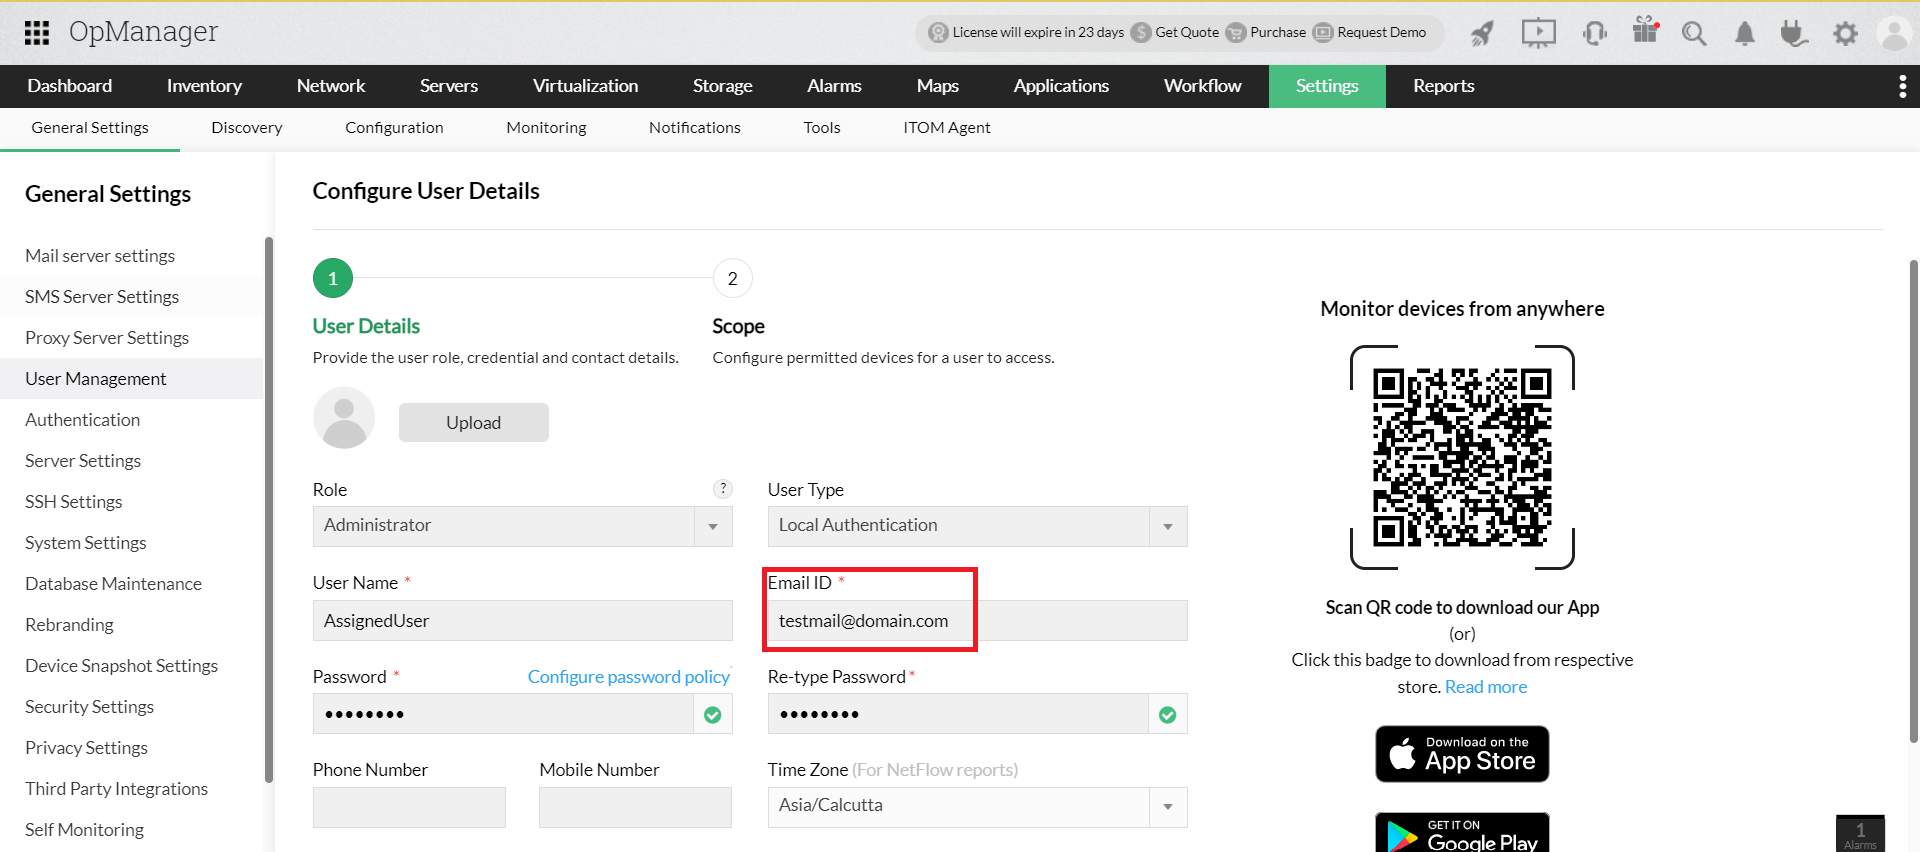
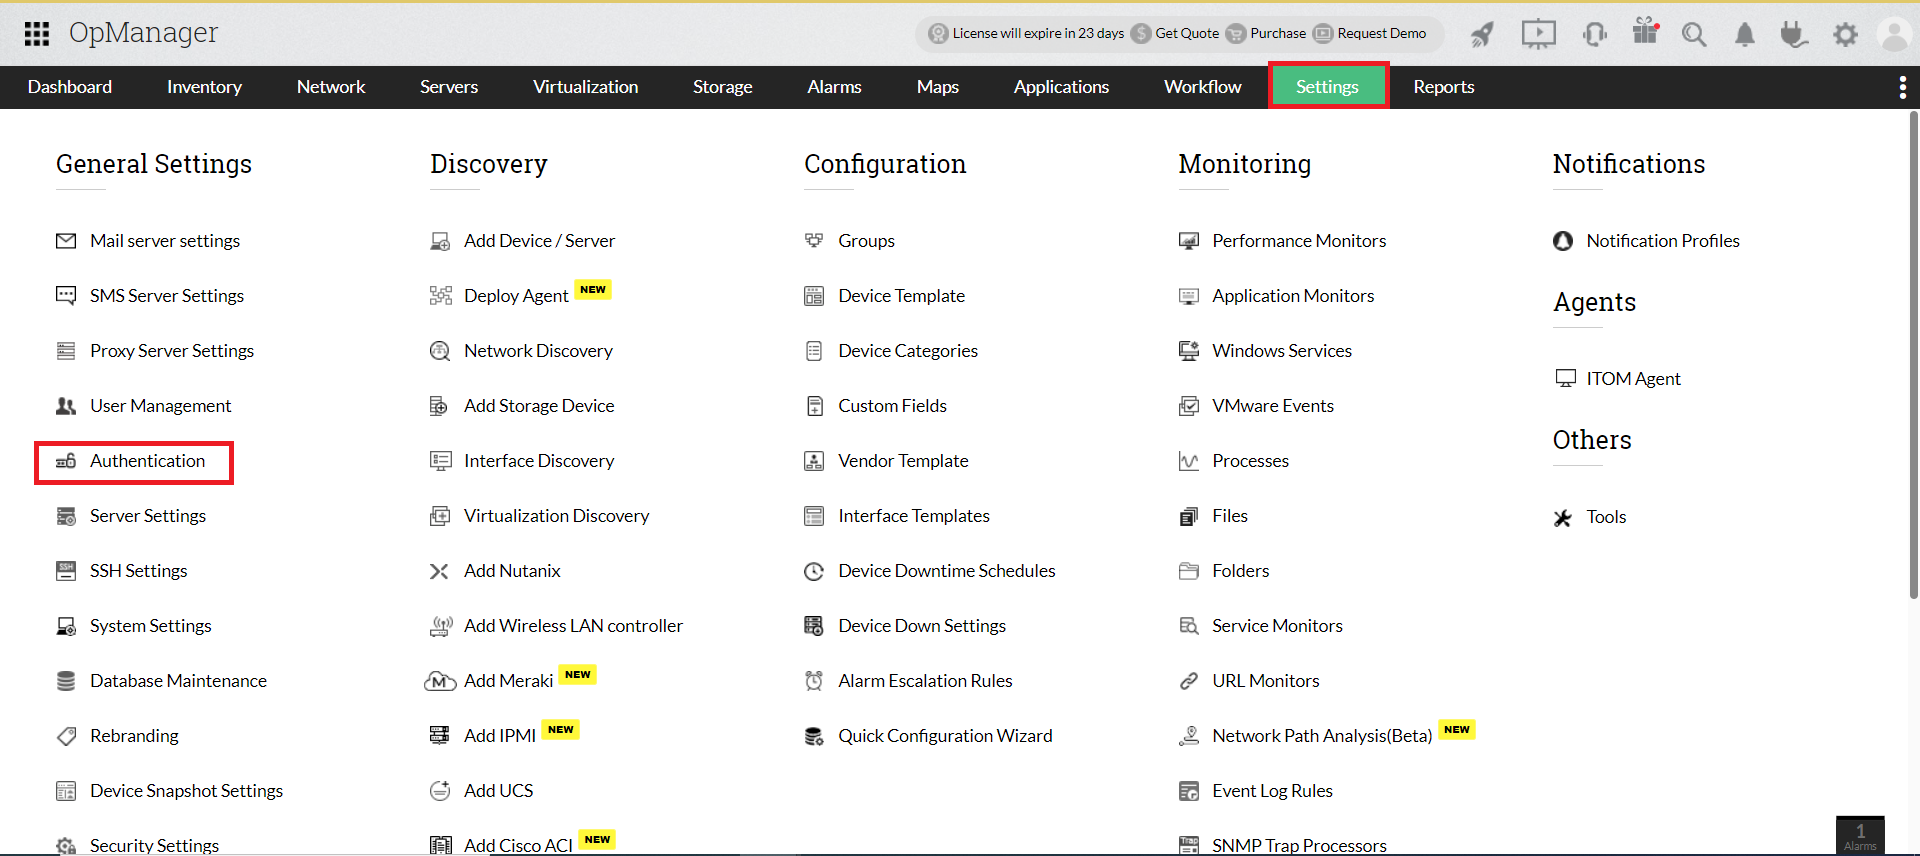
- Go to OpManager, navigate to Settings -> General Settings -> Authentication.
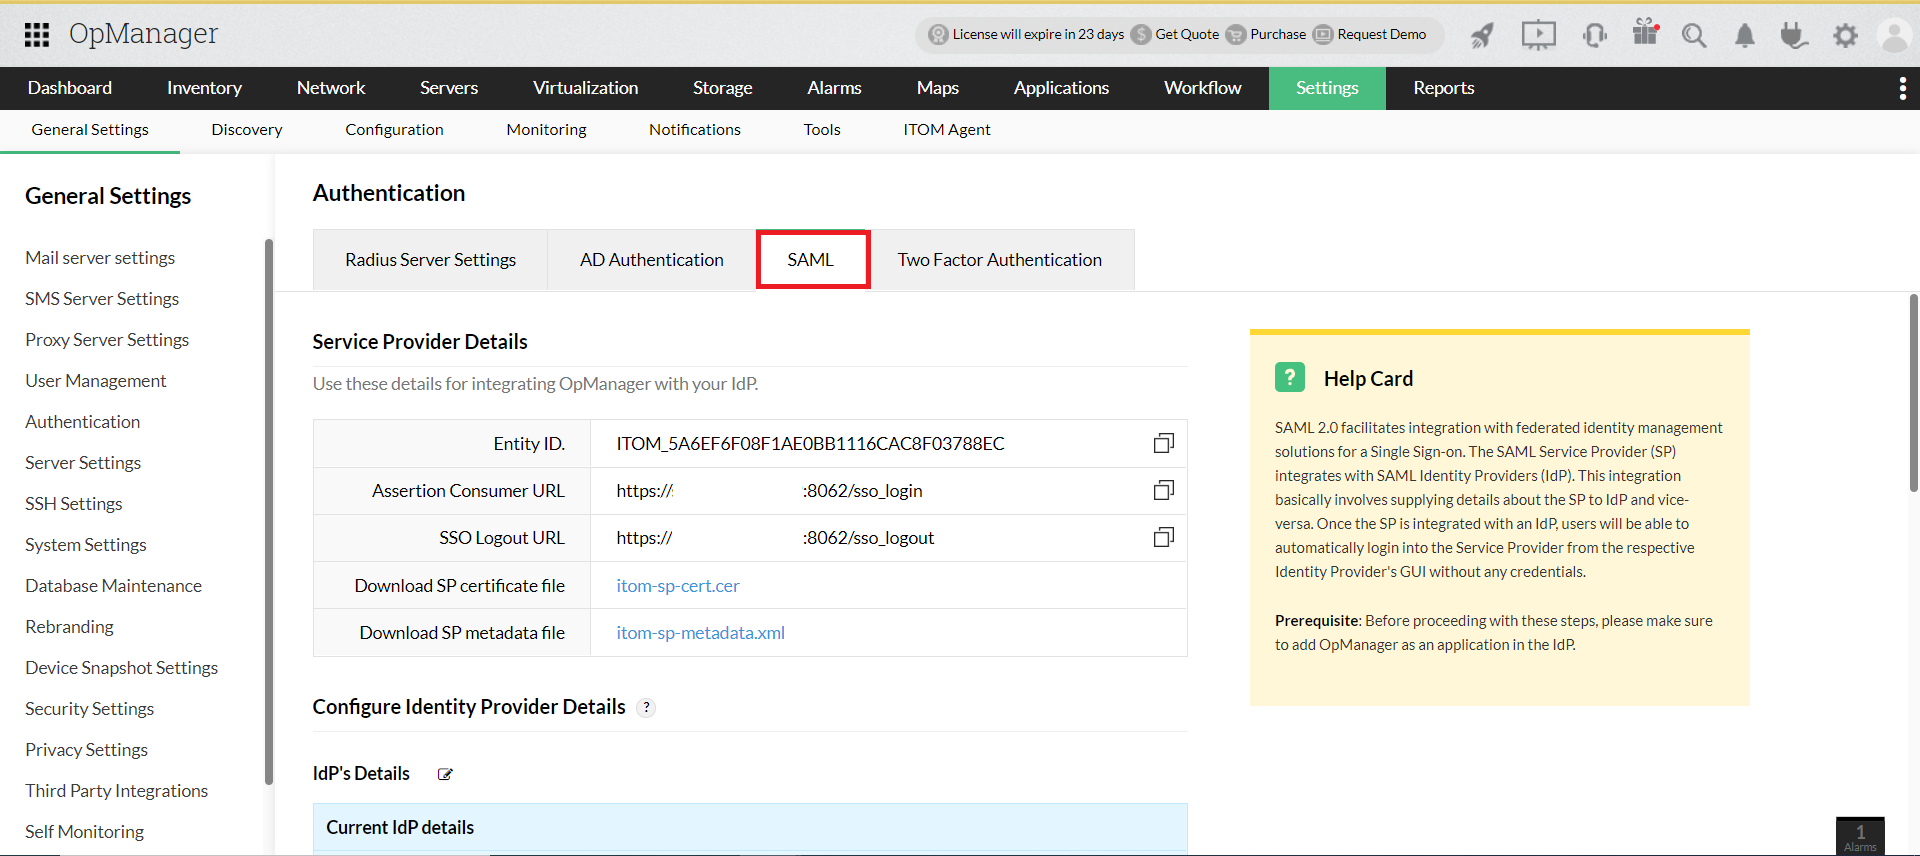
- Under SAML, copy the Entity ID, Assertion Consumer Service URL, and the Logout URL from the Service Provider Details section.
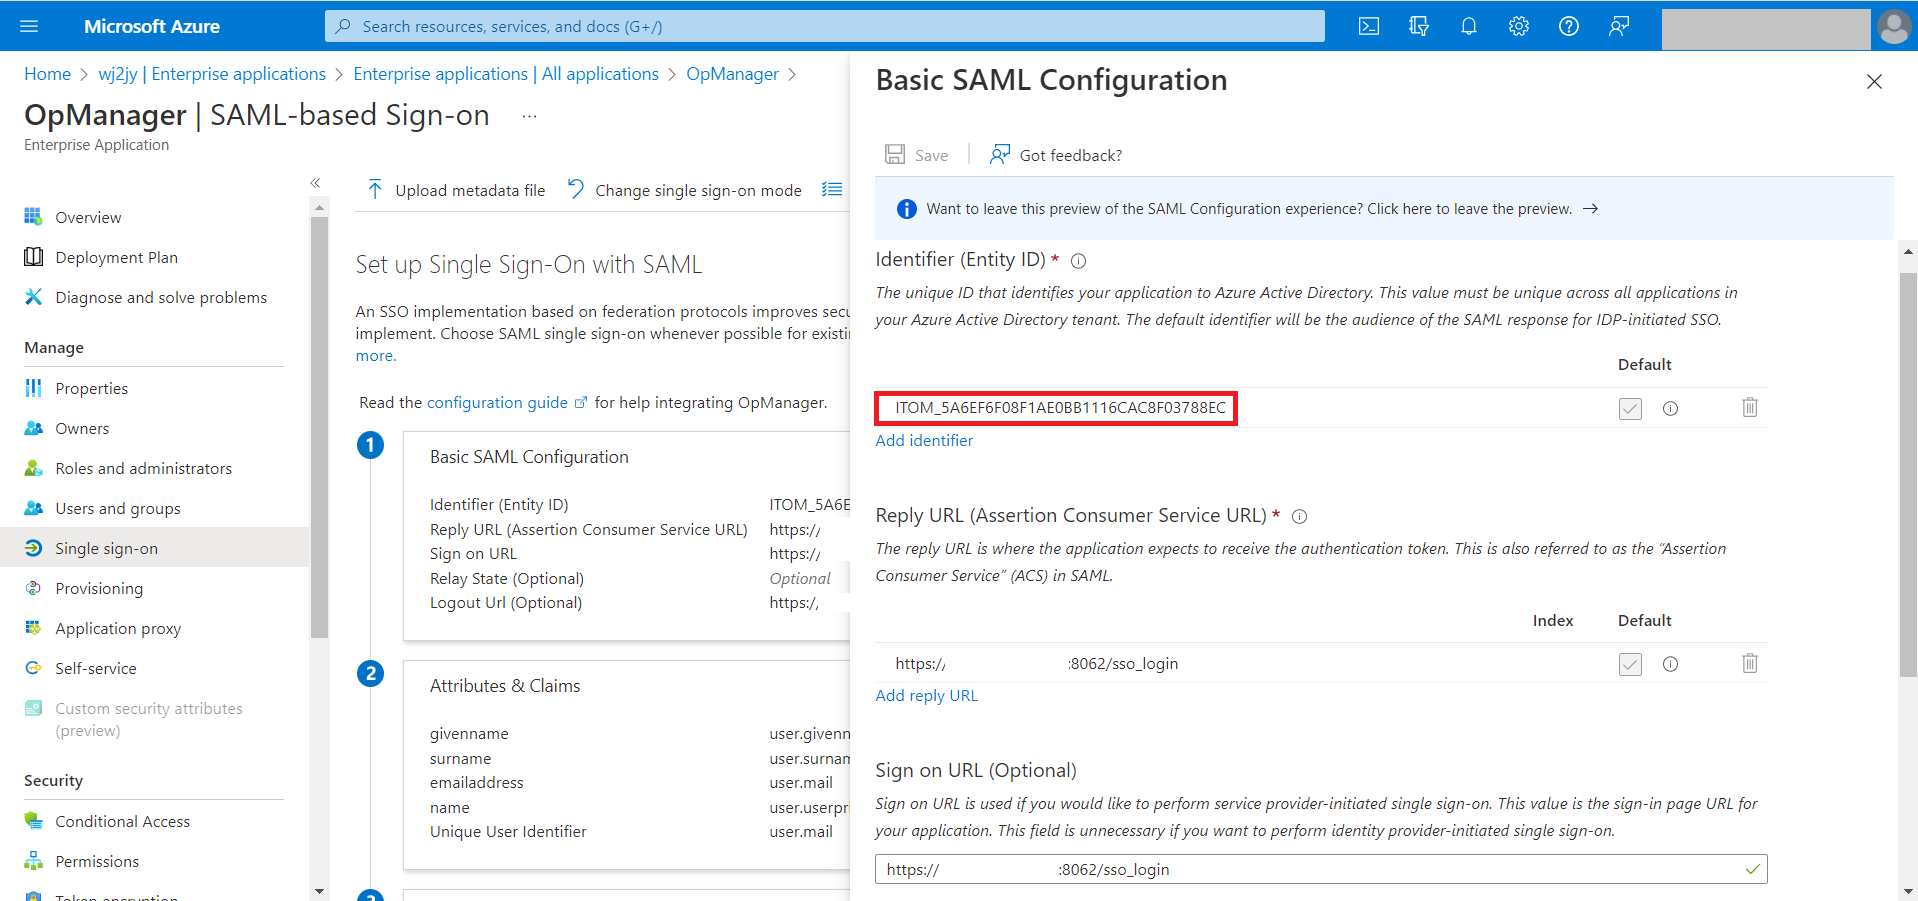
- Now, go back to Azure and enter those details in the Basic SAML Configuration section by selecting the edit option.
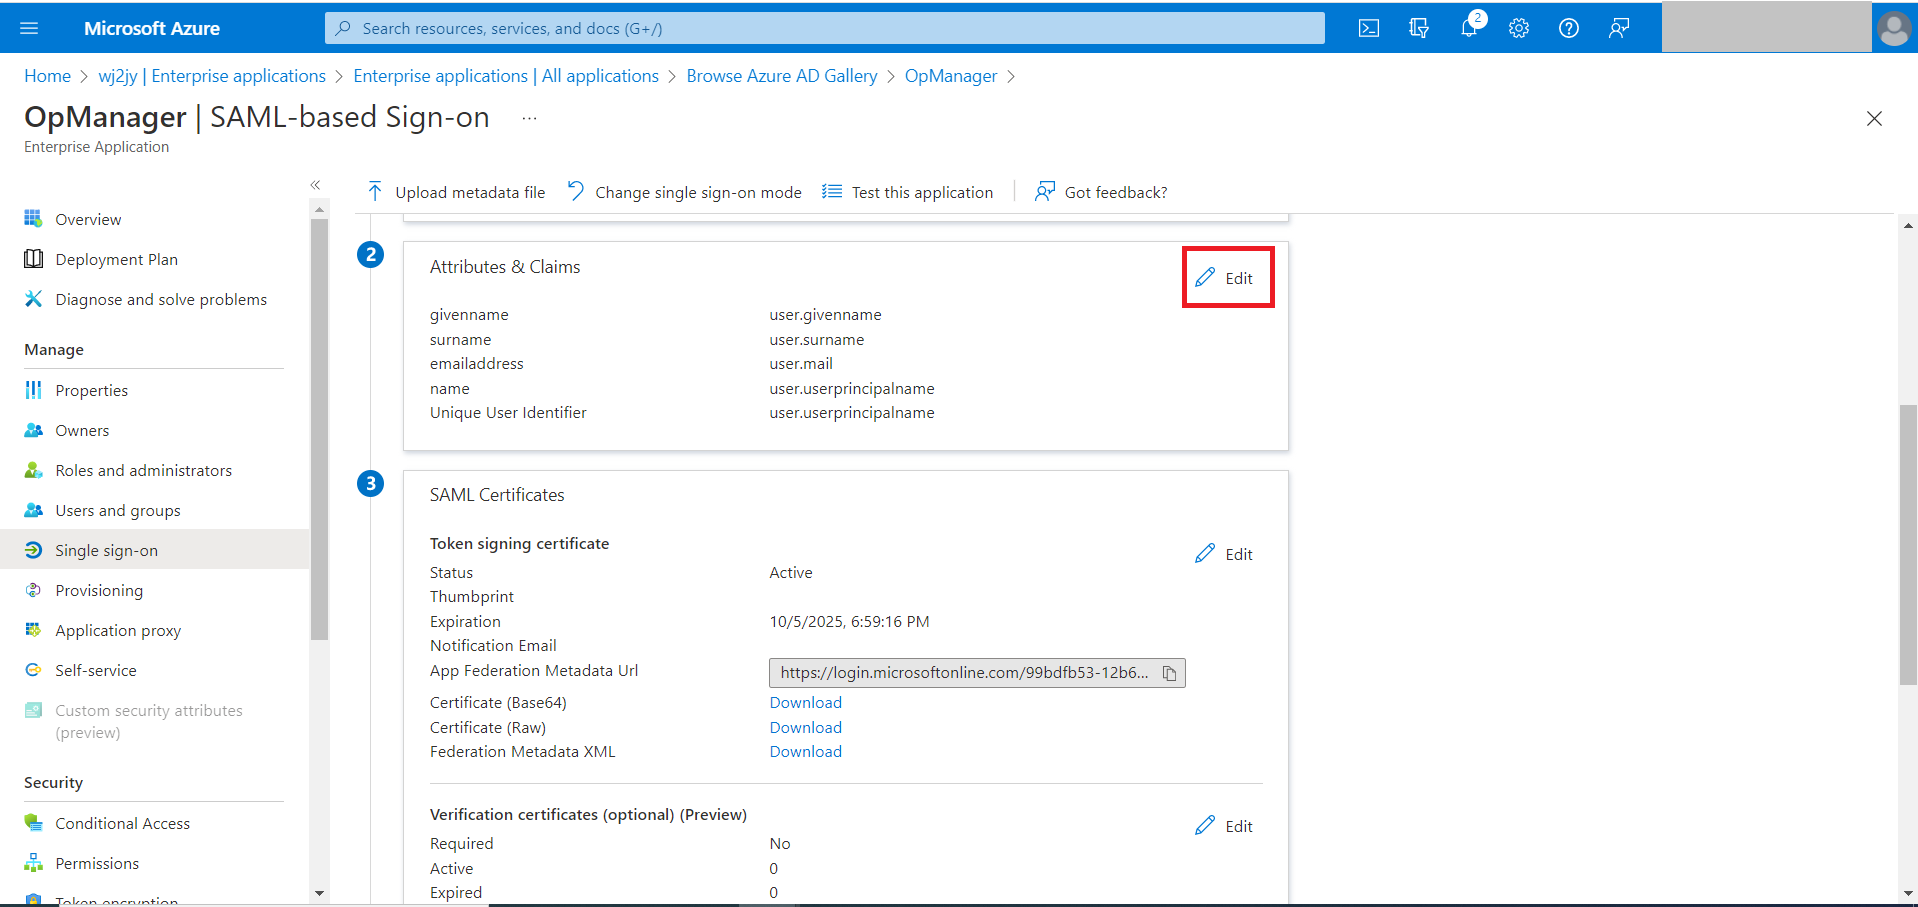
- Under the Attributes & Claims section, click on the Edit option. (The pencil icon).
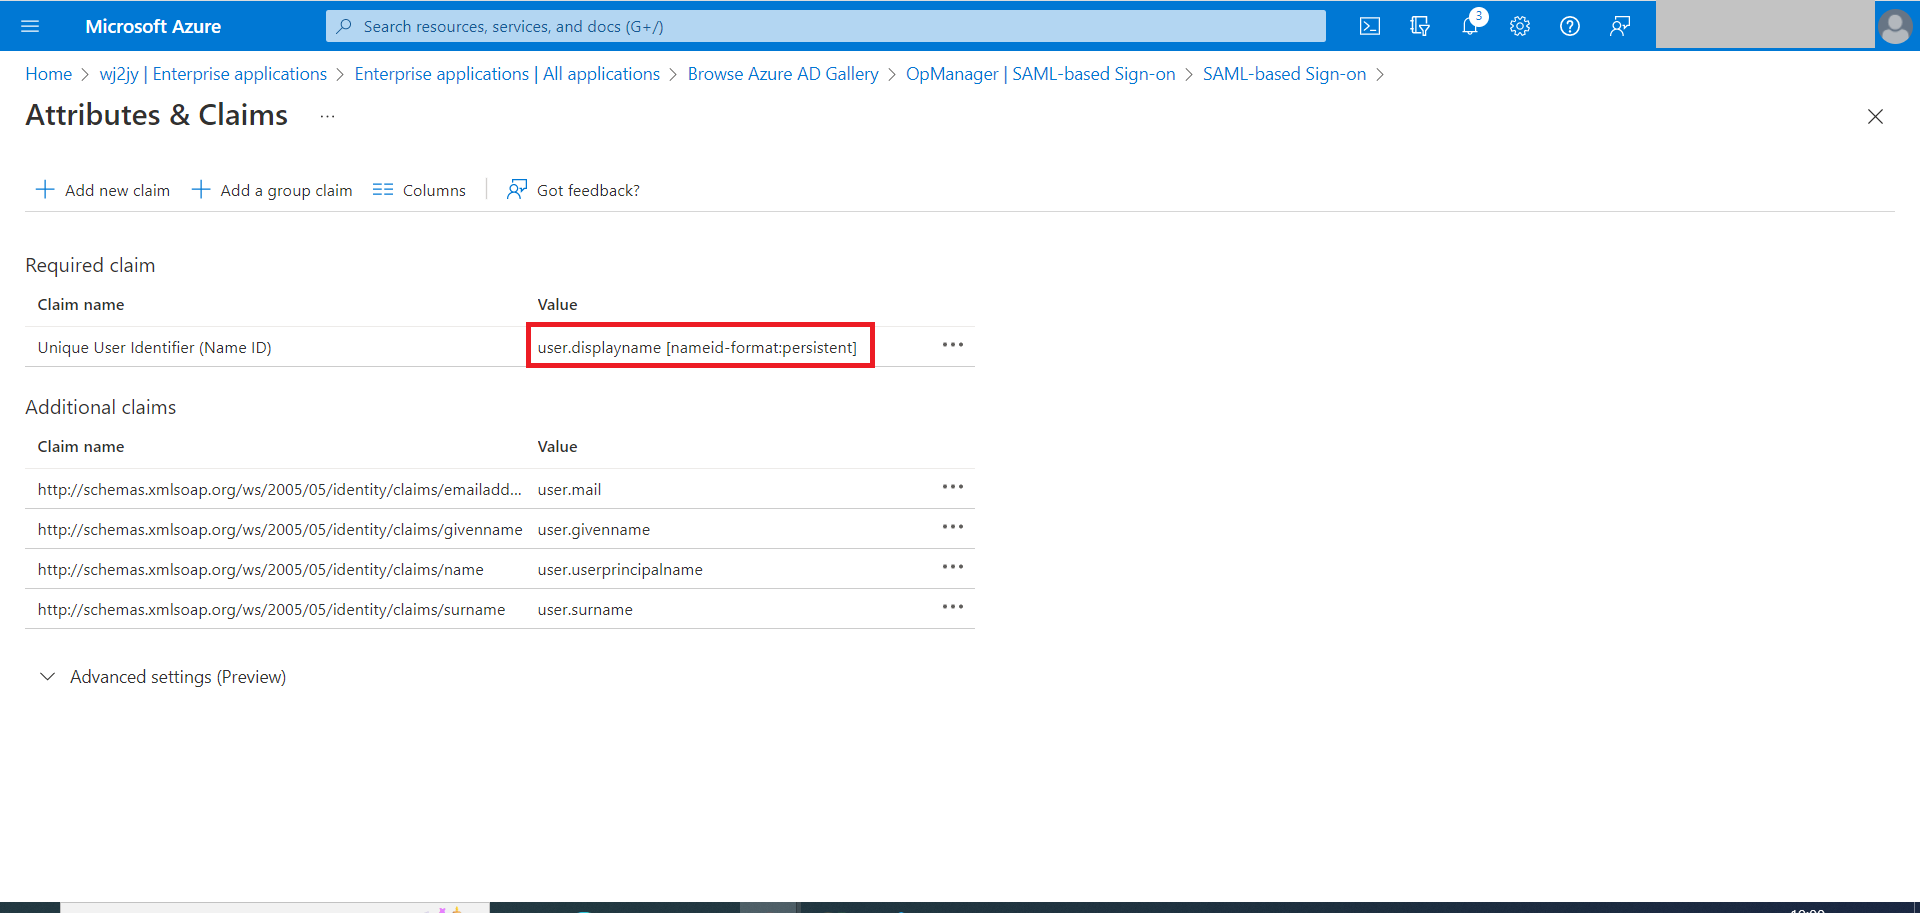
- Click on user.displayname [nameid-format:persistent]
- For OpManager versions,
- Before version 126147, choose the Name Identifier format as Persistent. Choose the Source Attribute as Display Name, if you are trying to authenticate local users in OpManager. If you are trying to authenticate AD or Domain users, click on Transformation and configure the appropriate OGNL expression to send the NameID value in the format < domainname >\< username > . Click Save.
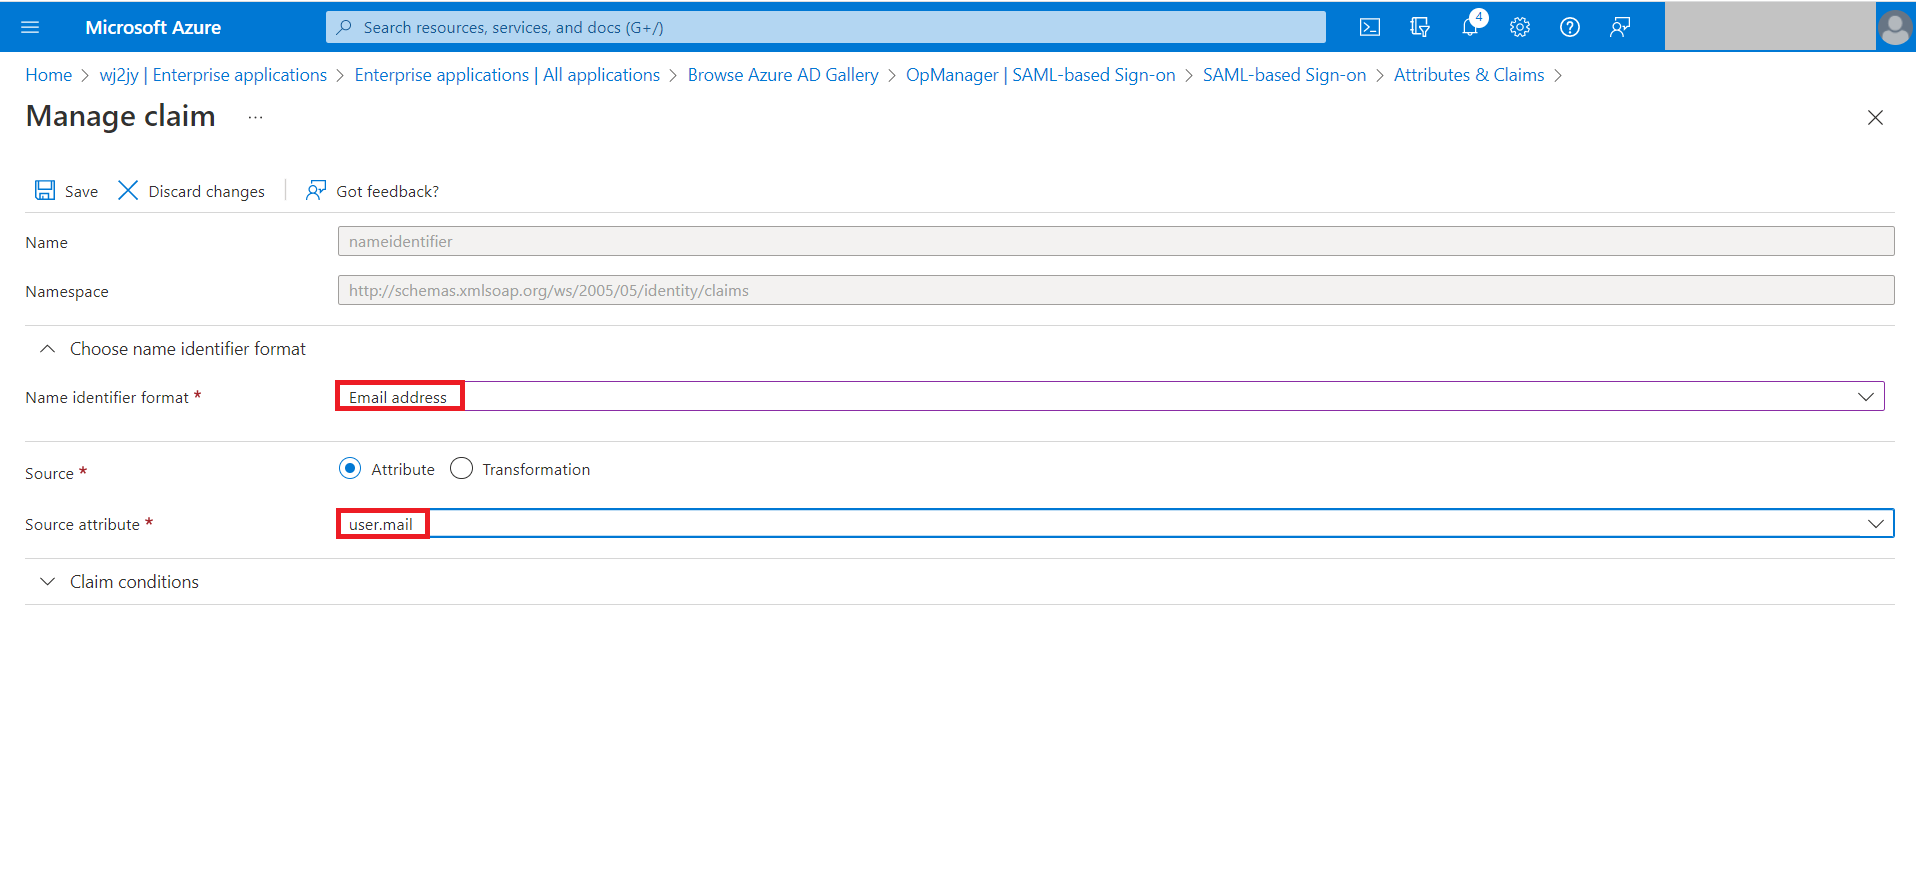
- For version 126147 and above, choose the Name Identifier format as Email address and Source Attribute as user.mail and click Save.
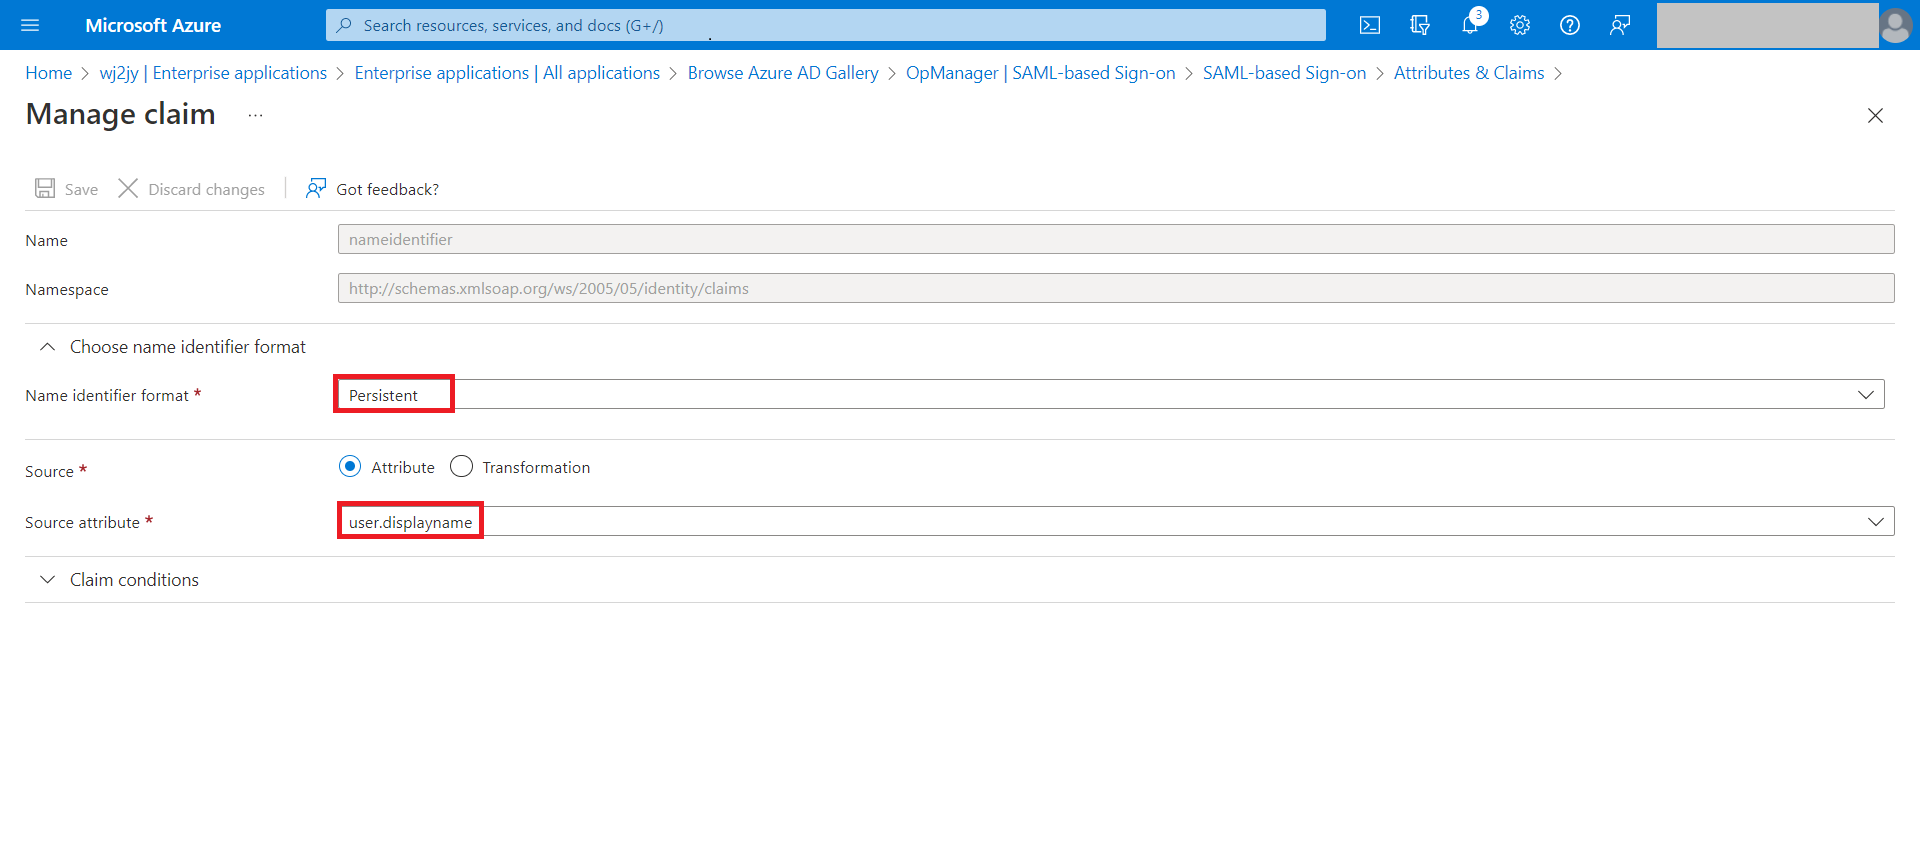
Note: If your display name contains space or other special characters, user mapping issues might happen, so configure a different attribute like first name, or you can switch to Email NameID format.
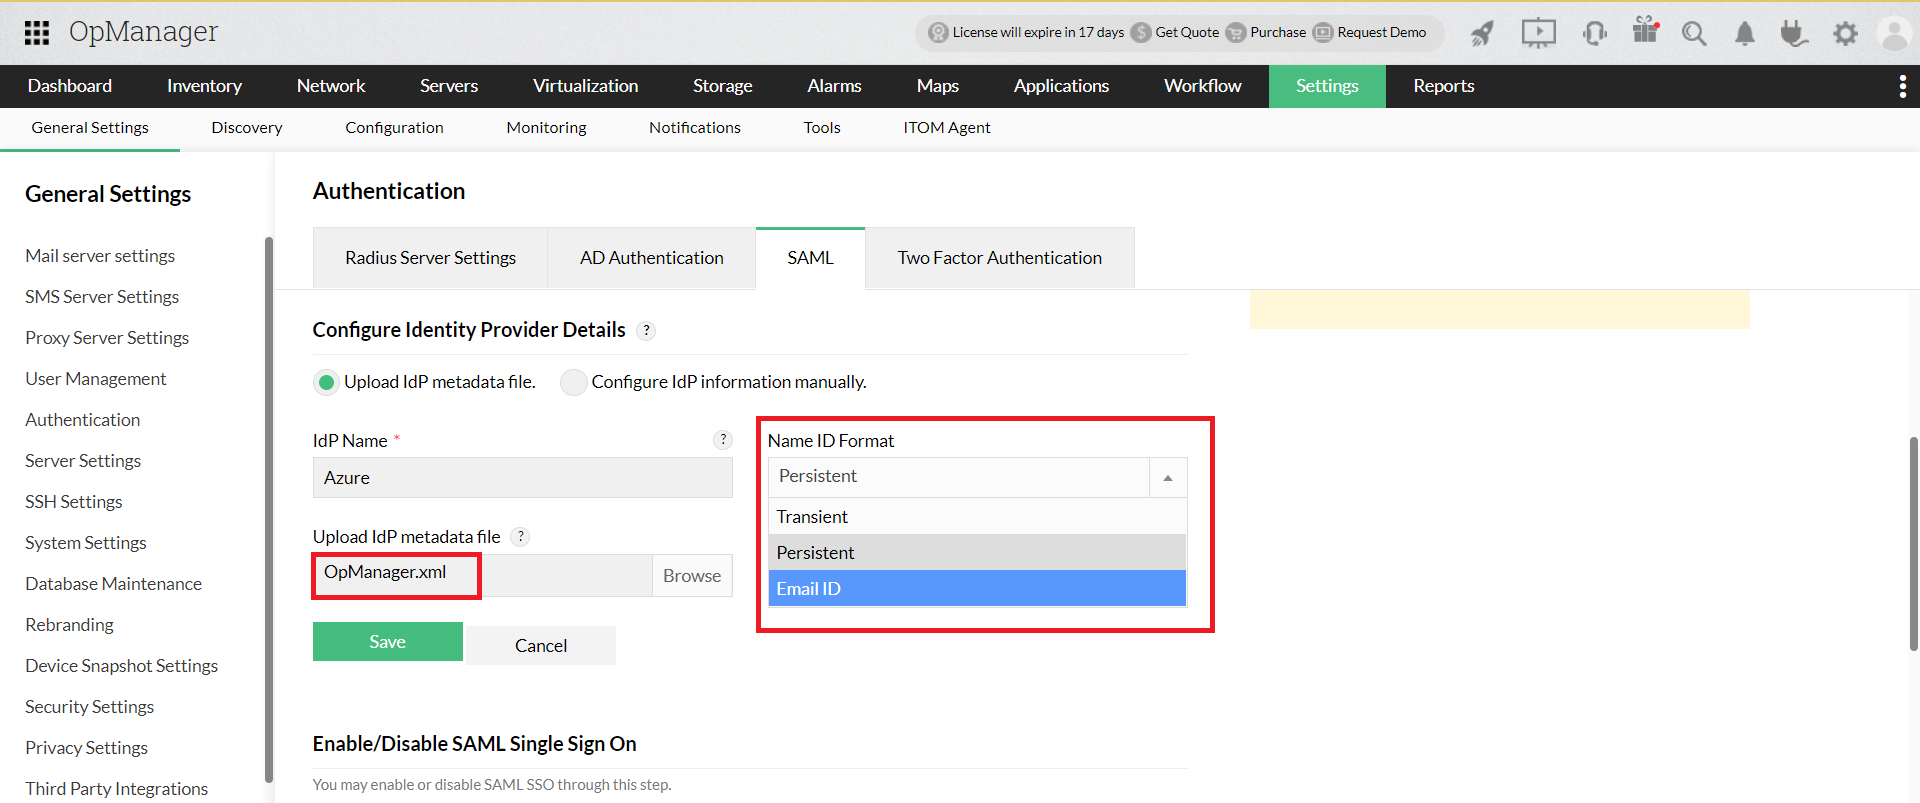
- Now, download the Federation Metadata XML file from the SAML Signing Certificate section.
- Open OpManager and go to Settings -> General Settings -> Authentication -> SAML. Upload the metadata file under Identity provider details and select the corresponding NameID format based on the OpManager version installed. Click on Save.
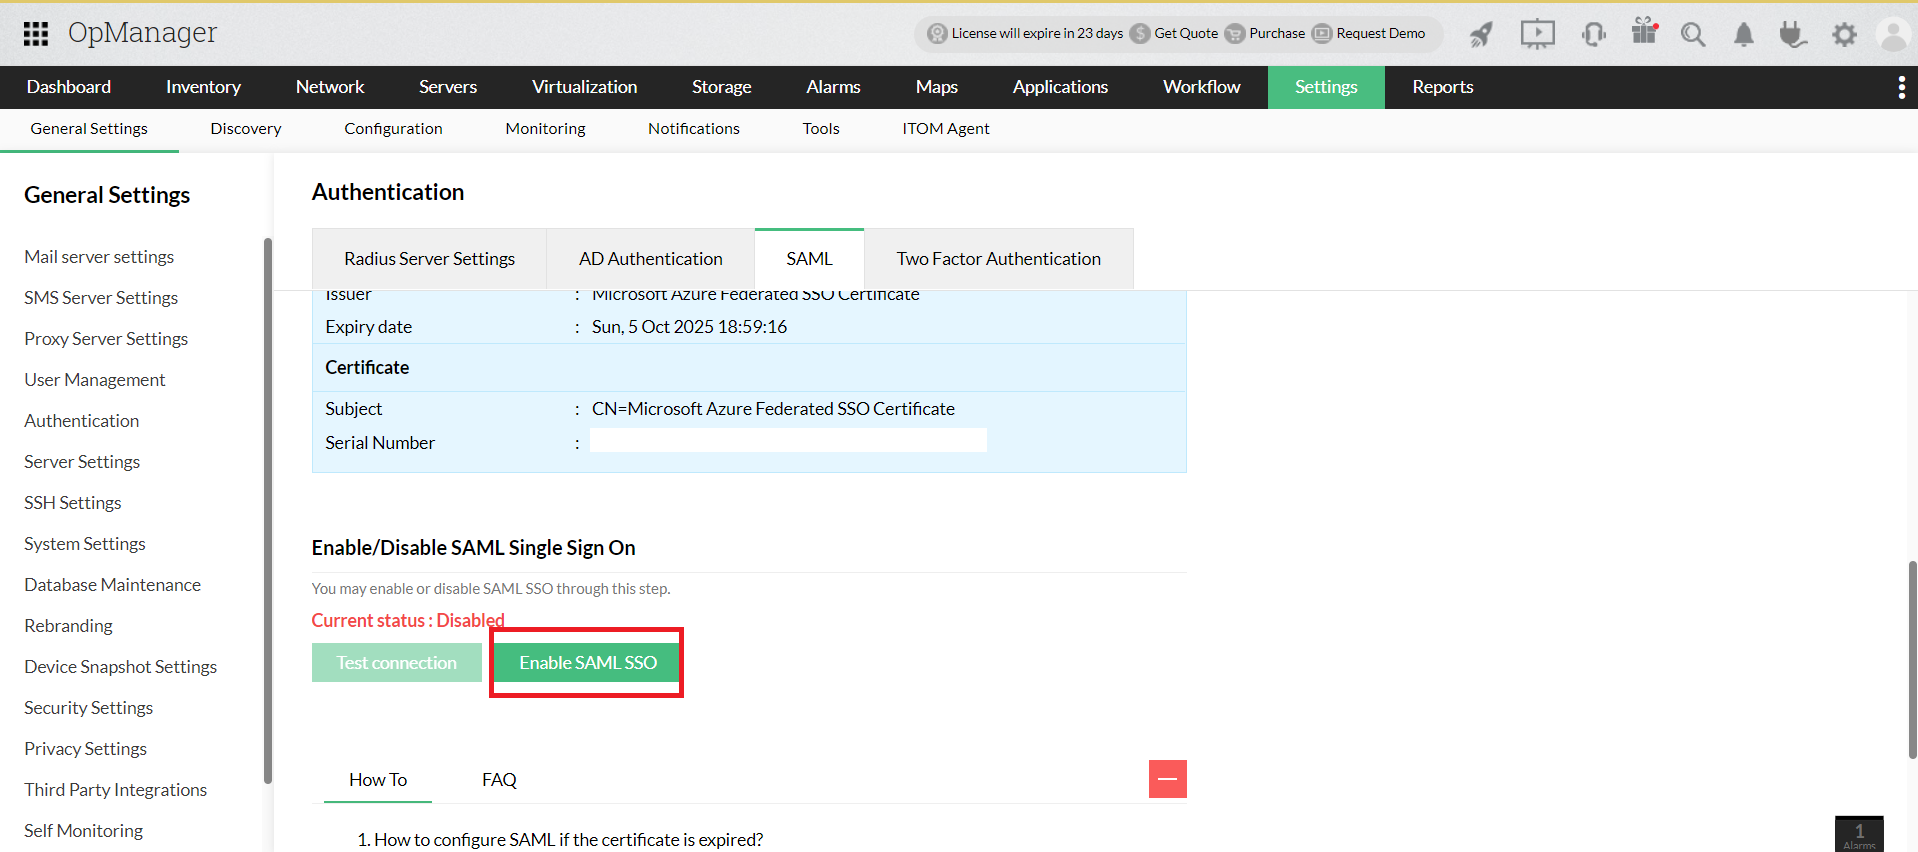
- Now, Click on the Enable SAML SSO option.
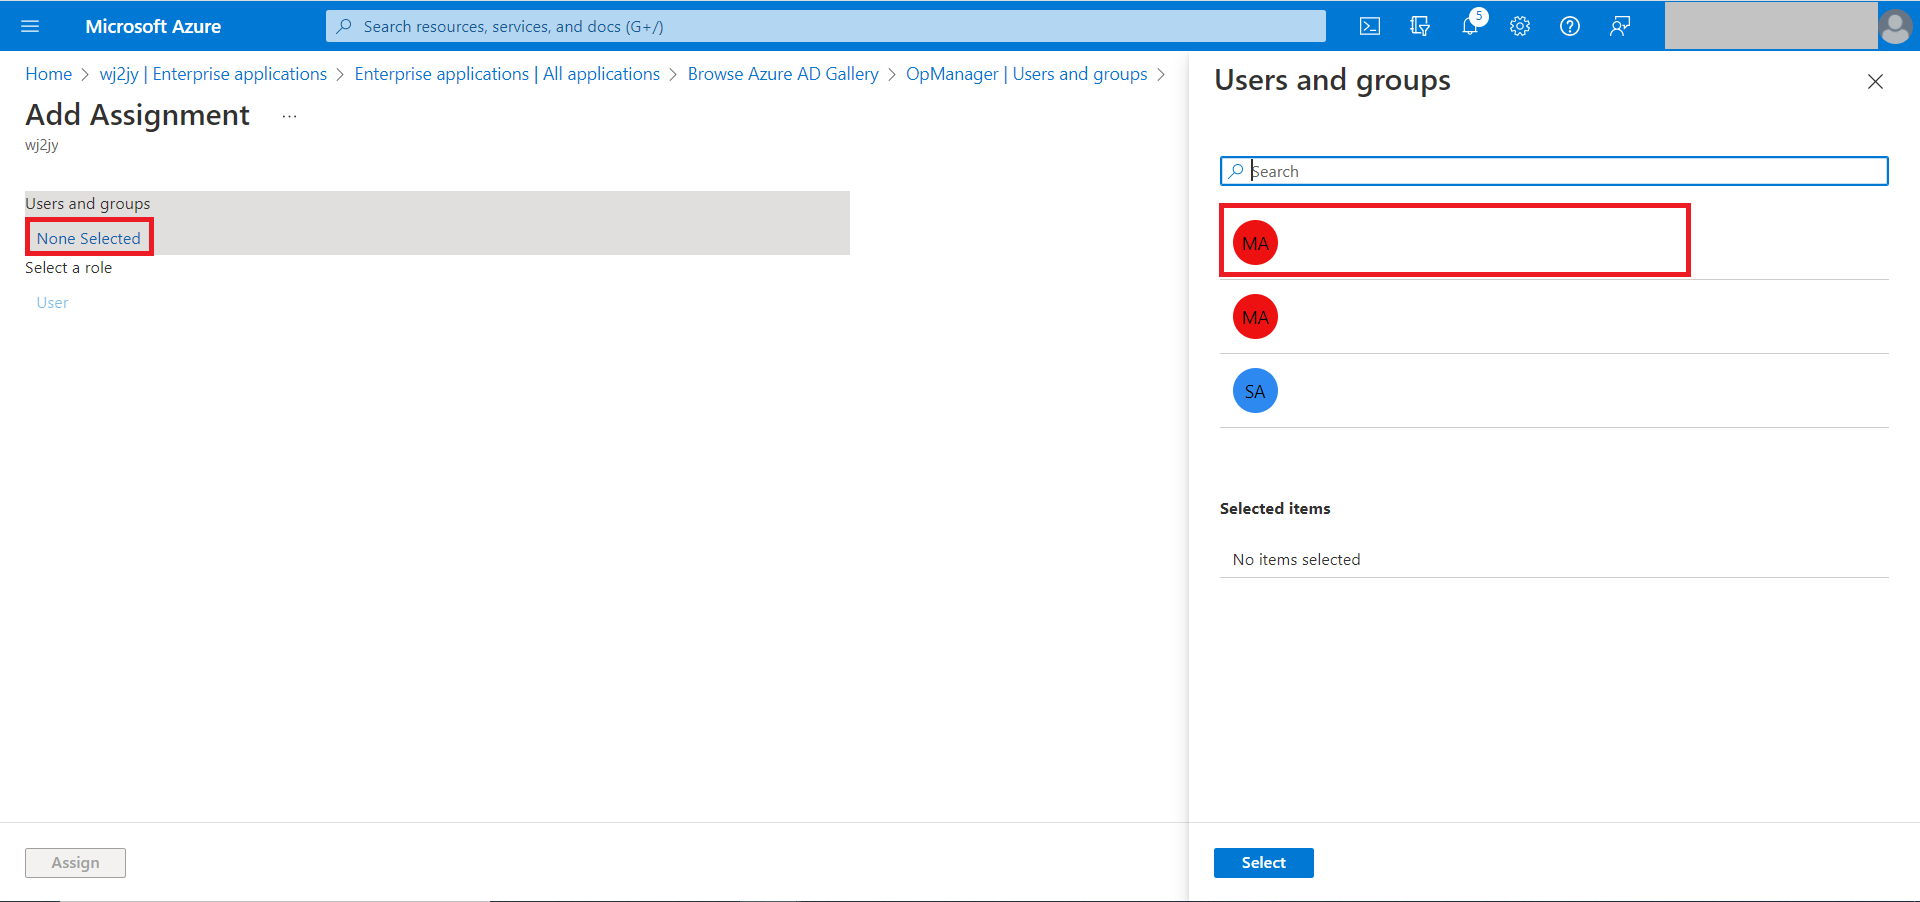
- Now go back to Azure and select Users and groups on the left side menu, then select Add user/group.
- Click None selected and from the right hand side, select the Users and click Assign.
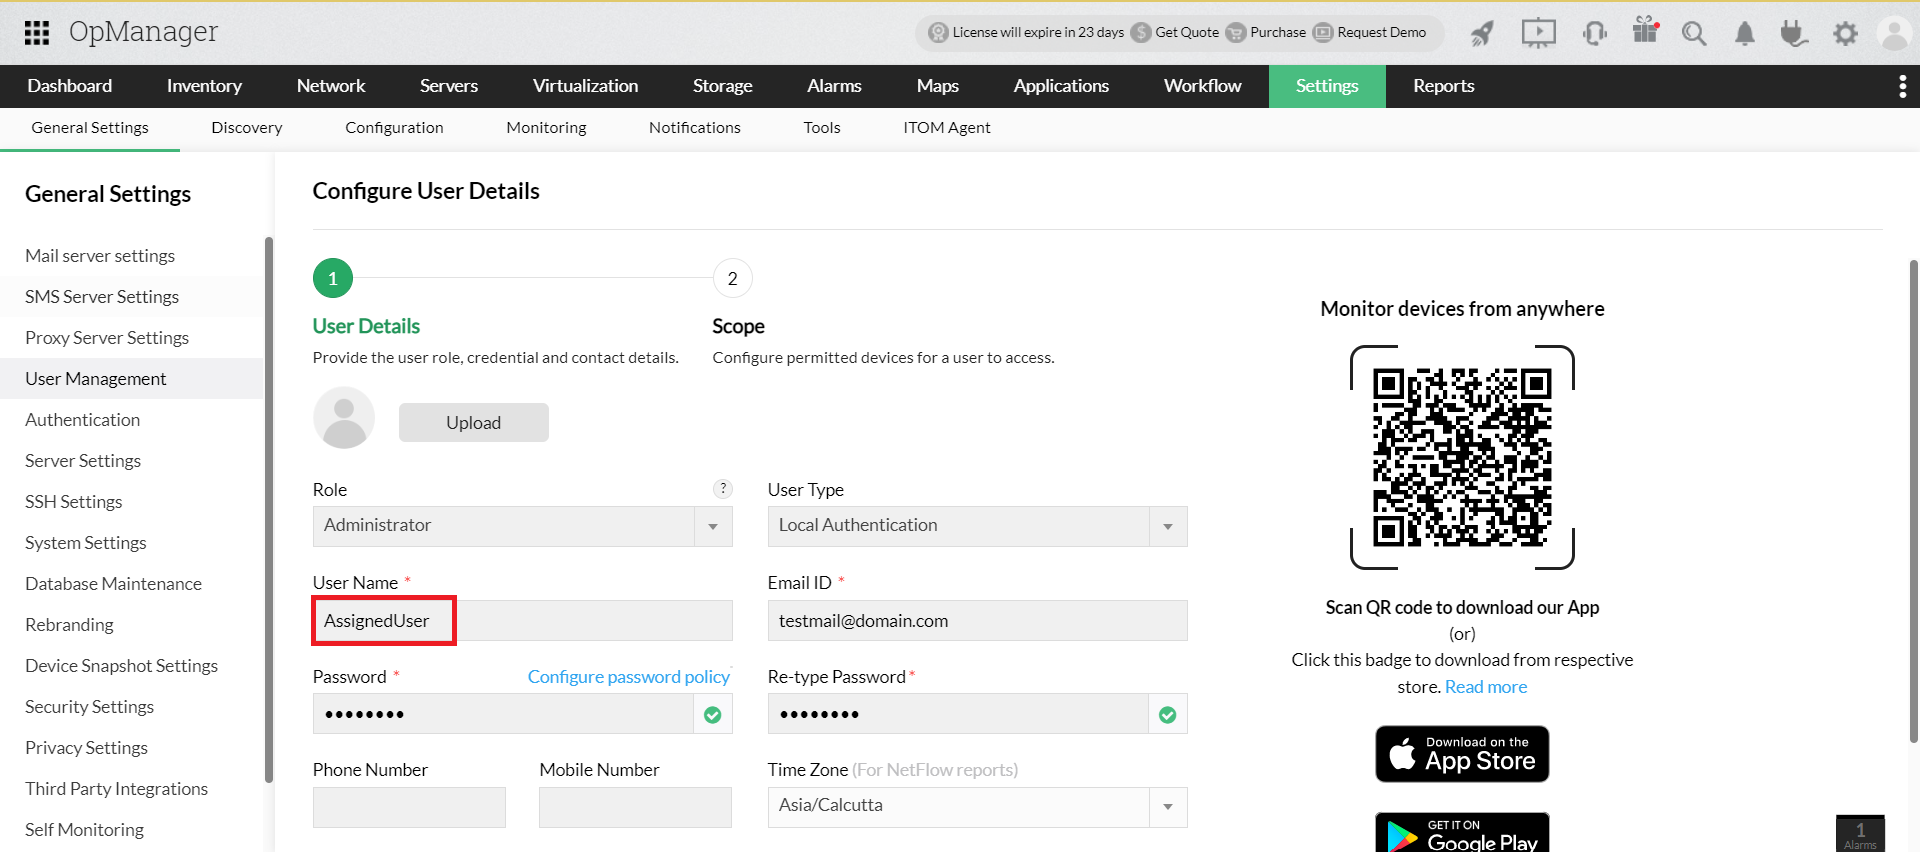
- After assigning the users, please ensure the user profiles are created in OpManager and verify the following,
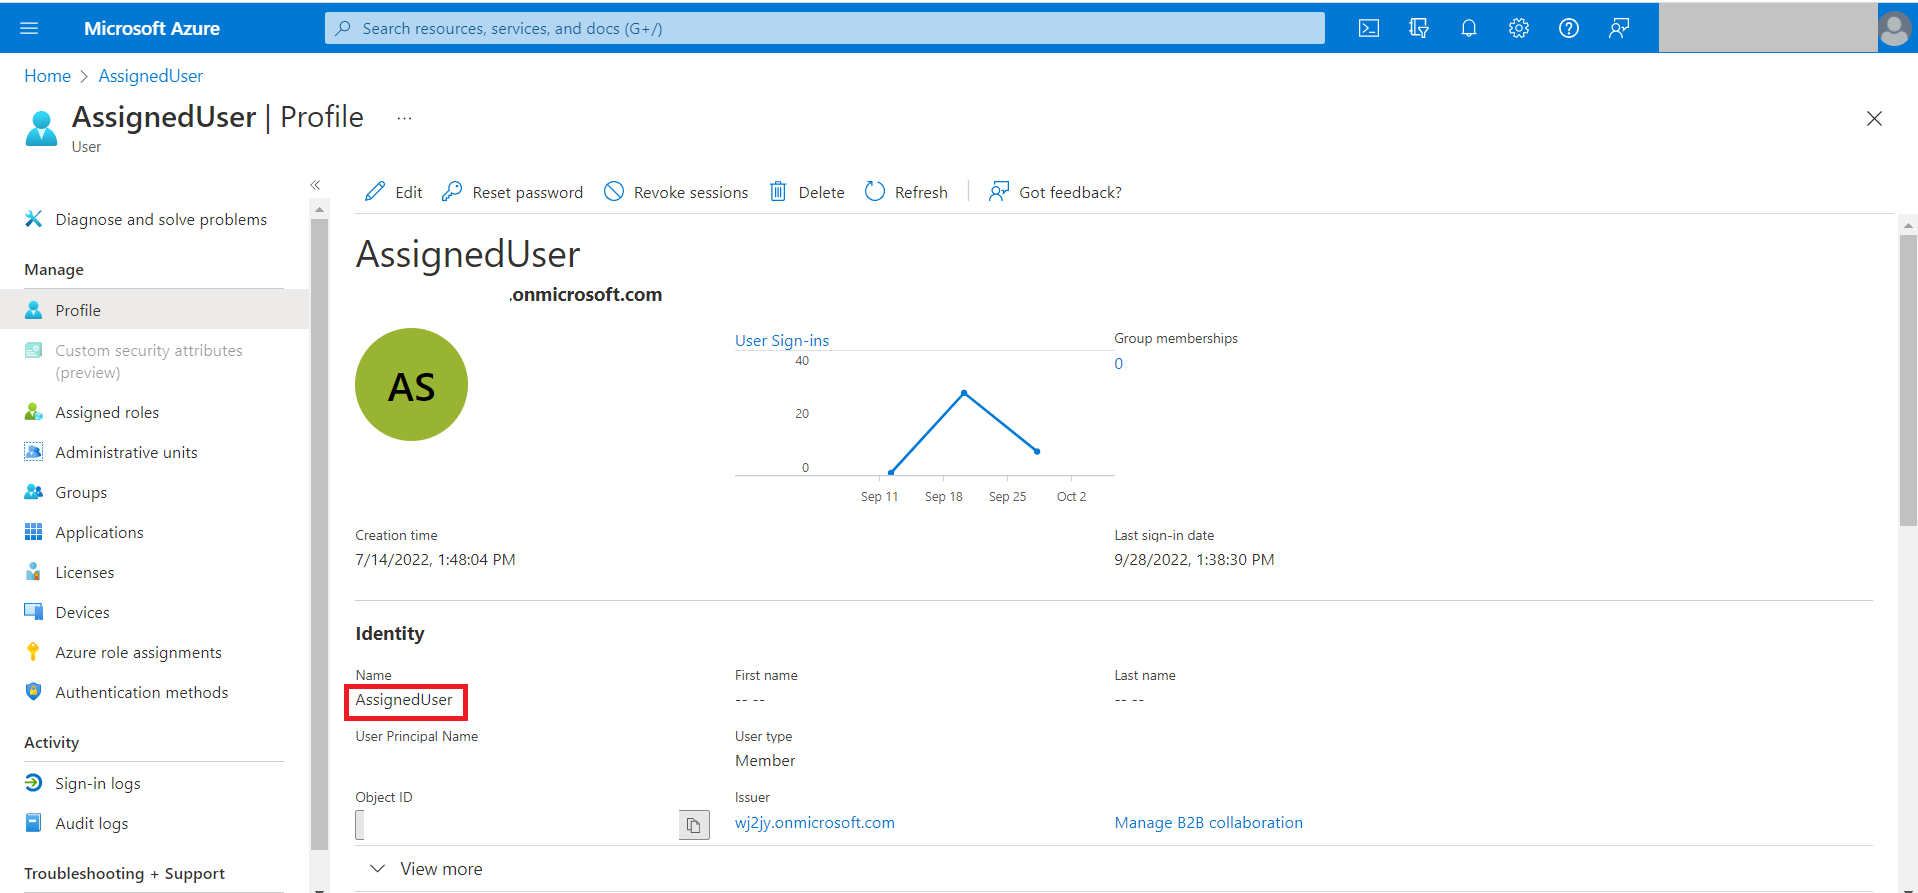
- For Persistent NameID ( Before version 126147 ) the username in OpManager should match the user displayname in Azure.
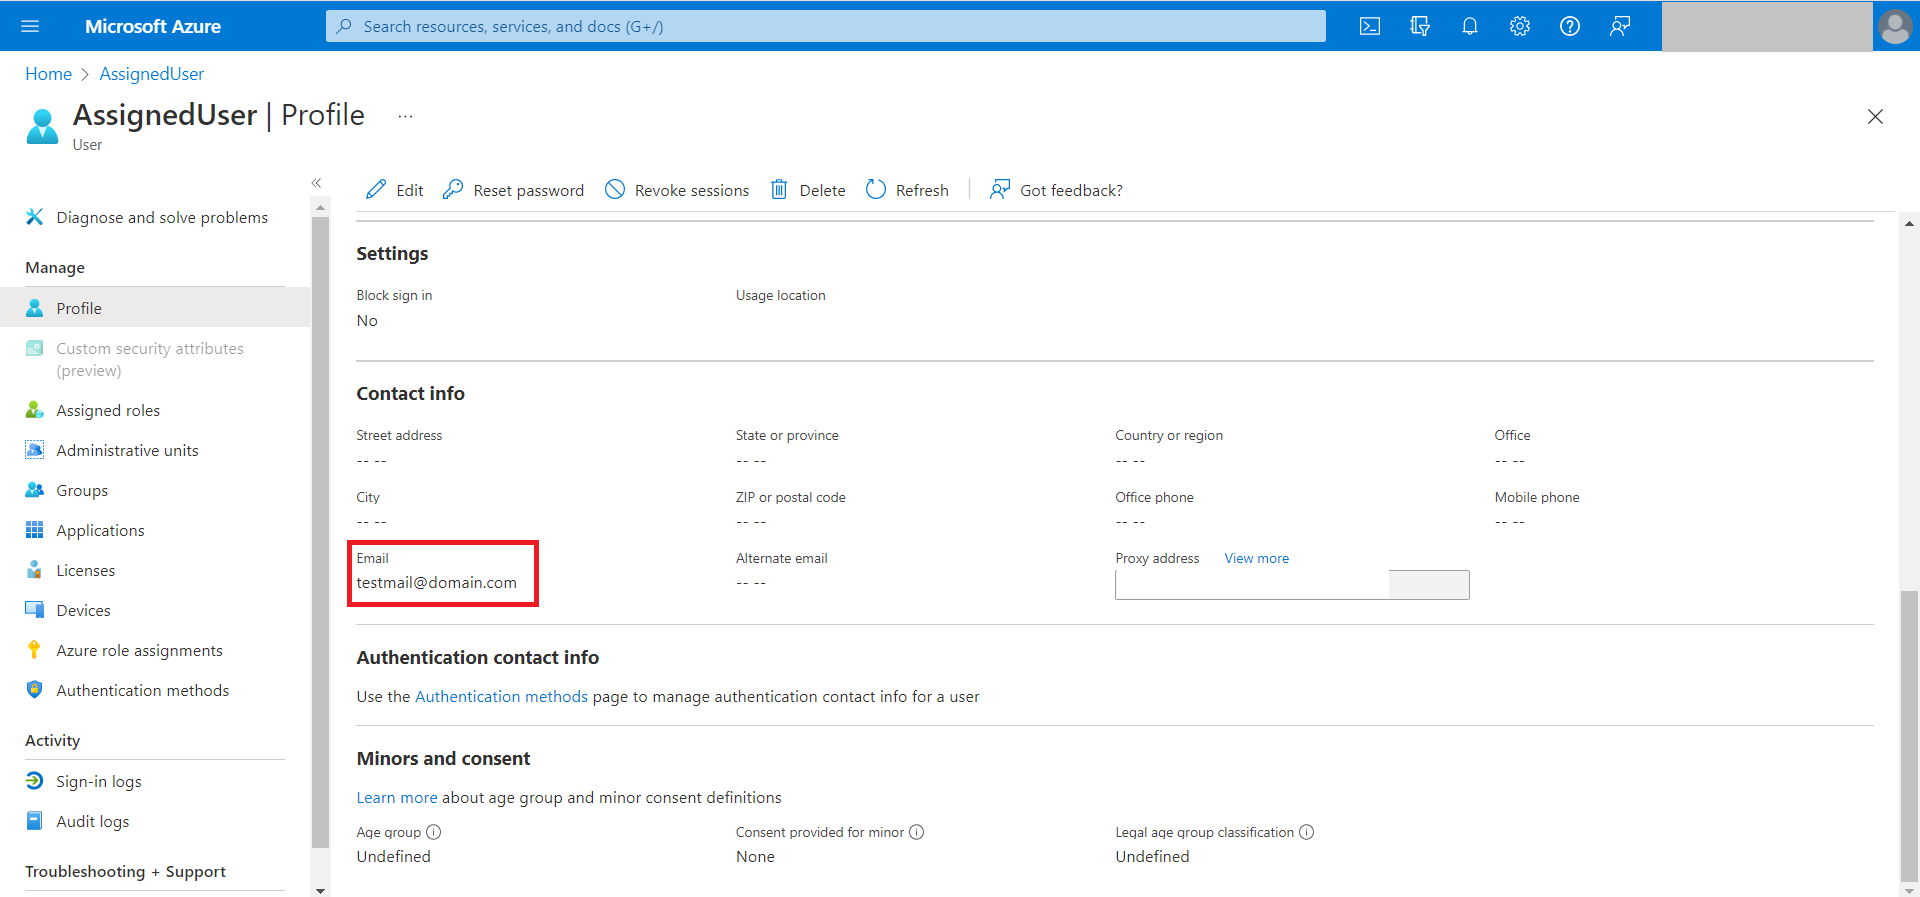
- For Email NameID ( For version 126147 and above ) the user Email in OpManager should match the user Email in Azure.
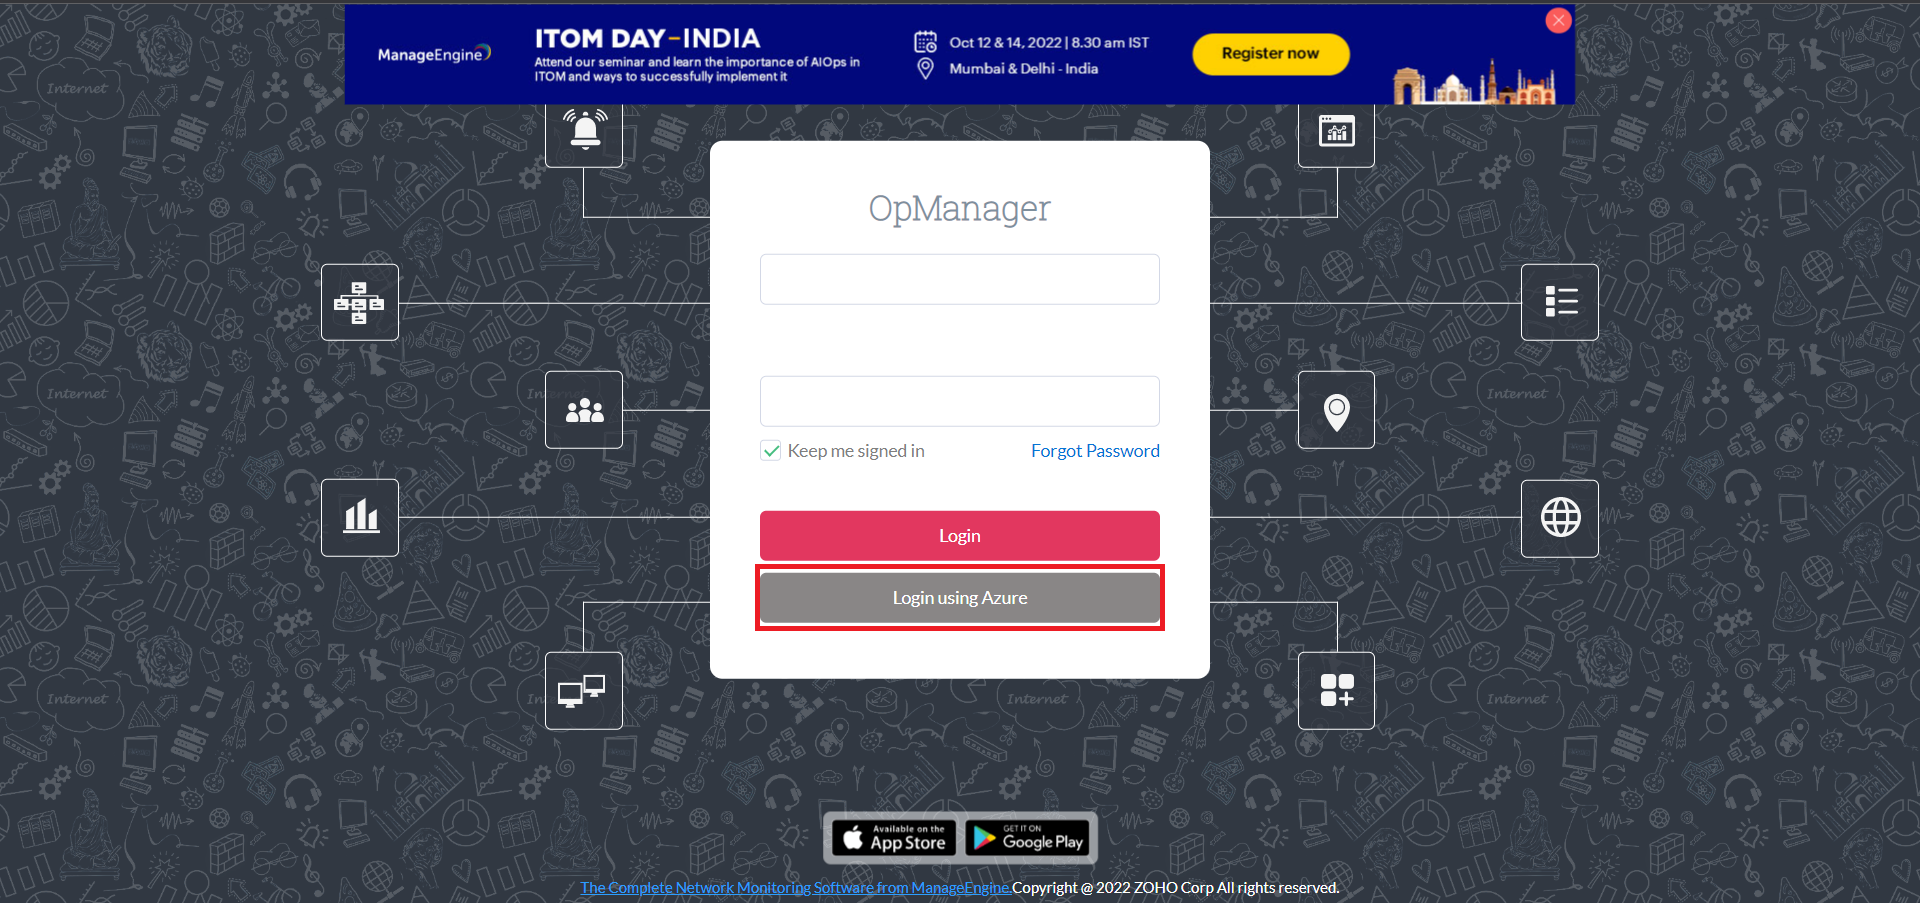
- Now, login to OpManager using your Azure account from the login page.


New to ADSelfService Plus?
Related Articles
Configuring SAML in OpManager
There are two ways to configure SAML in OpManager. You can either do it manually by providing the necessary credentials or you can upload the metadata file directly, if available. Service provider details If you opt to configure SAML manually, you ...Configuring SAML authentication settings in OpManager for OneLogin
Listed below are the steps to configure SAML authentication in OpManager (SP) for OneLogin (IdP) with Single Sign-On. Open OneLogin and navigate to Applications tab. Use the search bar and select SAML Custom Connector (Advanced). Open Configuration ...Configuring SAML authentication settings in OpManager for JumpCloud
Listed below are the steps to configure SAML authentication in OpManager (SP) for JumpCloud (IdP) with Single Sign-On. Login to JumpCloud and click on SSO (under User Management) in the left side menu. Click on the 'Add' symbol, adjacent to the left ...Configuring SAML authentication settings for Okta
To configure Okta IdP, Go to www.okta.com. Login to Okta. Click on the Admin tab and navigate to Applications. Click on Create a new app integration and select SAML 2.0. Click Next. Enter the Service Provider's name, in App name, that is, OpManager ...Configure SAML authentication settings in OpManager for Microsoft AD FS?
Listed below are the steps to configure SAML authentication in OpManager (SP) for Microsoft AD FS (IdP) with Single Sign-On. Open AD FS management and click on Add Relying Party Trust. Now, go to OpManager and navigate to Settings -> General Settings ...