Configuring Salesforce Authenticator for identity verification
ADSelfService Plus supports custom time-based one-time password (TOTP) authenticators for MFA. Below are the steps to set up Salesforce Authenticator as one of the MFA methods for identity verification.
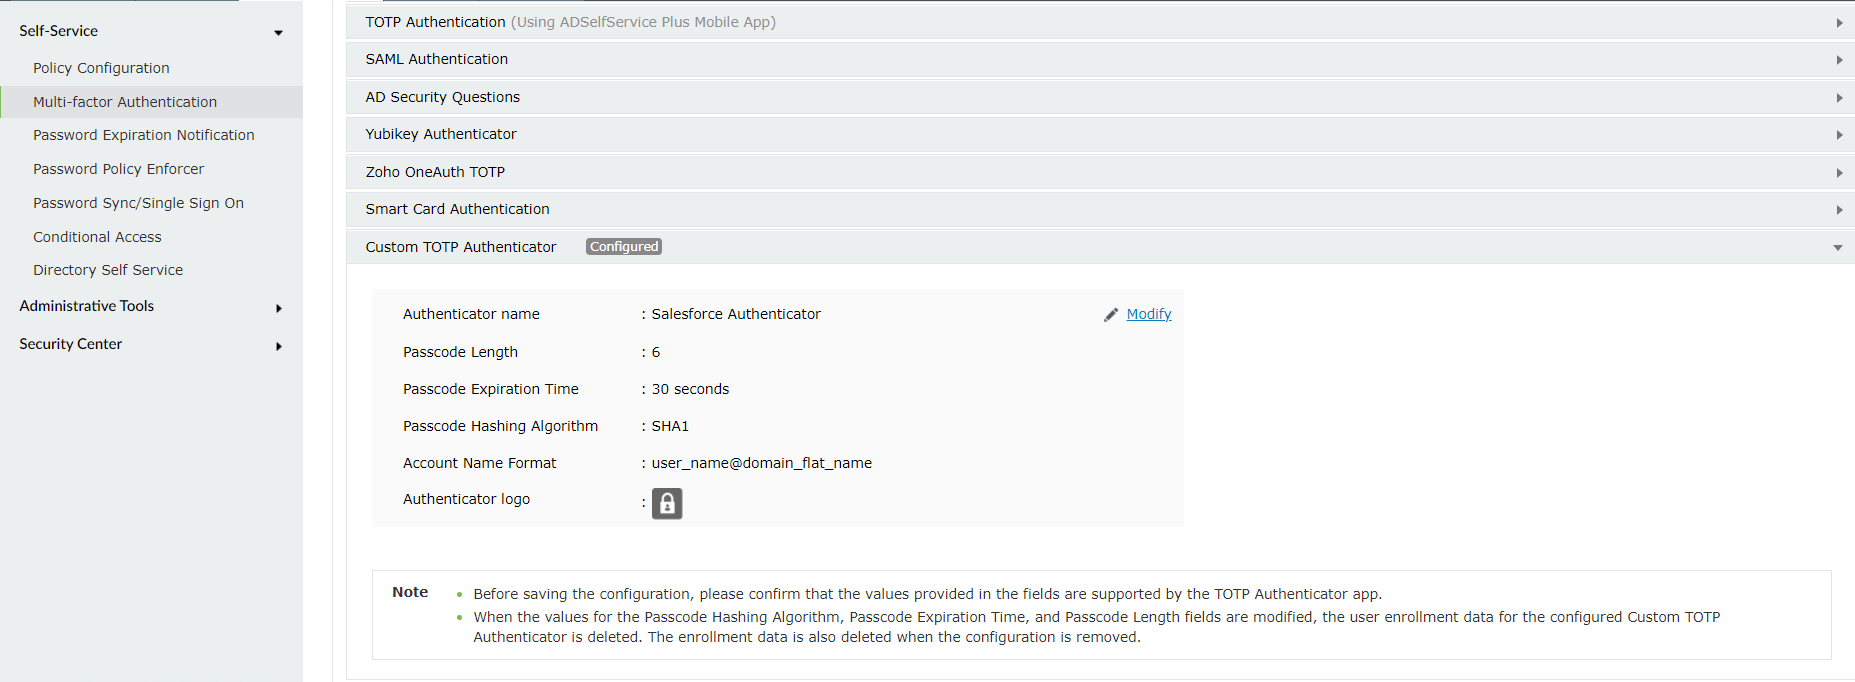
- Navigate to Configuration > Self-Service > Multi-factor Authentication > Authenticators Setup.
- From the Choose the Policy drop-down, select a policy.Note: ADSelfService Plus allows you to create OU- and group-based policies. To create a policy, go to Configuration > Self-Service > Policy Configuration > Add New Policy. Click Select OUs/Groups, and make a selection based on your requirements. You need to select at least one self-service feature. Finally, click Save Policy.
- Click Custom TOTP Authenticator.
- Enter the Authenticator Name, Passcode Length, Passcode Expiration Time, Passcode Hashing Algorithm, and Account Name Format.Note: All the values provided as options in the fields mentioned above are supported by Salesforce.
- Upload the Salesforce Authenticator logo image file in the Authenticator logo field.Note: If the Authenticator logo is not uploaded, a default logo will be used.
- Click Save.

How to configure Salesforce authenticator for identity verification
To configure Salesforce Authenticator as an MFA method for endpoints:
- Navigate to the MFA for Endpoints tab.
- To enable Salesforce Authenticator as a method of verification during machine login, check the box to enable the required number of factors for machine login and choose Salesforce Authenticator from the list of authenticators.
- To enable Salesforce Authenticator as a method of verification during OWA login, check the box to enable the required number of factors for OWA login and choose Salesforce Authenticator from the list of authenticators.
- To enable Salesforce Authenticator as a method of verification during VPN login, check the box to enable the required number of factors for VPN login and choose Salesforce Authenticator from the list of authenticators.
- Click Save Settings.
To configure Salesforce Authenticator as an MFA method for applications:
- Navigate to the MFA for Applications tab.
- Choose the number of authenticators you wish to enable in the drop-down field.
- In Select the authenticators required field, check the box next to Salesforce Authenticator.
- Click Save Settings.
To modify the configuration:
- Navigate to Configuration > Self-Service > Multi-factor Authentication > Authenticators Setup.
- Click Custom TOTP Authenticator.
- Click Modify and change the information provided wherever necessary.
- If the configuration has to be removed, click Remove Configuration.
- Click Save.
Note:
When the configuration is modified or removed, the user enrollment data for that configuration will be deleted as well.
When a user is shifted from one self-service policy to another and if both these policies do not have the same Custom TOTP Authenticator configuration, the user will be considered as not enrolled.
Enrollment using Salesforce Authenticator
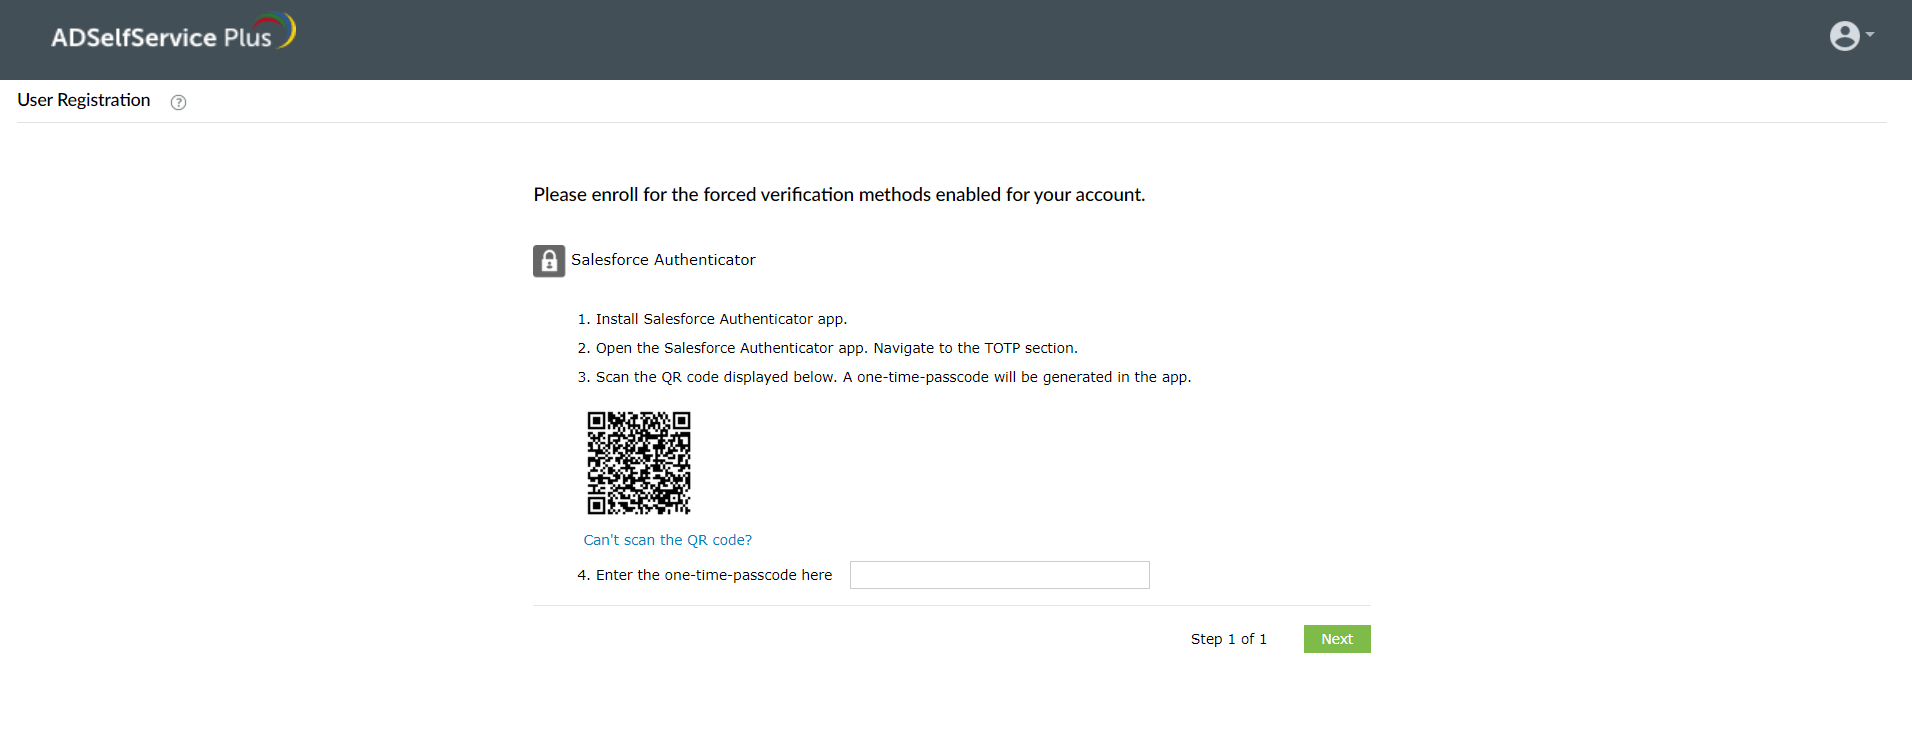
- In the ADSelfService Plus’ user portal, go to the Enrollment tab > Salesforce Authenticator. A QR code will be displayed. If forced enrollment has been configured, the user registration page will be displayed on logging in to the user portal.
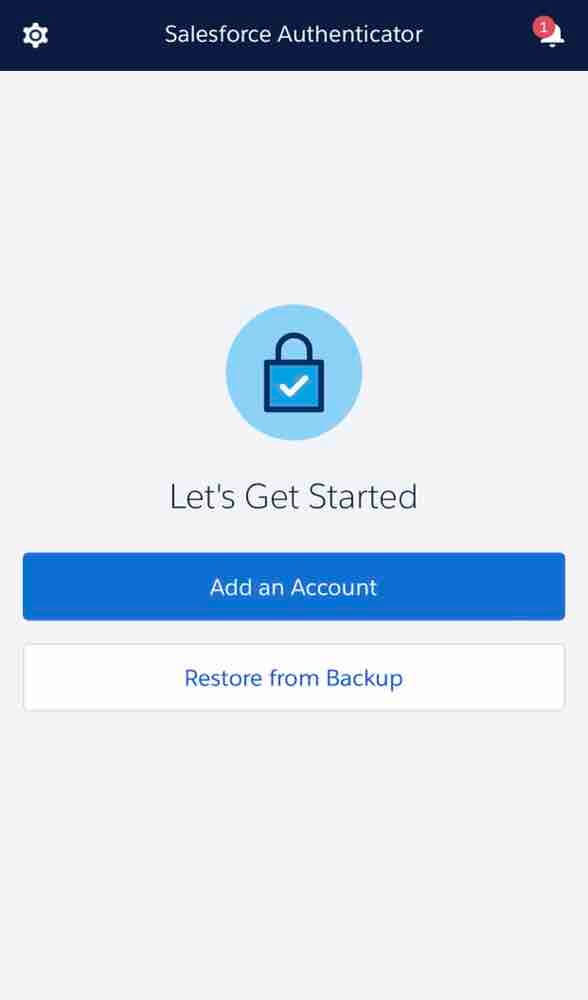
- Open the Salesforce Authenticator application on your device.
- Click Add an Account.
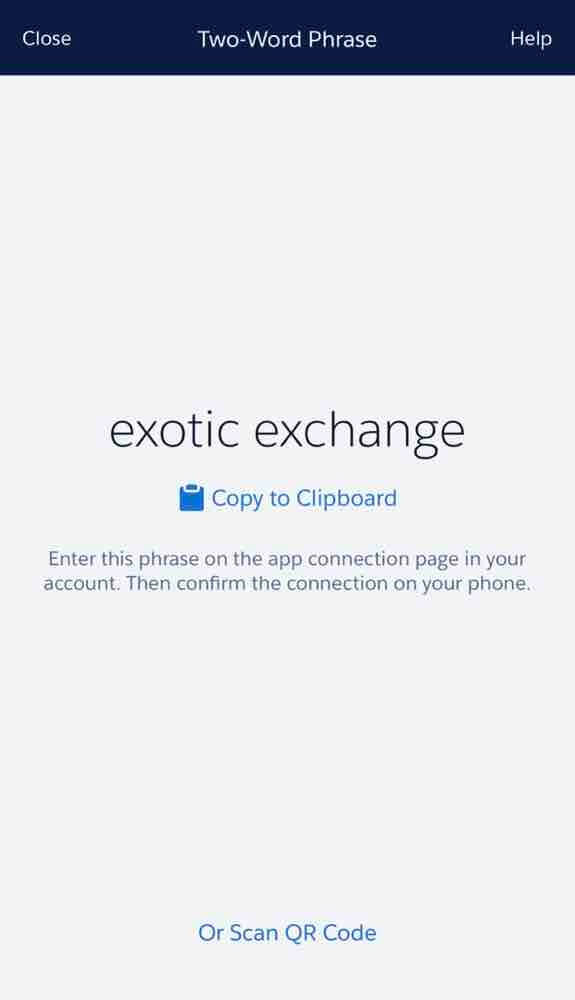
- Select the Scan QR Code option and scan the displayed QR code.
- If the operation is successful, your account will be automatically added to the dashboard


For successful identity verification, enter the passcode displayed in the Salesforce Authenticator application in the passcode field.
New to ADSelfService Plus?
Related Articles
How to configure Salesforce Authenticator as a MFA method in ADSelfService Plus
Objective This article provides detailed instructions on how to set up and use Salesforce Authenticator as a multi-factor authentication (MFA) method in ADSelfService Plus using the custom TOTP authenticator feature. By leveraging this, ...How to enable offline MFA in ADSelfService Plus
ManageEngine ADSelfService Plus supports offline multi-factor authentication (MFA) for Windows machine logins, User Account Control (UAC) prompt elevation, and Remote Desktop Protocol (RDP) server authentication when the product server is ...Multi-factor authentication techniques in ADSelfService Plus
Let's take a look into the various authentication methods supported by ADSelfService Plus for enterprise multi-factor authentication (MFA). Why should you use MFA? Authentication based solely on usernames and passwords is no longer considered secure. ...How to enable smart card authentication in ADSelfService Plus?
ADSelfService Plus supports smart card authentication which enables users to access the self-service portal securely, without having to enter a password. If your organization already utilizes smart cards, PKI, or certificates as an authentication ...Configuring Microsoft Authenticator for Active Directory-based actions
Microsoft Authenticator is an authentication method developed by Google that uses a time-based one-time-passcode (TOTP) in order to verify users' identities. It is often used as one of the multi-factor authentication (MFA) methods along with others ...
