Configuring Endpoint Central in DDI Central
Configuring Endpoint Central in DDI central
DDI central benefit administrators monitor and manage all the devices, patches and vulnerabilities by fetching and displaying the data from Endpoint central. In order to fetch the Endpoint Central, admins need to configure the Endpoint Central in DDI Central
To configure Endpoint Central in DDI Central:
- Go to the Settings section on the right side menu bar
- Select the Endpoint Central option on the settings menu.
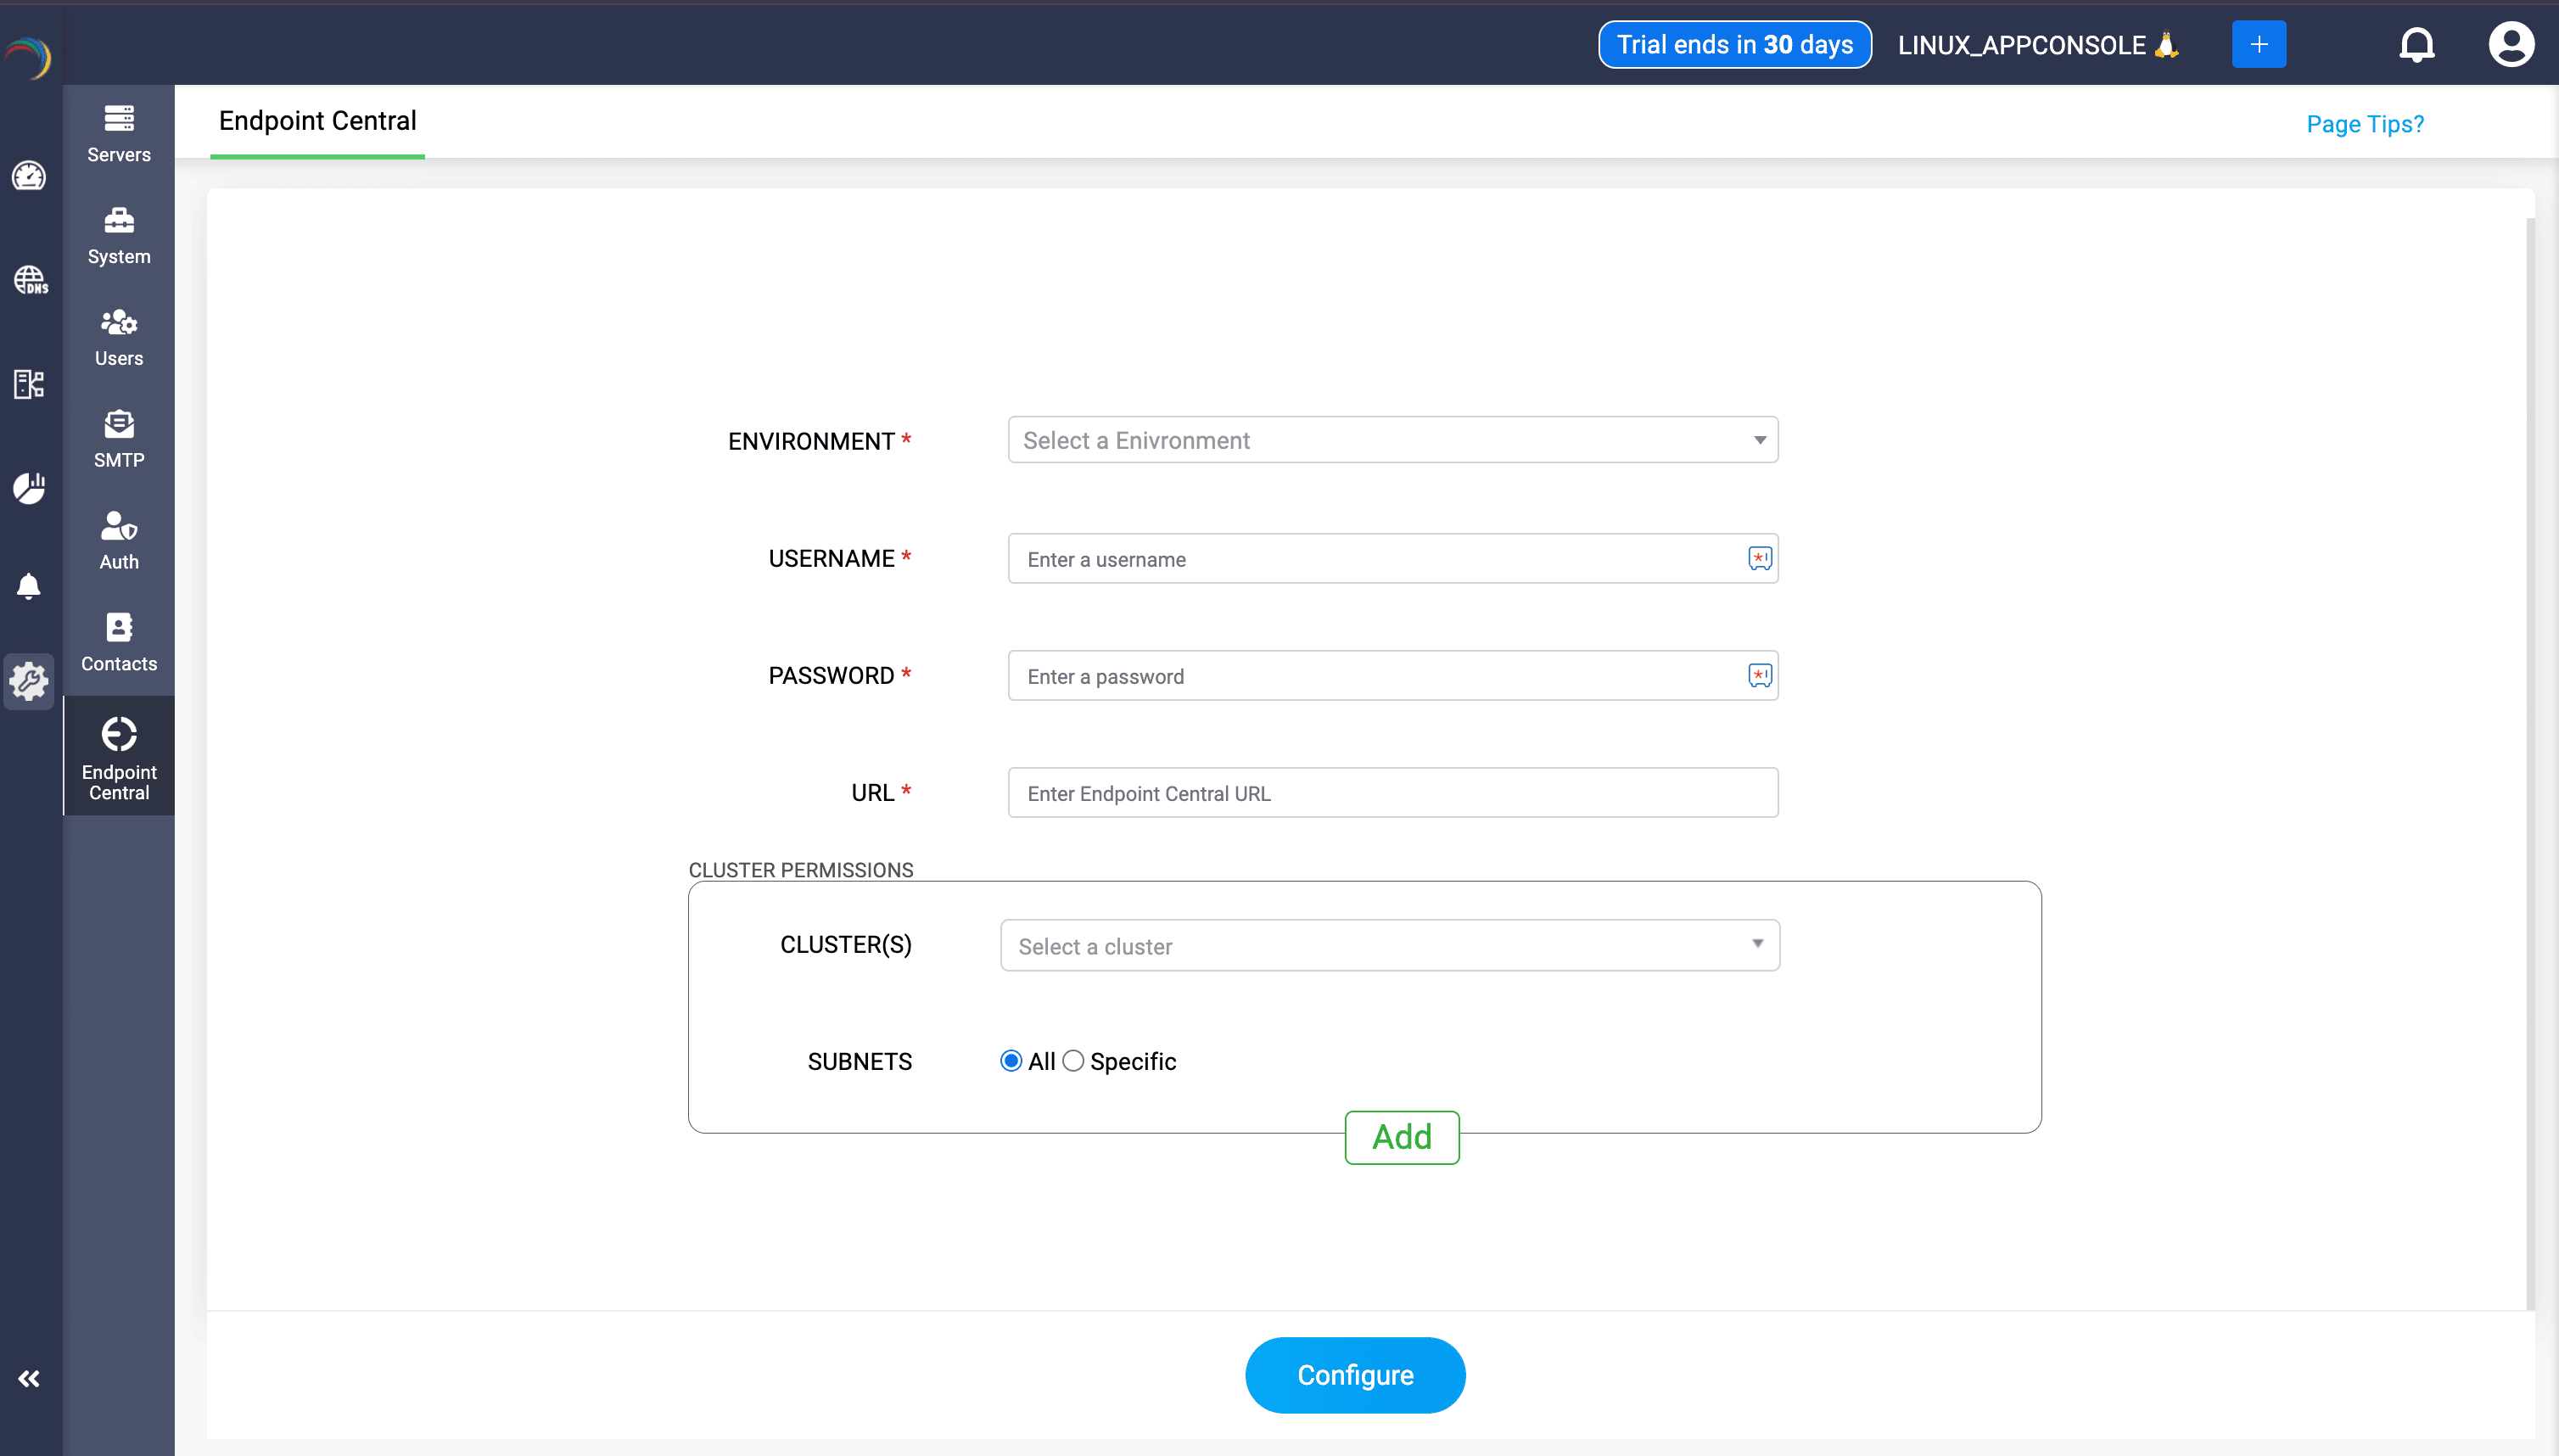
- Provide the details for configuring Endpoint Central.

- ENVIRONMENT: Select the environment of the Endpoint Central from which you want the data to be fetched and displayed.
USERNAME and PASSWORD: Provide the user name of the Endpoint Central application.
Note: For On-prem environment, the fields will be username and password. For Cloud environment, it is Client ID and Client secret.- URL: Provide the URL of the Endpoint Central application
- CLUSTER PERMISSIONS: Provide the cluster permission for allowing DDI central to visualize the data.
- CLUSTER(S): Select the cluster/clusters from which you want to display the data in DDI Central
- SUBNETS: Select the subnets from which you want to display the data in DDI Central.
- All: When selected all, DDI Central fetches and displays the data from all the subnets in the network
- Specific: When selected specific, DDI Central fetches and displays the data from the subnets you select from the dropdown menu
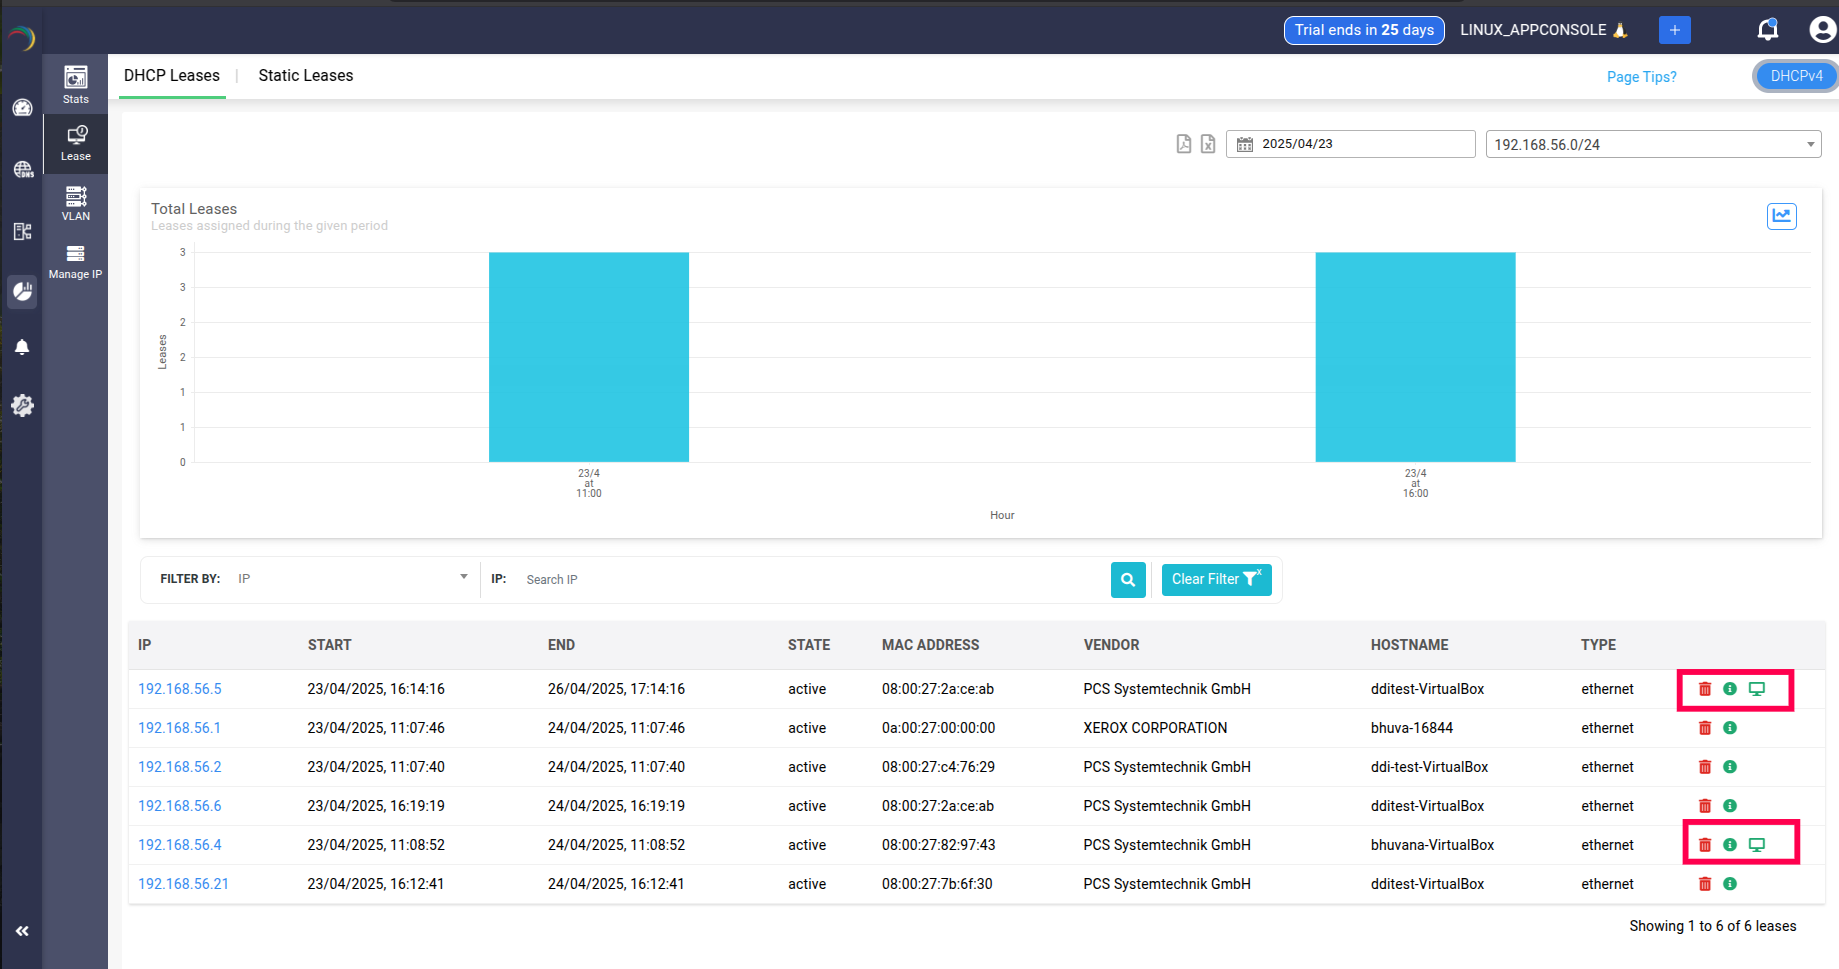
After successfully setting up Endpoint central integration, Go to IPAM->DHCP Lease page.
A Monitor icon appears in the DHCP lease data table alongside the Delete and Additional Info icons. This indicates that the device to which IP got leased has its data fetched from Endpoint central.
Note: The highlighted icon only appears to the devices whose data got fetched from the Endpoint Central. Also, when the network admin disables the endpoint integration, the icon will stop appearing in the table. Incase the endpoint integration needed, it has to be configured again from scratch.

New to ADSelfService Plus?
Related Articles
DDI Central system settings
DDI Central System settings DDI Central provides customizable time configurations for both DNS and DHCP services, which lets administrators can set their own time period, based on their system configurations. This helps admins automate network tasks ...DDI Central Windows system settings
DDI Central System settings DDI Central provides customizable time configurations for both DNS and DHCP services, which lets administrators can set their own time period, based on their system configurations. This helps admins automate network tasks ...DDI Central for Microsoft DNS DHCP
About ManageEngine DDI Central DDI Central is a comprehensive network management solution that unifies DNS, DHCP, and IP Address Management (IPAM) to enhance operational efficiency and network stability. It is deployed as an overlay on your existing ...Configuring SMTP server OAuth with Microsoft Azure
Configuring a mail server with OAuth What is OAuth authentication? OAuth or Open Authorization is an open standard for token-based authentication and authorization that enables secure access to resources without sharing user credentials (such as ...DDI Central Endpoint integration
DDI Central Endpoint integration ManageEngine DDI Central's integration with Endpoint Central enables organizations to seamlessly access all the details of the devices and visualize them effectively. This helps network administrators manage and ...