[ForYourInformation -33] Checklists for request management
Bring
the ‘Checklists’ into action.
This feature is available from 11107 and post builds of ServiceDesk Plus.
As a result of our constant efforts to
make the job easier, we brought in a NEW feature, ‘Checklist’.
Have you ever got this feeling after
going out of your house? I locked the door. Didn’t I? Did I turn off the Air
Conditioner?
People are preoccupied and tend to
miss-out few important things. This goes without saying, IT people
like us are always preoccupied.
A checklist might come handy in this situation.

Okay, What is a checklist in ServiceDesk Plus? How does it
help us? Long story short, it lets us make sure that we have taken care of
those few important things before we close a request.
Go to Admin >> Incident Management >> Helpdesk
Customizer >> Checklist >> New Checklist.
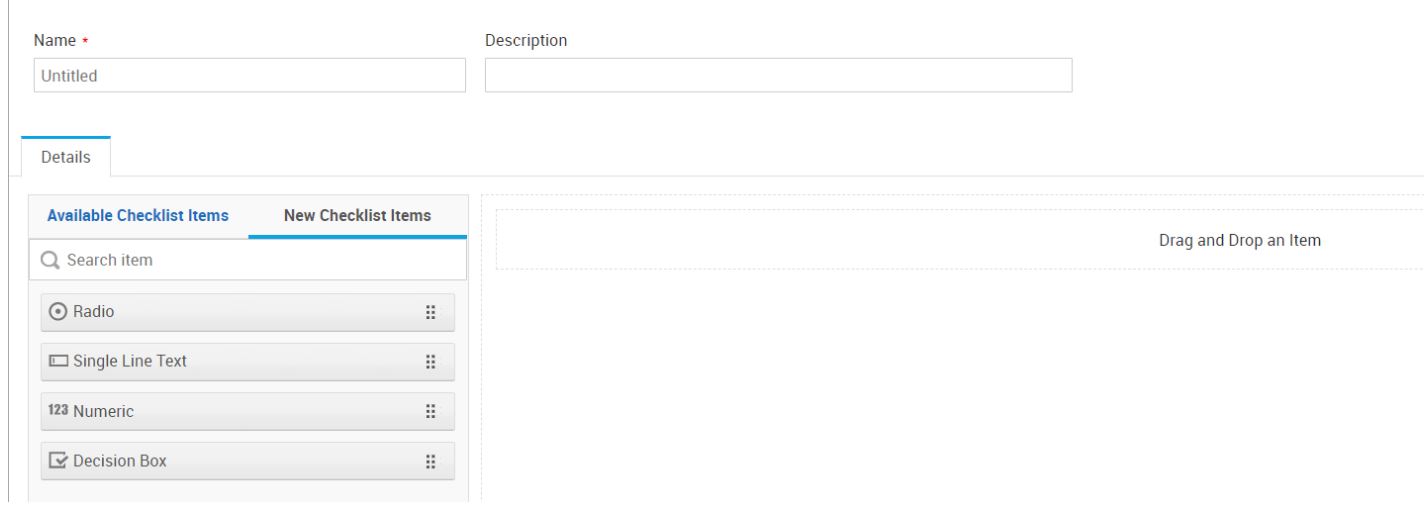
We have 4 different options to choose from.
1.Radio button - Allows only one option to be selected from
a set at once.
2.Single line text - As the name indicates, lets users add a plain text in a line.
3.Numeric field - Allows only the numbers as the input,
however, numbers with decimal points are not supported.
4.Decision box - More like True or False, it features a
single check-box, if left unchecked, this field's value is set as false.
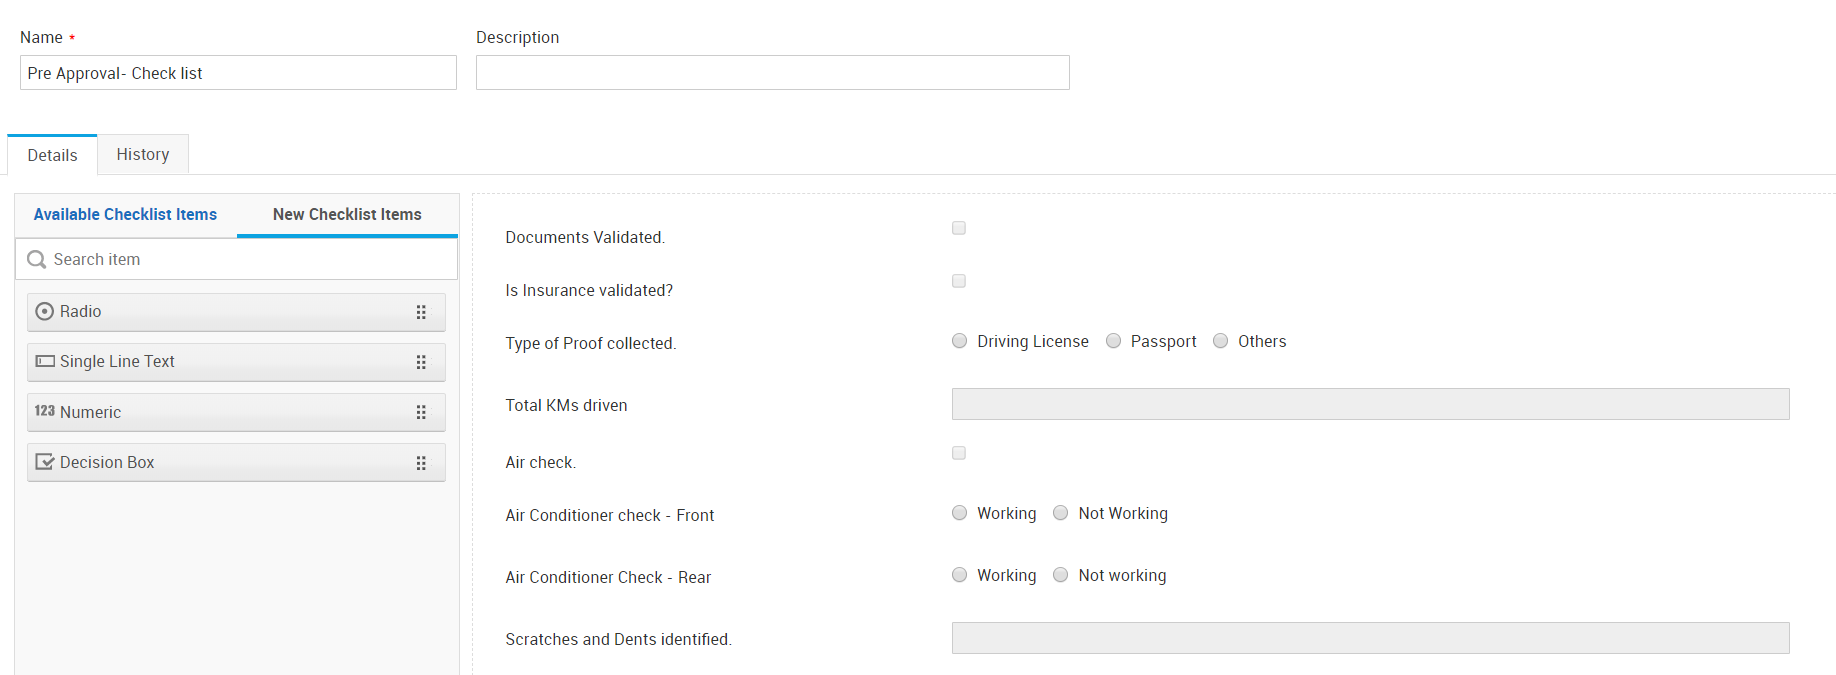
Every checklist item created for a specific checklist will be available
in Checklist items under Admin >> Helpdesk Customizer >>
Checklist >> Checklist items.

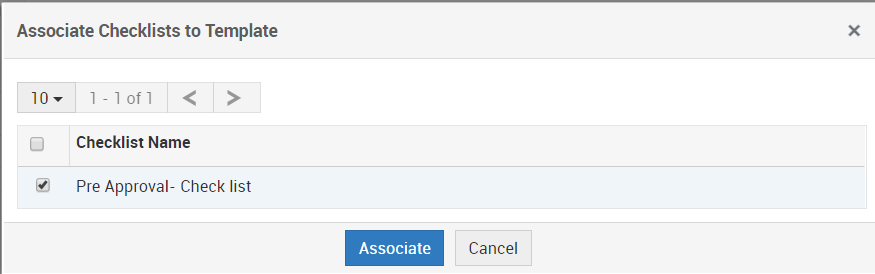
We have now got a template named ‘New Rental Approval’
Associate Checklist to the Template
>> Under Admin >> Incident Management >>
Incident template / Admin >> Service Catalog >> Service Catalog.
>> Choose the template that we need to associate with this
checklist. In this case ‘New Rental Approval’.
>> Under the Workflow tab, choose ‘Associate’ in the
Checklist section.
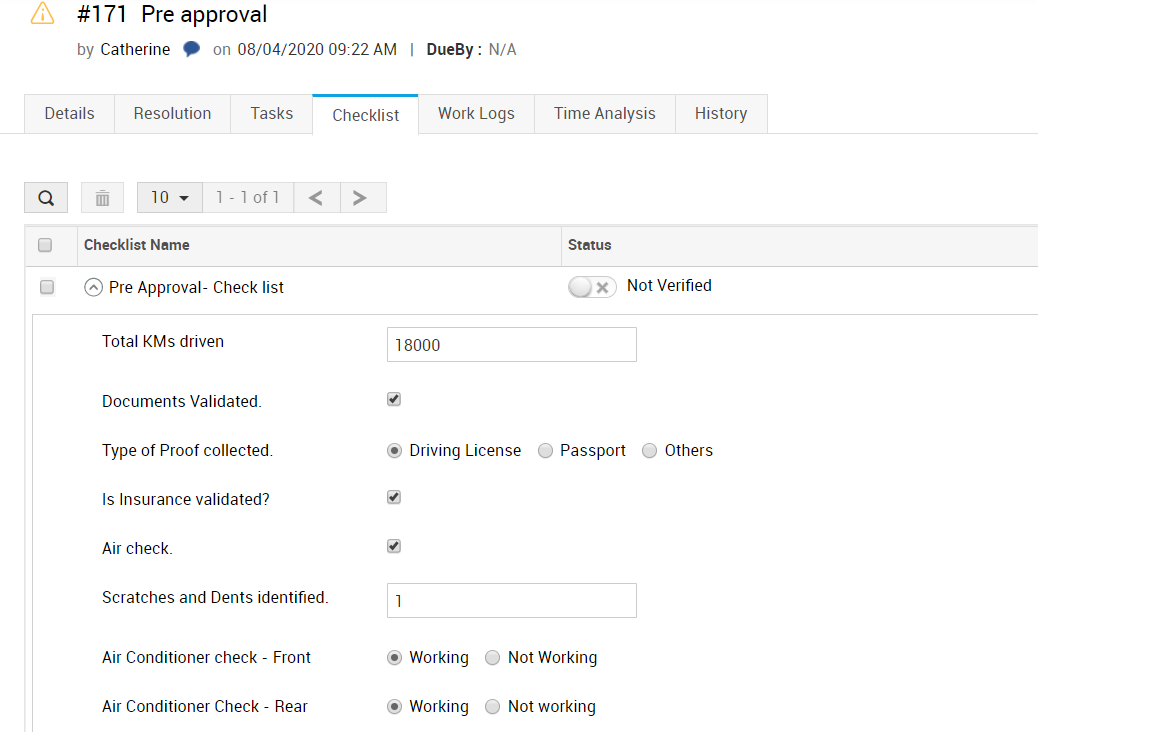
Now, when a request is logged using this template ‘New Rental Approval’,
the checklist associated will be listed in the Checklist section
Utilize
this feature and let us know your thoughts. Cheers..!

Topic Participants
Mohamed Sulthan
Evgeniy
Michael Charles
RCPSC
Dinesh Bhaskaran