Five ServiceDesk Plus features you are missing out on!
Configuring request workflows, CMDB relationship map, timer actions, custom widgets, and Zia Agents in ServiceDesk Plus on-premises


• Administrator (SDAdmin) login access to ServiceDesk Plus
• For Zia Agents: ServiceDesk Plus must already be integrated with ChatGPT
• For Custom Widgets: any external tool or URL to be embedded (for example, a Zoom meeting link) must be available beforehand
1. Configuring a request workflow
Request workflows define the approval sequence, parallel tasks, and team handoffs for a request type. The steps below configure an onboarding workflow that creates child tickets for the IT Assets and Facilities teams simultaneously.
1. Go to Admin > Automation > Workflow. Click New Workflow and name it (for example, New Employee Onboarding).
2. Add a State node with an Open status. Attach an Approval level and assign it to the Reporting Manager.
3. From Branch Nodes, drag a Fork node to run onboarding tasks in parallel. In each branch, add a User Defined Action node set to Create Child Request—one targeting the IT Assets portal, one targeting Facilities.
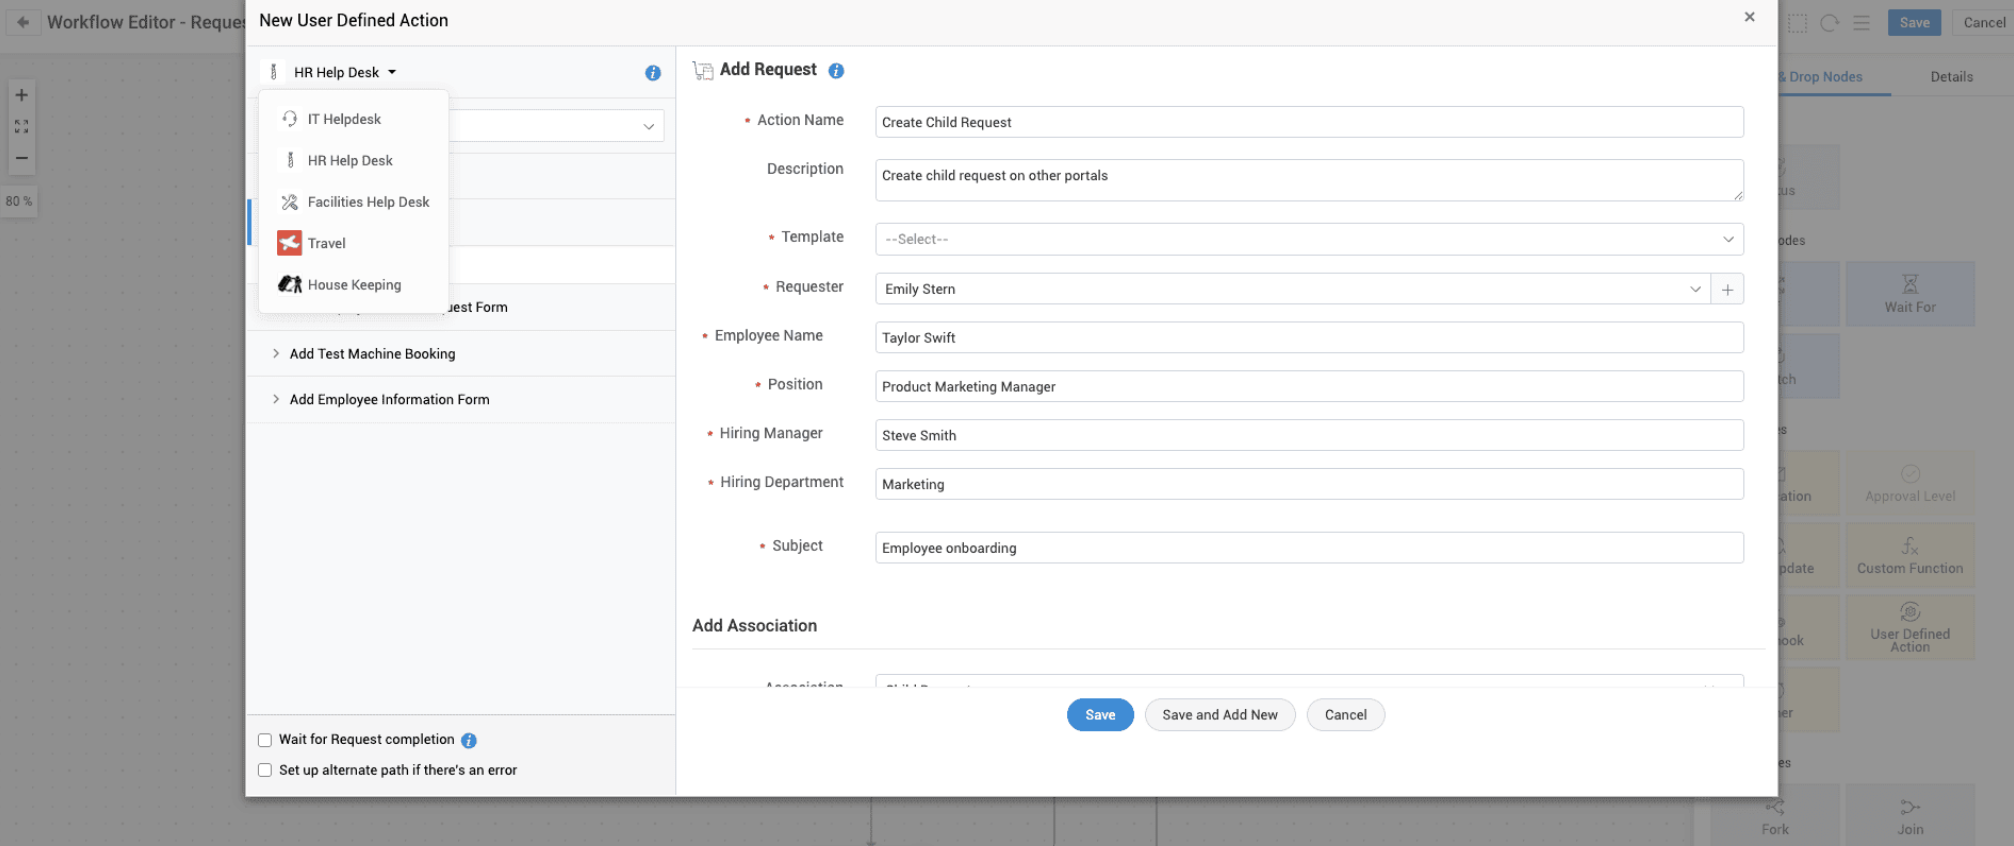
4. In the first branch, add an If Condition node for laptop/asset provisioning and assign it to the IT Assets team.
5. In the second branch, add an If Condition node for ID card issuance and space allocation, and assign it to the Facilities team.
6. Connect both branches to a Join node so the workflow proceeds only after both tasks close.
7. Add a Notification Action node to send the welcome email, then connect it to the Closed state.
8. To trigger the workflow automatically, go to Admin > Service Catalog > Templates, open the relevant template, and select the workflow under the Workflow field.
Note: The Fork node's ability to trigger child requests across portals via User Defined Actions requires each target portal to have request creation enabled via the API.
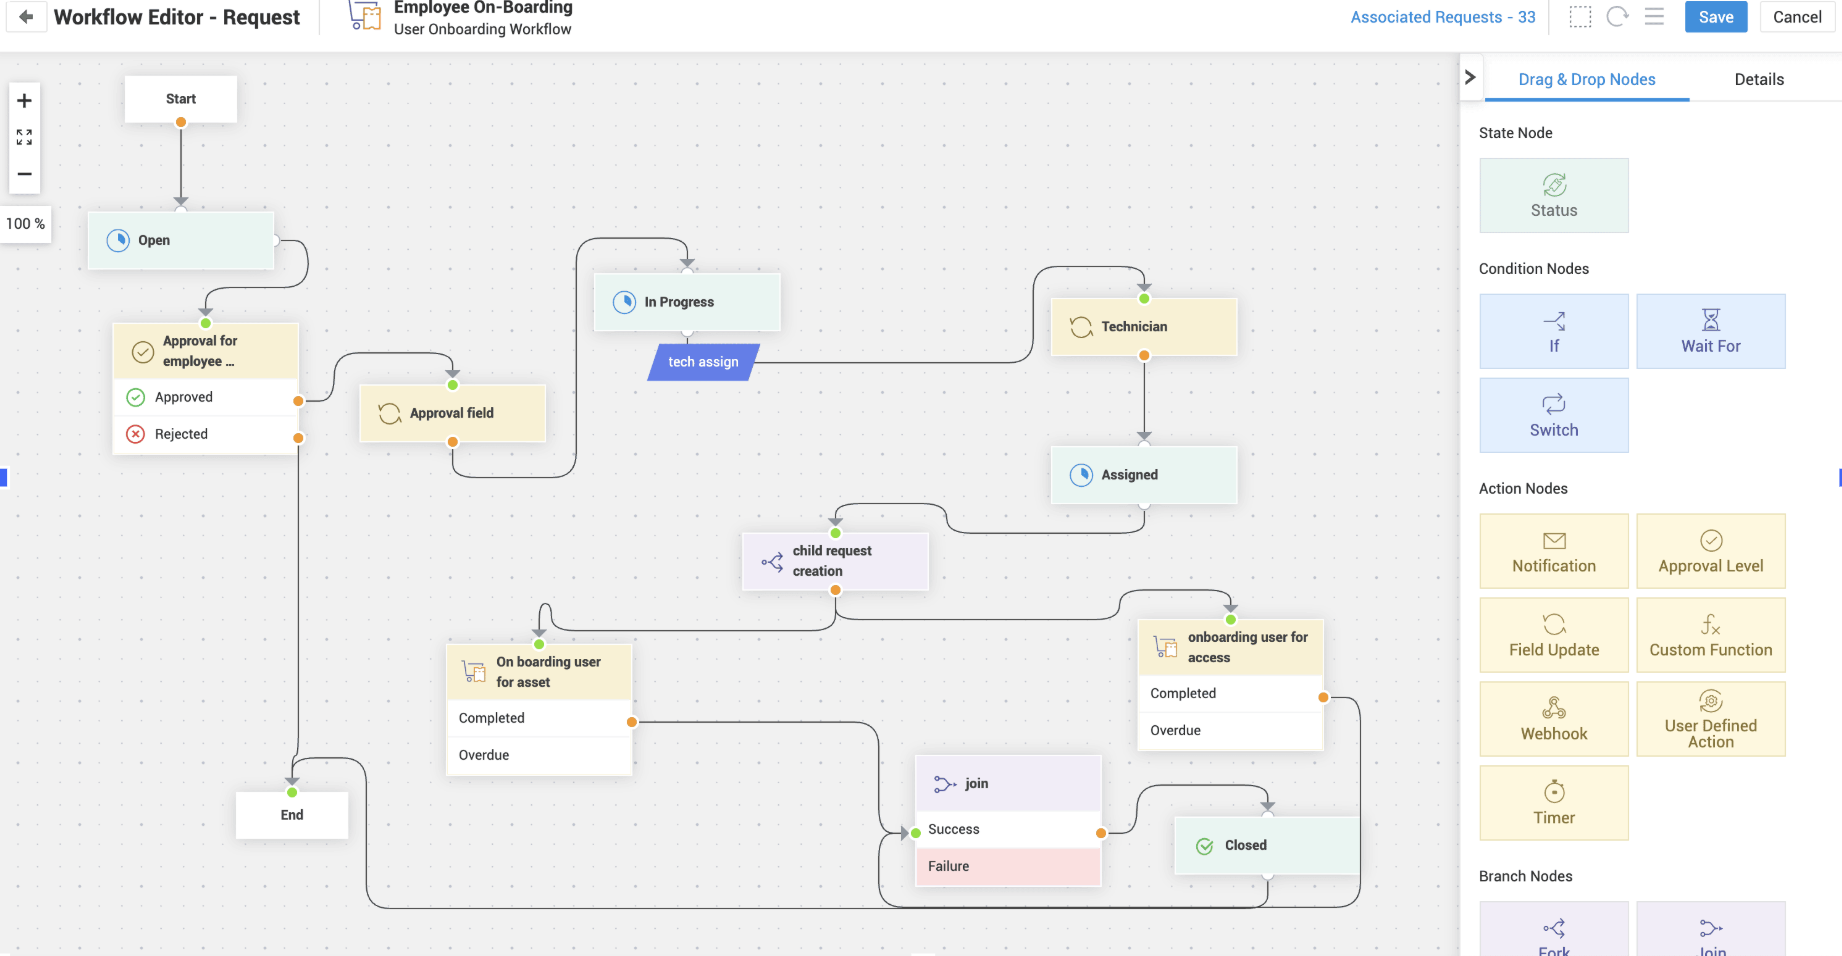
Employee Onboarding Process Using Workflow Automation
2. Using the CMDB relationship map
The relationship map shows dependencies between CIs (servers, applications, network devices, and business services) to identify downstream impact before a change is approved.
1. Go to CMDB > CI List. Search for and open the target CI.
2. Click Relationship Map from the CI detail view. Expand the graph to 2–3 relationship levels.
3. Identify dependent applications, servers, and downstream CIs. Note any with open tickets or recent incidents.
4. If the CI is already linked to a change request, open CI/Assets from within the change ticket to view its relationship map without leaving the request.
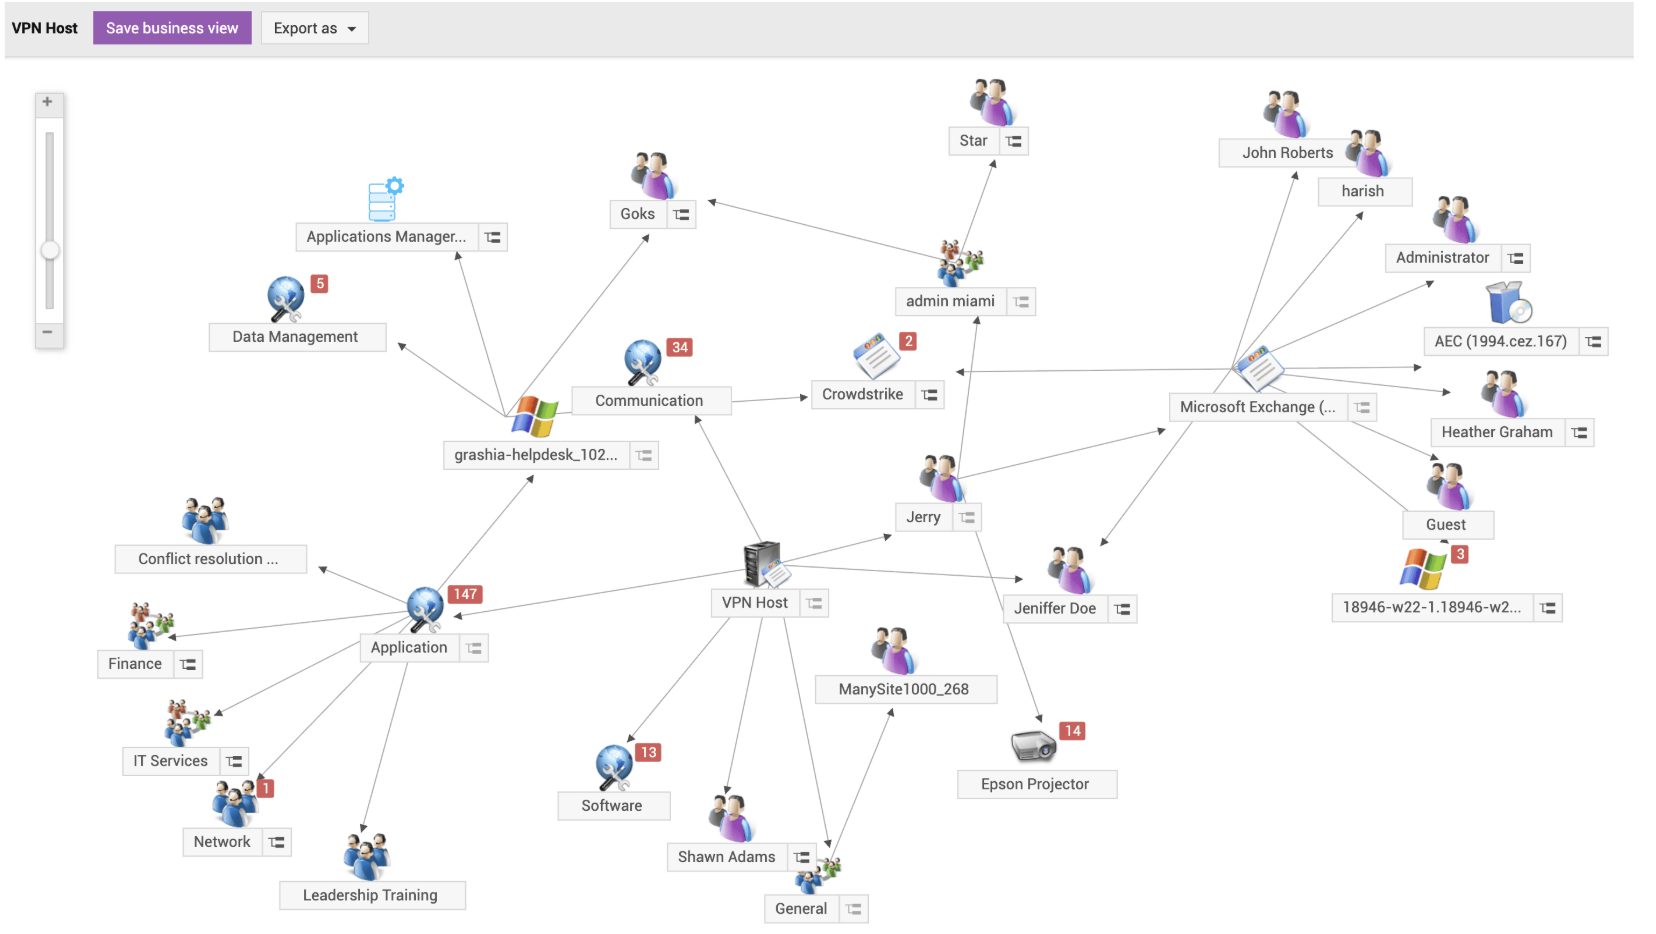
Relationship Map Showing Dependencies and Impact Analysis for a Critical Server
3. Setting up request timer actions
Timer actions trigger reminders or escalations automatically based on elapsed time in a given status, without technician intervention.
1. Go to Admin > Automation > Timer Actions > New Timer Action. Enter a name and description, and select the applicable request template under Action applies for.
2. Under Condition, set: Request Template is <template name> and Status is Waiting for Approval.
3. Stage 1 (reminder): Set the initial delay (for example, 24 hours). Under After Rules > Add New Rule, configure a notification action to email the reporting manager. Click Save and Associate.
4. Stage 2 (escalation): Click New Stage, set the wait time (for example, 36 hours). Under During Rules > Add New Rule, configure a field update to reassign the request to the department head. Under After Rules > Add New Rule, configure a notification to alert HR. Click Save and Associate, then Save.
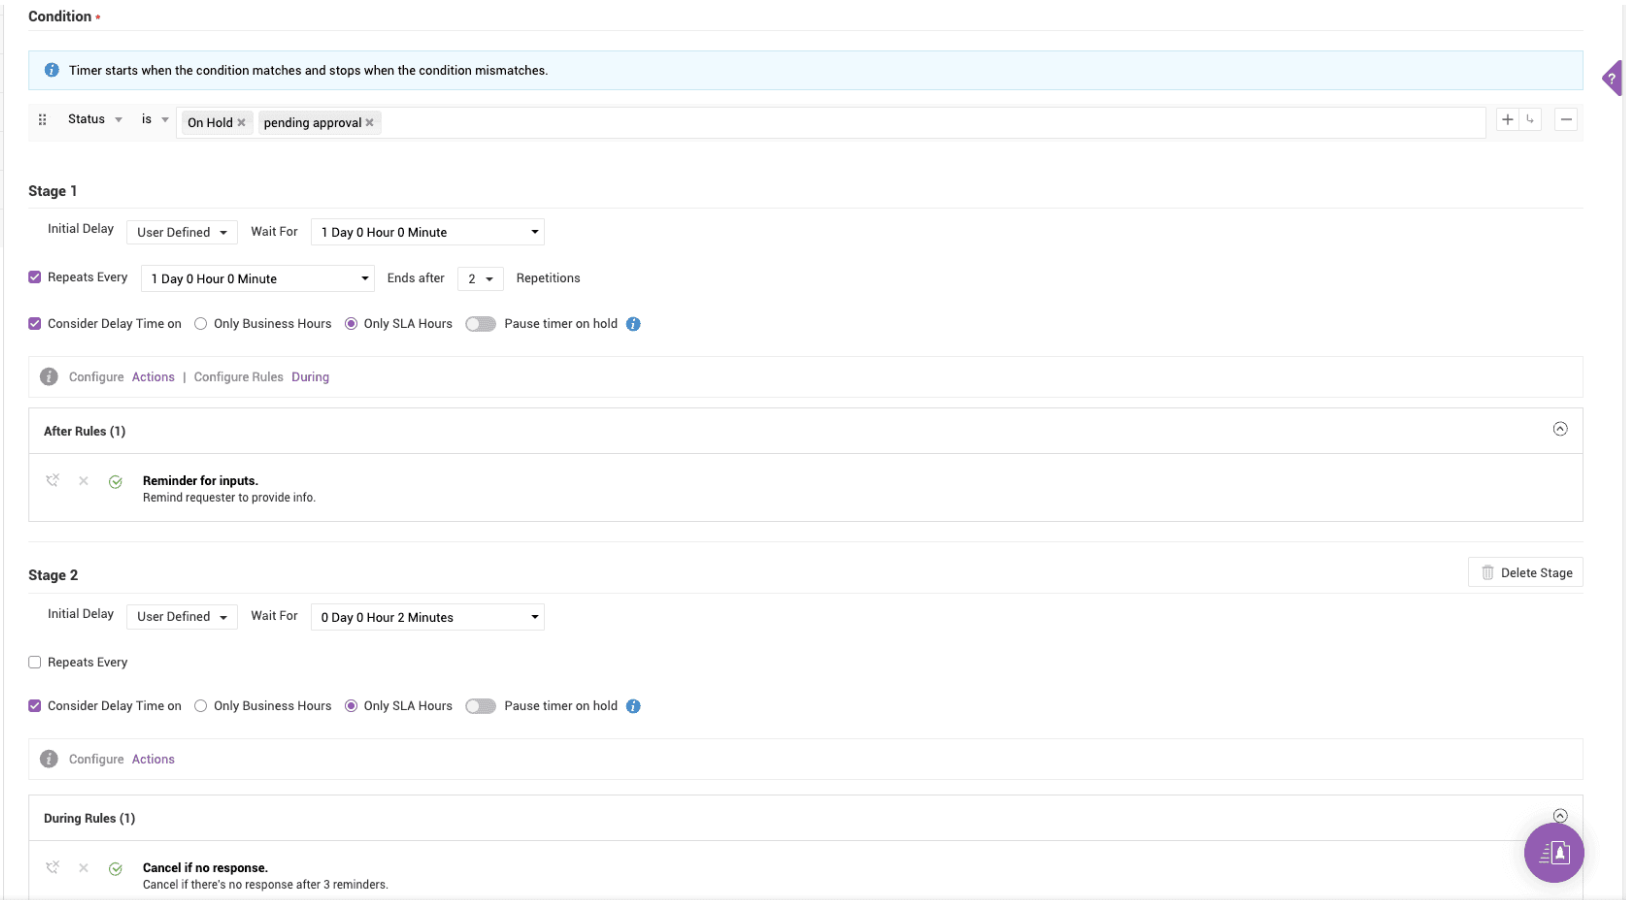
Note: Stage wait times are cumulative from when the prior stage's condition is met, not from ticket creation.
4. Adding a custom widget to the request details page
Custom widgets embed external tools or dashboards directly into the ticket workspace.
1. Go to Admin > Developer Space > Custom Widgets > Add Widget.
2. Create a widget with an action button (for example, Start Zoom Call) and configure it with the target URL (for example, a Zoom meeting link).
3. Configure the widget's action to open the meeting or tool on click.
4. Place the widget on the Request Details page so it is visible during ticket handling.
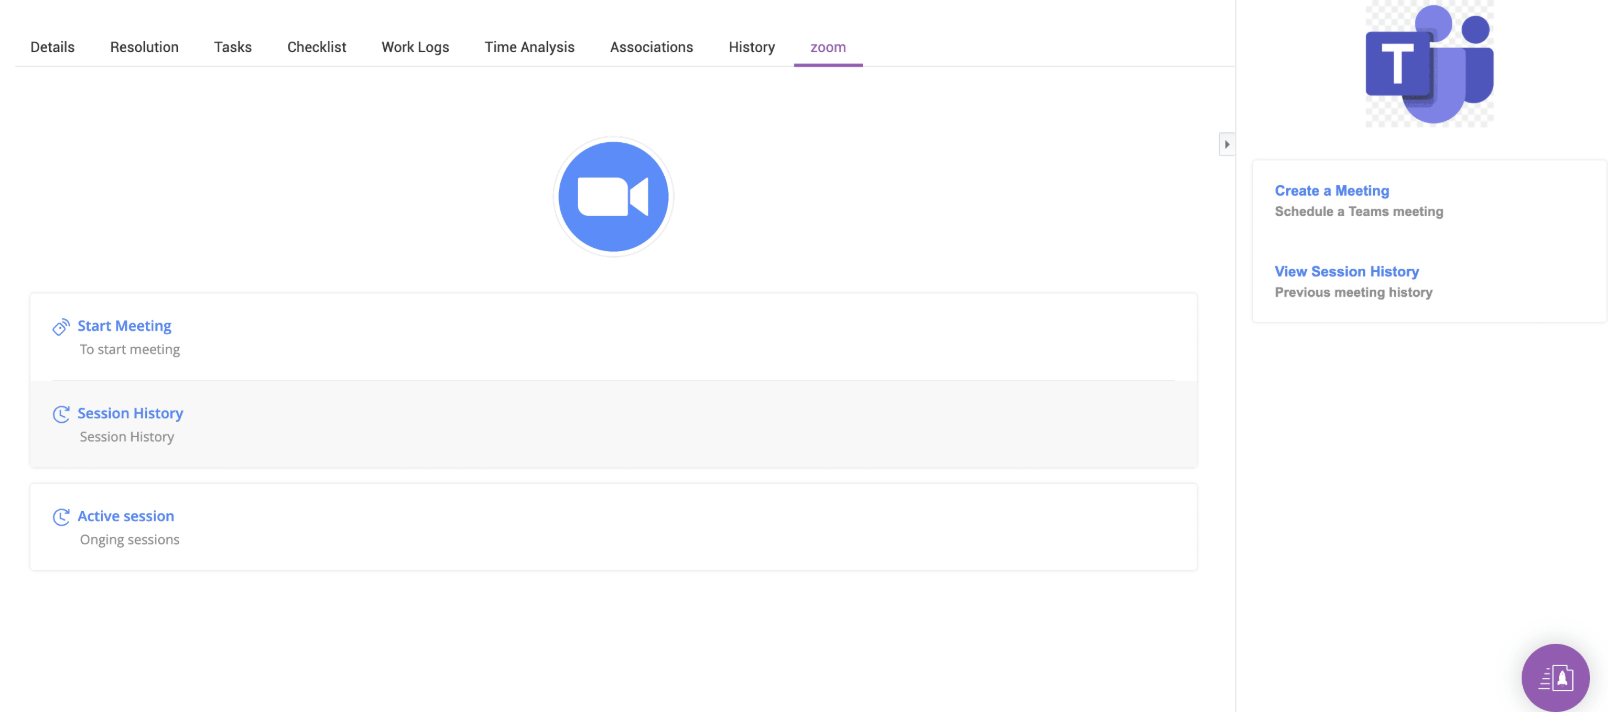
Unified Ticket Workspace with Embedded Custom Widgets
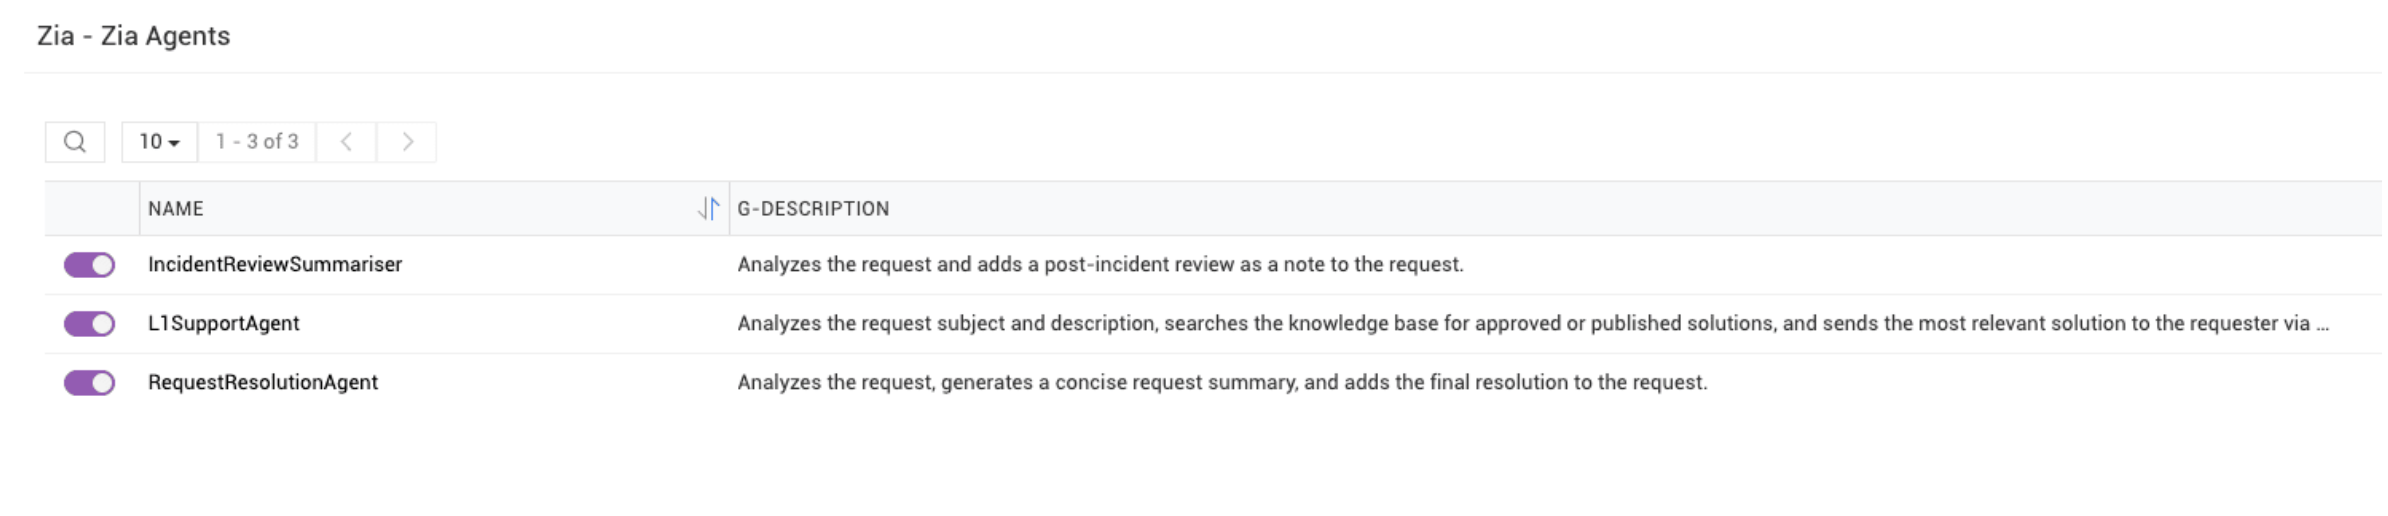
Zia Agents are automation assistants built on the Model Context Protocol, available out-of-the-box in three configurations.
1. Go to Admin > Zia > Zia Agents.
2. Enable the agents relevant to your operations:
• L1 Support Agent—classifies incoming requests and sends first-level resolution emails to requesters without technician involvement.
• Request Resolution Agent—analyzes request details and appends resolution content to the ticket.
• Incident Review Summarizer—generates a post-incident review and logs it as a note on the request.
Note: Zia Agents require an active ChatGPT integration configured under Admin > Zia before they can be enabled.

Related reading
• Request workflows: node types and branching logic
• CMDB: adding and mapping configuration items
• Timer actions: stage conditions reference
Topic Participants
Monishka GR