UI Customization over the build 10250 and above
Follow the steps for customization in 10250 build and above
- shutdown the product
- create a new conf file under NetFlow/conf/netflow with the name custom_properties.conf
- add the below mentioned property with customer specific info
- To change the login background as per the requirement please copy the images under <NetFlowHome>/images/BGImages (create image folder if not exist)
- For changing the whole background change loginBackgroungimg with (2048 x 1366)
- For changing the center image alone set loginBackgroungimg2 with (734 x 260)
- Restart the Product and check
property for the Customization to be entered in the custom_properties.conf:
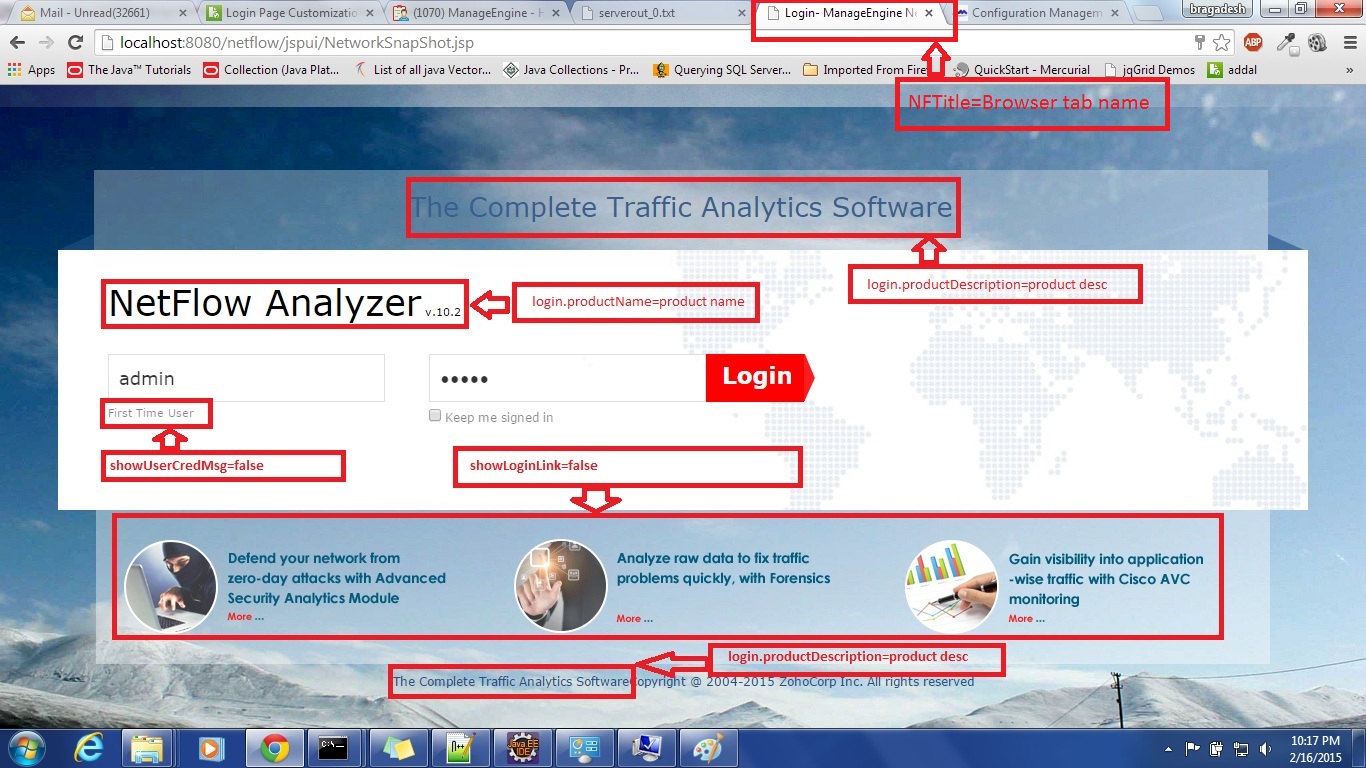
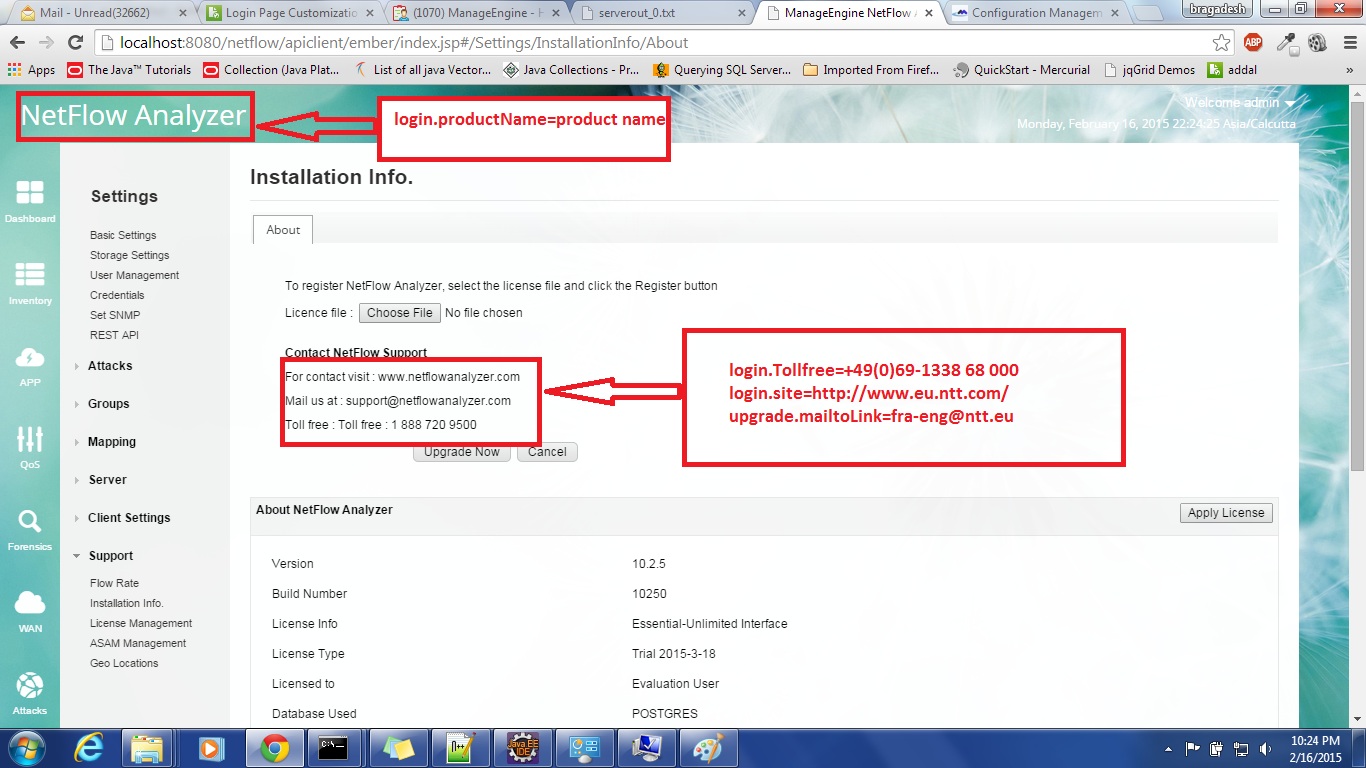
login.productName=<product name>
NFTitle=<Browser Tab Tile Name>
login.productDescription=<product desc>
showUserCredMsg=false
showLoginLink=false
loginBackgroungimg=/images/BGImages/<loginBackgroungimg.jpg>
loginBackgroungimg2=/images/BGImages/<logincentergroungimg.jpg>
login.Tollfree=+49(0)69-1338 68 000
login.site={your login site address}
upgrade.mailtoLink={your support email address}
Note :
From 11000 build onwards the loginBackgroungimg and loginBackgroungimg2 should be given as
loginBackgroungimg=/BgImages/BGImages/<loginBackgroungimg.jpg>
loginBackgroungimg2=/BgImages/BGImages/<logincentergroungimg.jpg>
The following are the Test Cases
- Shutdown the product.
- Create a new conf file under NetFlow/conf/netflow directory with the name of custom_properties.conf.
- Enter the following key and value pair in the conf file
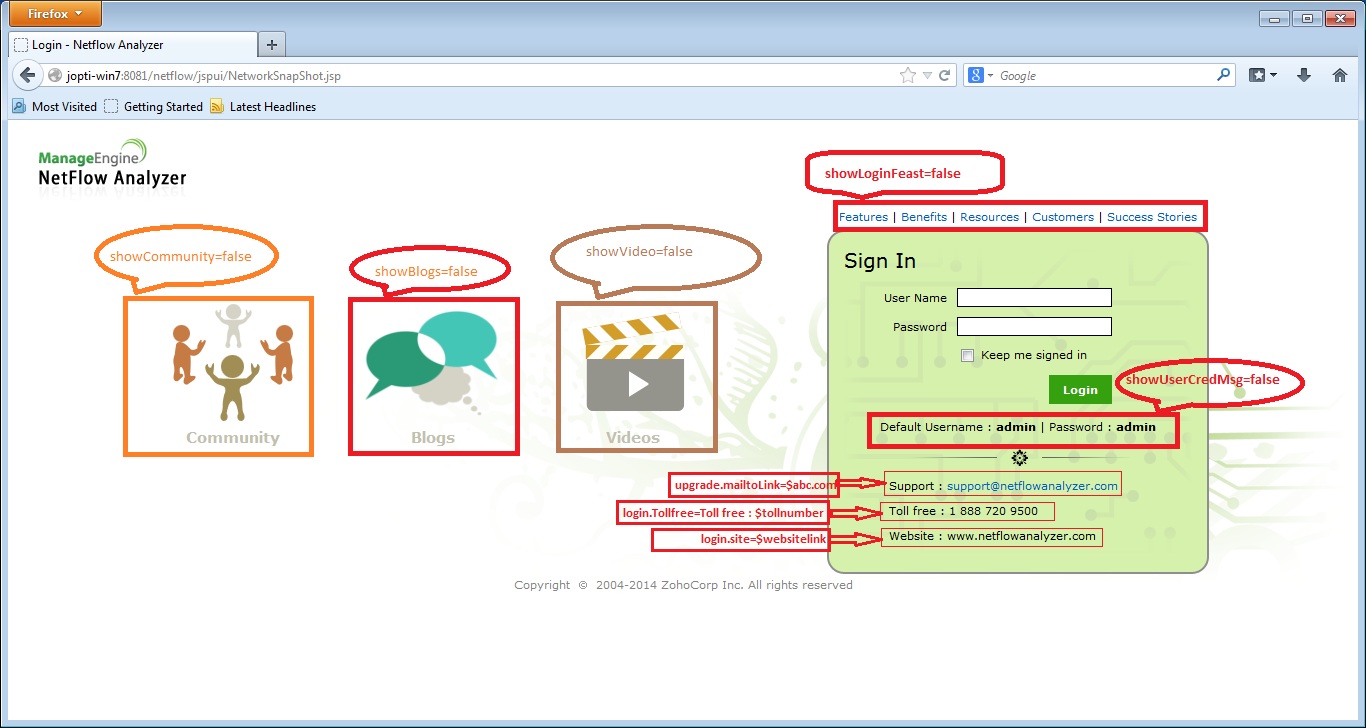
. showLoginFeast=false
showCommunity=false
showBlogs=false
showVideo=false
showUserCredMsg=false
login.Tollfree=Toll free : +49(0)69-1338 68 000
login.site=http://www.eu.ntt.com/
upgrade.mailtoLink=fra-eng@ntt.eu
- Start the product.
- To disable this custom report, remove the entry from custom_properties.conf file or set the value pair as false.
Regrading the Rebranding in the old UI please follow the below steps and check :
To replace the logo with your organization logo in the product pages after login, please follow the steps below:
NOTE: This is for NetFlow Analyzer Essential:
Navigate to the "\NetFlow\webapps\netflow\images" directory.
To change the NetFlow Analyzer logo on the top left corner:
1. Change the size of your image to 432 X 52 pixels and name it as 'headerlogo.gif' and place it in the above mentioned location by overwriting the existing image.
To change the logo in all the PDF reports:
2. Change the size of your image to 902 X 61 pixels, name it as 'pdfbanner.jpg' and place it in the above mentioned location by overwriting the exiting image.
To change the logo in Login Screen:
3.Change the size of your image to 326px × 61px and name it as 'LoginLogo.gif' and place it in the above mentioned location by overwriting the existing image.
To replace the logo with your organization logo in the product pages after login, please follow the steps below:
NOTE: This is for NetFlow Analyzer Essential:
Navigate to the "\NetFlow\webapps\netflow\images" directory.
To change the NetFlow Analyzer logo on the top left corner:
1. Change the size of your image to 432 X 52 pixels and name it as 'headerlogo.gif' and place it in the above mentioned location by overwriting the existing image.
To change the logo in all the PDF reports:
2. Change the size of your image to 902 X 61 pixels, name it as 'pdfbanner.jpg' and place it in the above mentioned location by overwriting the exiting image.
To change the logo in Login Screen:
3.Change the size of your image to 326px × 61px and name it as 'LoginLogo.gif' and place it in the above mentioned location by overwriting the existing image.