WhatsApp Integration with ServiceDesk Plus via Twilio
This article provides steps for integrating ServiceDesk On-Premises with WhatsApp.
Note: This integration is compatible with versions above 14600.
Before you begin, ensure you've reviewed the following prerequisites:
- Ensure your ServiceDesk Plus instance is publicly hosted and accessible over the internet.
- Have a Premium Twilio account capable of creating a messaging service.
- Obtain a WhatsApp business-enabled phone number, or a Twilio phone number if a WhatsApp business-enabled number is unavailable.
- Possess a Meta/Facebook account.
- Prepare a valid ID proof for the Meta business verification process.
Once you've addressed these prerequisites, we'll move forward to configure the services step by step.
Setting up Twilio:
If you already have a WhatsApp business-enabled phone number, you can skip the following steps. Otherwise, follow these instructions to purchase a Twilio phone number, which will then be used to create a WhatsApp Business account.
To acquire a phone number through Twilio, navigate to Phone numbers -> Manage -> Buy a number. Upon doing so, a list of available numbers will be displayed. Select a preferred number from the list and proceed with the purchase. This phone number will be utilized for the integration process.
After your purchase:
- Within the Twilio console, upon reaching the landing page, you'll find your Account SID and AuthToken displayed. Copy both credentials and securely store them in a safe location. These credentials are crucial for further configuration and integration.
- Once copied, we need to create a WhatsApp sender now. To create one, click on Messaging - > Senders - > WhatsApp senders in the left pane.
- Click on "Create new sender" at the top-right corner. Once inside, specify the Twilio number you purchased or use your existing business number if available. After specifying, click on "Continue."
- The next step involves linking a WhatsApp Business account with your number. Click on "Continue with Facebook" to initiate this association process. You'll then be redirected to the Meta/Facebook sign-up page, where you'll be guided through the business creation process.
- Follow the on-screen instructions to create the Business account. You'll be prompted to fill in details such as the Business name and other relevant fields. Please note that this business name and the provided information will be displayed to the user while interacting with the bot.
Note:
During the business creation process, Meta might initially restrict the account due to compliance reasons. If your account becomes restricted, check the email associated with your Meta account for a notification about the account restriction. Within the email, you'll likely find an option to appeal for a review. To proceed, you'll need to submit a valid ID proof for verification. Once the necessary documentation is provided, the business account will be reinstated upon successful review.
- After completing the association process, a WhatsApp sender will be established in the Twilio console. Locate and click on "WhatsApp Sender" displayed on the right side of the sender information. This action will enable you to access and modify the sender settings as needed.
- Within the sender settings, navigate to the Endpoint Configuration section. Select the option "Use a Messaging Service" and proceed by clicking on "Create a new Messaging Service." This action will initiate the setup process for a new Messaging Service associated with your sender.
- If the "Create a new Messaging Service" option doesn't function as expected, you can alternatively navigate to Messaging -> Services in the left pane of the Twilio interface. From there, click on "Create Messaging Service" located at the top-right corner. This action will allow you to initiate the creation of a new Messaging Service manually.
- Follow the on-screen instructions to create the messaging service. Provide a name for the service and specify its use case as guided. Once completed, click on "Update Messaging Service."
- Next, you'll be prompted to add a WhatsApp sender to the service. Click on "Add senders" and select the sender type as 'WhatsApp Number' to proceed with this step.
- Click on "Set up integration" to proceed to the next step. Within the setup options, under "Incoming messages," select the option "Send a webhook."
- You'll be prompted to enter the Request URL for the webhook.
- Input the URL in the following format: <sdp-hosted-domain>/AppIntegrations?serviceName=twilio
- Replace <sdp-hosted-domain> with your ServiceDesk Plus hosted domain. For instance, if your hosted domain is https://servicedeskplus.com, then your request URL will be: https://servicedeskplus.com/AppIntegrations?serviceName=twilio
- Once the URL is specified, click on "Add Compliance Info." Subsequently, choose "Complete Messaging Service Setup."
- Now that both the Sender and Messaging Service are set up, navigate to "Properties" in the left pane within the messaging service settings. Make a note of the Messaging Service SID, as it will be utilized in further configurations.
Steps to configure ServiceDesk Plus after completing the Twilio setup:
- Download and extract the provided zip file.
- Open the "twilioConf.json" file from the extracted folder. Replace the parameters in the JSON with the values obtained earlier:
- Replace "twilioSID" with your Twilio account's SID.
- Replace "twilioPhoneNumber" with your Twilio or Business phone number.
- Replace "messagingServiceSID" with the Messaging Service SID obtained earlier.
- Replace "authToken" with your Twilio account's AuthToken.
- Replace "hostedDomain" with your ServiceDesk Plus hosted domain.
- Save the file and move it to the "ServiceDesk Plus/integration/conf" directory.
- Move the "AppIntegrations_Handler_Custom.xml" file to the "<SDP_Home>/integration/conf" directory.
- Move the "security-plugin.xml" to the "<SDP_Home>/integration/resources/WEB-INF/security" directory, replacing the existing "security-plugin.xml" file.
- Create a new folder named 'twilio' under "<SDP_Home>/integration/resources" directory. Move the "whatsapp.html" and "sdp-mobileapp-logo.png" files from the zip to this 'twilio' directory.
- Finally, move the "SDPPlugin_TwilioHandler.jar" file to the "<SDP_Home>/integration/lib" directory.
By following these steps, you'll have configured ServiceDesk Plus to integrate with Twilio for WhatsApp functionalities.
Feature Configurations:
- Within the AppIntegrations_Handler_Custom.xml file, there exist two default parameters: OTPLogin and notification.
- OTPLogin enables user authorization via One Time Password, requiring a user's email address to be filled.
- The notification parameter triggers alerts for technicians when requests are assigned or approval is needed.
- If both features are necessary, maintain their default values; otherwise, adjust the parameters to false.
- Once all configurations are completed and transferred, restart the ServiceDesk Plus server to complete the successful installation of the WhatsApp Plugin.
- Before proceeding with integration, ensure that user profiles in ServiceDesk Plus contain valid entries for mobile numbers and primary email addresses. For the mobile number, enter it with the country code but without the plus sign (e.g., 91xxxxxxxxxx, where 91 represents the country code).
- Once restarted, inside your Twilio console, navigate to Messaging -> Content Template Builder in the left pane to check whether the templates required for this integration are created. Once the templates are approved, you can proceed further.
- To finalize, send a message to your Twilio/Business phone number to initiate the authorization process.
Security Note:
1. The authToken is stored plainly within the twilioConf.json file. Ensure restricted access to this file and consider enabling password protection for added security.
2. /revoke command will revoke the authorisation.
2. /revoke command will revoke the authorisation.
Features available :
Once you're done with the authorisation process, you'll be thrown with a welcome message from the bot along with a list of few commands available as follows :
Once you're done with the authorisation process, you'll be thrown with a welcome message from the bot along with a list of few commands available as follows :
1. Create a request :
This option allows a requester or a technician to create a request in ServiceDesk Plus right from their WhatsApp. When the 'create a request' option is chosen, the user will be thrown with a redirect link to a form which will have the input fields for the request details (subject and description). Once the details are entered and the Submit button is clicked, the content will be populated in the WhatsApp chat window which the user will send it to the bot, upon which the request will get created in ServiceDesk Plus.
The form-based inputs are to make sure that the request details are devoid of human errors. Alternatively, to create a request, the subject and description can be inputted directly in the WhatsApp chat window in the format below :
Subject: <subject_content>
Description: <description_content>
Sending messages to the bot in the format above will also create a request in ServiceDesk Plus.
Subject: <subject_content>
Description: <description_content>
Sending messages to the bot in the format above will also create a request in ServiceDesk Plus.
2. Pending Approvals :
As the name suggests, this option will list the pending approvals of the user. The user will have an option to approve/reject the approvals in the details card.
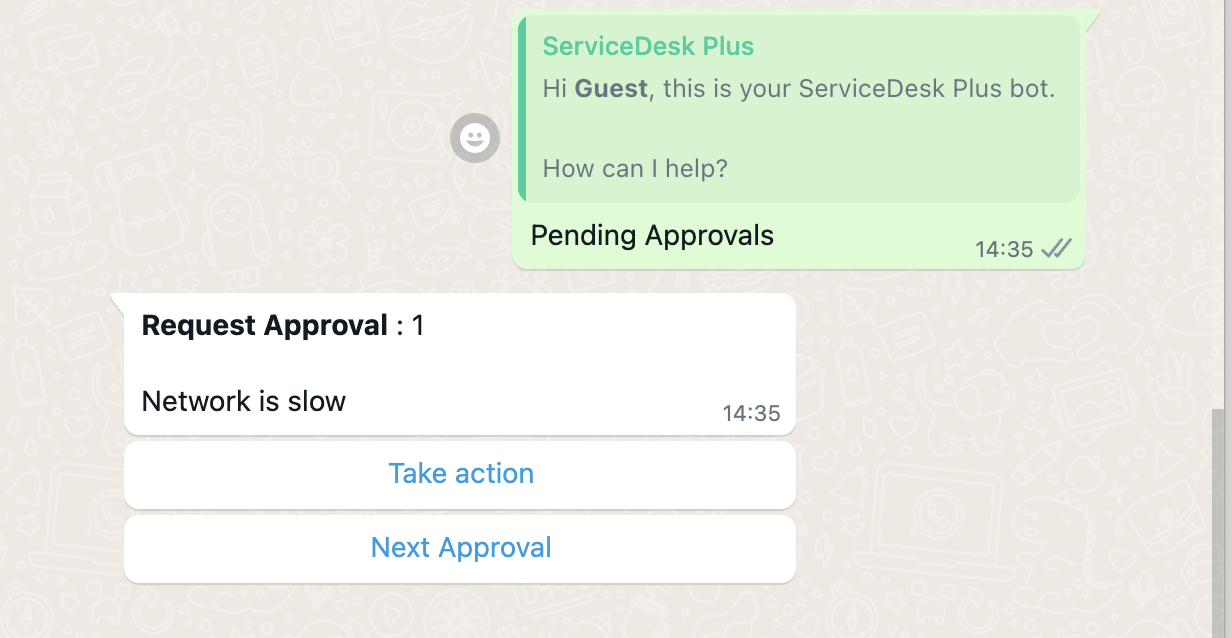
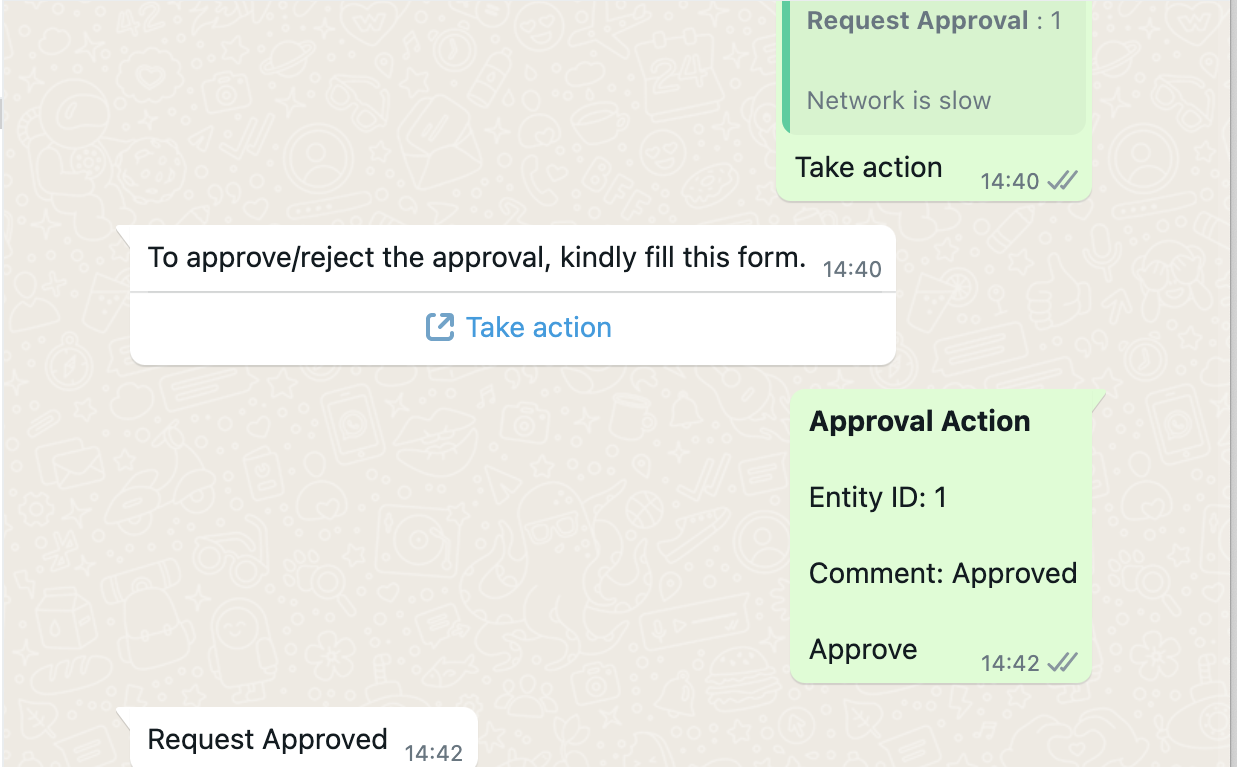
This also follows the form-based input where we get the comments from the user and the approve/reject accordingly. Alternatively, the approval action can be executed by sending the message in the format below :
As the name suggests, this option will list the pending approvals of the user. The user will have an option to approve/reject the approvals in the details card.
This also follows the form-based input where we get the comments from the user and the approve/reject accordingly. Alternatively, the approval action can be executed by sending the message in the format below :
*Approval action*
Entity ID: <ID>
Comment: <comment>
Approve/Reject
where Entity ID is the ID of the request/change to be approved or rejected. At the bottom of the message, if the entity has to be approved, the keyword Approve has to be specified or else Reject has to be specified. This holds true only for the non form-based inputs to perform actions.
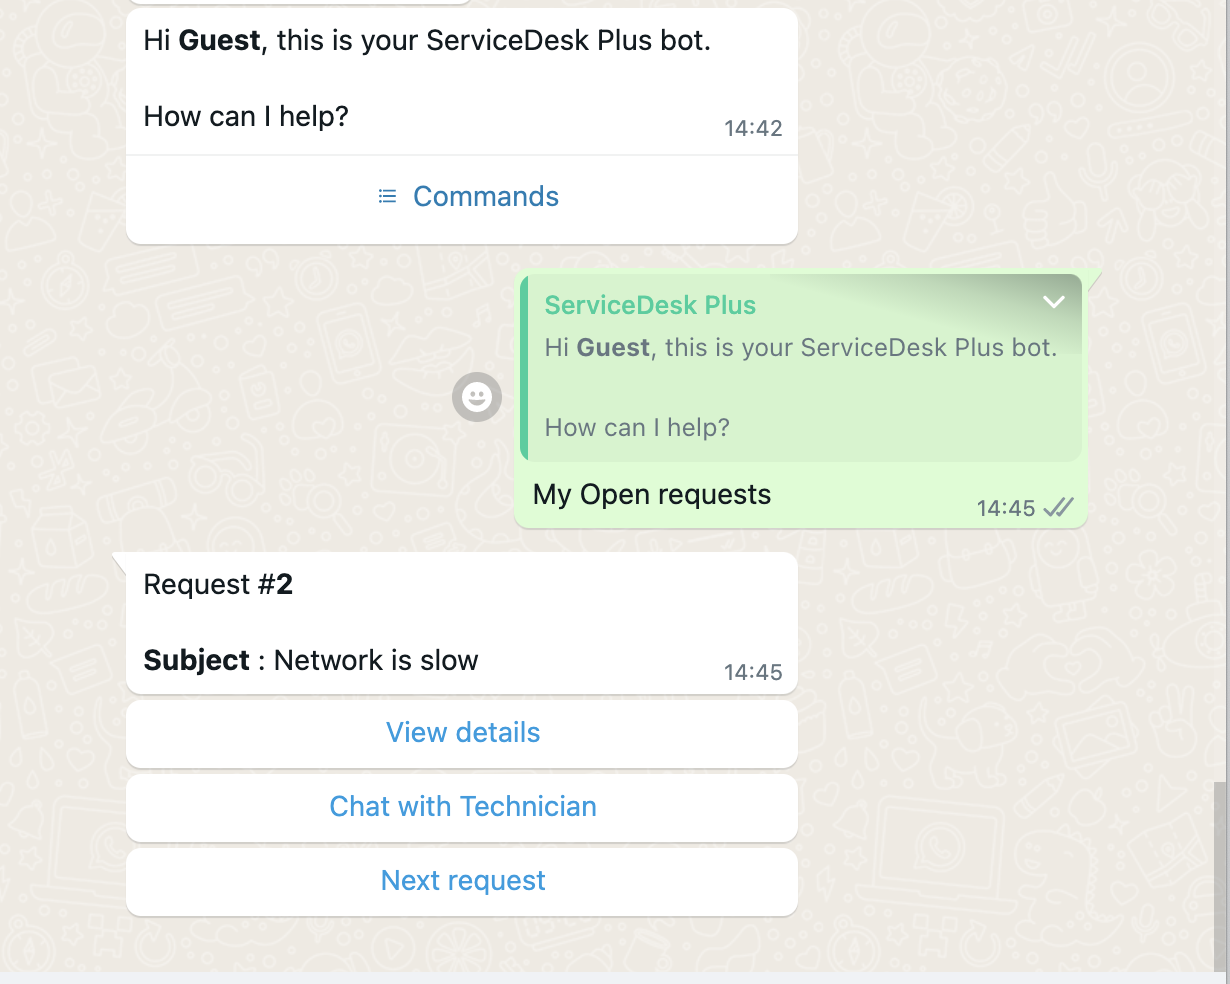
3. My Open Requests :
This will return the list of open requests for the user. In the details card, the user will have an option to view more details and chat with a technician.
where Entity ID is the ID of the request/change to be approved or rejected. At the bottom of the message, if the entity has to be approved, the keyword Approve has to be specified or else Reject has to be specified. This holds true only for the non form-based inputs to perform actions.
3. My Open Requests :
This will return the list of open requests for the user. In the details card, the user will have an option to view more details and chat with a technician.
Chat with Technician will initiate a chat session in ServiceDesk Plus with an available technician. Once the technician picks up your chat, any further messages sent from WhatsApp will be relayed to ServiceDesk Plus as chat messages, until the chat session ends. To end the chat from WhatsApp, simply type '/end chat' and send.
Please note that the Chat with Technician is for requesters alone. Technician will not be able to initiate a chat from WhatsApp.
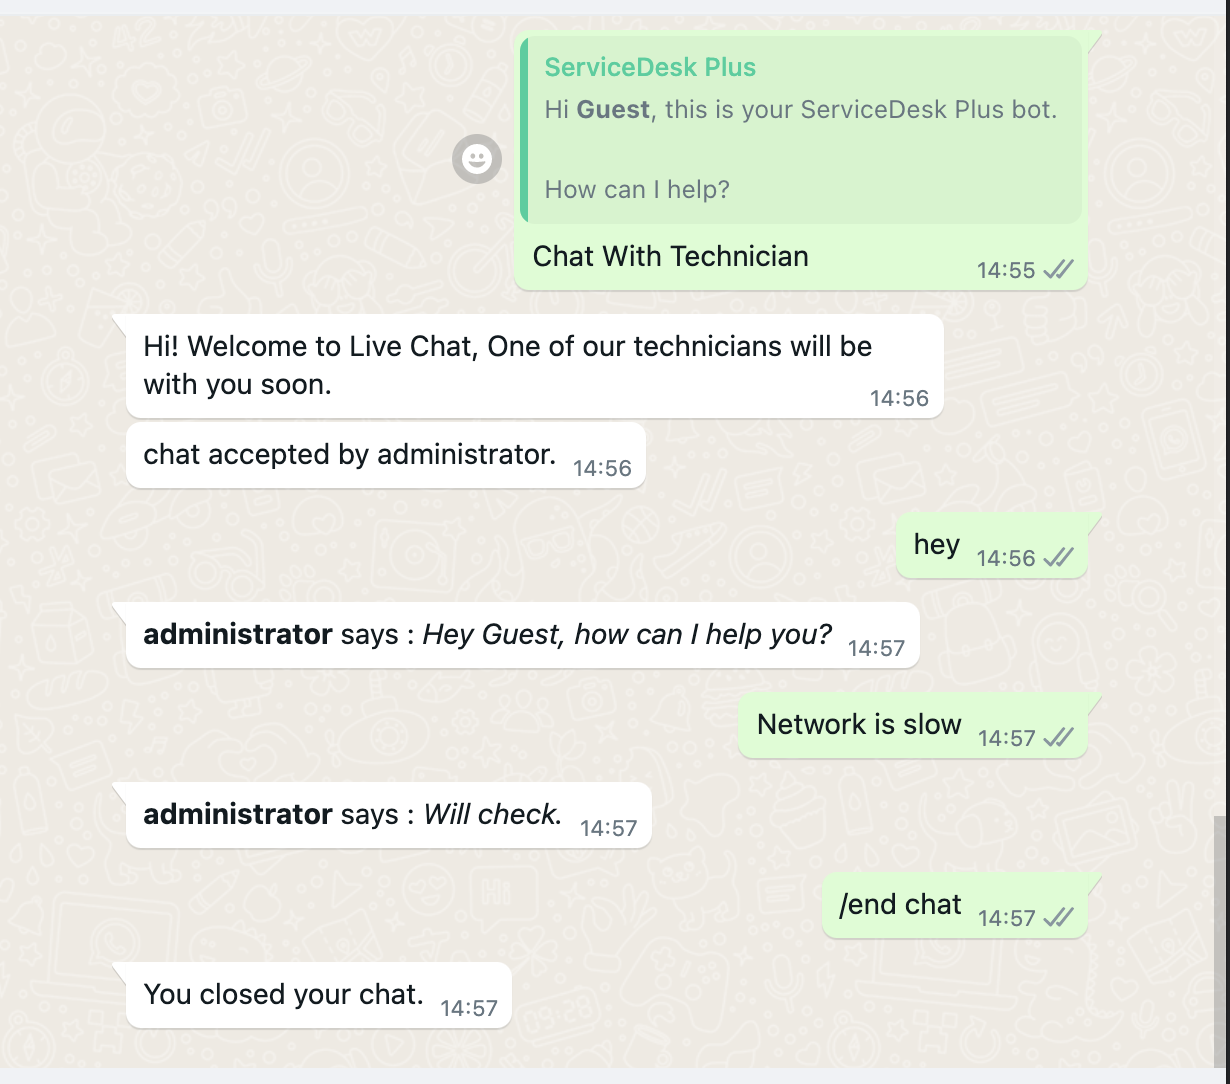
4. Chat With Technician :
This button will initiate a chat in ServiceDesk Plus with available technicians. Similar to the above, once a technician accepts your chat, further messages from your WhatsApp will be considered as chat messages, until the chat session ends. '/end chat' to end the chat session holds true for here too.
5. Choose Instance :
Choose Instance will allow users to set their instance/portal to perform their actions on. In the details card, Clicking on Choose instance button will set the instance, whereas Next instance will show the next available instance to choose.
Please note that the Chat with Technician is for requesters alone. Technician will not be able to initiate a chat from WhatsApp.
4. Chat With Technician :
This button will initiate a chat in ServiceDesk Plus with available technicians. Similar to the above, once a technician accepts your chat, further messages from your WhatsApp will be considered as chat messages, until the chat session ends. '/end chat' to end the chat session holds true for here too.
5. Choose Instance :
Choose Instance will allow users to set their instance/portal to perform their actions on. In the details card, Clicking on Choose instance button will set the instance, whereas Next instance will show the next available instance to choose.
6. Adding a note to a request :
Once a request is created from WhatsApp, in the success message details card, there will be a Add a Note button to add notes to the request. Clicking on that will redirect to the form to get the input. Alternatively, the message can be sent in the below template to add a note :
ID: <request_id>
Note: <note_content>
where <request_id> is the ID of the request and <note_content> is the note to be added.
where <request_id> is the ID of the request and <note_content> is the note to be added.
7. Notifications when a request is assigned/when an approval request is raised :
Technicians will get notified when a request is assigned to them, provided that their WhatsApp number is mapped to the ServiceDesk Plus user. Similarly when an approval request is raised, the user will get notified in their WhatsApp. These can be configured in the AppIntegrations_Handler_Custom.xml file.
New to ADSelfService Plus?
Related Articles
WhatsApp Integration via Twilio (Notification only)
WhatsApp Integration via Twilio You can now integrate ServiceDesk Plus MSP with WhatsApp to trigger WhatsApp notifications to ServiceDesk Plus MSP technicians/users on the latest events that happen in the application. This can be done through Twilio ...How to integrate ServiceDesk Plus MSP with WhatsApp business.
This article provides steps for integrating ServiceDesk plus MSP with WhatsApp (business). Note: This integration is compatible with versions 14600 & above. Before you begin, ensure you've reviewed the following prerequisites: Ensure your ServiceDesk ...WhatsApp Integration with ServiceDesk Plus
This article will guide you through the steps of installing the WhatsApp Integration with ServiceDesk Plus plugin. Note: This integration is compatible with versions above 14600. Pre-Requisites : Facebook account to create a business account. Ensure ...Features available In WhatsApp Integration With ServiceDesk Plus
WhatsApp Integration with ServiceDesk Plus - What's Available? This article will guide through the features available with the WhatsApp plugin and how to make use of them. 1. Create a request : This option allows a requester or a technician to create ...Microsoft SCCM Integration for ServiceDesk Plus and AssetExplorer
Microsoft System Center Configuration Manager (SCCM) integration helps you fetch workstation details from SCCM and add them to ServiceDesk Plus or AssetExplorer. How does it work? The SCCM integration tool connects directly to the SCCM SQL ...