Configuring ManageEngine CloudDNS as a primary DNS provider
If your organization works with multiple DNS providers you can deploy CloudDNS as the primary provider, in parallel with other third-party primary or secondary DNS providers. Under this configuration, CloudDNS supports only authoritative (AXFR) zone transfers, which transfer the whole zone file from CloudDNS servers to the secondary servers.
In this setup, when transferring zone data from CloudDNS, the AXFR protocol does not transfer CloudDNS's advanced configurations like Geofilters, monitoring setup, and specialized failover configurations. Only the zone files that are RFC1035 compliant are updated in the secondary servers.
Create or select the primary zone from the Domains page, that you prefer to set up as the master zone for your secondary servers.
 The domain type has to be Primary AXFR to enable zone transfers.
Inside the Primary AXFR zone of your choice, click on the Zone Transfers button in the top right corner of the page to enable outgoing transfers from that particular zone.
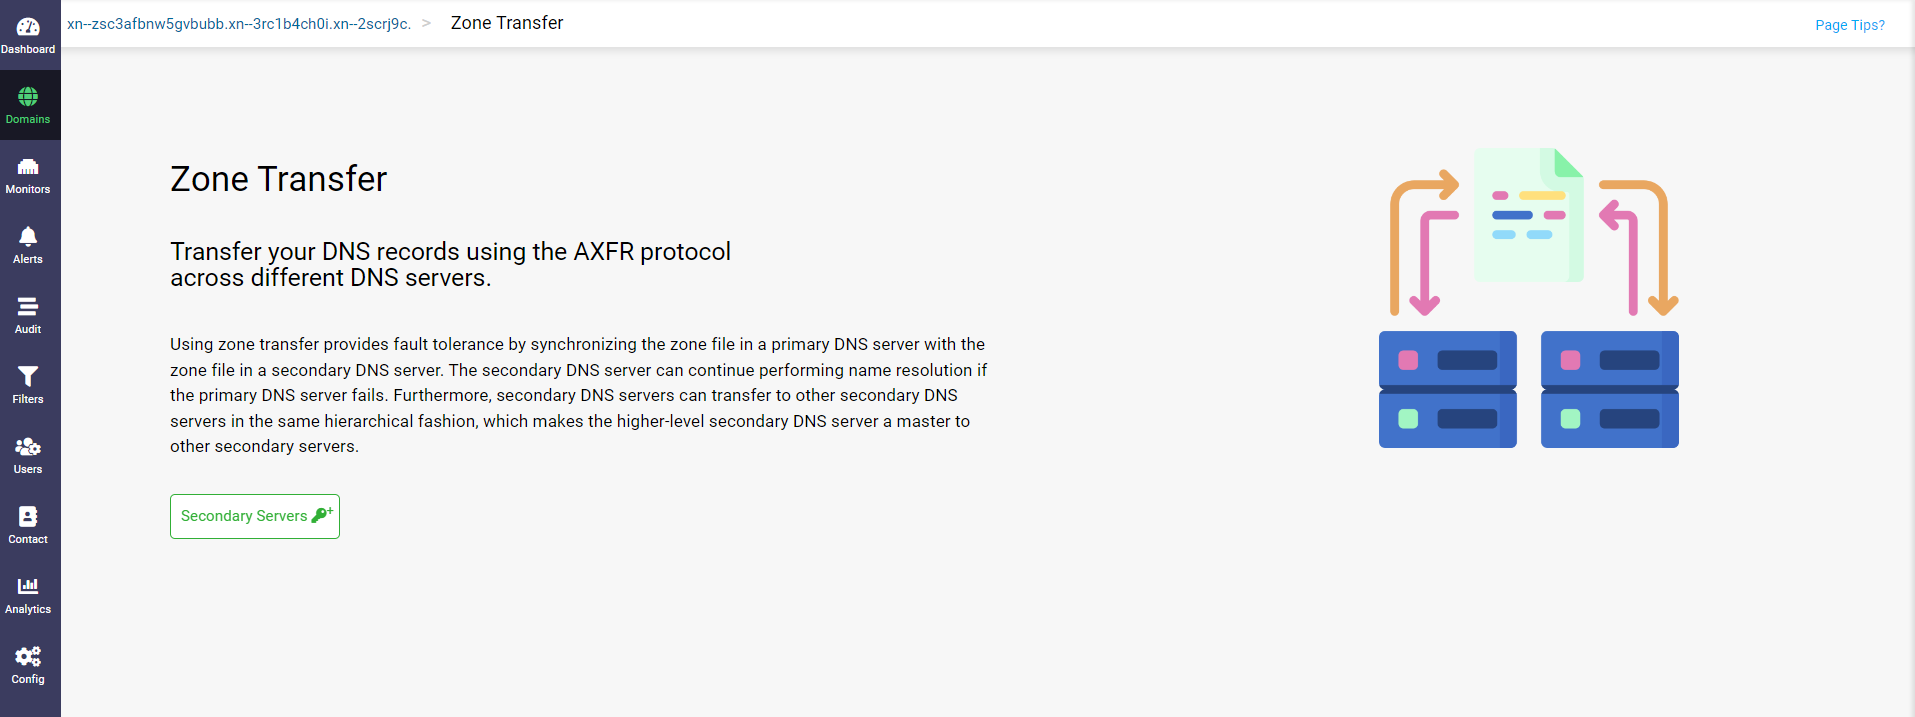
The Zone Transfers page displays requesting you to add the secondary servers hosting the secondary zones to which the current zone acts as the primary zone.
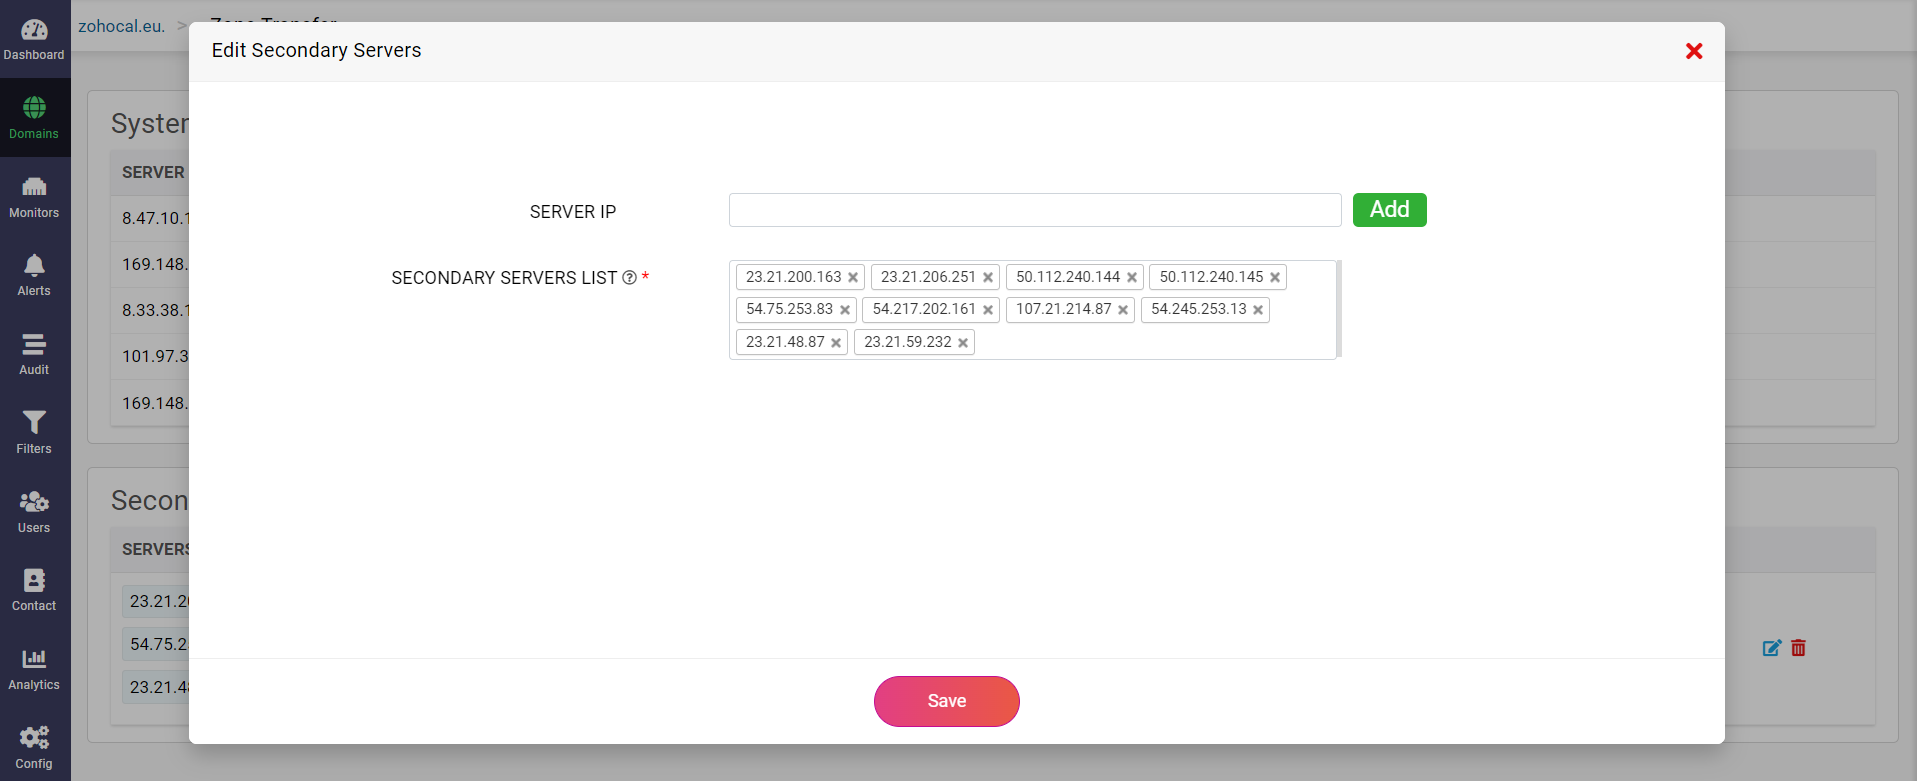
Clicking on the Secondary Servers button displays the Add Secondary Servers dialog box.
Enabling or bypassing Transaction Signature Key authentication
In the Add Secondary Servers dialog box:
You can enable or bypass the transaction signature key authentication for zone transfer operations by enabling or disabling the Enable TSIG option. If Enable TSIG is disabled, you can select the Server IP Group(s) of your choice from the IP GROUP drop-down list that features the list of Server IP Groups created under the organization or key in any additional specific IP address secondary servers directly in the Server IP text box and click Add after each entry. More on Server IP Groups here.
Once the list of secondary servers is updated, just click the Save button to save the zone transfer configuration, as shown below:
When you enable TSIG authentication, you can either create a TSIG key on your own just by entering the details of the key and generating the secret key at that very instant or update the TSIG key from other providers. The TSIG key created or updated manually will be stored as an active template under the TSIG Key Templates tab on the Config page.
However, you can accomplish all the above steps in a single step by just linking any active key template to the domain, saved under the TSIG Key Templates tab on the Config page.
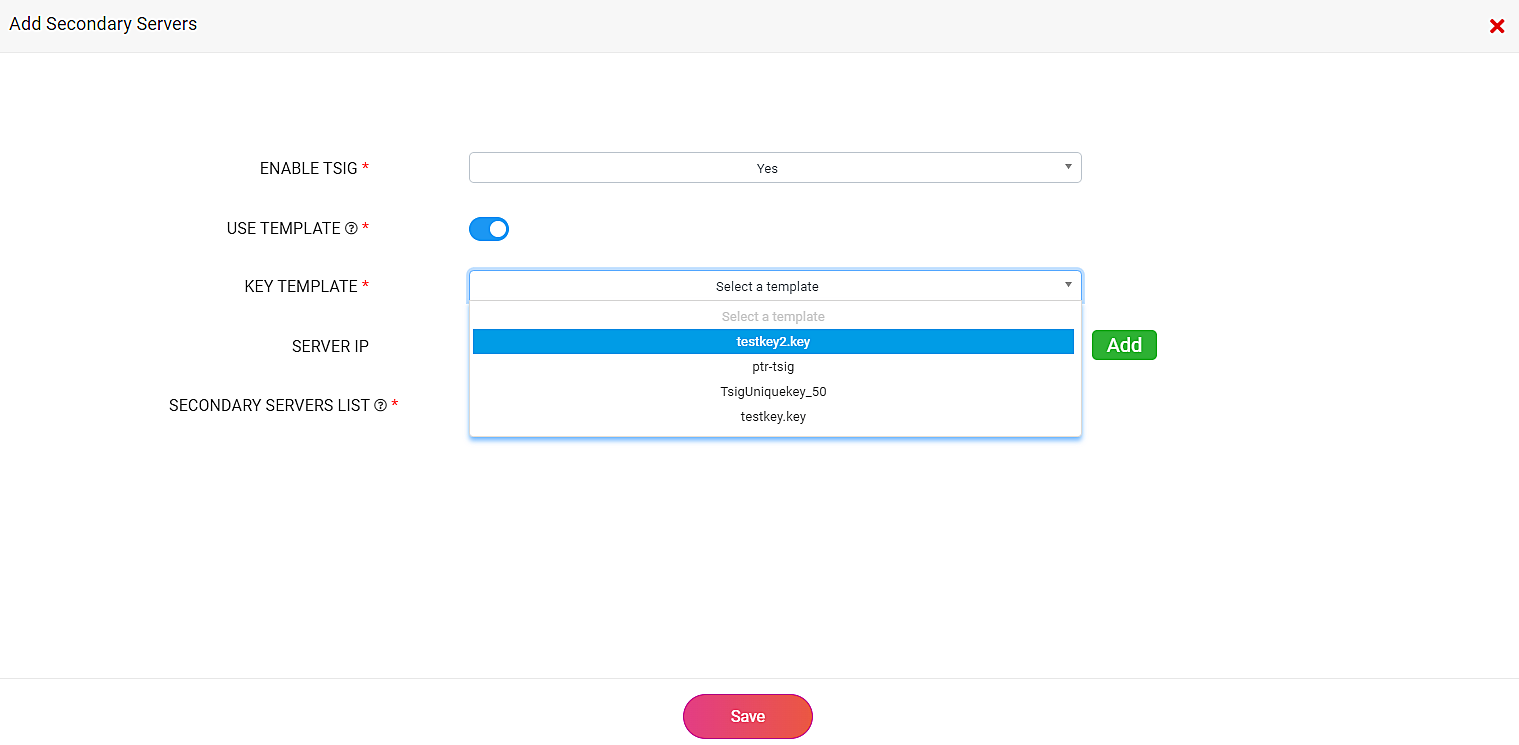
Using Key Templates
Enabling the Use Template toggle prompts you to select the template you wish to associate with the domain via the Select Template option.
The Key Templates are saved under the TSIG Key Templates tab on the Config page with the following fields as shown below:
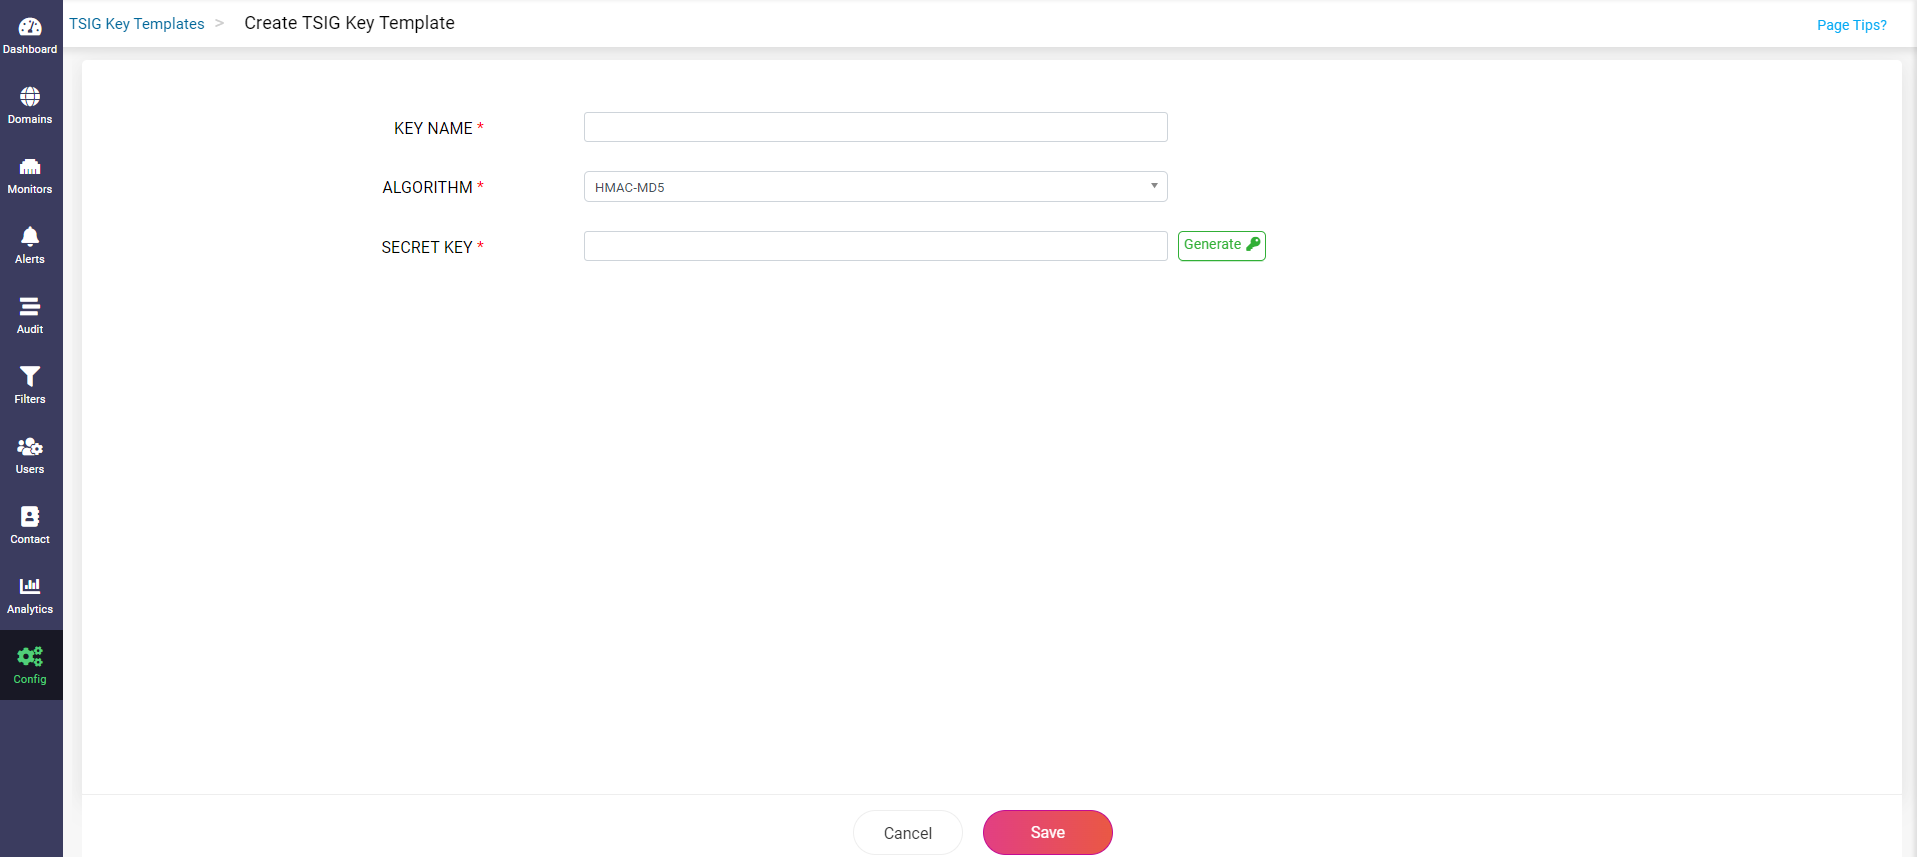
Key Name
The Key Name is mainly used to identify the key across the primary and secondary name servers. Ensure a unique name is assigned to the key.
Algorithm
TSIG Algorithm serves essentially as a cryptographic hash function that executes HMAC operations to generate the TSIG key value. Currently, CloudDNS supports the following algorithms HMAC MD5, HMAC SHA1, HMAC SHA224, HMAC SHA256, HMAC SHA384, and HMAC SHA512 to generate the TSIG key.
Secret Key
The secret key value is an encoded base64 string with a maximum value of 255 characters that acts as a shared signature to provide transaction-level authentication for the name servers during zone transfer operations.
In case, you would like to create a secret key on your own, just disable the Use Template toggle and manually enter the Key Name and other essential attributes as shown below:
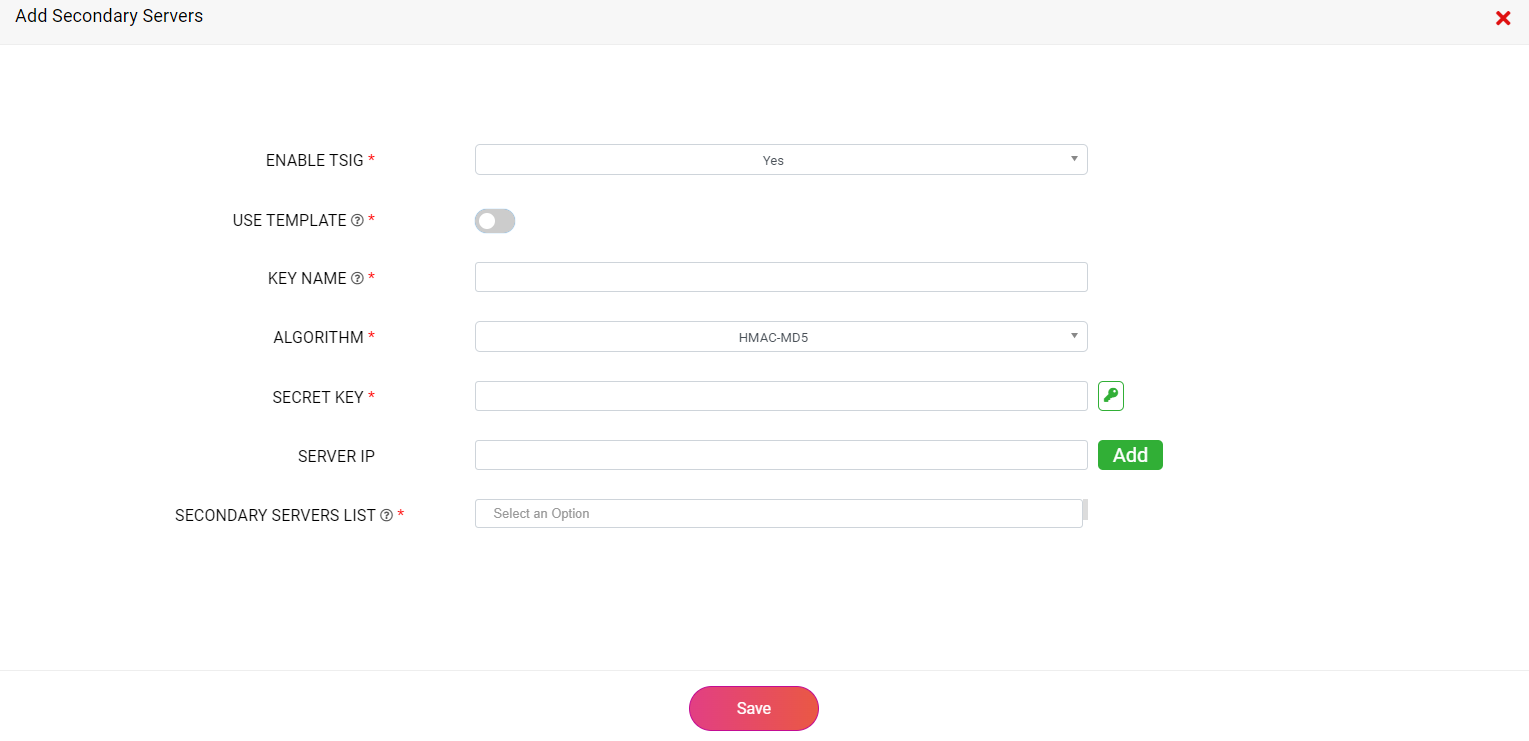
You can generate a fresh encoded value for the Secret Key by entering a Key Name, selecting one of the CloudDNS's cryptographic Algorithms, and clicking on the small button with a green key icon, next to the empty text box of the Secret Key field. This will automatically fill the empty text box with the encoded secret key value.
As an alternative, you can also copy and update the secret key generated by the associated secondary name server network in the field next to the Secret Key label.
Such user-generated secret keys with manually entered key details will be saved as new active templates with the given unique Key Name under TSIG Key Templates on the Config Page and can be associated with any of your domains for later use.
If you'd like to edit a key, you can only edit the details directly via the active templates stored under TSIG Key Templates tab on the Config page and not directly from the Zone Transfers page.
Once you are done bypassing or configuring a TSIG key authentication to your domain, all you got to do is enter the list of secondary server IPs and click the Save button.
The first server in the list is given the highest priority and the last server in the list is given the least priority.
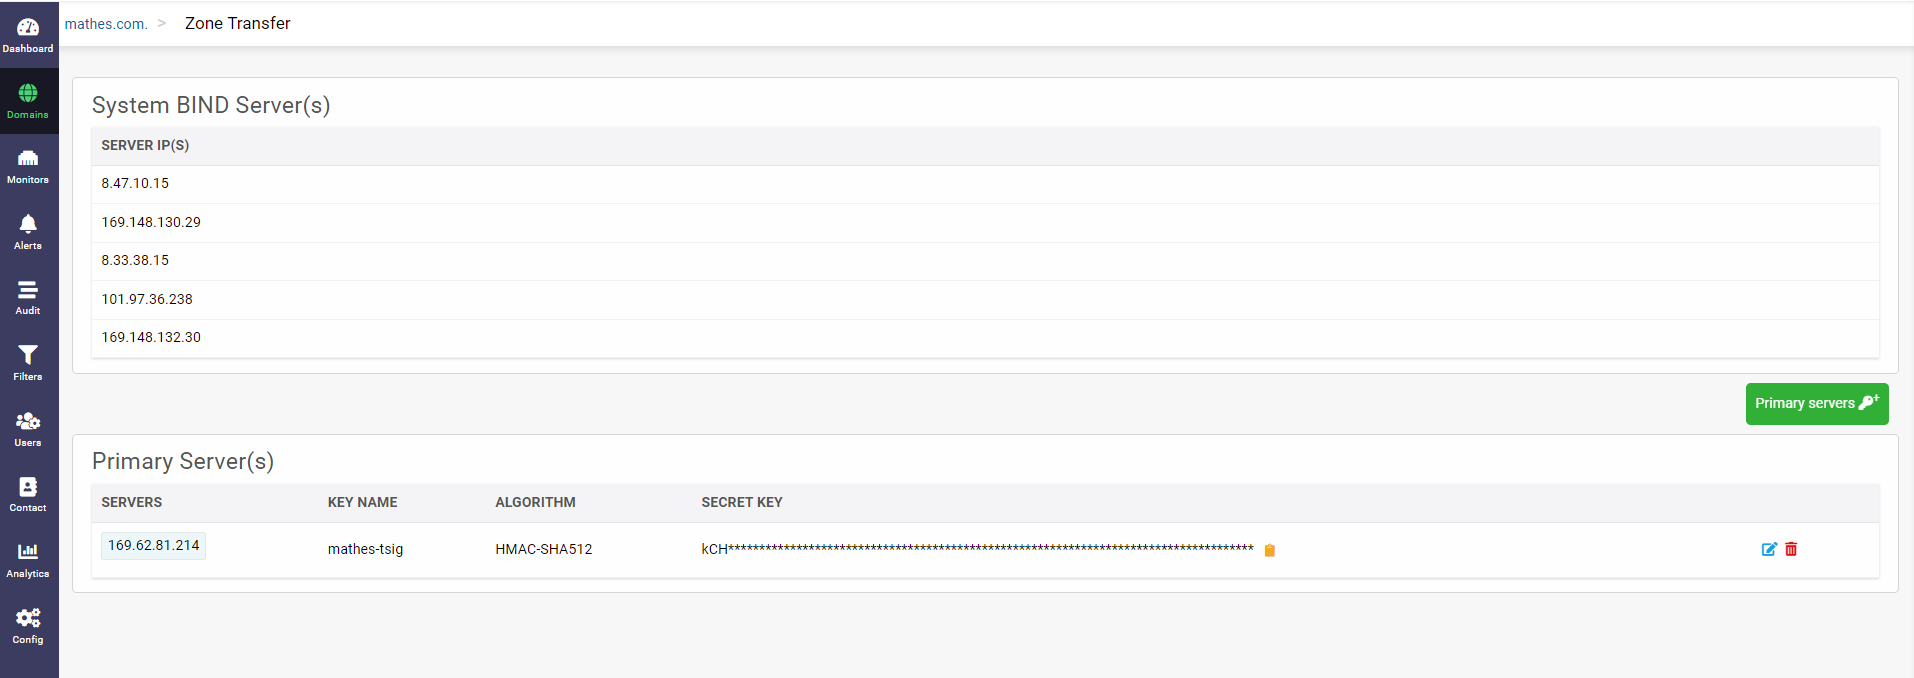
Now, you can view the list of secondary servers associated with a primary zone along with the TSIG authentication details, if enabled, displaying the unique Key Name, Algorithm, and a base64 encoded Key Value as shown below:
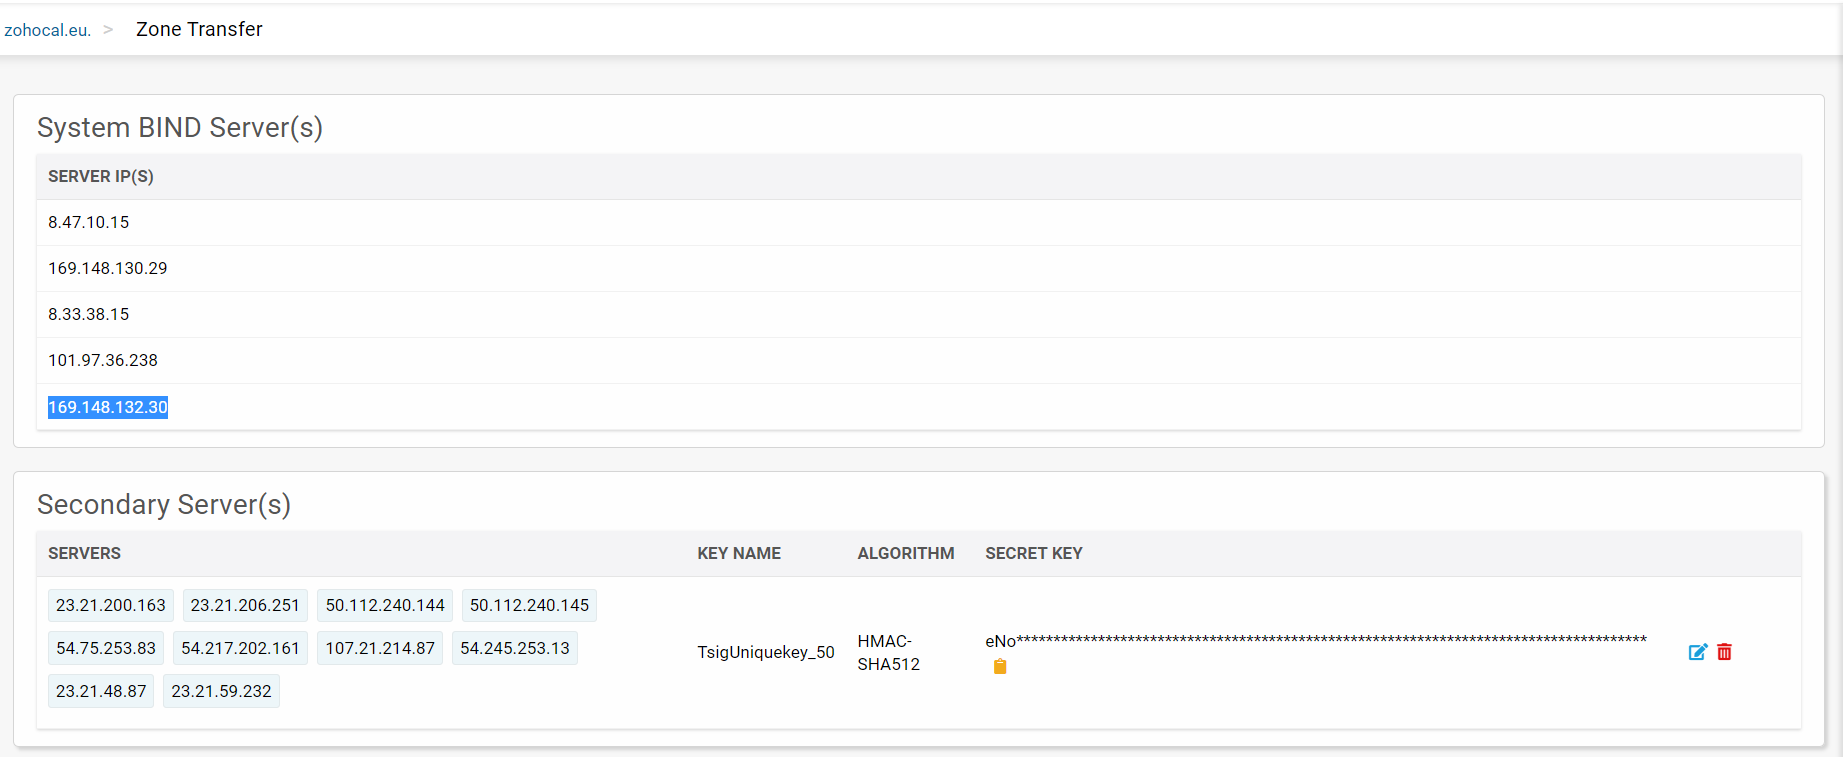
Also, CloudDNS displays the list of System BIND Servers on the top defining the network through which the primaries in CloudDNS carry out the Zone transfer transactions with the secondary name servers hosted by other DNS providers. The secondary servers receive responses and zone data transfers only from networks that the primary zone is published on.
Click on the tiny yellow Copy Secret Key button at the end of the key value to copy the encoded string to your clipboard. Click on the small blue edit button in the Secondary Servers section to access the Edit Secondary Server(s) which helps you add new or edit the secondary servers list as per your requirements.
After completing the configurations in the primary zone, configure your secondary servers to utilize CloudDNS name servers as the primary server.
Configuring ManageEngine CloudDNS as a secondary DNS provider
Configuring ManageEngine CloudDNS as a secondary DNS provider makes it responsible for initiating zone transfers by frequently polling primary servers for updates. CloudDNS enables you to create one or more secondary zones for the primary zone hosted with a different provider.
The secondary zone keeps frequently polling with SOA(Start Of Authority) queries to the servers hosting primary zones. These frequent polling intervals are based on the SOA Refresh TTL value configured in the SOA record. The SOA record possesses a serial number that is incrementally increased with each change made to the zone file. At the time of polling, if the secondary zone detects a larger SOA serial number on the primary server than the one it possesses, it initiates authoritative zone transfer with an AXFR query requesting the new zone data.
During the AXFR zone transfer, the secondary zone receives a read-only copy of the primary zone hosted on a different DNS provider, which restricts you from adding or editing the DNS records or responses of a secondary zone within the CloudDNS platform.
Create a secondary zone in CloudDNS platform.
Inside the secondary zone of your choice, click on Zone Transfers button in the top right corner of the page to enable incoming transfers to that particular zone.
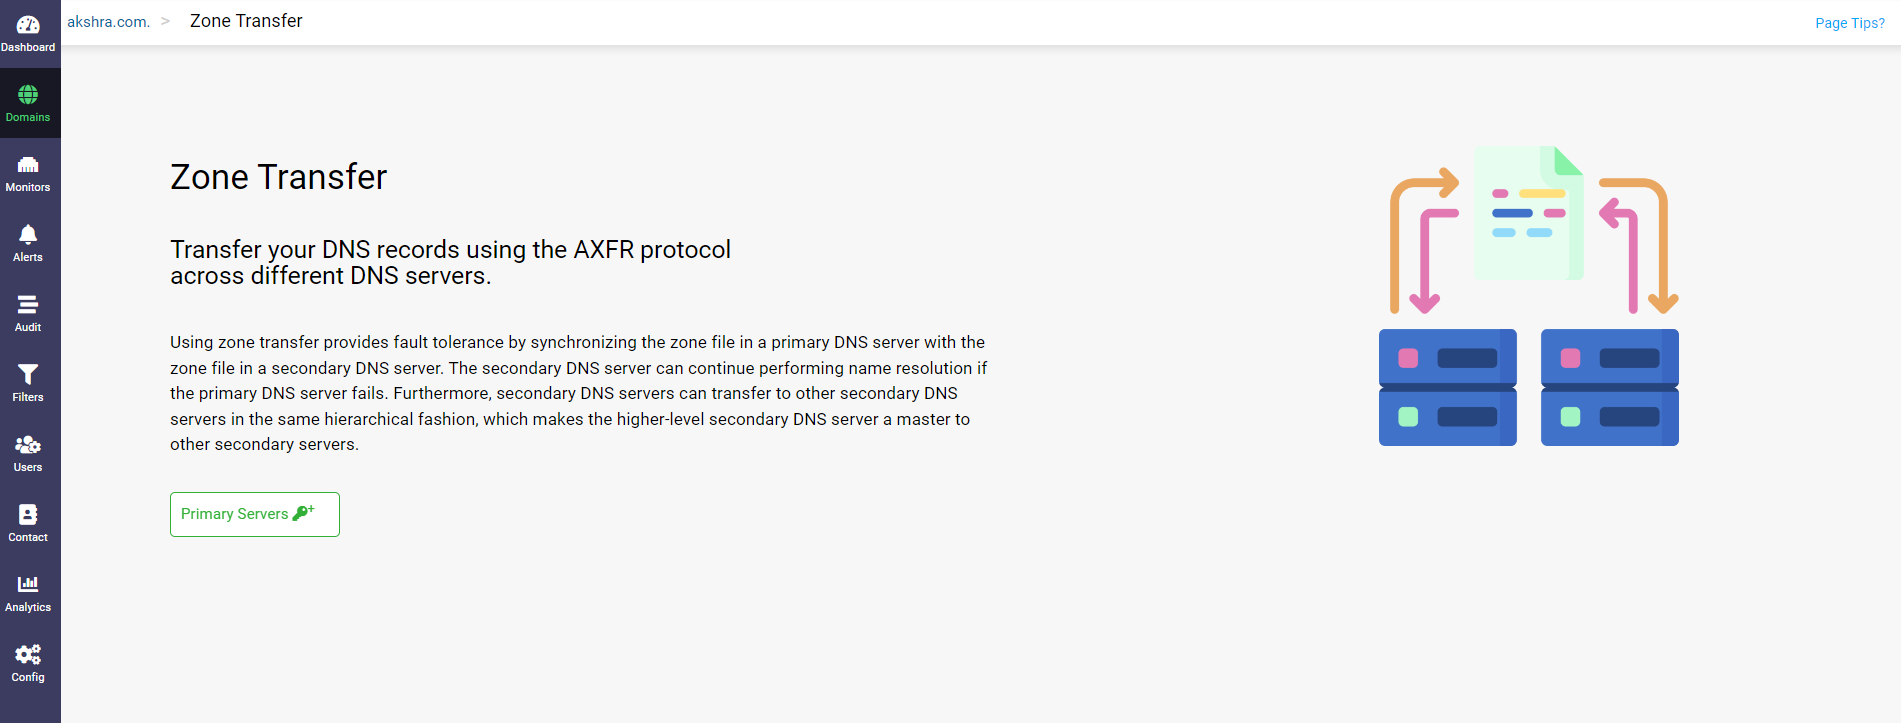
The Zone Transfers page displays with the Primary Servers button, requesting you to add the primary servers hosting the primary zones to which the current zone acts as the secondary zone.
Clicking on the Primary Servers button, displays the Add Primary Servers dialog box.
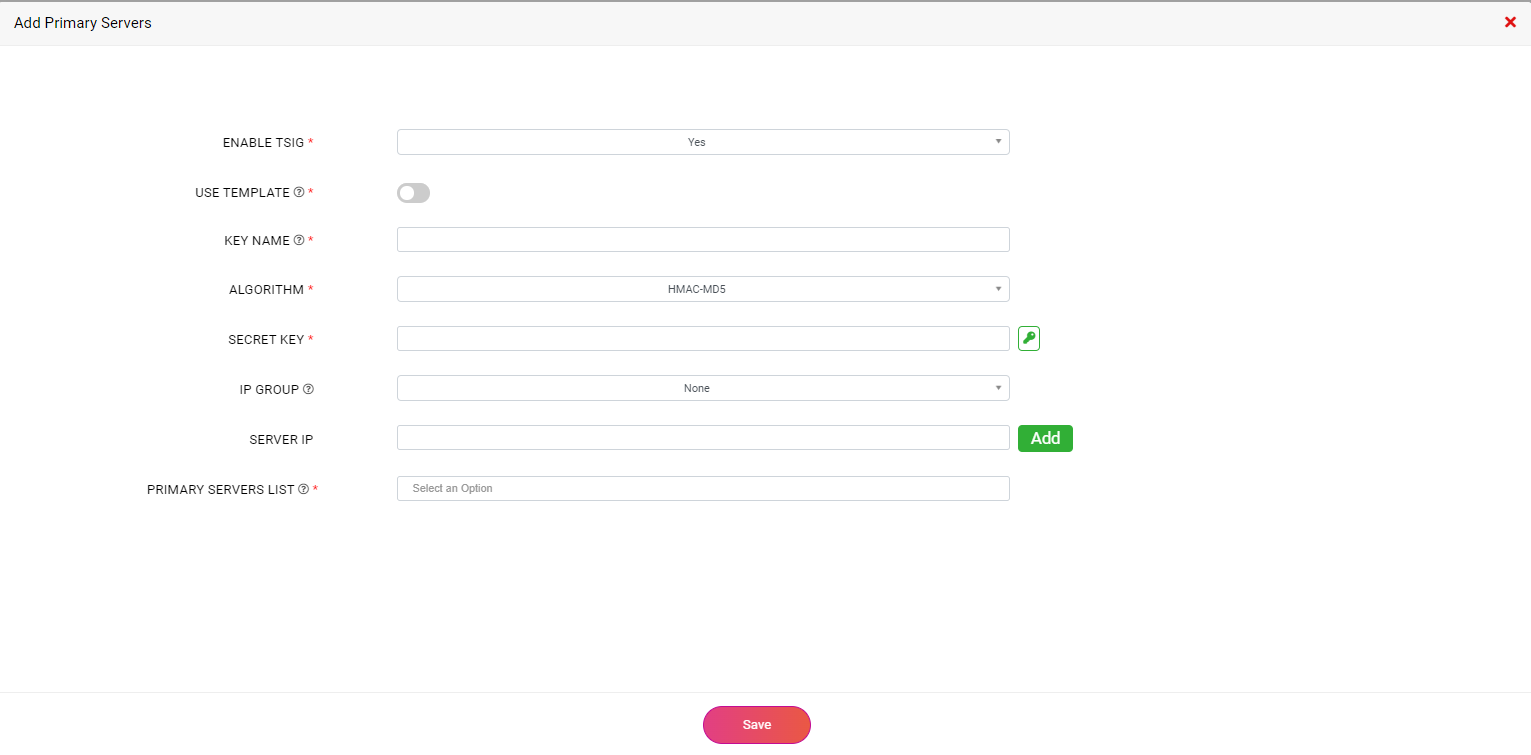
In the Add Primary Servers dialog box:
For enabling or bypassing TSIG authentication follow the same procedure for the secondary servers as mentioned above.
Once you are done bypassing or configuring a TSIG key authentication to your domain, all you got to do is enter the list of primary server IPs by selecting the required Server IP Group(s) and click the Save button. More on Server IP Group(s) here.
Specify a list of additional primary IPs which will be utilized by CloudDNS to effectively load-balance AXFR queries among all primary servers or if an AXFR query fails, CloudDNS will steer towards querying one of the other primary servers.
The first server in the list is given the highest priority and the last server in the list is given the least priority.
Now, you can view the list of primary servers associated with a secondary zone along with the TSIG authentication details with the Key Name, Algorithm, and a base64 encoded Key Value as below:
Click on the tiny yellow Copy Secret Key button at the end of the key value to copy the encoded string to your clipboard. Click on the small blue edit button in the Primary Server(s) section to access the Edit Primary Server(s) which helps you add new or edit the Primary servers list as per your requirements.
After completing the configurations in the secondary zone in CloudDNS, configure your primary DNS server with another DNS provider to allow AXFR queries from ManageEngine CloudDNS servers. For this, in the primary server, you must configure the CloudDNS Secondary network from which the SOA/AXFR queries will originate. The network that is configured in the primary server must match the one on which the secondary zone is published.
In the Zone Transfers page, CloudDNS displays the list of System BIND Servers on the top defining the network through which the secondary name servers in CloudDNS carry out the zone transfer transactions with the primaries hosted with other DNS providers.
 Reach out to support@meclouddns.com for any product-related queries.