How to install existing PFX Certificate?
Summary
This article will guide you through the process of applying a multi-domain or wildcard certificate (PFX) in ADSelfService Plus.
Configuration steps
Step 1: Enable HTTPS in ADSelfService Plus
- Log in to ADSelfService Plus with admin credentials.
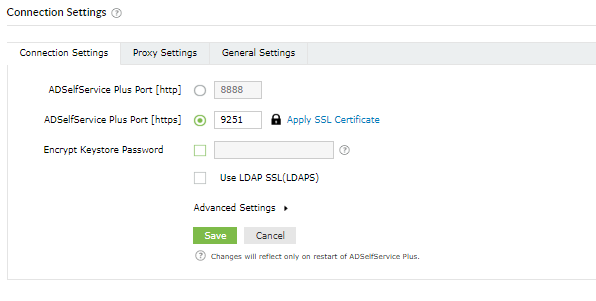
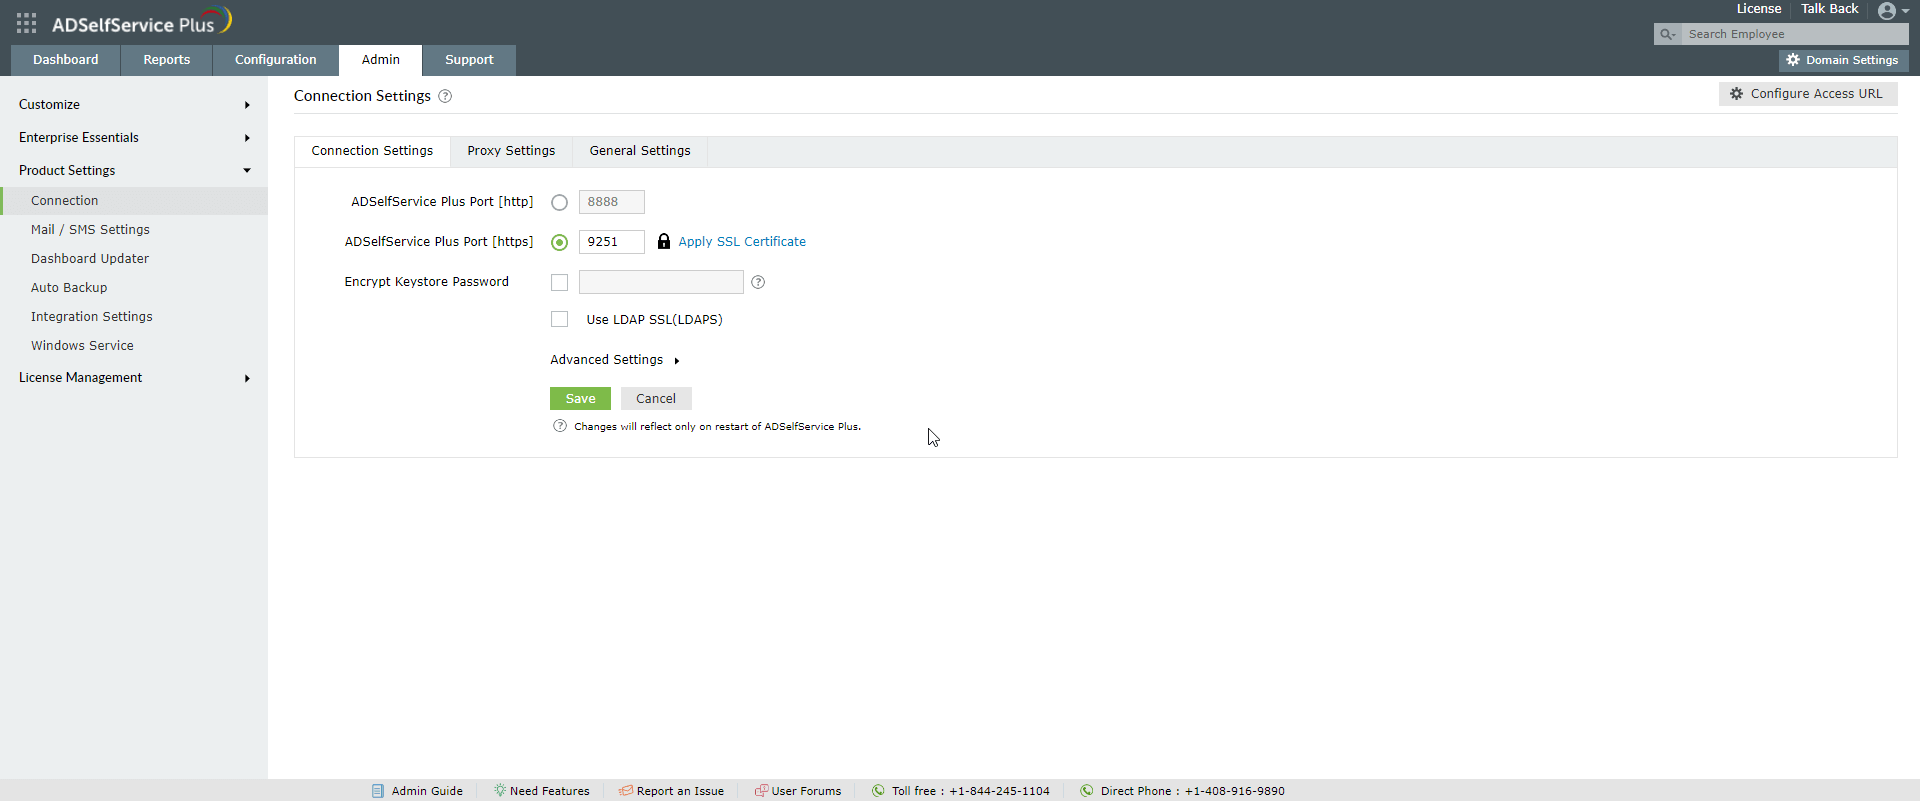
- Navigate to Admin → Product Settings → Connection.
- Check the Enable SSL Port [https] box.
- Click Save.
Step 2: Generate CSR

Note: If you already have an SSL certificate, skip to Step 4.
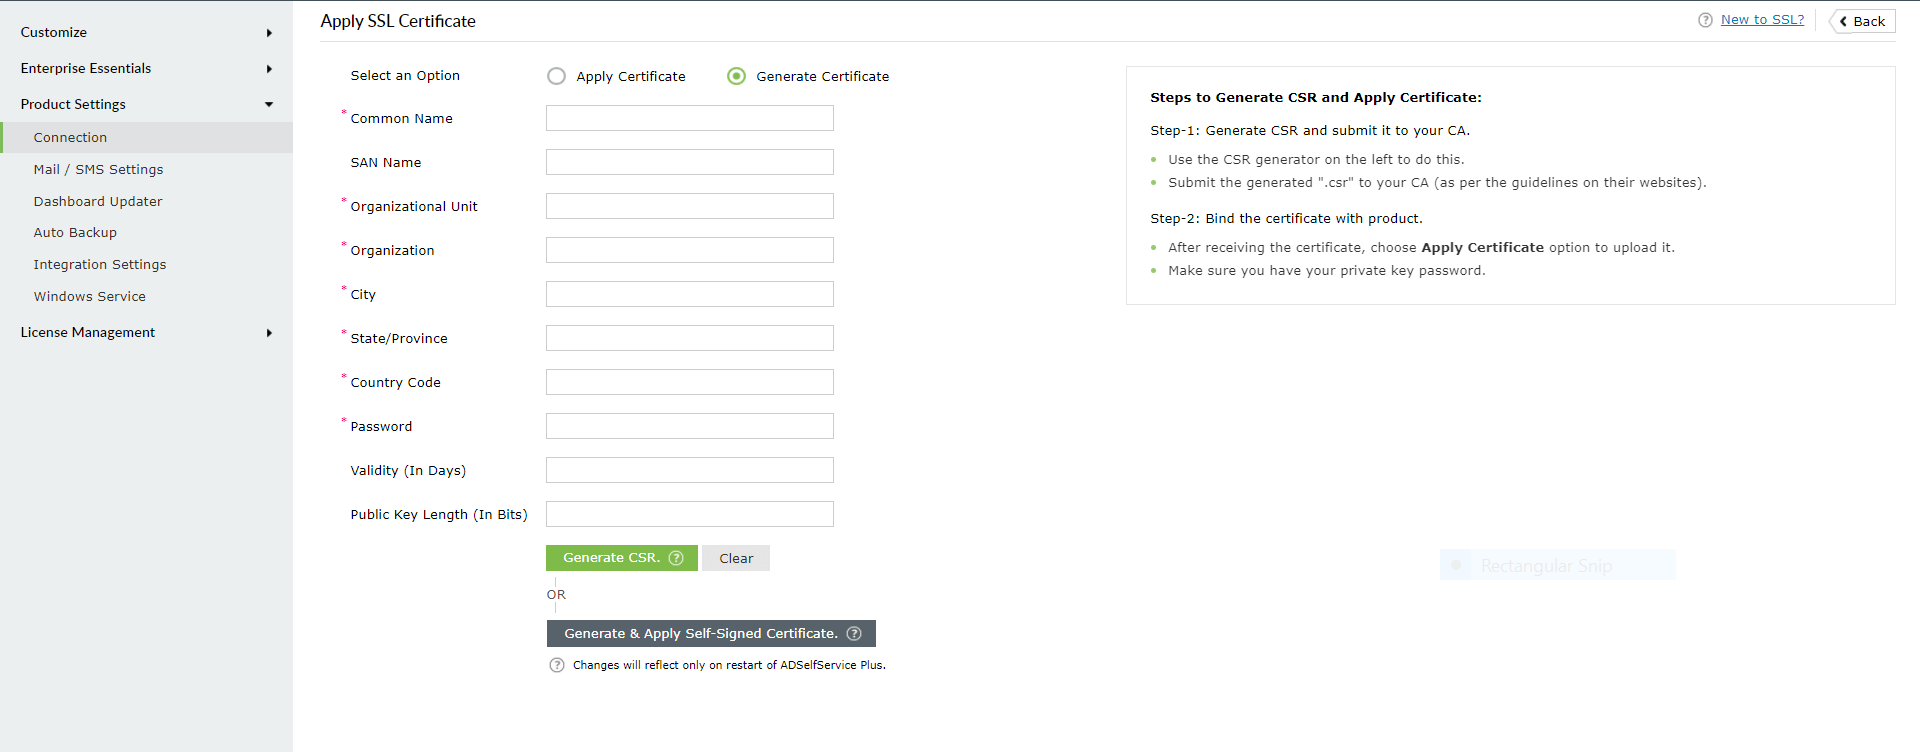
1. Click the SSL Certification Tool button.

2. Click Generate Certificate and fill in all the necessary fields. Refer to the table below:
| Common name | The name of the server in which ADSelfService Plus is running. |
| SAN Name | The names of the additional hosts (sites, IP addresses, etc.) to be protected by the SSL certificate. |
| Organizational Unit | The department name that you want to appear in the certificate. |
| Organization | The legal name of your organization. |
| City | The city name as provided in your organization’s registered address. |
| State/Province | The state/province as provided in your organization’s registered address. |
| Country Code | The two-letter code of the country in which your organization is located. |
Password | A password must be at least six characters. The more complex the password, the better the security. |
Validity (In days) | The number of days the certificate should be valid. If no value is provided, it will be set to 90 days. |
Public Key Length (In bits) | The public key length. The larger the size, the stronger the key. The default size is 1024 bits and can be incremented only in multiples of 64. |
 3. Once you’ve entered all the details, click the Generate CSR button.
Step 3: Submit the generated CSR file to your Certification Authority
- When you click the Generate CSR button, two files—SelfService.csr and SelfService.keystore—will be generated.
- You can locate the SelfService.csr file in <Installation_directory>\webapps\adssp\certificates folder and the SelfService.keystore file in <Installation_directory>\jre\bin folder.
- Submit the SelfService.csr file to your Certification Authority (CA).
Step 4: Bind the CA-signed certificates with ADSelfService Plus
Option 1: Using the admin portal
- Go back to Admin → Product Settings → Connection.
- Click SSL Certification Tool at the next to HTTPS
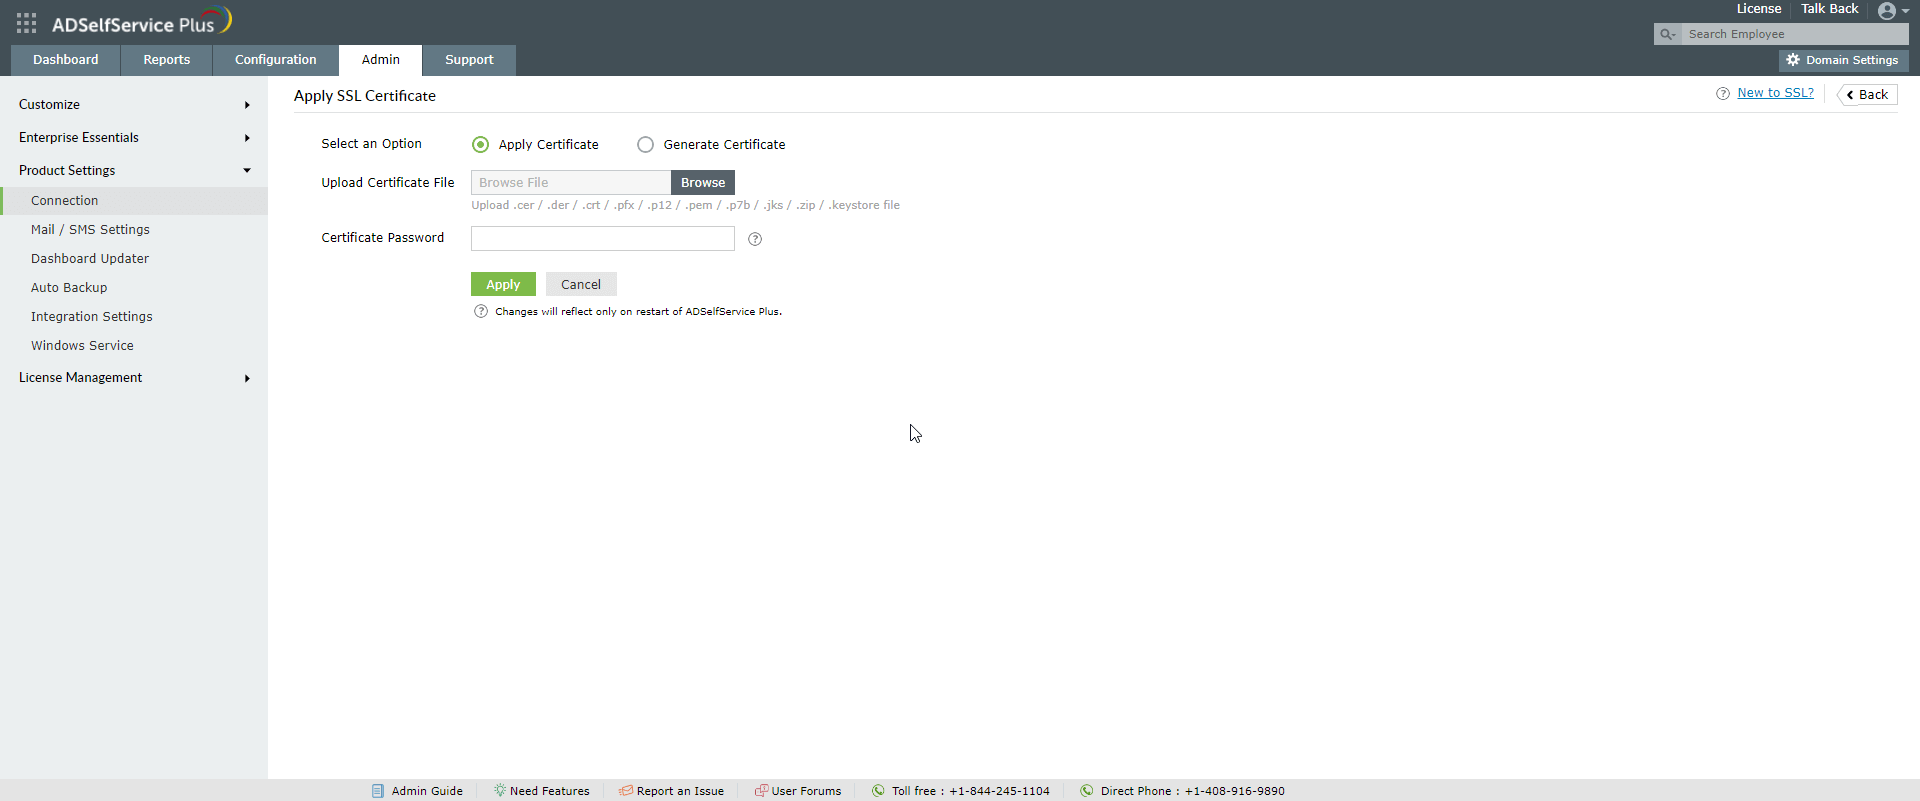
- Select Apply Certificate.
- Click Browse to upload the certificate.
- In Certificate Password field, enter the password of the uploaded certificate.
- Click Apply.

Option 2: Manual
- Back up the server.keystore, SelfService.p12, server.xml, and web.xml files located at <Installation_Directory>\conf folder (Default location: C:\ManageEngine\ADSelfService Plus\conf).
- Copy the certificate file, say cert.pfx, and paste it under the <Installation_directory>\conf folder (Default location: C:\ManageEngine\ ADSelfService Plus\ conf).
- Open the server.xml file, located in the <Installation_directory>\conf folder, in a text editor. Scroll down to the end of the file where you’ll find a connector tag as shown below:

<Connector SSLEnabled="true" ……
/>
/>
4. Modify the following properties:
i. Replace the value of keystoreFile with ./conf/cert.pfx
ii. Replace the value of keystorePass with the password of your PFX certificate.
For example:

<Connector SSLEnabled="true" acceptCount="100" clientAuth="false" connectionTimeout="20000" debug="0" disableUploadTimeout="true" enableLookups="false" keystoreFile="./conf/cert.pfx" keystorePass="********" keystoreType="PKCS12" maxSpareThreads="75" maxThreads="150" minSpareThreads="25" name="SSL" port="9251" scheme="https" secure="true" sslEnabledProtocols="TLSv1,TLSv1.1,TLSv1.2" sslProtocol="TLS"/>
5. Restart ADSelfService Plus, and check if the certificates are installed correctly.

Note: The Endpoint MFA feature will be accessible after installing the SSL certificates only if the Protocol option has been set to HTTPS under Configure Access URL (Admin > Customize > Product Settings > Connection > Connection Settings > Configure Access URL).
New to ADSelfService Plus?
Related Articles
How to install P7B certificate in ADSelfService Plus?
Summary This article will guide you through the process of applying a single-domain certificate (CER, CRT, P7B, etc.) in ADSelfService Plus. Configuration steps Step 1: Enable HTTPS in ADSelfService Plus Log in to ADSelfService Plus with admin ...How to install self-signed certificates?
Summary This article will guide you through the process of applying a self-signed (Internal CA) SSL certificate in ADSelfService Plus. Configuration steps Step 1: Enable HTTPS in ADSelfService Plus Log in to ADSelfService Plus with admin credentials. ...Multi-factor authentication techniques in ADSelfService Plus
Let's take a look into the various authentication methods supported by ADSelfService Plus for enterprise multi-factor authentication (MFA). Why should you use MFA? Authentication based solely on usernames and passwords is no longer considered secure. ...Migrating from ADSelfService Plus 32-bit to ADSelfService Plus 64-bit
This article will help you migrate from ADSelfService Plus 32-bit version to the 64-bit version. Before you begin 32-bit to 64-bit migration is possible only between the same builds. For example, you cannot migrate from a 32-bit version of build 5310 ...How to migrate the ADSelfService Plus installation from one machine to another
Description This article will guide you through the process for migrating the ADSelfService Plus installation from one machine to another. Important: Before you start the migration process, please update your ADSelfService Plus installation to the ...
