How to configure high availability in Azure using a load balancer
ManageEngine ADSelfService Plus provides a high availability feature to ensure uninterrupted access to the product even for system and product failures. With high availability, when the ADSelfService Plus service on one machine fails, another instance running on a different machine automatically takes over. Since Microsoft Azure does not inherently support ADSelfService Plus' high availability configuration, we use a load balancer to achieve the desired output.
The following guide helps you to configure high availability in Azure using a load balancer.
Prerequisite
Create two new virtual machines and install ADSelfService Plus in Azure by following this guide or use the pre-installed virtual machine image available in the Azure marketplace. Make sure both the virtual machines installed in Azure are in the same virtual network and in the same region. Designate the primary and secondary machines as per your requirement.
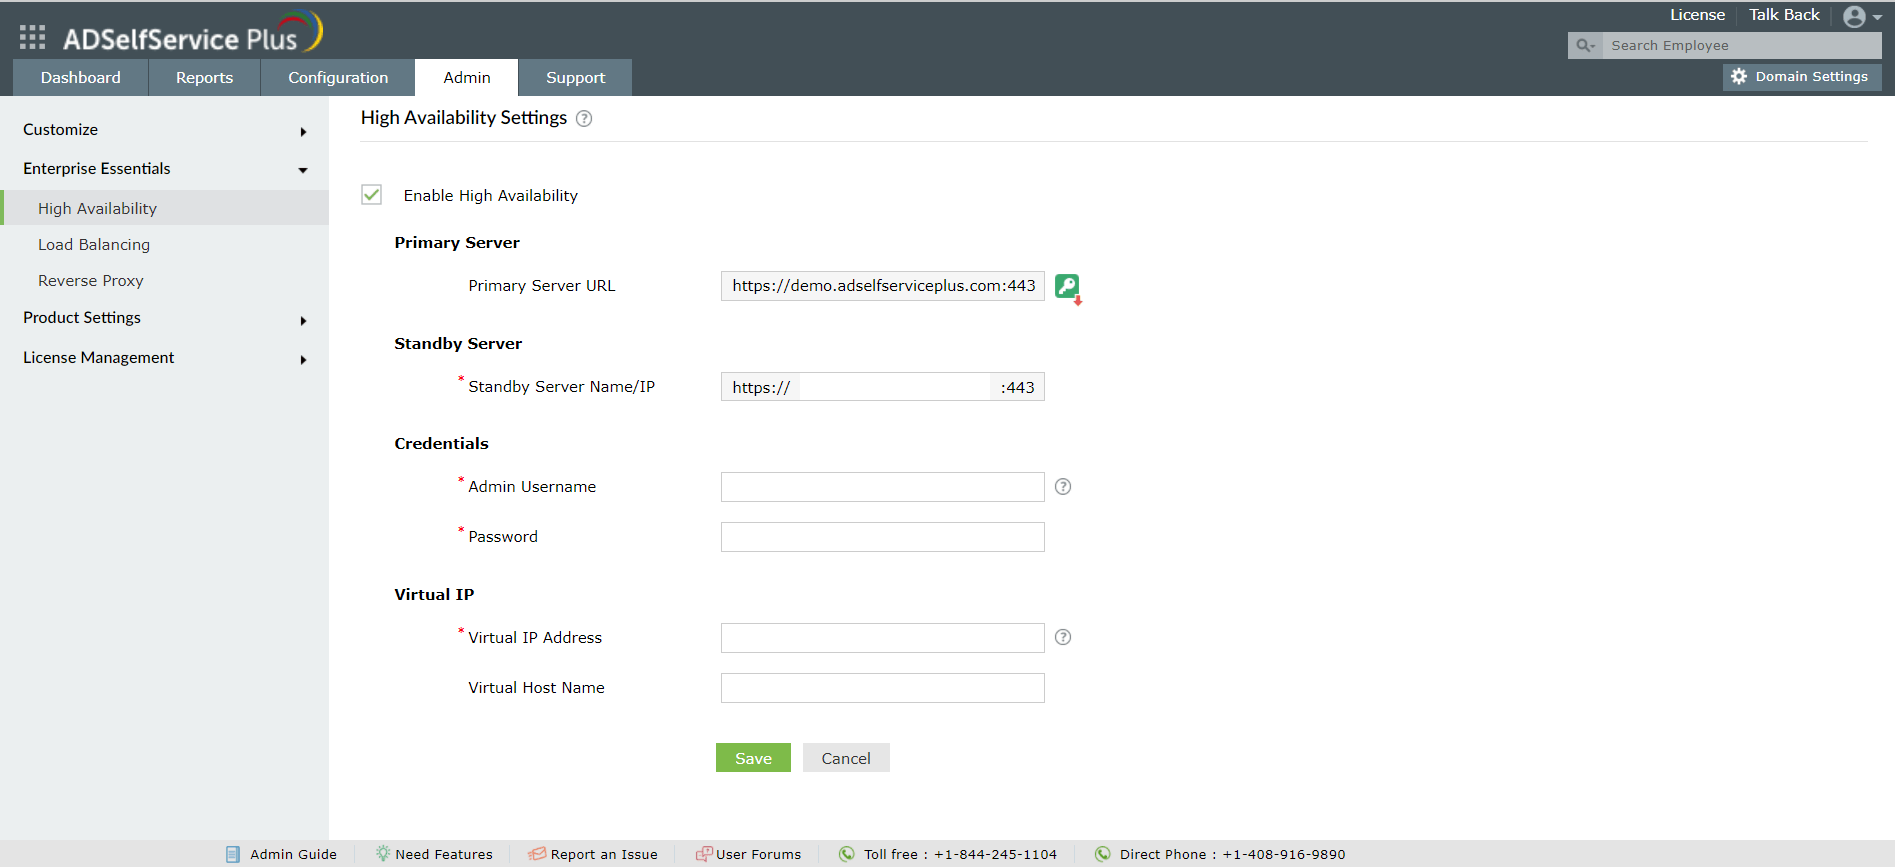
Configuring high availability settings in the ADSelfService Plus portal
1. Log into ADSelfService Plus.
2. Go to Admin → Enterprise Essentials → High Availability.
3. Select Enable High Availability.
4. In the Primary Server section, the URL of the ADSelfService Plus server you are currently accessing (i.e., the primary server) will be auto-filled.
5. In the Standby Server section, enter the URL of the ADSelfService Plus standby server.
6. In the Credentials section enter the Admin Username and the Password of a super admin user in the ADSelfService Plus standby server.

Note: Super admins are users who have been given full control over the entire product.
7. In the Virtual IP section, enter:
i. A temporary IP address that is not used in your Azure environment.
ii. The Virtual Host Name.
Note: A virtual host name is the alias given to the virtual IP.
iii. Click Save.
iv. After successful configuration of high availability, in the fos.conf file (Installation_directory\conf) set the publicIP.enabled property to false and restart both virtual machines.
Creating a load balancer in Azure
- In the search field present at the top of the Azure portal, enter load balancer and select the option Load balancers.
- Click Create.
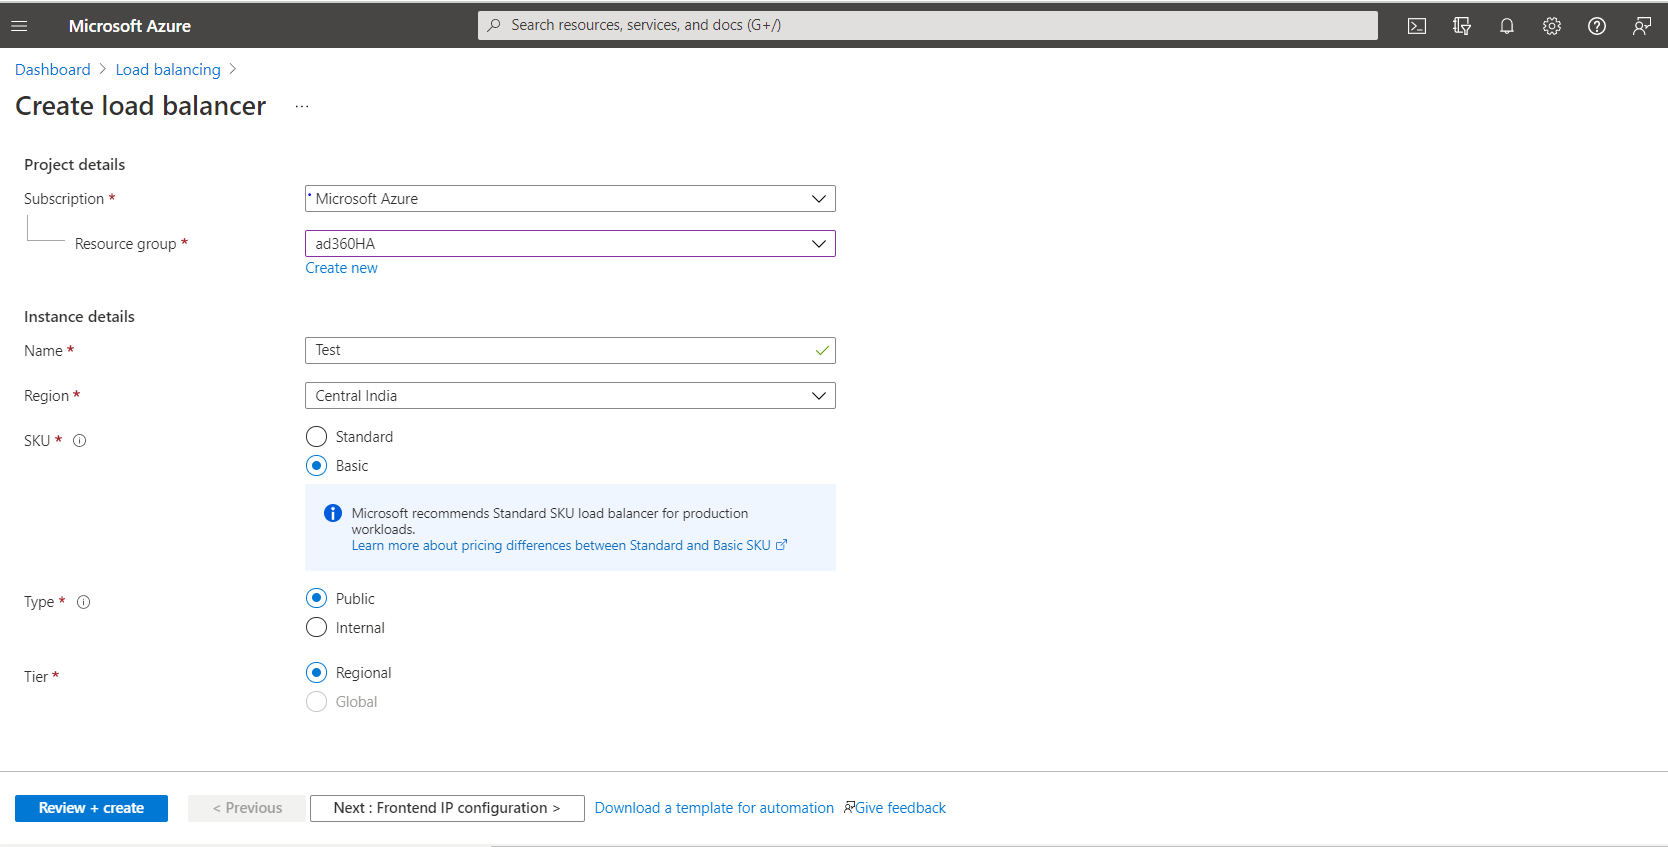
Basic configuration
- In the Basics tab, select the same resource group as that of the virtual machines.
- Enter a name in the Name field. (for example: adssp-lb).
- In the Region field, select the region of the virtual machines.
- For SKU, Type, and Tier, you can choose between the options provided that suit your requirement.
- After the settings on the Basics tab are configured, click Next: Frontend IP configuration that displays at the bottom of the screen.
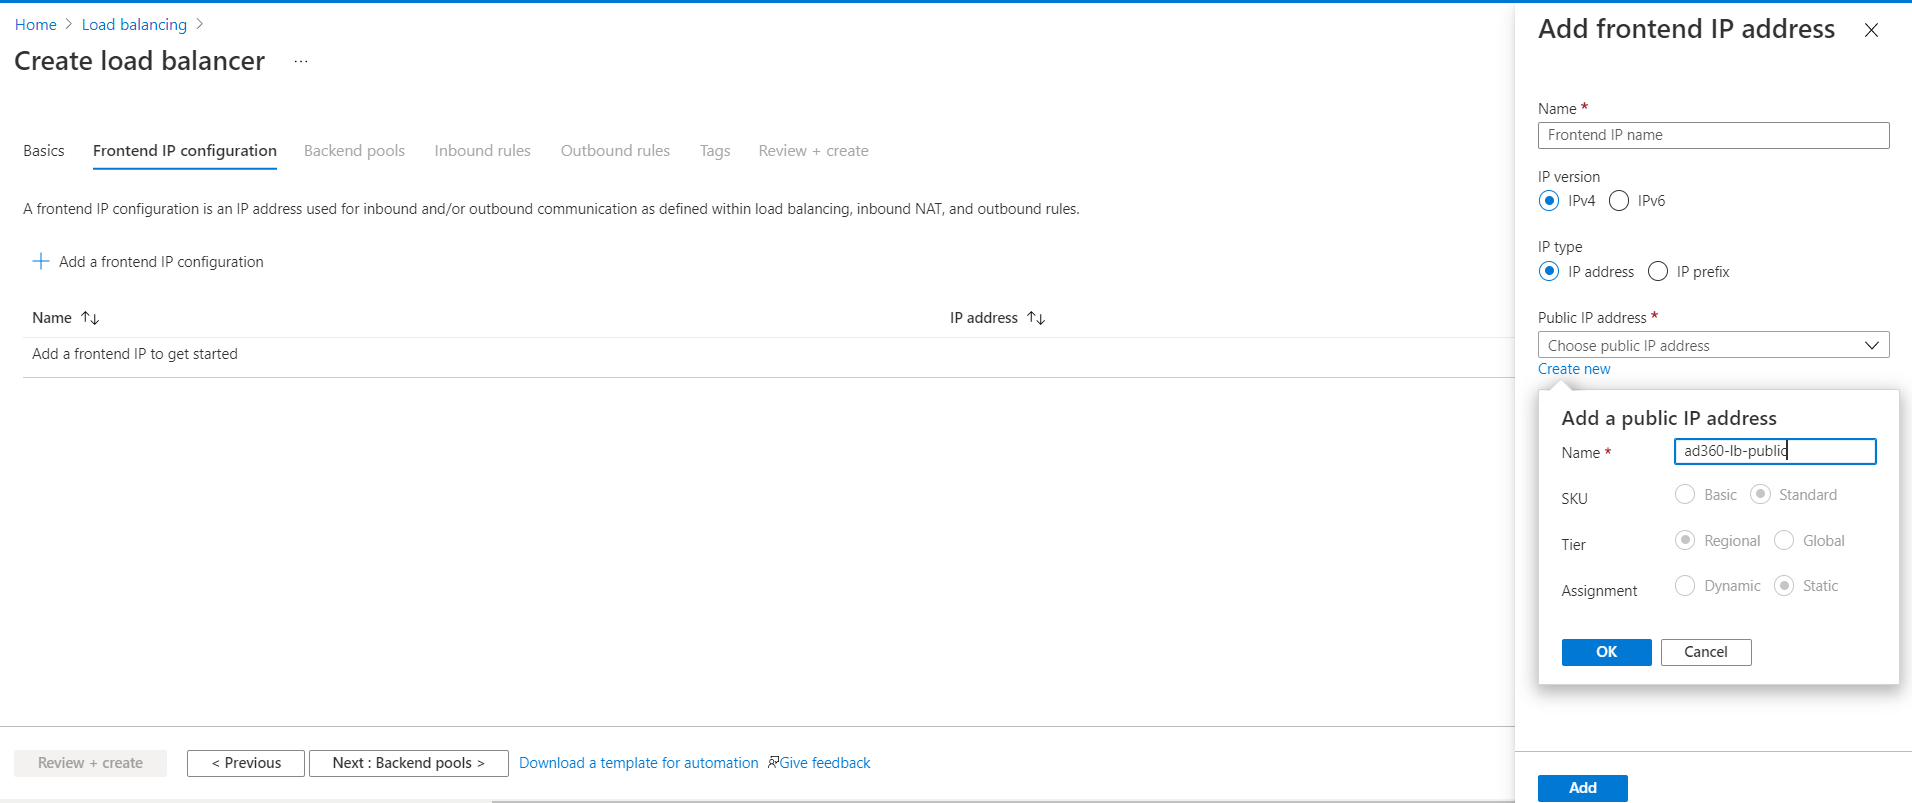
Frontend IP configuration
1. Click Add a frontend IP configuration.
2. In the Add frontend IP address tab, enter a name (for example: adssp-lb-frontend) in the Name field.
Note: The frontend IP configured is the IP address that will be used to access the virtual servers hosting the ADSelfService Plus instance via the load balancer.
3. If you have chosen Public as the Type in step 6 of Basic configuration, you can create a new public IP address by entering a name or select an IP address from the drop-down menu.
4. If Internal was chosen as the Type in step 6 of Basic configuration, select a virtual network (same as that of the virtual machine) and subnet. For Assignment, you can choose either Dynamic or Static as per your preference.
5. Click Next: Backend pools.
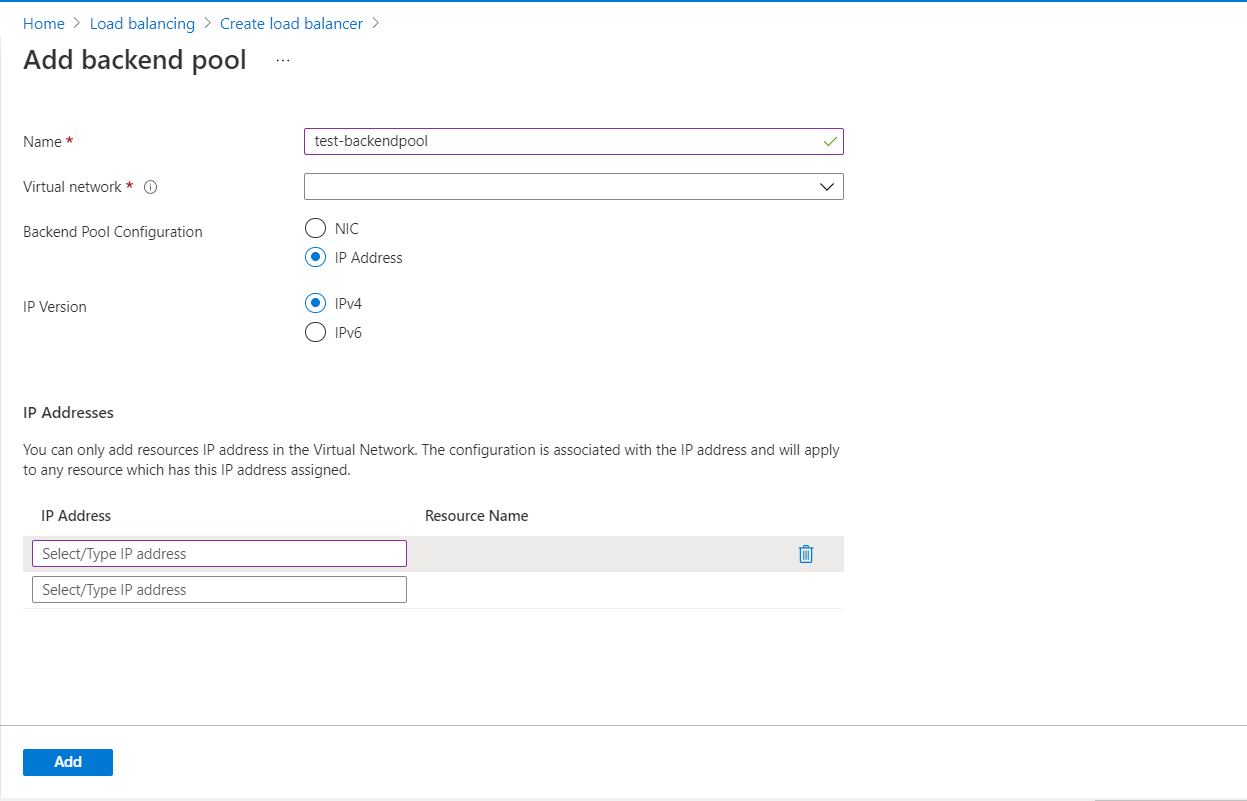
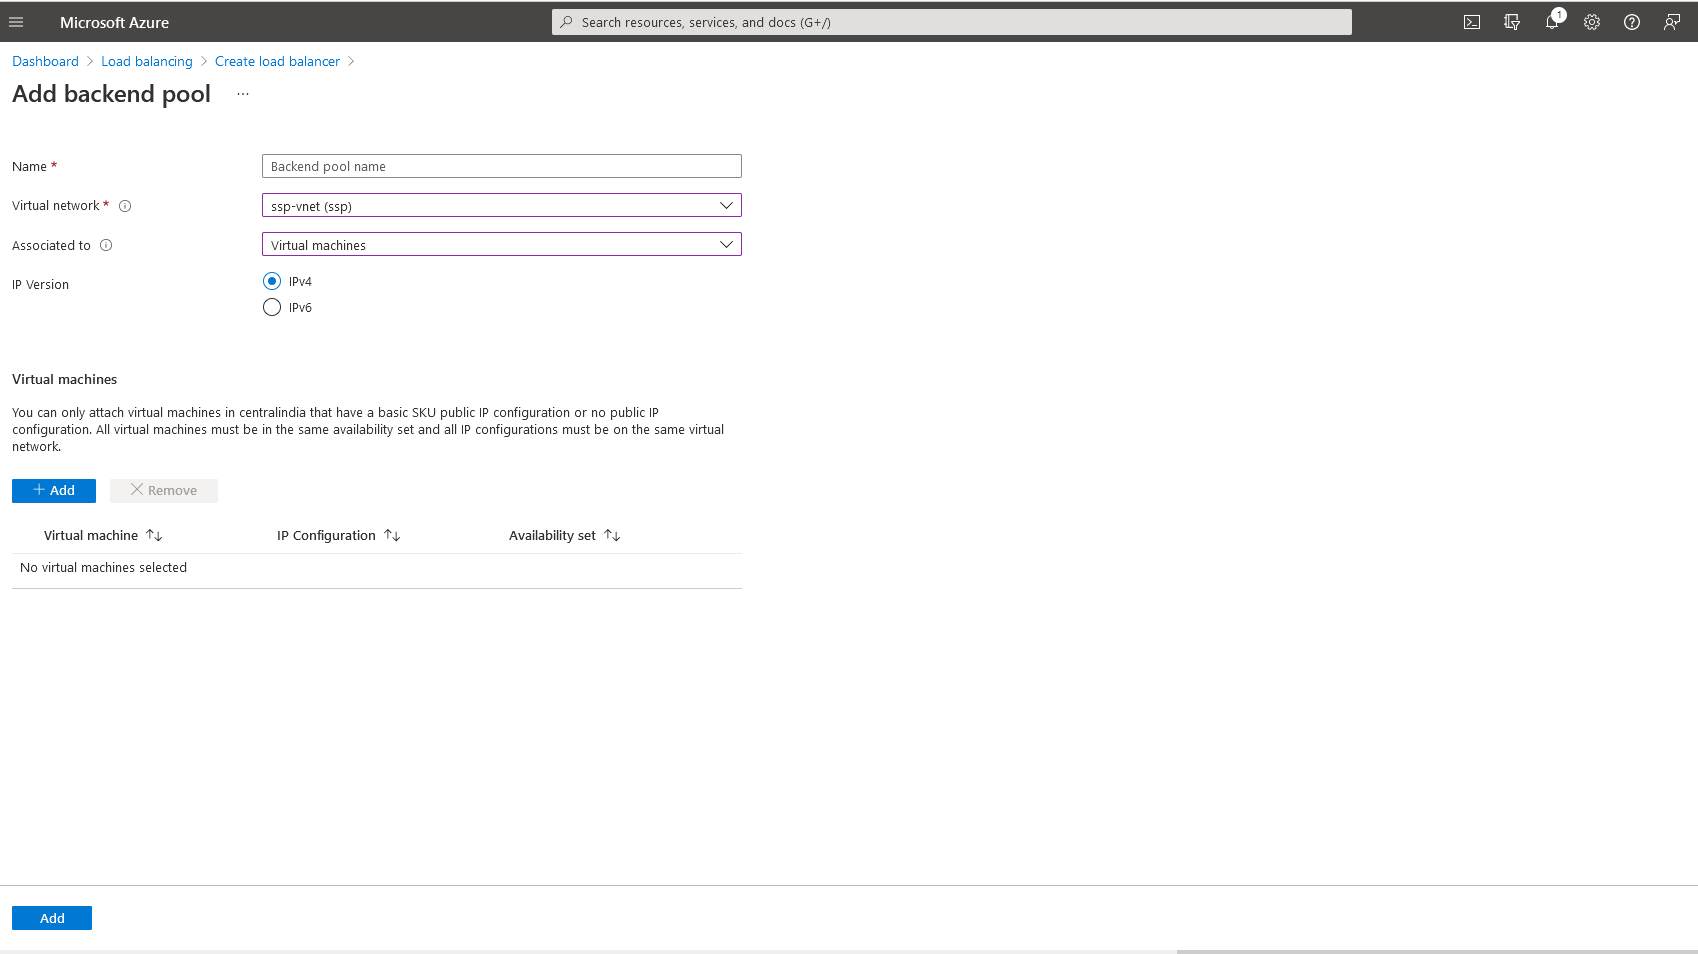
Backend pool configuration
- Click + to add a backend pool.
- In the Name field, enter any name.
- Choose the same virtual network as that of the virtual machines.
- If Standard was the chosen option for SKU in step 6 of Basic configuration,
- Select either the NIC or IP Address radio button for Backend Pool Configuration.
- As per the option you have chosen, you can either select the virtual machines from the list or enter the IP address of the two virtual machines and click Add
. 
5. If the option selected for SKU was Basic in step 6 of Basic configuration,
- For Associated to, choose the option Virtual machines from the drop-down menu.
- Click the + button and select the virtual machines from the list
- Click Add.
Inbound rules configuration
- Click on Add a load balancing rule.
- In the Name field, enter a name (for example: adssp-lb-rule).
- In the Frontend IP address drop-down menu, select the IP address configured earlier.
- Select the backend pool name entered previously from the drop-down menu. (Refer step 14 in the Backend pool configuration.)
- For Protocol, choose TCP.
- In the Port field, enter a port number through which you wish to access the load balancer
- Enter the product port number in the Backend port field.
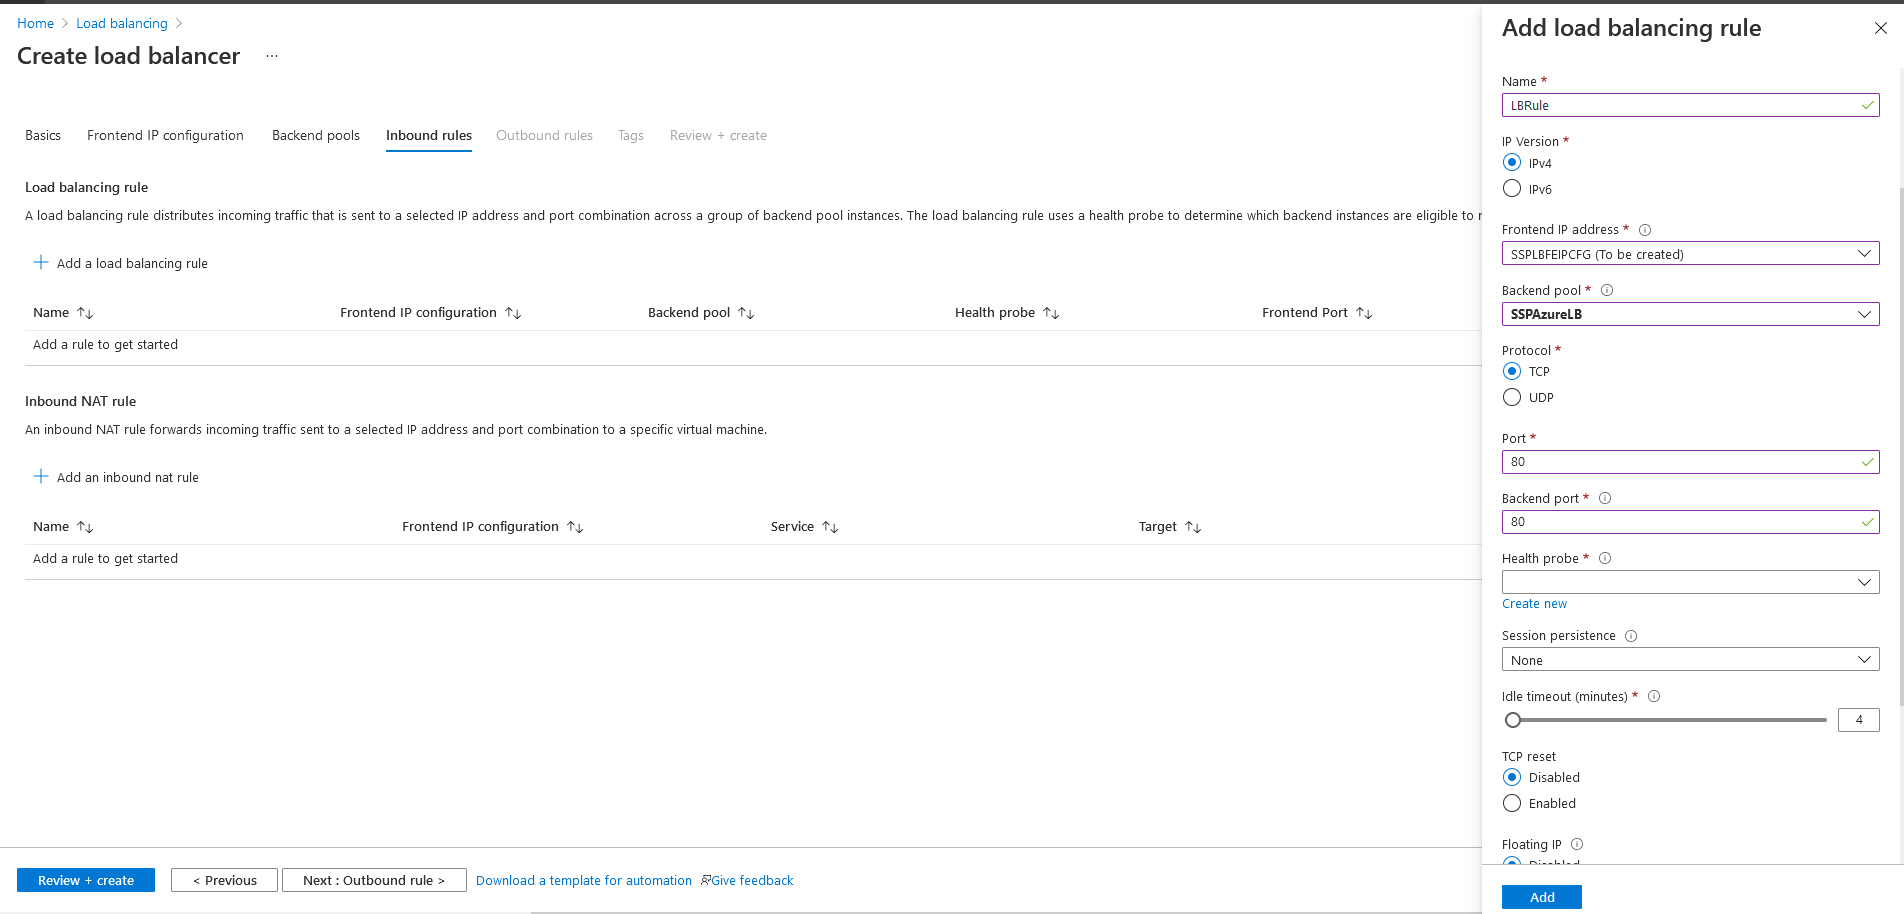
- For Health probe, select the option Create new and enter a name.
- Choose TCP as the protocol from the drop-down menu and enter the product port number in the Port field
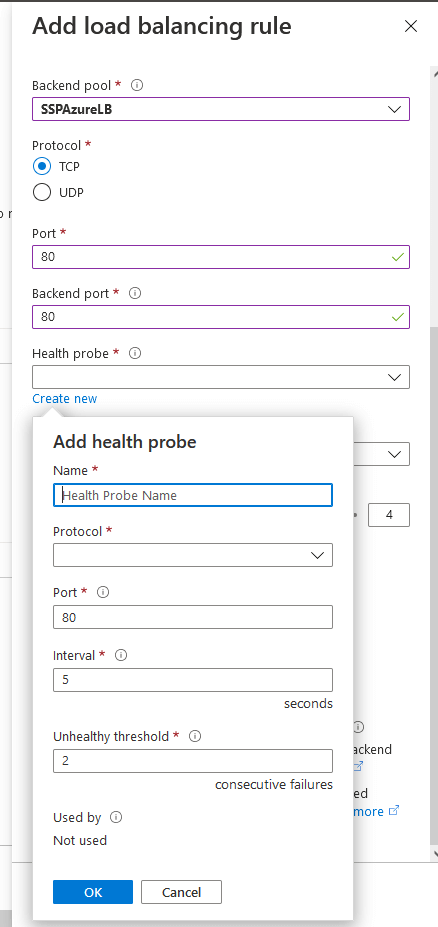
- Leave the default values for the other two settings and OK.
- In the Session persistence field, enter the Client IP (optional).
- Retain the default options for the rest of the settings and click Add.
- Keep the default value settings in the Outbound rules and Tags tabs.
- Click the option Review + create and then click Create.
Once all the settings are configured, you will be able to access ADSelfService Plus through the configured frontend IP address and port.
Note: The load balancer is used for redistributing the request to the virtual machines in the backend pool. The virtual machines in the pool cannot access the load balancer in the same pool.

New to ADSelfService Plus?
Related Articles
Configuring high availability in ADSelfService Plus
ADSelfService Plus utilizes automatic failover to support high availability in case of system and product failures. Essentially, this means that when the ADSelfService Plus service on one machine fails, another instance of ADSelfService Plus running ...How to migrate the ADSelfService Plus installation from one machine to another
Description This article will guide you through the process for migrating the ADSelfService Plus installation from one machine to another. Important: Before you start the migration process, please update your ADSelfService Plus installation to the ...Encryption and data storage in ADSelfService Plus database
Encryption in the ADSelfService Plus database ADSelfService Plus' database uses the following encryption methods to store sensitive data: Database Encryption method PostgreSQL AES-256-CBC Microsoft SQL AES-256-CBC The following sensitive information ...ADSelfService Plus product startup issues
What do you need to know before troubleshooting You need to have administrator access to ADSelfService Plus. When you experience an error with ADSelfService Plus, check if these prerequisites are satisfied: Install ADSelfService Plus as a service ...Multi-factor authentication techniques in ADSelfService Plus
Let's take a look into the various authentication methods supported by ADSelfService Plus for enterprise multi-factor authentication (MFA). Why should you use MFA? Authentication based solely on usernames and passwords is no longer considered secure. ...