How to configure and troubleshoot the cached credentials update feature
ManageEngine ADSelfService Plus' cached credentials update feature helps remote users reset their domain password from their login screens using the self-service password reset feature, and regain access to their Windows machines from outside the domain network. The feature employs a VPN to achieve this. This webpage elaborates on enabling the cached credentials update feature in ADSelfService Plus for four different VPN providers: Fortinet, Cisco IPSec, Cisco AnyConnect, and Windows Native VPN.

- When MFA for VPN uses one-way authentication methods, like biometrics and push notification, users will be asked to authenticate using the configured methods after password reset. Once authentication is successful, the cached credentials update will be initiated.
- When MFA for VPN uses challenge-based authentication methods, such as TOTP using Google Authenticator, the cached credentials update may not function. In this case, please reach out to the ADSelfService Plus support team for additional assistance in enabling the feature.
Prerequisite
Step 1: Configure the cached credentials update
- Navigate to Configuration > Administrative Tools > GINA/Mac/Linux(Ctrl+Alt+Del).
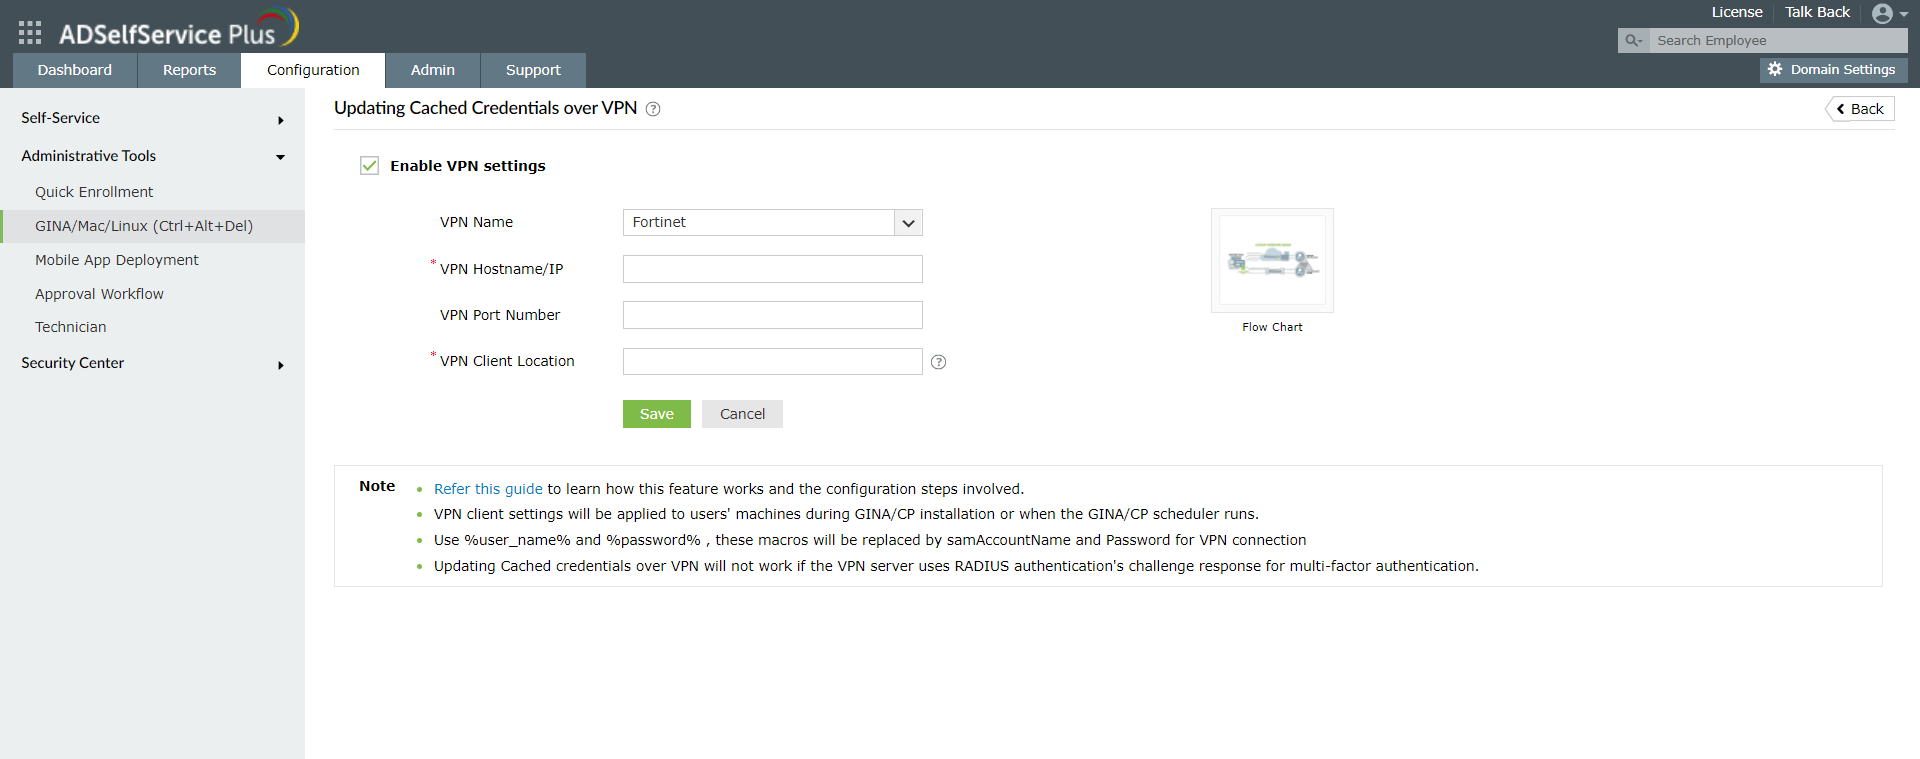
- Click Updating Cached Credentials over VPN.
- Select Enable VPN settings.
- Select your VPN provider (Fortinet, Cisco IPSec, Cisco AnyConnect, or Windows Native VPN) from the drop-down list.
- Enter the VPN HostName/IP address and VPN port number in their respective fields.
- In case Fortinet, Cisco IPSec, or Cisco AnyConnect is used, enter the VPN Client Location along with the client file name. Here are the default locations of the VPN client files for the three providers:
- Fortinet: C:\Program Files (x86)\Fortinet\FortiClient\FortiSSLVPNclient.exe
- Cisco IPSec: C:\Program Files (x86)\Cisco\Cisco IPSec\vpnclient.exe
- Cisco AnyConnect: C:\Program Files (x86)\Cisco\Cisco AnyConnect Secure Mobility Client\vpncli.exeNote: FortiSSLVPNclient.exe will not be available by default when FortiClient is installed in the client machine. It must be downloaded from the Fortinet support portal using your business account:
- Login into https://support.fortinet.com/welcome/#/.
- Navigate to Firmware Images > Download.
- Select FortiClient.
- Navigate to your FortiClient version installed on your client machines and download FortiClientTools_xxxxx.zip by clicking the link.
- Extract the ZIP file which contains an SSL VPN Client command line that holds the FortiSSLVPNClient.exe file and three dependent dynamic link library (DLL) files.
- Paste this EXE file and the three DLL files inside C:\Program Files (x86)\Fortinet\FortiClient in all the client machines.
- Click Save.
Step 2: Install the ADSelfService Plus login agent in client machines
To enable the cached credentials update in client machines, the ADSelfService Plus login agent must be installed on them. Upon installation, the login agent places the self-service password reset option on the machine's login screen, and enables the cached credentials update functionality. During subsequent self-service password reset attempts, the login agent sends the authentication information and new credentials to the ADSelfService Plus server, which in turn sends it to AD. Once the authentication and password reset is approved, AD relays the new password back to the client machine via the VPN and the machine's cached credentials are updated.
The login agent can be installed through the product portal, manually, via GPO, via Microsoft System Center Configuration Manager, and using third-party software. Here, we will be going through installation via the product portal.

ADSelfService Plus login agent installation via product portal
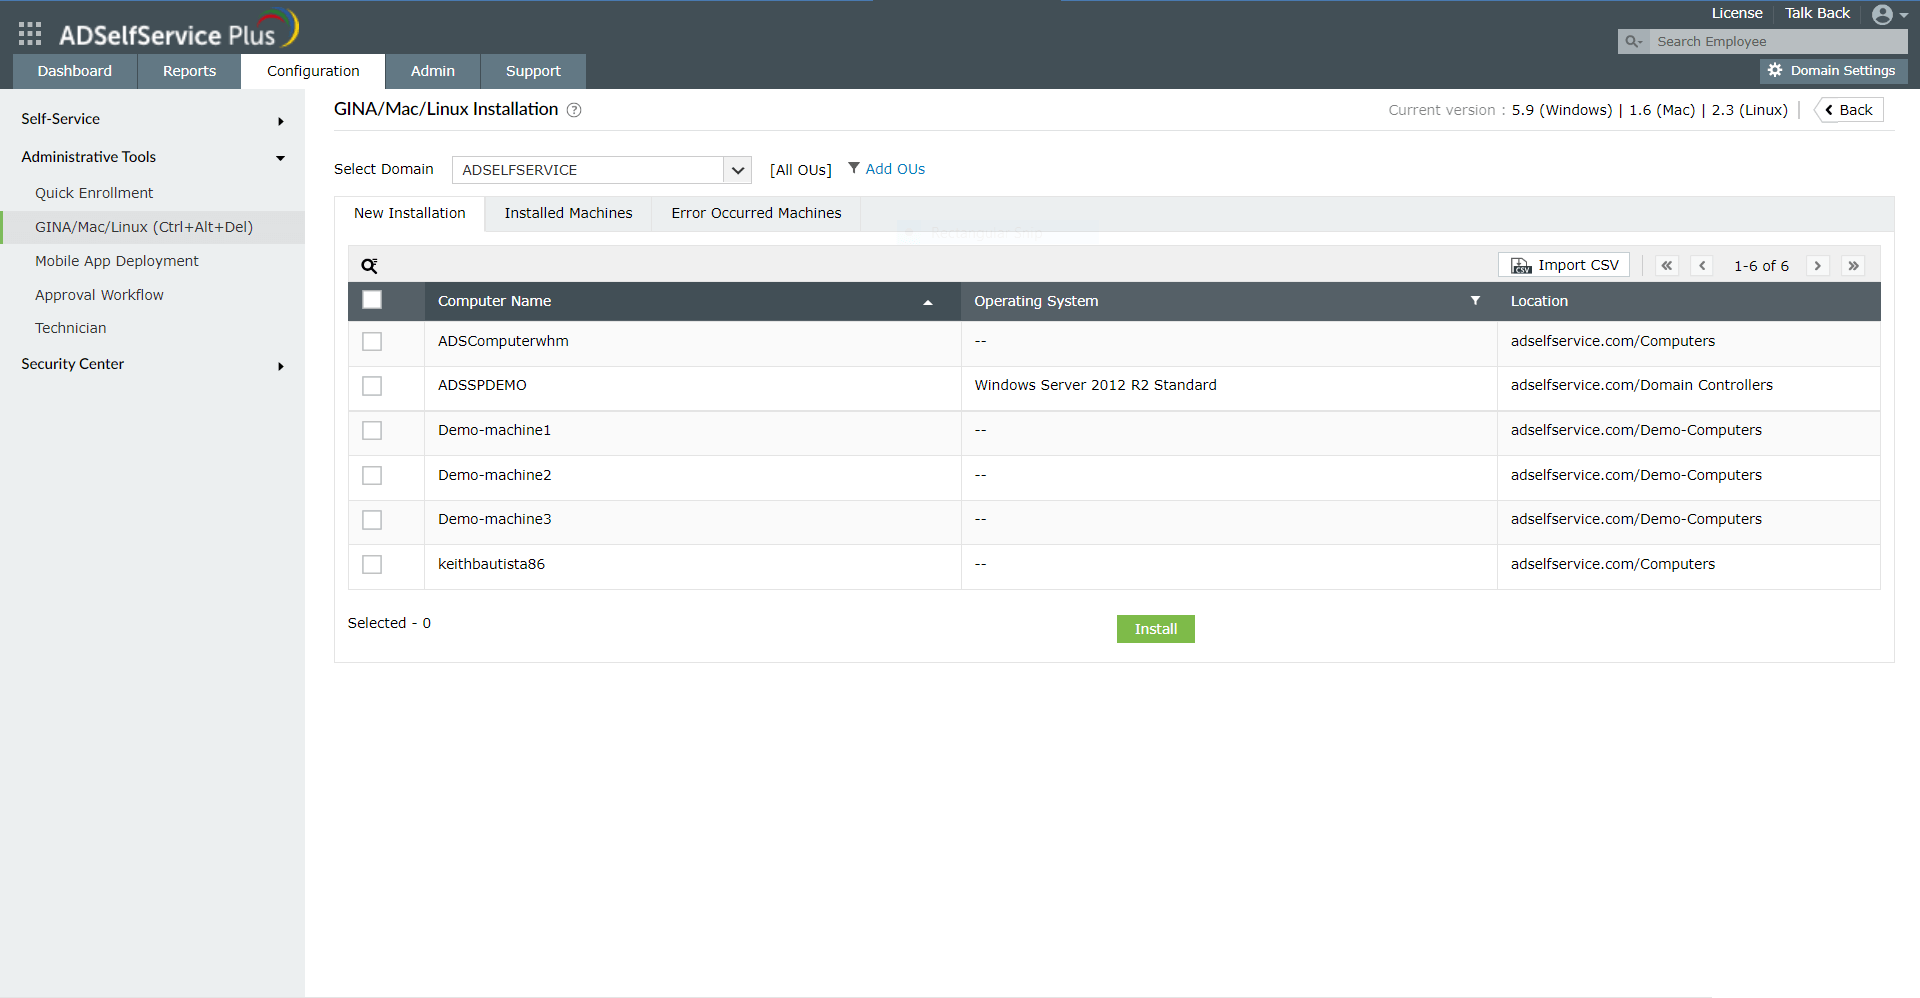
- In the ADSelfService Plus web portal, go to Configuration > Administrative Tools > GINA/Mac/Linux (Ctrl+Alt+Del) > GINA/Mac/Linux installation.
- Click New Installation.
- Select a domain, and then the computers (on which you want to install the login agent).
- Click Install.
GINA Customization Scheduler configuration
- Navigate to the Configuration → Administrative Tools → GINA/Mac/Linux (Ctrl+Alt+Del).
- Click GINA/Mac/Linux Schedulers.
- Click on the edit icon ().
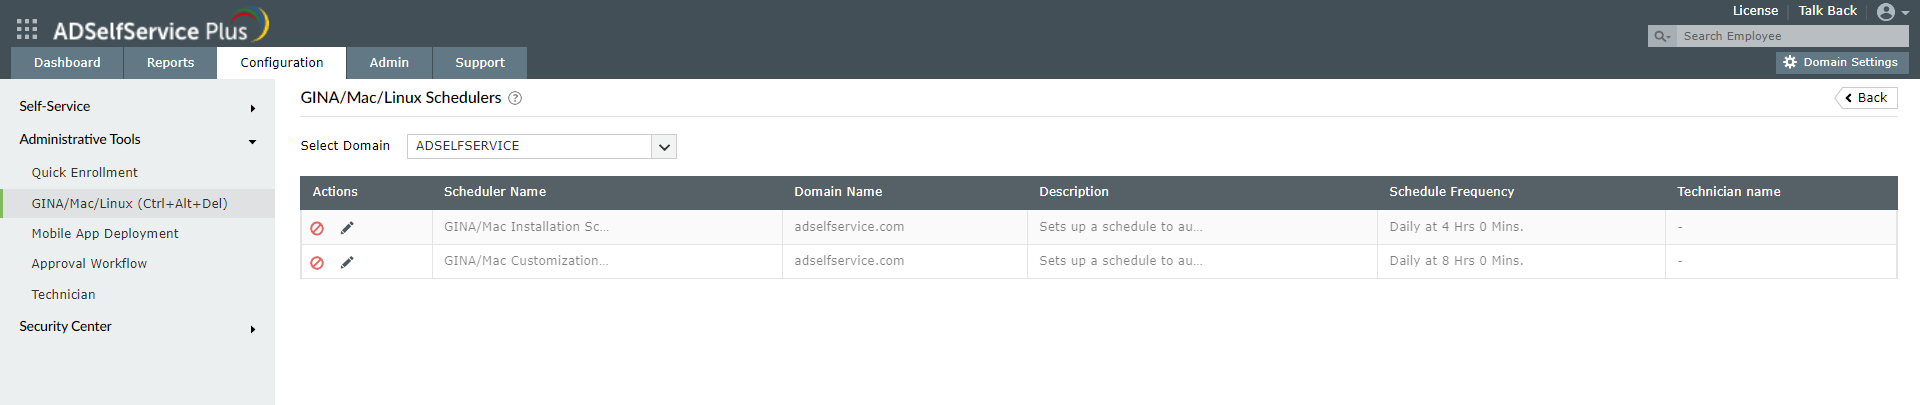
- In the window that opens, select the domain, OUs, or groups for which you want to deploy the client software.
- Set the Schedule Time and configure the Notification Frequency as daily, weekly, monthly, or hourly.

- Click Save.
ADSelfService Plus login agent reinstallation
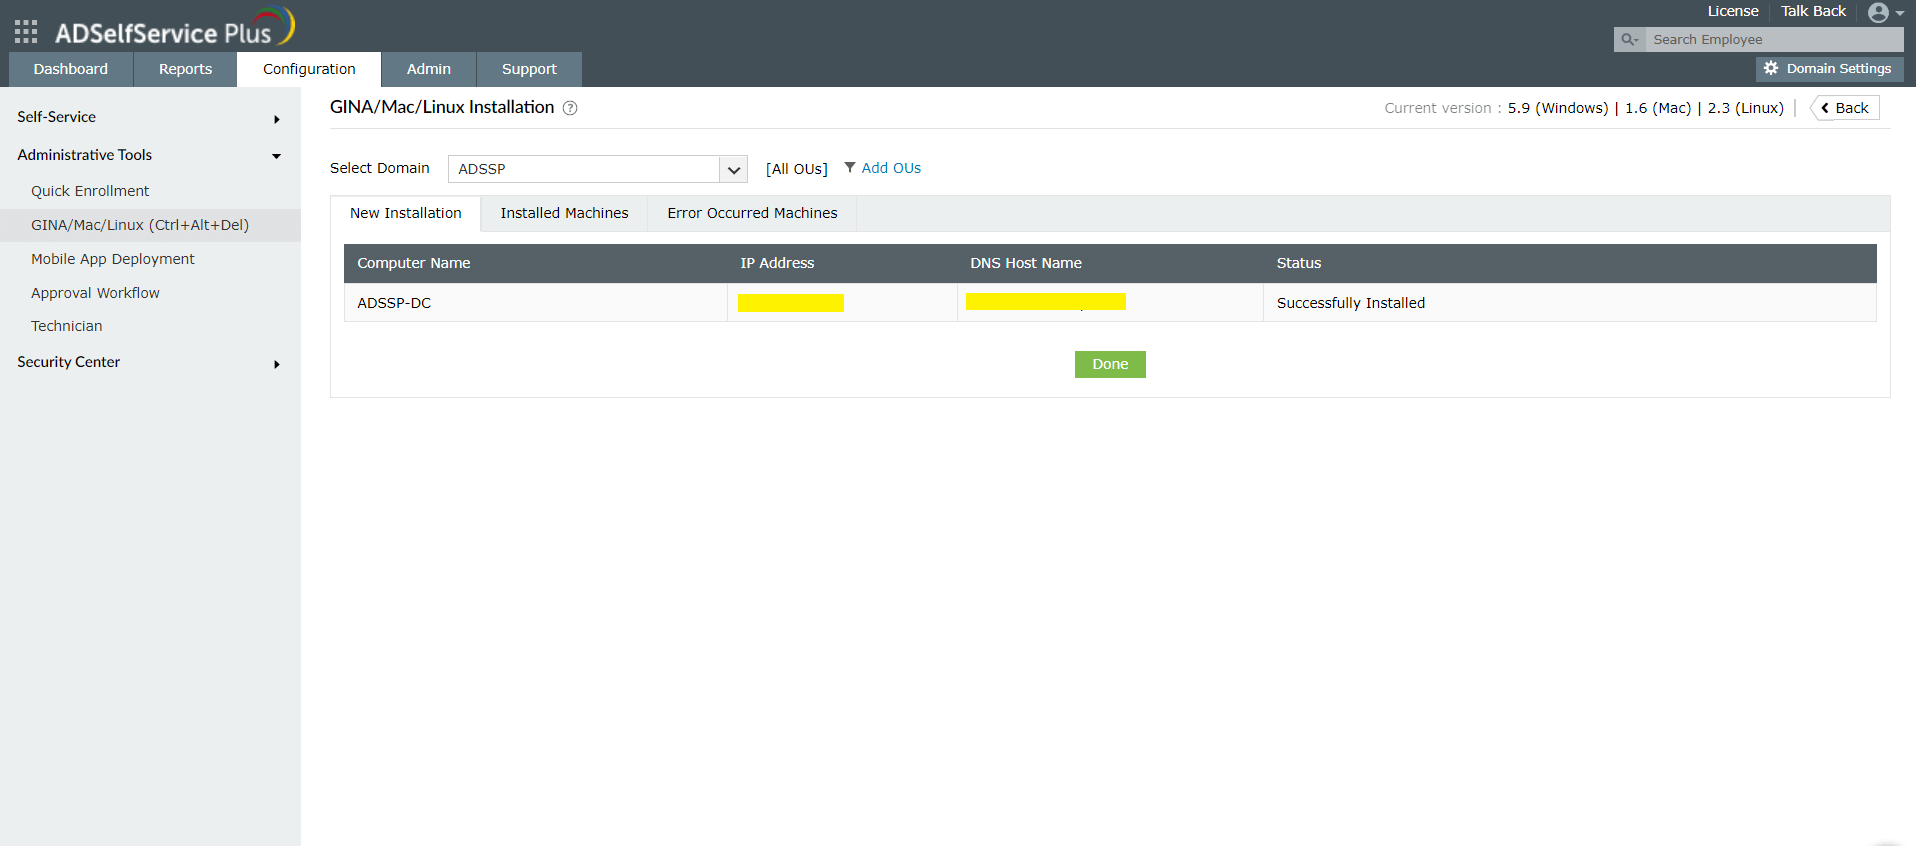
- In the ADSelfService Plus web portal, go to Configuration > Administrative Tools > GINA/Mac/Linux (Ctrl+Alt+Del) > GINA/Mac/Linux installation.
- Go to Installed Machines.
- Select the computers on which the login agent is installed.
- Click Reinstall.
 '
'
Troubleshooting
If the cached credentials are not updated for any client machine during self-service password reset after the feature is enabled, ensure the following:
- The login agent is installed on the client machine.
- The following registry entries are correctly updated after manual installation of the login agent:
Go to HKEY_LOCAL_MACHINE\SOFTWARE\ZOHO Corp\ADSelfService Plus Client Software and ensure that the following registry entries are present:
- IsTPVPNEnabled: The value must be t for all VPN providers except Windows Native VPN.
- IsVPNEnabled: Value must be "t".
- VPNClientLocation: The correct file path and filename of the VPN client agent must be present. For example:
C:\Program Files (x86)\Fortinet\FortiClient\FortiSSLVPNclient.exe
- The client machine successfully connects to the VPN.
This can be confirmed by executing the following commands in Command Prompt depending on the VPN provider used.
Cisco IPSec:
vpnclient.exe connect <profile name> user %user_name% pwd %password%Cisco AnyConnect:
pncli.exe -s < %tempFile%
(or)
vpncli.exe connect %servername%
%user_name%
%password%Fortinet:
connect -s adsspvpn -h %servername%:%portno% -u %user_name%:%password%In case a custom VPN provider is used, the following command line must be used
pstools..psexec.exe -s -i - The AD domain controller is reachable through the VPN. This can be confirmed by pinging the server.
- For Windows Native VPN:
- L2TP/IPSec with pre-shared key is the type of VPN used.
- AD domain credentials are provided during VPN configuration.

New to ADSelfService Plus?
Related Articles
Updating cached credentials in ADSelfService Plus through a custom VPN
ADSelfService Plus can automatically update the locally cached credentials on remote user machines as and when users reset their passwords. To update cached credentials, ADSelfService Plus requires the Windows login agent bundled with the product and ...How to update cached credentials for remote users with ADSelfService Plus
Remote users' password challenges Remote employees may often work in a different time zone than the IT team. In such a situation, if a remote employee forgets their password, they could be stranded for hours, unable to log in to their machine for an ...Microsoft 365 password reset
The Self-Service Password Reset (SSPR) feature in Azure AD allows users to reset their passwords without going through the help desk. However, changes to users' Azure AD passwords are only synchronized with their on-premises domain accounts when ...ADSelfService Plus self-service password reset configuration: Reset & Unlock tab
Reset & Unlock tab The Reset & Unlock tab consists of settings related to the self-password reset and account unlock features. Learn how to configure these settings to suit your requirements. Here are the settings under the Reset & Unlock tab: Unlock ...Updating cached credentials by configuring custom VPN providers in ADSelfService Plus
ADSelfService Plus can automatically update the locally cached credentials in remote users’ machines as and when they reset their passwords. To update cached credentials, ADSelfService Plus requires the Windows logon agent, bundled with the product, ...