Establishing Field Dependency in ServiceDesk Plus Using CSV Data and Field/Form Rules
This Knowledge Base article outlines the process of establishing field dependency in ServiceDesk Plus using CSV data and Field/Form Rules. By following these steps, administrators can enhance the flexibility and efficiency of form interactions, leading to better service delivery and user satisfaction.


Usecase:
Assume, a request template includes four additional fields: 'Zone,' 'Region' and 'District' and 'Cluster'. When a pick-list value for the 'Zone' field is selected, the corresponding field values for the 'Region', 'District' and 'Cluster' data must be dynamically populated by retrieving it from an externally stored CSV file. This will be useful when the number of field values increases.
Steps to follow:
1. Create 4 Additional fields and include these in the required template
- Zone - Single line additional field - Content will be populated from the CSV file as a Picklist value.
- Region - Single line additional field - Content will be populated from the CSV file as a Picklist value.
- District - Single line additional field - Content will be populated from the CSV file as a Picklist value.
- Cluster - Single line additional field - Content will be populated from the CSV file as a Picklist value.
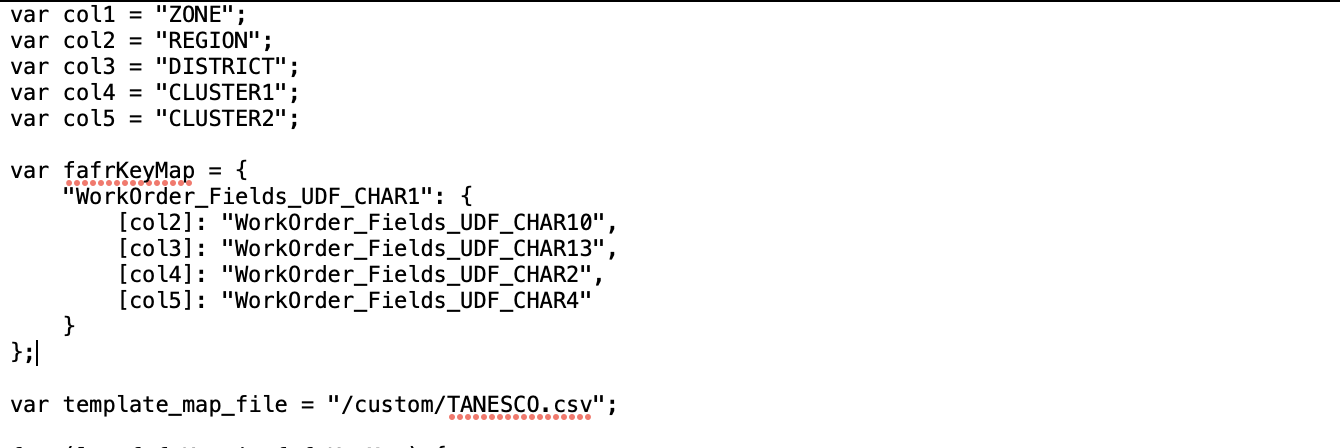
2. Compose a CSV file with first column as the "Zone", then "Region", then 'District' and finally "Cluster". Place this CSV File in "<SDP_Home>\custom" Folder
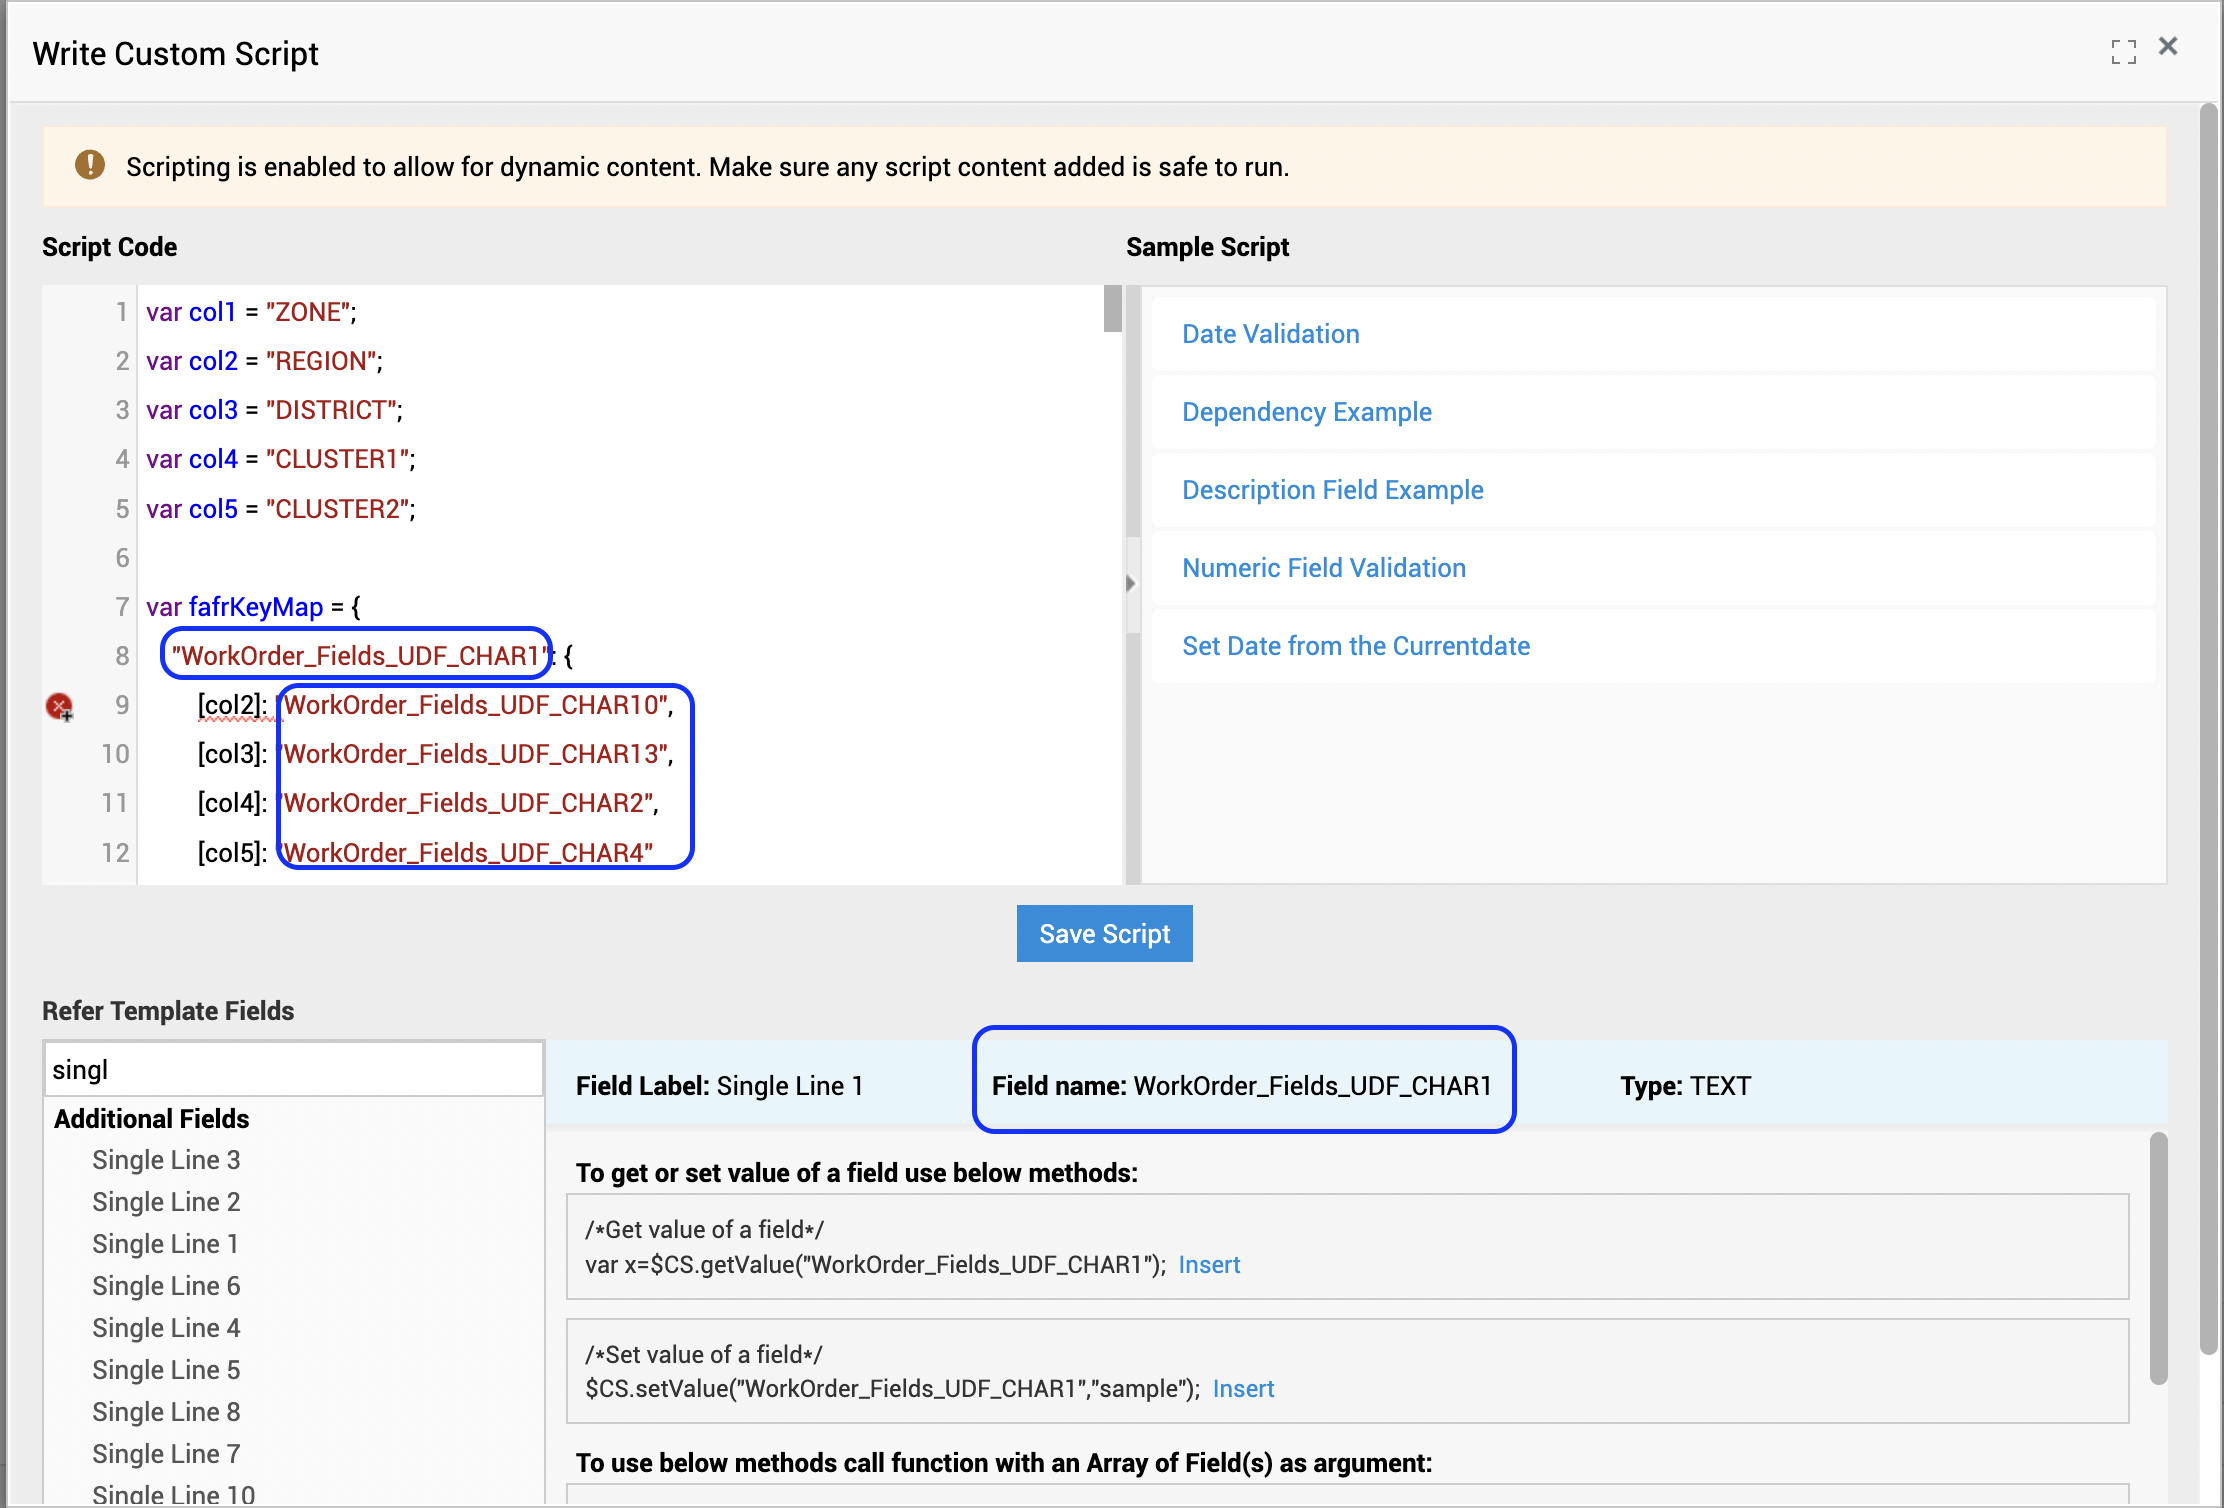
3. Download the attached script and update the UDF Field names & CSV file headers in the script.
UDF Field Names can be taken from the FAFR window itself, type in the Field Label and you will get the respective Field Name.
4. Set up the script to execute On Form Load. The designated single-line fields will transform into picklists according to the user's selection.
If you are still unable to view the file despite retaining it in the custom folder, replace the attached security xml in location: <SDP_Home>\custom\WEB-INF\security folder
Included with this article are scripts for 3-field dependency, 4-field dependency, and 5-field dependency. Ensure that the required additional fields and their respective scripts are utilized accordingly.
New to ADSelfService Plus?
Related Articles
Import and update Requester from CSV (Comma Separated Value) Files
Import Requester from CSV (Comma Separated Value) Files You can also add requesters by importing from CSV files. To import requesters from CSV file Step 1: Locate the CSV file Click Import from CSV link in the Requester List page. The Import ...How to import requests data into ServiceDesk Plus MSP ?
You can import your existing helpdesk Requests (tickets) into ServiceDesk Plus MSP (SDP MSP) using XLS format. Requests can be migrated to SDP MSP with basic details. Assets data can be scanned again through SDP MSP windows domain scan or using ...Perform actions in ServiceDesk Plus On-Premise from JIRA Cloud using automation rules
Create a request and perform similar actions in ServiceDesk Plus On-Premise from JIRA cloud Overview: This document outlines the steps to integrate JIRA with ServiceDesk Plus (SDP) using JIRA's native automation rules. This integration allows ...How to migrate data from SDP to SDP MSP.
Below are the only details which can be exported from SDP and imported to SDP MSP application. 1) You can export request data from ServiceDesk Plus (SDP) using XLS format. Requests -> Goto Admin -> Reports -> New custom report -> Tabular reports -> ...Query to get software data in CSV format.
Steps to export Software data in CSV format 1. Login to ServiceDesk Plus MSP/AssetExplorer. 2. Click on the Reports tab and then click on New Query Report button. 3. Copy and paste the following query and click Run Report. select swm.name "Scanned ...