Creating Authoritative zones
Creating Authoritative Zones
You can create a new domain using the Add Domain button or import domains in bulk using the Import button in the top right corner.
Add Domain
On clicking the Add Domain button, the Create Domain page appears as shown below:
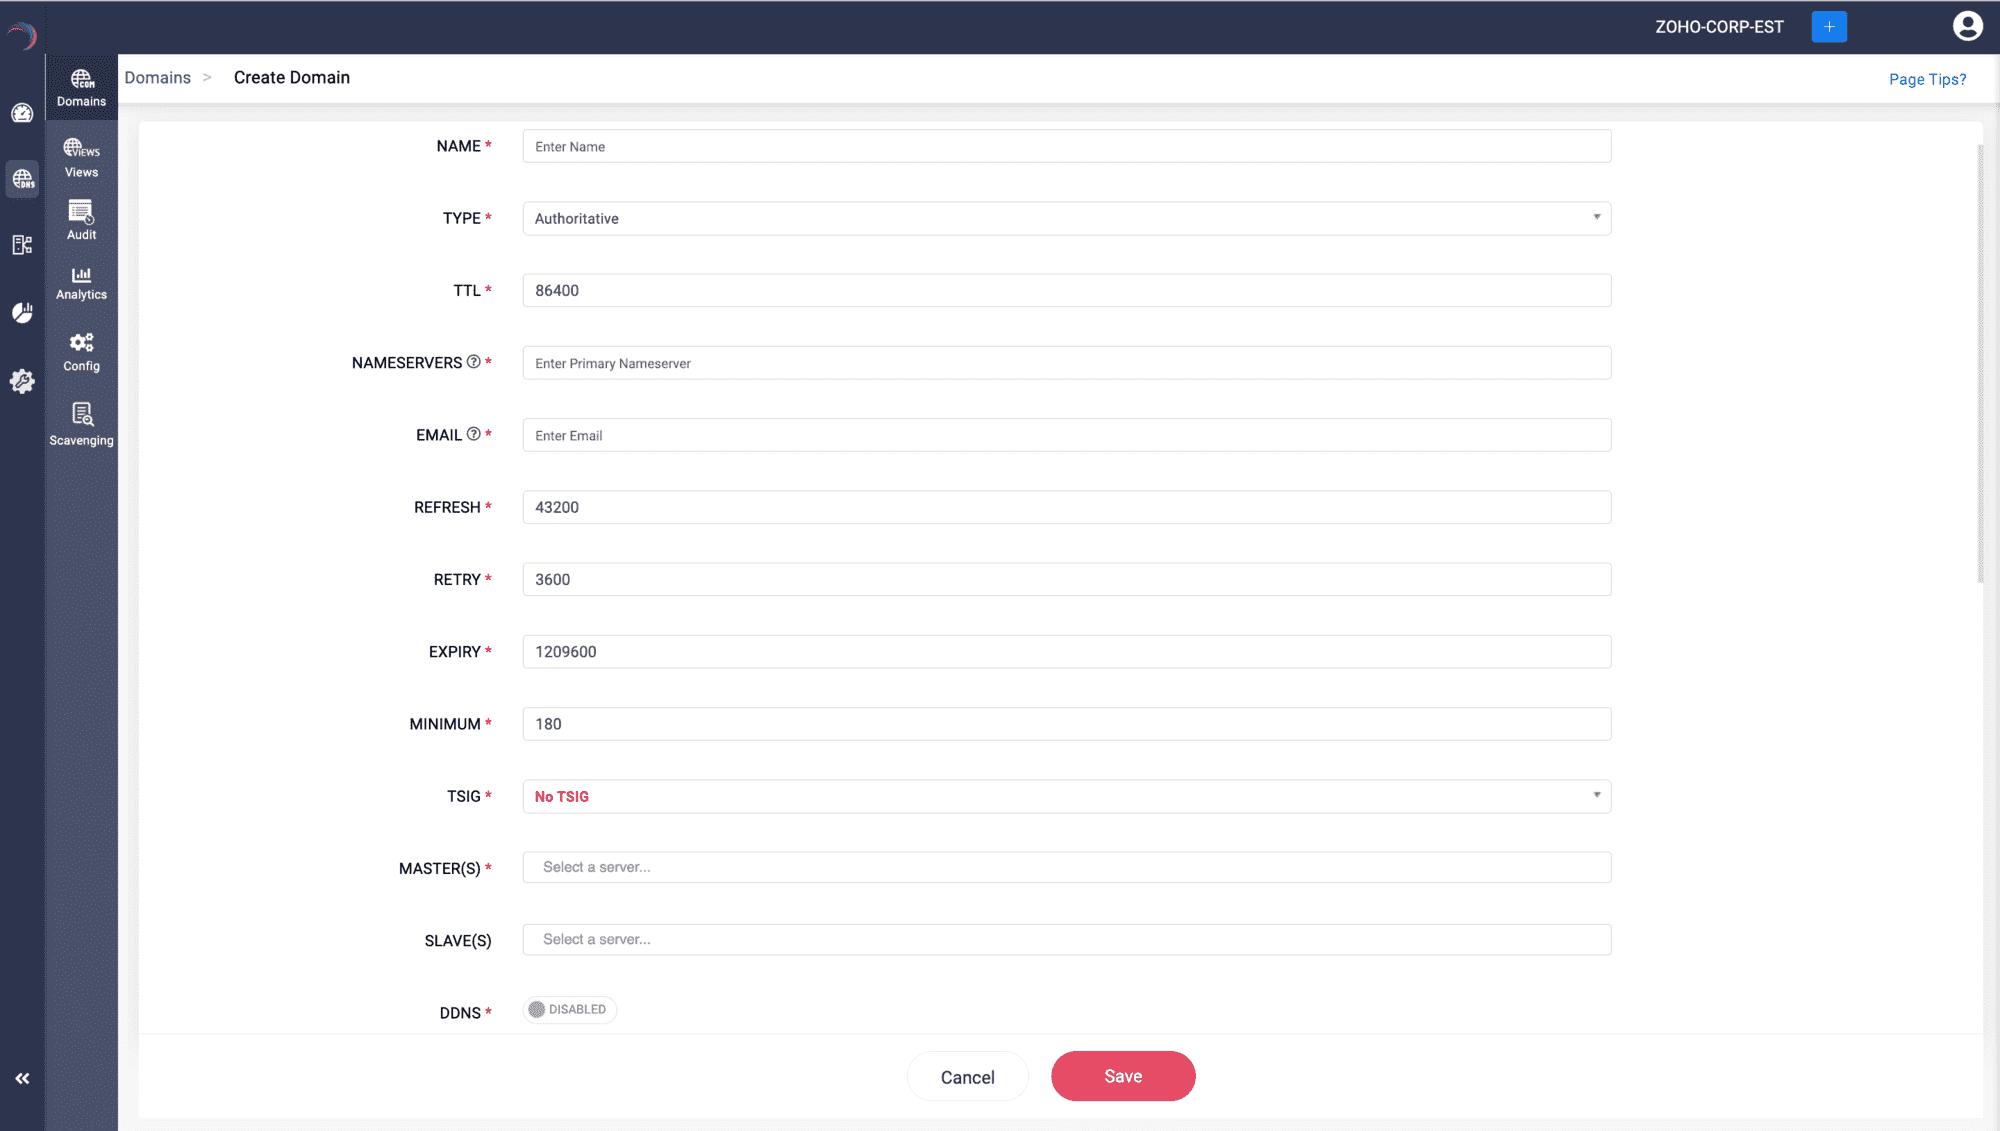
In the Create Domain page enter the value for the fields based on the descriptions below:
- NAME: Name the new domain name you wish to create or manage.
- TYPE: Select the type of DNS zone. DDI Central offers three types of Zones: Authoritative, Forward and Response Policy Zones (RPZ). Now select Authoritative. Authoritative: This type indicates that the DNS server has the authority to answer queries for the specified domain with authoritative data. This means it holds the actual DNS records, such as A records, MX records, and so on, for the domain. It is the definitive source for information about that domain, and its answers are considered official. Note: Type of the domain once chosen cannot be updated. To update the type of the domain delete the domain and re-configure it.
- TTL (Time to Live): Specifies the resolving servers how long to cache information about the domain before querying for it again. Specified in seconds, and the default value is set to 86400.
- NAMESERVERS: Enter the nameserver that has the authority to resolve queries and providing responses to queries for this domain. Note: It has become common practice for users to enter a nameserver that bears the same name as the domain under which it is configured. DDI Central now requires users to establish an appropriate A or AAAA record that can provide an authoritative answer for the nameserver before allowing it to be used with the domain name. For example, when configuring the domain 'clouddns.com' with a nameserver such as 'ns1.clouddns.com', DDI Central prompts you to first create an authoritative address record, either A or AAAA, for 'ns1.clouddns.com' within the domain.
- EMAIL: Enter the email address of the domain administrator or the personnel responsible for managing the DNS zone.
- REFRESH: Specified in seconds, tells secondary nameservers how often to check with the primary nameserver for updates.
- RETRY: Incase the secondary nameserver fails to reach the primary, this value specifies how long it should wait before retrying.
- EXPIRY: Determines the duration, in seconds, for which a secondary nameserver will attempt to contact the primary nameserver. After this period, if no response is received, the secondary nameserver will consider the data stale and cease responding to queries with it.
- MINIMUM: Specifies the minimum TTL that tells the resolving servers how long to remember that a particular record does not exist.
- TSIG: Transaction Signature is a security protocol used to secure zone transfer operations. "No TSIG" indicates that no transaction signature will be used.
- PRIMARY: Specifies the master DNS server for the zone. In a primary-secondary setup, the master server is where the zone records are originally created and managed.
- SECONDARY: Specifies secondary or slave DNS servers. These servers get their zone data from the master server through zone transfers.
- DDNS: Dynamic DNS allows for the automatic updating of a name server in the Domain Name System via DHCP servers. Failing to enable DDNS here, you can alternatively enable DDNS by navigating toDHCP-> Domains. Add the domain there and specify the TSIG key for secure dynamic updates.
Click Save button at the bottom to create or update the domain with the specified parameters, while Cancel would discard any changes made.
Import Domains
ME DDI Central enables you to bulk import records into DDI Central console using the Import button on the top right corner.
On clicking the Import button, the Import Domains window appears on screen.
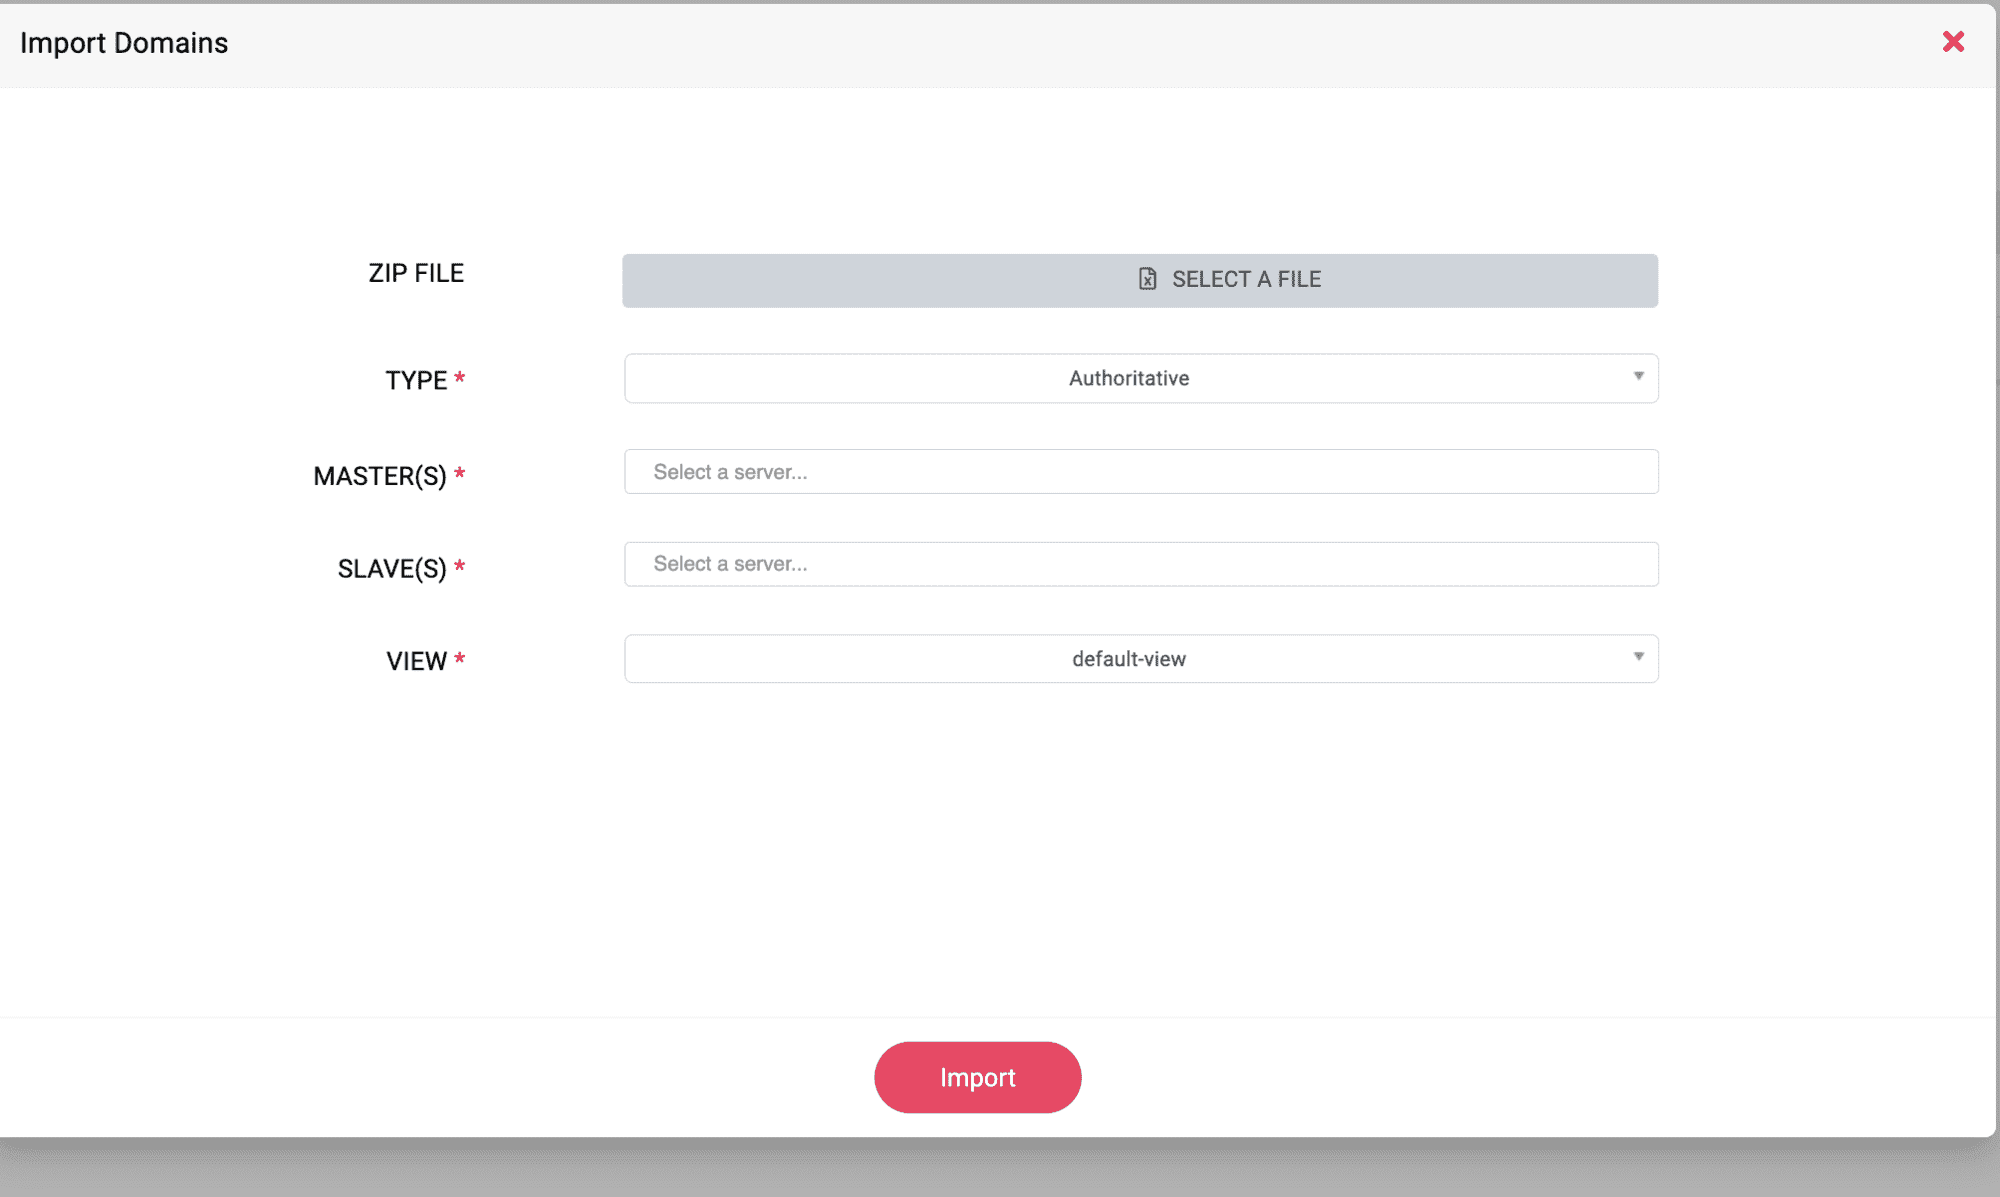
On the Import Domains window, enter the values for the following fields:
- ZIP FILE: Upload the ZIP file containing domain information in a specific format required by the system.
- TYPE: Specify the type of DNS zone being imported. The default option shown is Authoritative, indicating that the data being imported is for an authoritative DNS zone. Authoritative DNS zones are responsible for containing the DNS records for a particular domain.
- PRIMARY: Select one or more master DNS servers. The master server would be the primary source of data for the zones being imported and would handle DNS queries and updates.
- SECONDARY: Similar to the MASTER(S) field, select one or more slave (or secondary) DNS servers. Slave servers receive zone data from the master server and serve as backups to handle queries if the master is unavailable.
- VIEW: Select a DNS view by its name to provide different information to different sets of clients based on some pre-defined criteria. For example, you might have an "internal" view for clients on your local network and an "external" view for clients on the internet.
- Import Button: Once all fields are filled out and you are ready to import the domain data, click the Import button to initiate the import process.
The two methods discussed above can help you create authoritative zones.

New to ADSelfService Plus?
Related Articles
Creating Authoritative Zones
Creating authoritative zones for Microsoft DNS servers using DDI Central To create authoritative zones for Microsoft DNS servers using DDI Central: Get into the DNS module. Select the Domains menu. On the Domains page, You can create a new domain ...Creating Authoritative Zones
You can create a new domain using the Add Domain button or import domains in bulk using the Import button in the top right corner. Add Domain On clicking the Add Domain button, the Create Domain page appears as shown below: In the Create Domain page ...Creating authoritative zones for Microsoft DNS servers using DDI Central
Creating authoritative zones for Microsoft DNS servers using DDI Central To create authoritative zones for Microsoft DNS servers using DDI Central: Get into the DNS module. Select the Domains menu. On the Domains page, You can create a new domain ...Creating forward zones
Creating DNS Forwarders DNS Zone Forwarding or Forwarder Zones in DDI Central refers to the process of redirecting queries for a specific DNS zone to another DNS server. This is typically used when a DNS server is not authoritative for a particular ...Creating reverse zones
Creating reverse authoritative zones Reverse DNS is the process of resolving an IP address back to a domain name. It is commonly used for services such as email servers to verify that an IP address maps to a domain name. Reverse DNS for an IP address ...