Configuring Microsoft DNS Resource Records
Configuring DNS Resource Records(RR)
DNS records hold information about domain names, and their associated IP addresses. They are stored in authoritative DNS servers and consist of a series of text files written in DNS syntax, a string of characters that directs the DNS server on what and how to respond to DNS queries.
There are various types of DNS records in DNS zones, and each one has a different use.
What is a A record
An A record is the most commonly used record and is required as its primary purpose is to map out the Fully Qualified Domain Name (FQDN) to the respective IPv4 address. They are mostly used for DNS lookups.
A records can also be used for pointing to a subdomain which also contains the same IP address.
How do you create an A record?
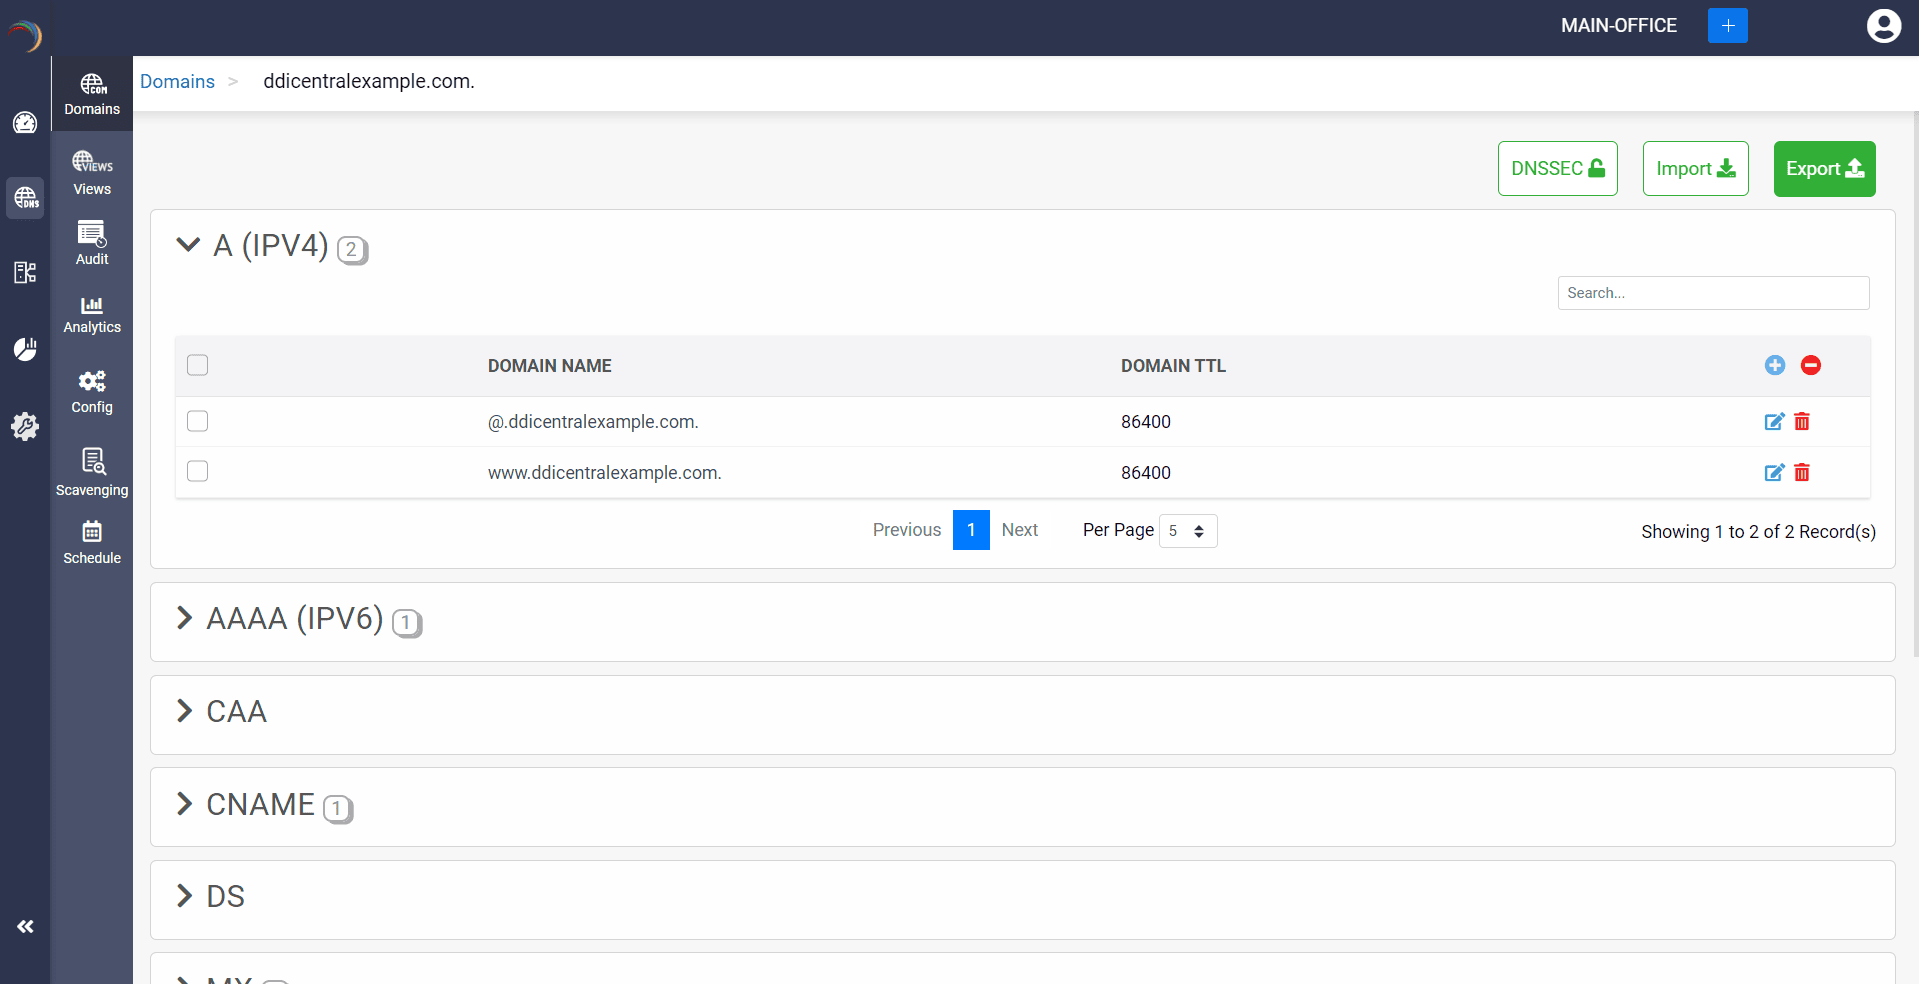
Step 1: Click on the A record of the DNS zone for a domain.
Step 2: On the right side, you can view a "+" sign for adding a record, and a "-" sign for deleting a record. Click the "+" sign to add a new A record.
Step 3: Provide the details of the new A record, such as name, TTL, date and time, and IP address.
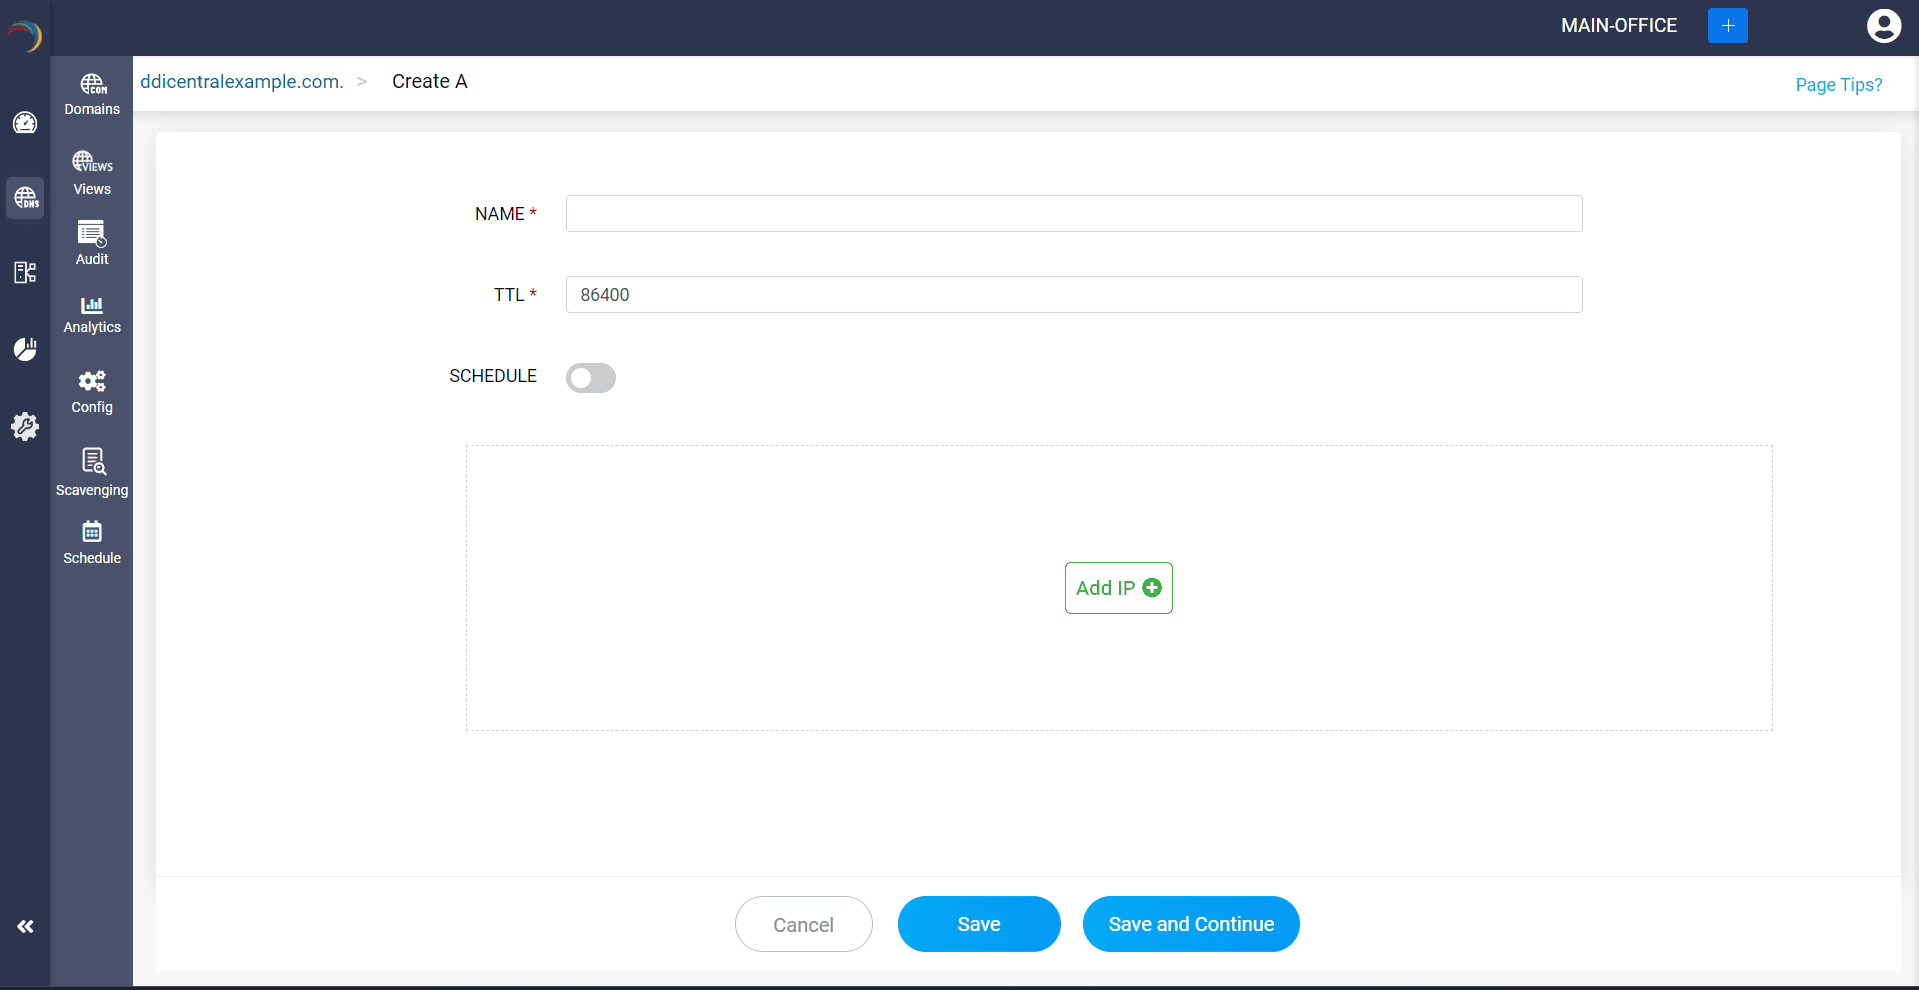
Step 4:

What is a AAAA record
AAAA records, also know as quad A records, is also required but are primarily used for mapping out the domain name to an IPv6 address. An AAAA record serves the same purpose as the A record, except that the A record has IPv4 addresses, while AAAA record has IPv6 addresses.
They are mostly used for DNS lookups for domain names requiring IPv6 addresses. AAAA records are needed for the latest domains created which support IPv6 as the number of domains supporting IPv4 are diminishing.
How do you create an AAAA record?
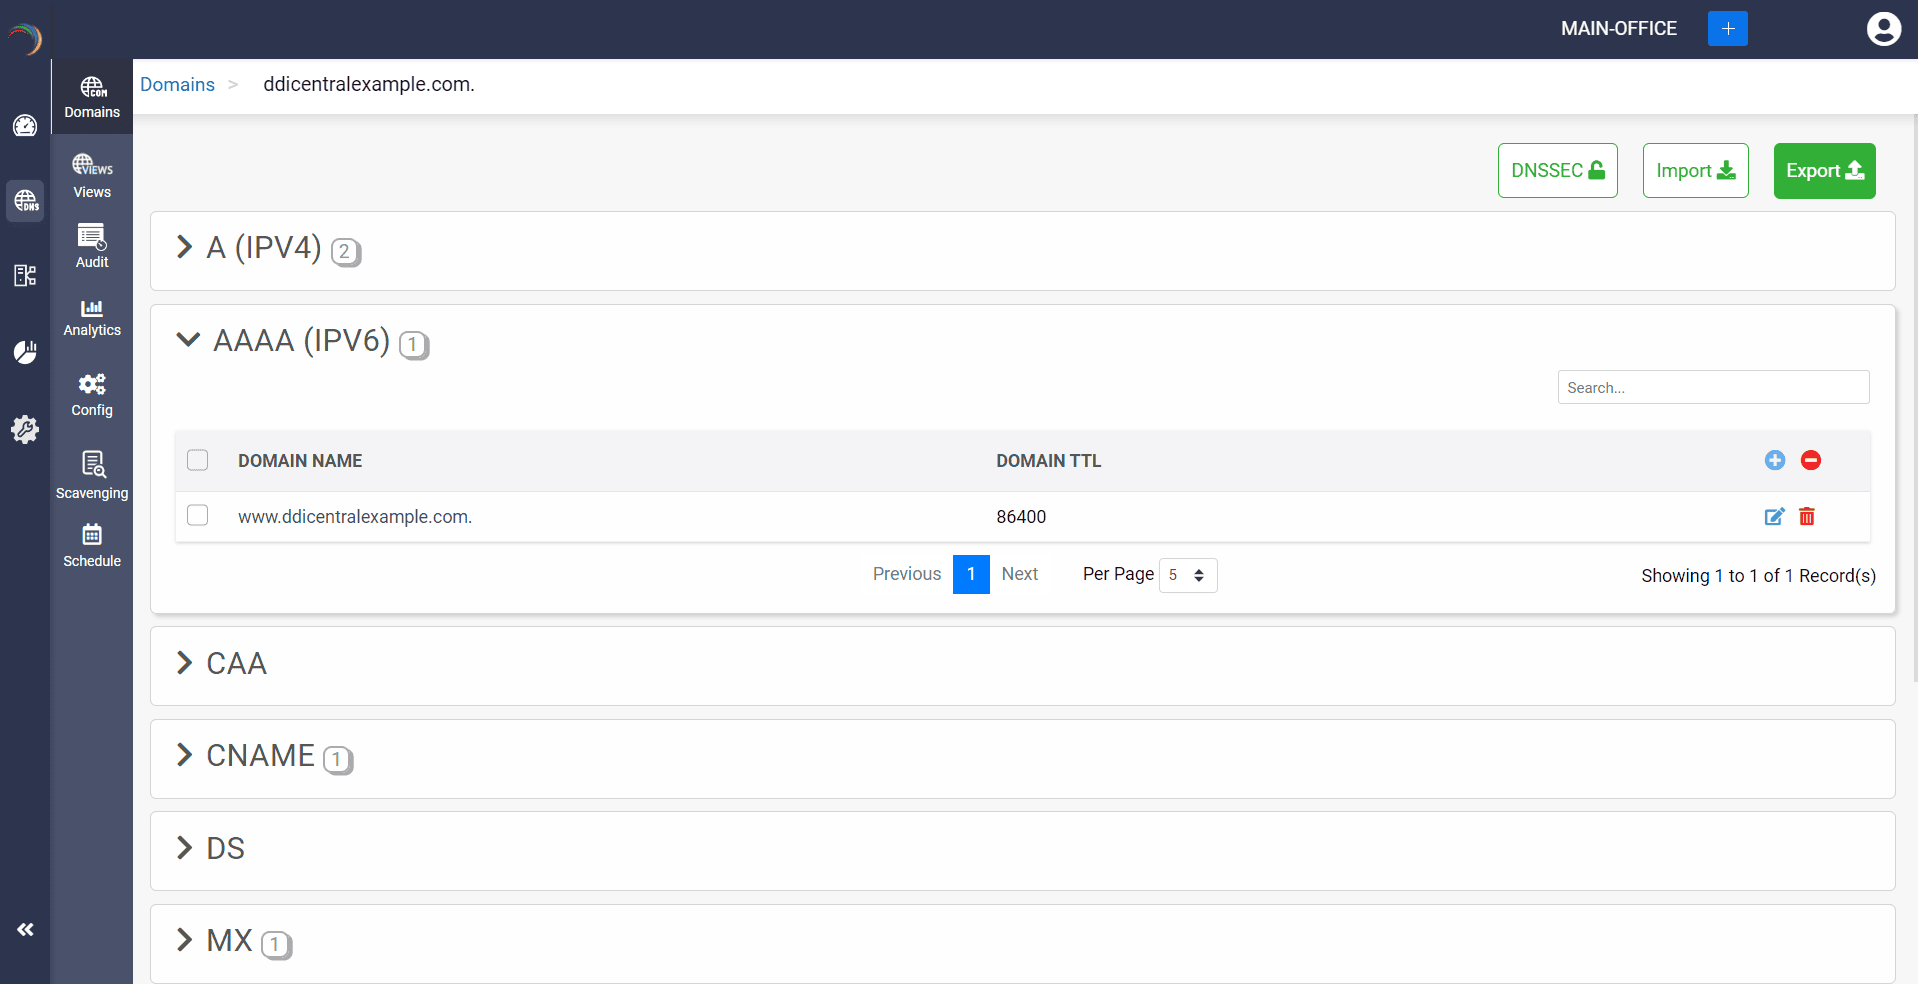
Step 1: Click on the AAAA record of the DNS zone for a domain.
Step 2: On the right side, you can view a "+" sign for adding a record, and a "-" sign for deleting a record. Click the "+" sign to add a new AAAA record.
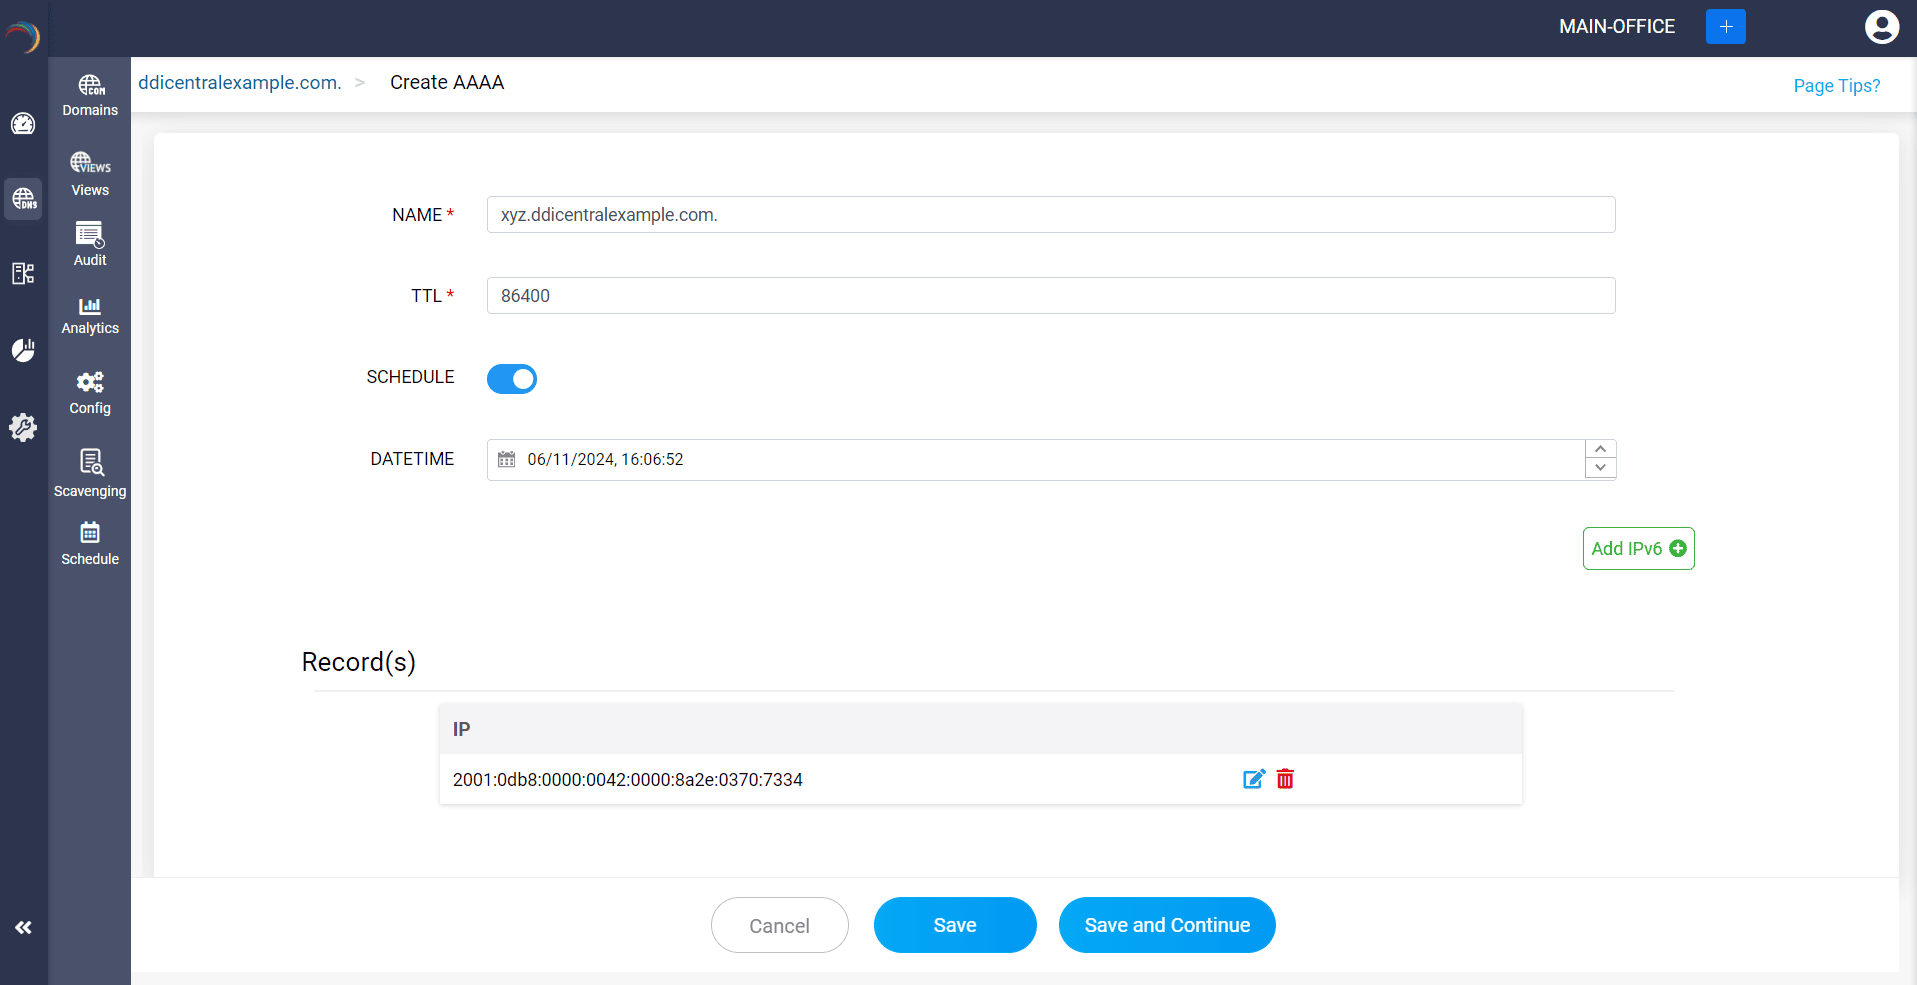
Step 3: Provide the details of the new AAAA record, such as name, TTL, date and time, and IP address.
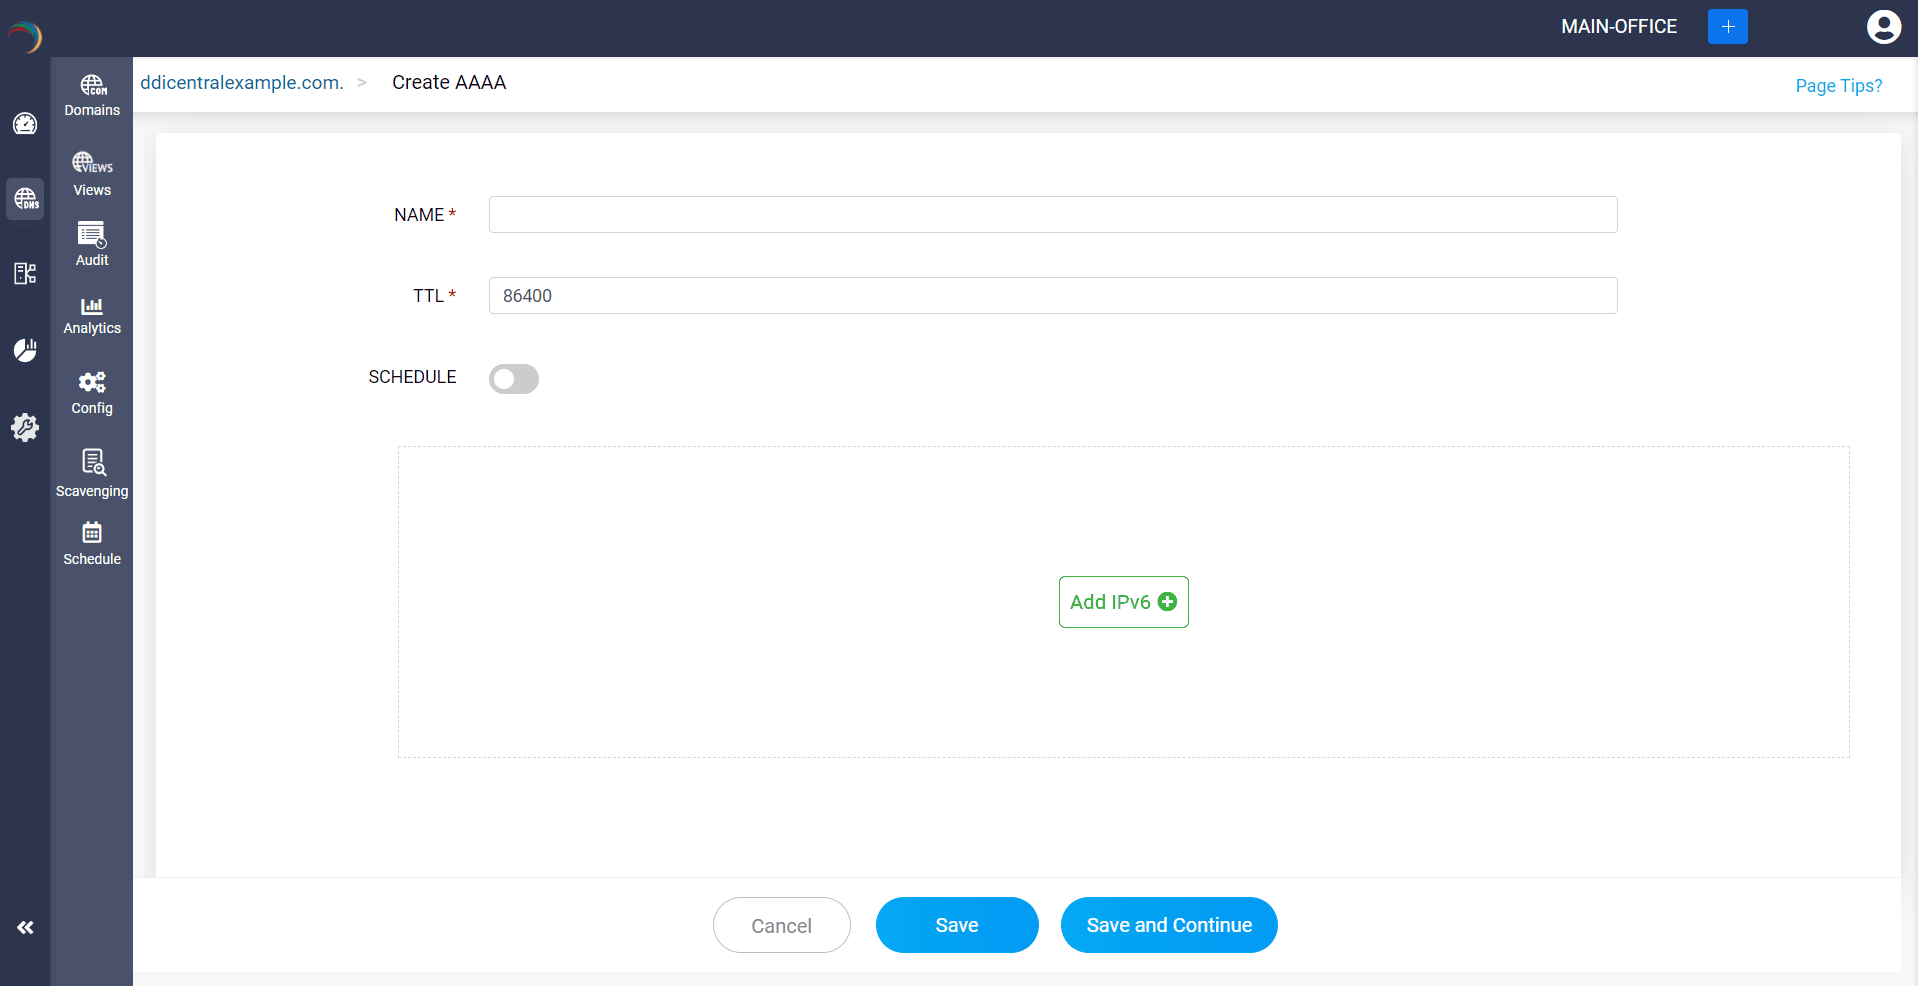
Step 4: Proceed to save the record by clicking on "Save" or "Save and Continue".
What is a CAA record
Certificate Authority Authorization (CAA) record details about which certificate authorities (CAs) are valid so they can issue certificates for a domain name. This ensures that only trusted CAs are issuing SSL and TLS certificates for authorized domains, while preventing unauthorized CAs from issuing certificate for malicious domains.
CAA records acts a permit entry for identifying and allowing trustable CAs for reliable certificate issuance.
How do you create a CAA record?
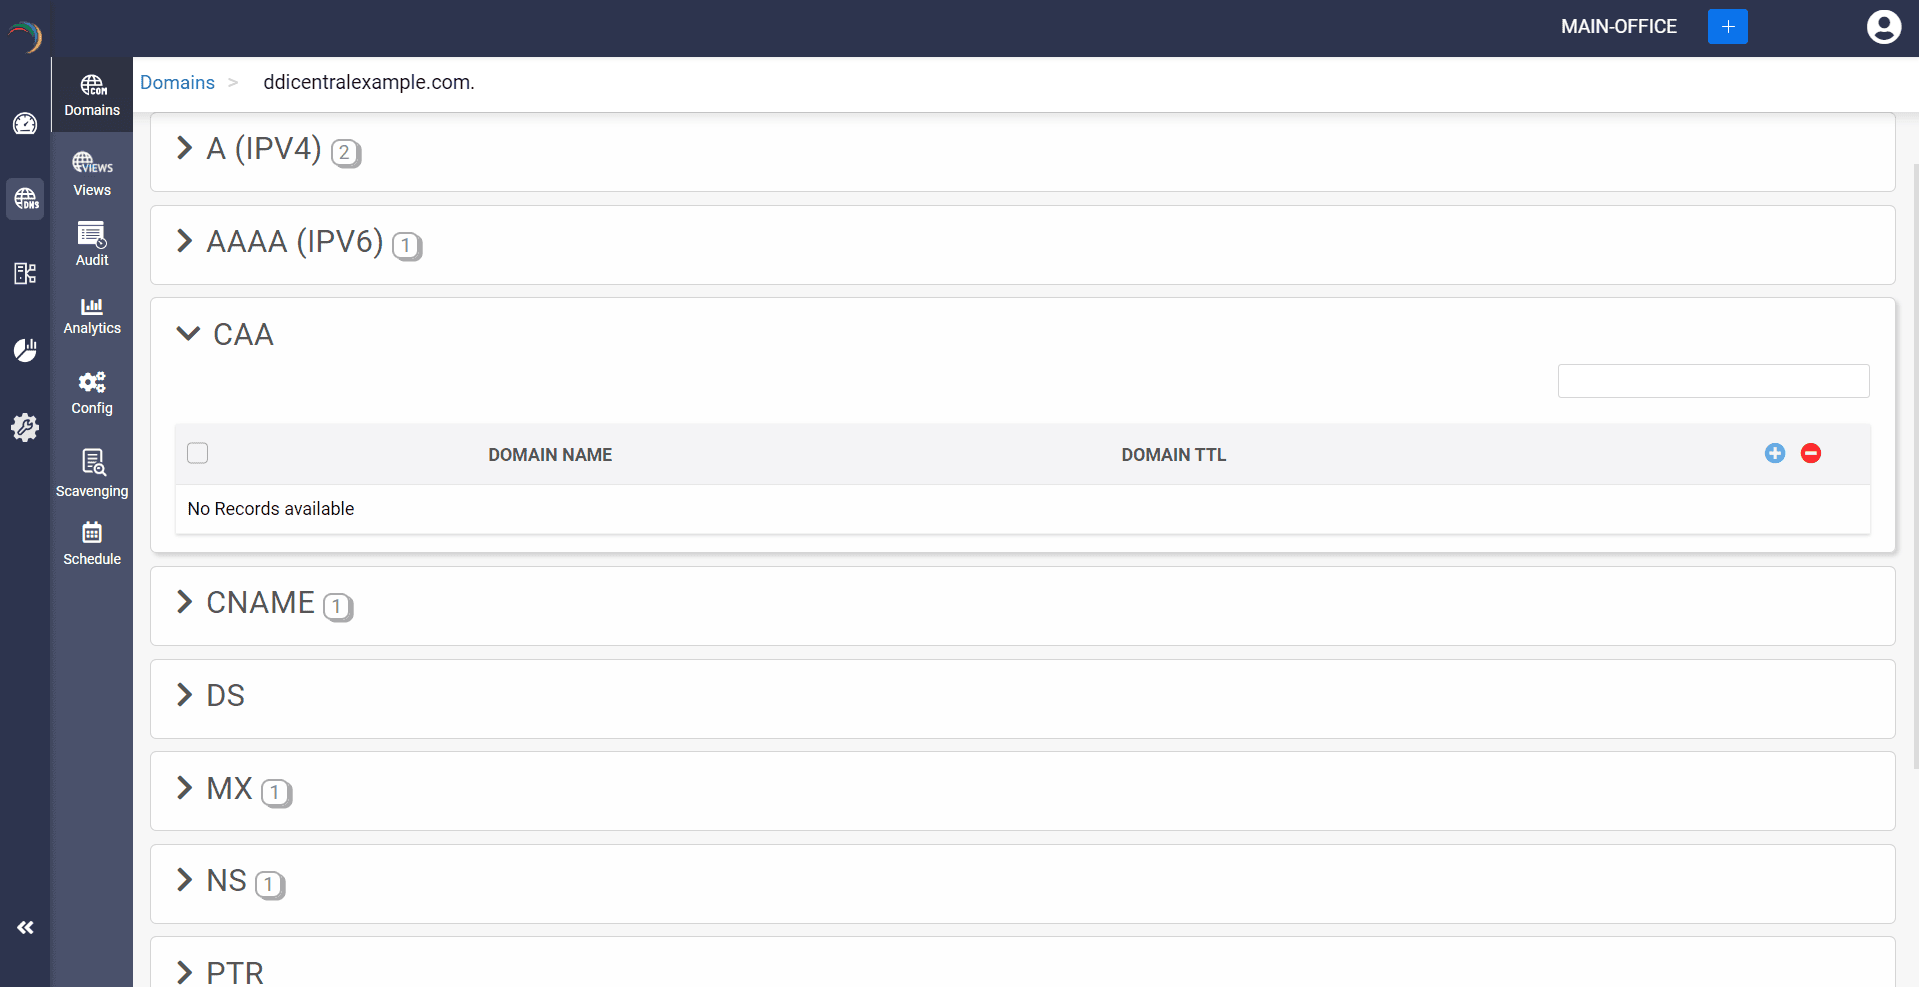
Step 1: Click on the CAA record of the DNS zone for a domain.
Step 2: On the right side, you can view a "+" sign for adding a record, and a "-" sign for deleting a record. Click the "+" sign to add a new CAA record.
Step 3: Provide the details of the new CAA record, such as name, TTL, date and time, there are three values in the Add Value section.
Value: This field specifies the domain name of the certificate authority allowed to issue certificates for the zone.
Flag: This field specifies properties or directives associated with the record. Common flag values:
- 0: No specific flag; standard behavior.
- 128: Indicates the record is critical, meaning it must be understood and processed by the CA.
The tag identifies the purpose of the CAA record. Common tags include:
- issue: Authorizes a specific CA to issue certificates for the domain.
- issuewild: Authorizes a CA to issue wildcard certificates for the domain.
- iodef: Specifies a URL or email to report invalid certificate requests.

Step 4: Proceed to save the record by clicking on "Save" or "Save and Continue".

What is a CNAME record
CNAME records help map an alias domain name to a canonical domain name. Alias domain names assist users with finding the true/canonical domain name. CNAME records helps by associating multiple alias domain names to a single canonical domain name.
CNAME records are primarily used to simplify DNS management, enhance server load balancing and failover.
How do you create a CNAME record?
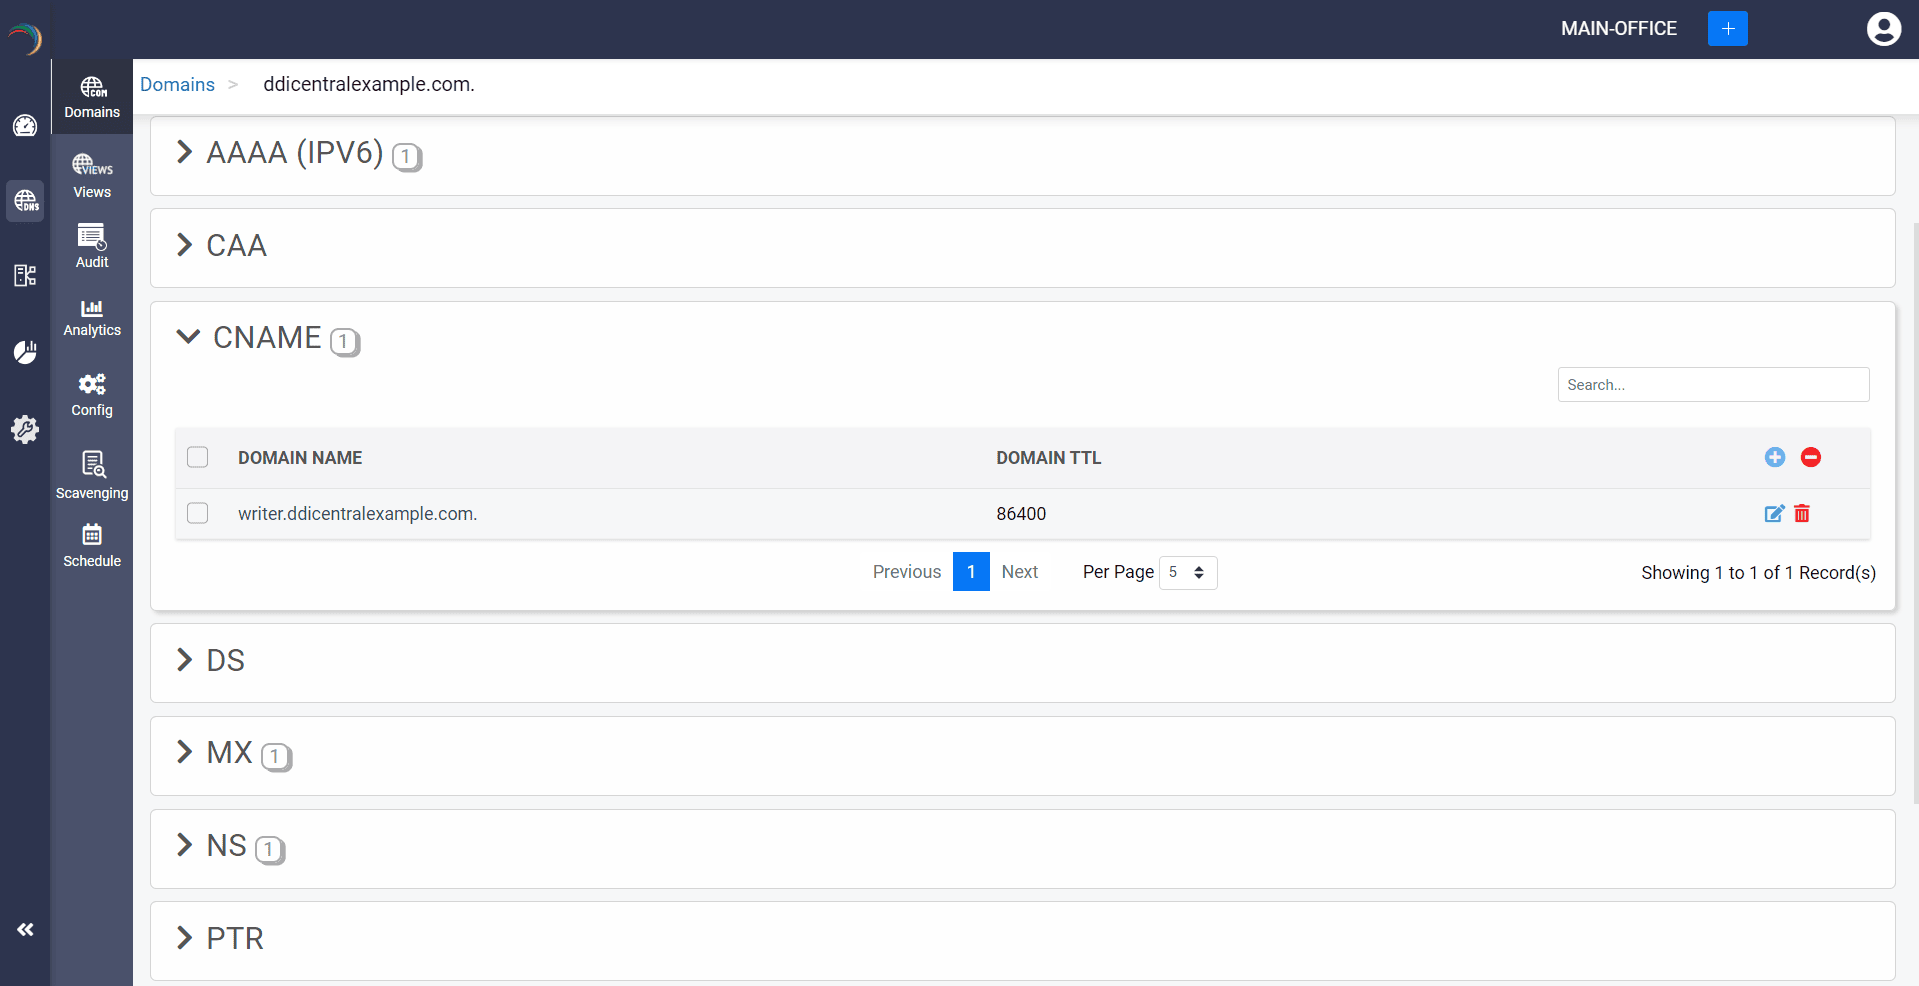
Step 1: Click on the CNAME record of the DNS zone for a domain.
Step 2: On the right side, you can view a "+" sign for adding a record, and a "-" sign for deleting a record. Click the "+" sign to add a new CNAME record.
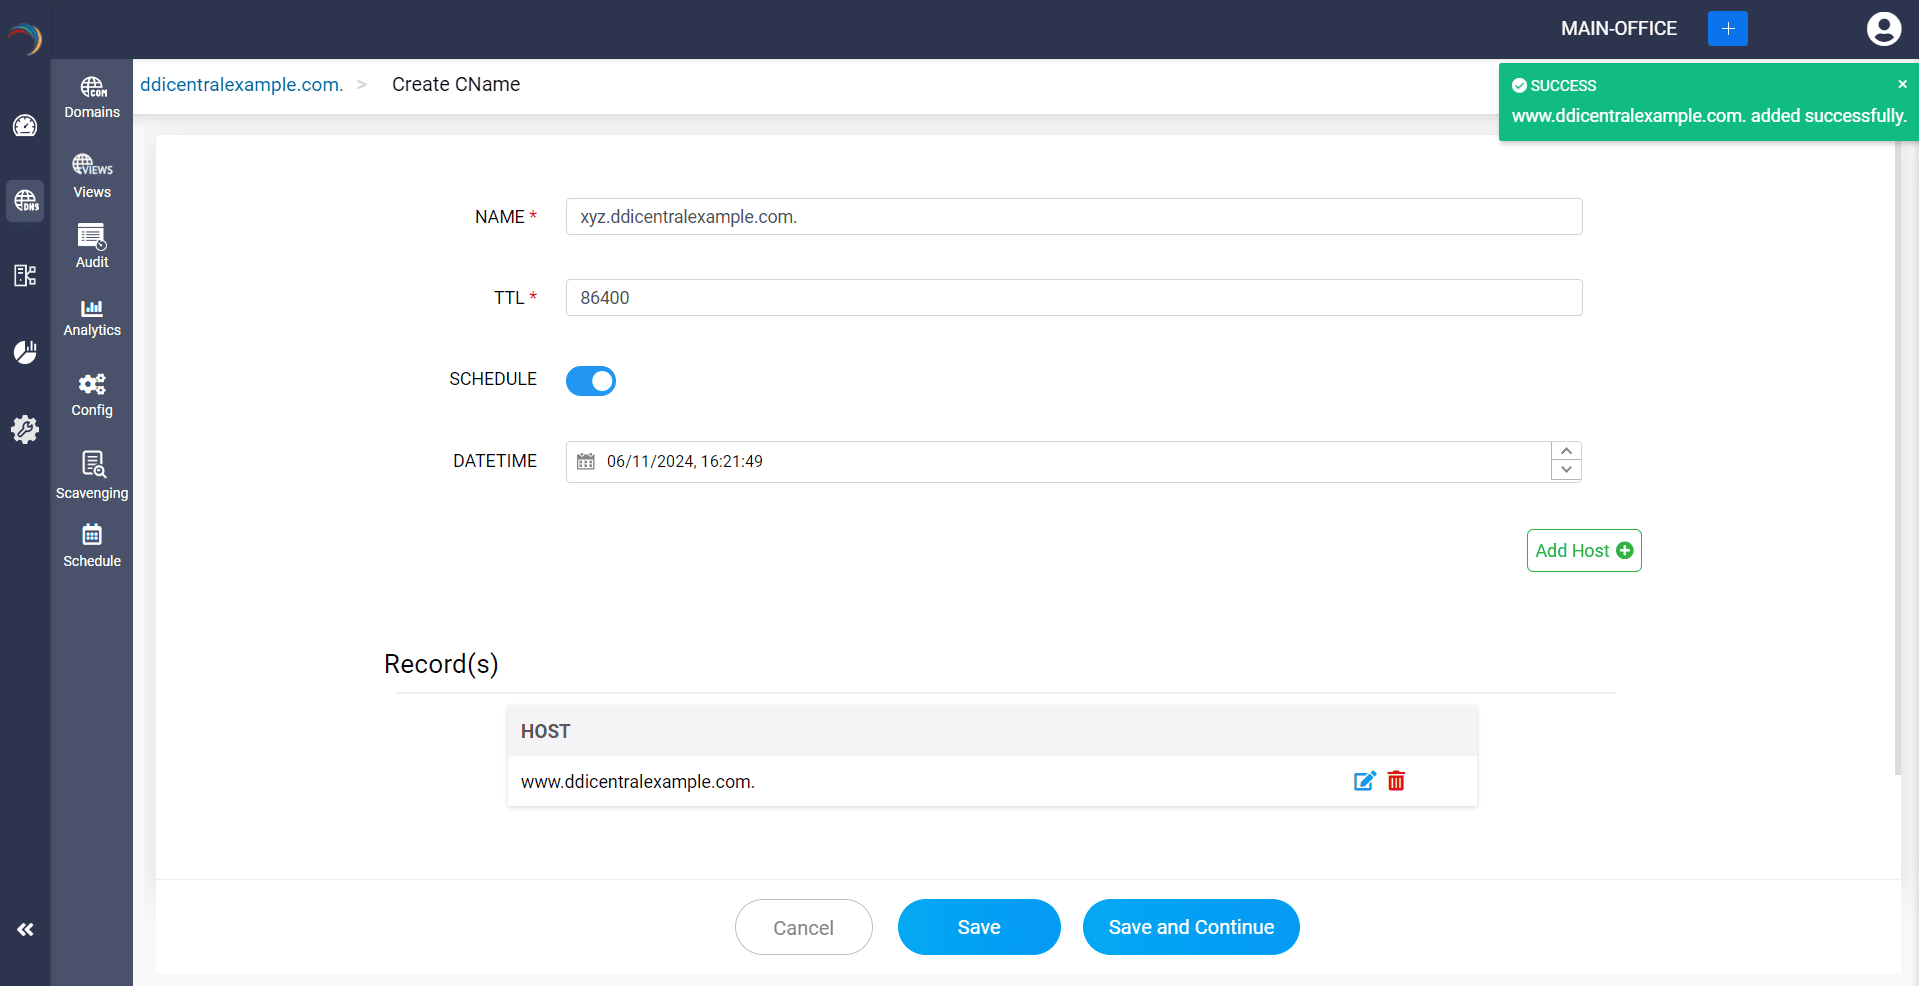
Step 3: Provide the details of the new CNAME record, such as name, TTL, date and time.
Provide the alias domain that points to the canonical domain in the Host field.

Step 4: Proceed to save the record by clicking on "Save" or "Save and Continue".
What is a DS record
Delegate Signature (DS) records are used in the Domain Name System Security Extensions (DNSSEC) for digital signing for DNS information transferred from the server to the client. This helps secure the integrity and authenticity of the DNS response and creates a chain of trust by digitally signing each server.
DS records prevents DNS spoofing and cache poisoning by securing the DNS response.
How do you create a DS record?
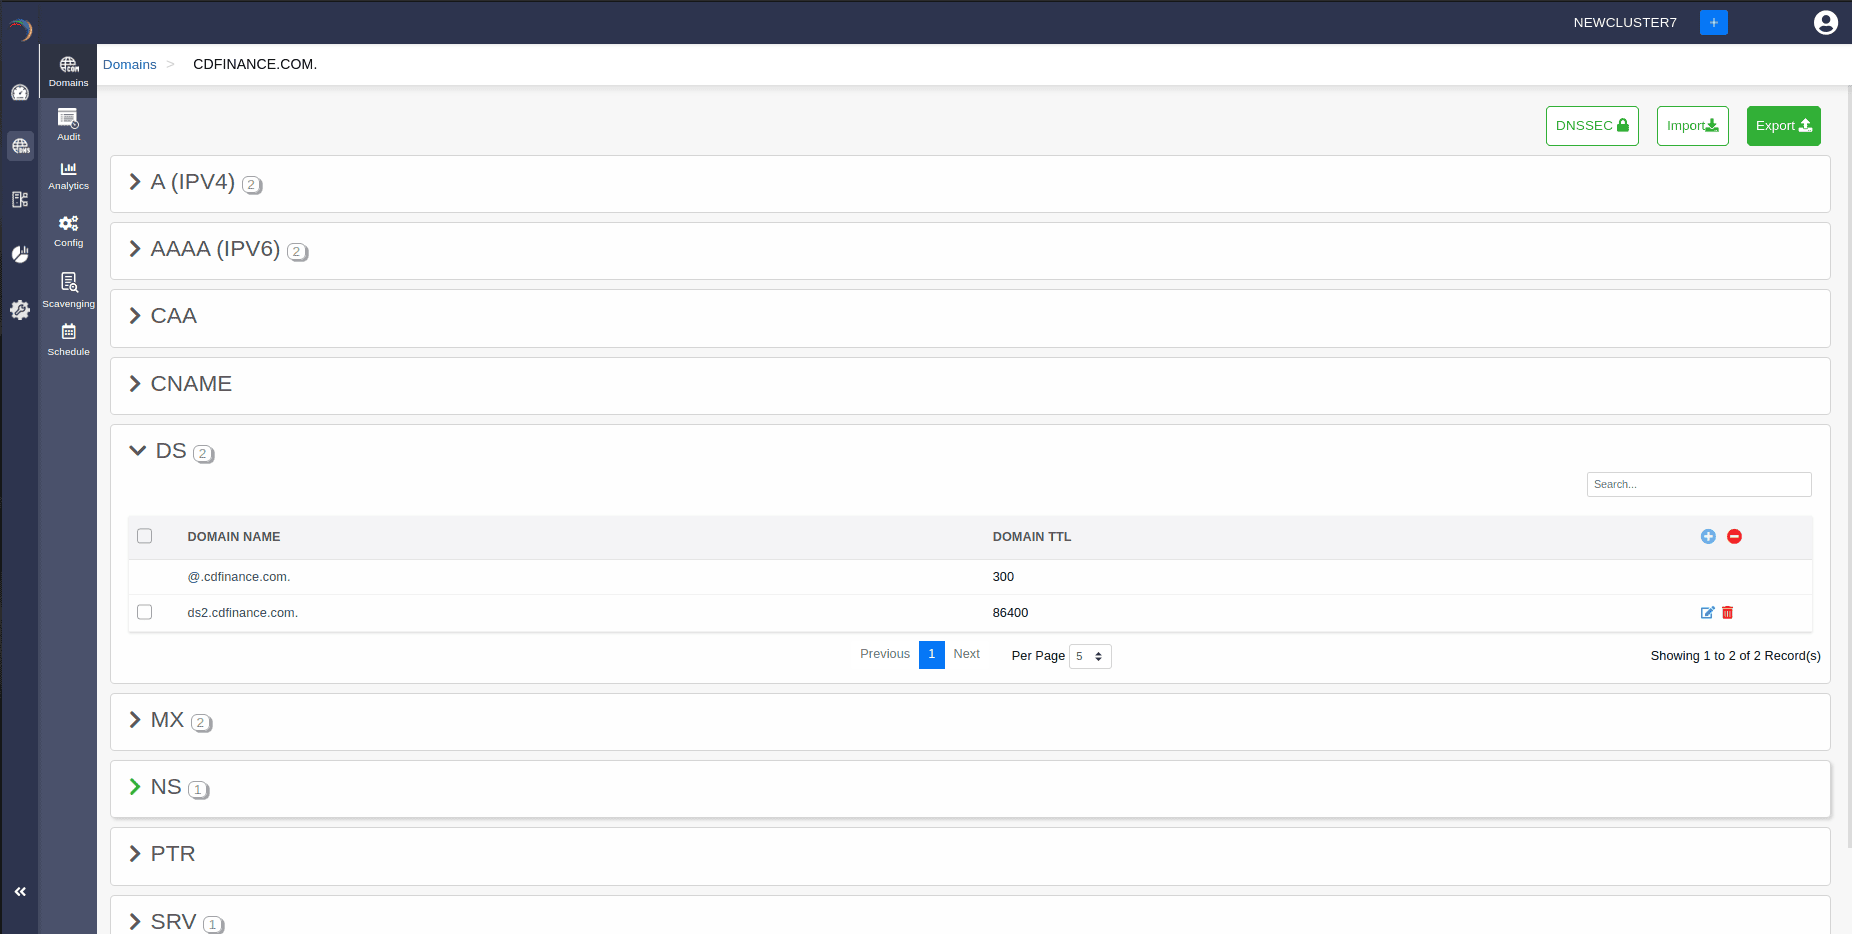
Step 1: Click on the DS record of the DNS zone for a domain.
Step 2: On the right side, you can view a "+" sign for adding a record, and a "-" sign for deleting a record. Click the "+" sign to add a new DS record.
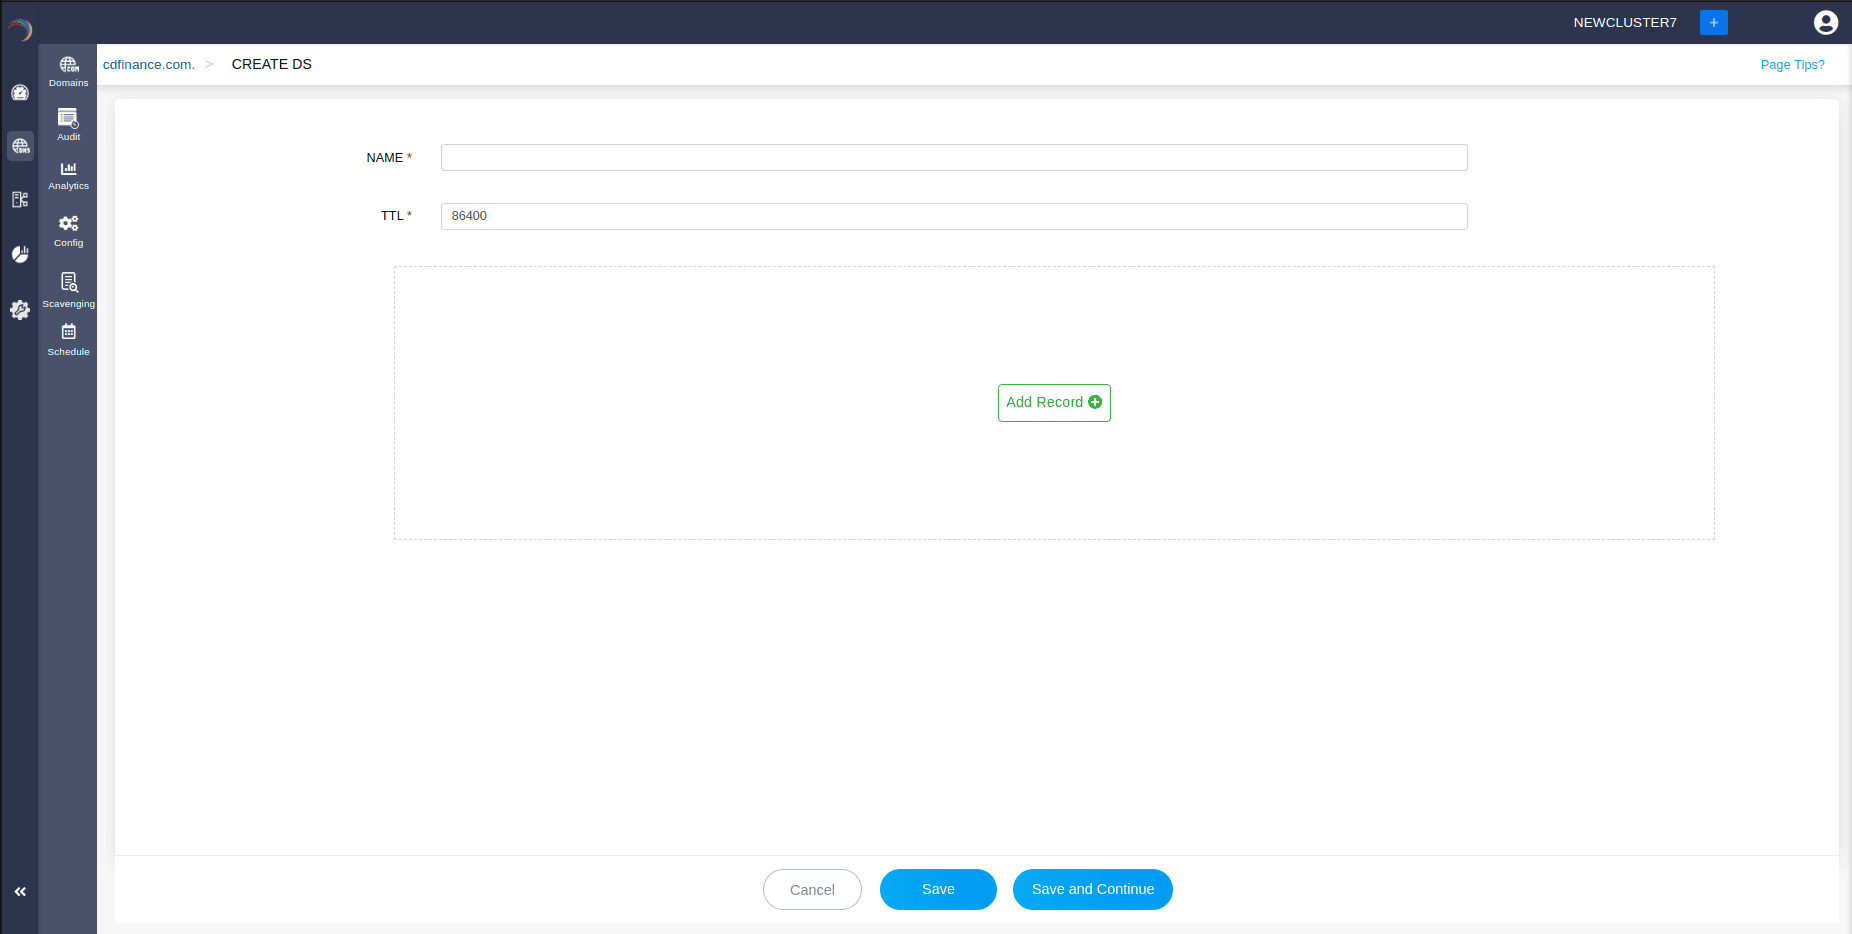
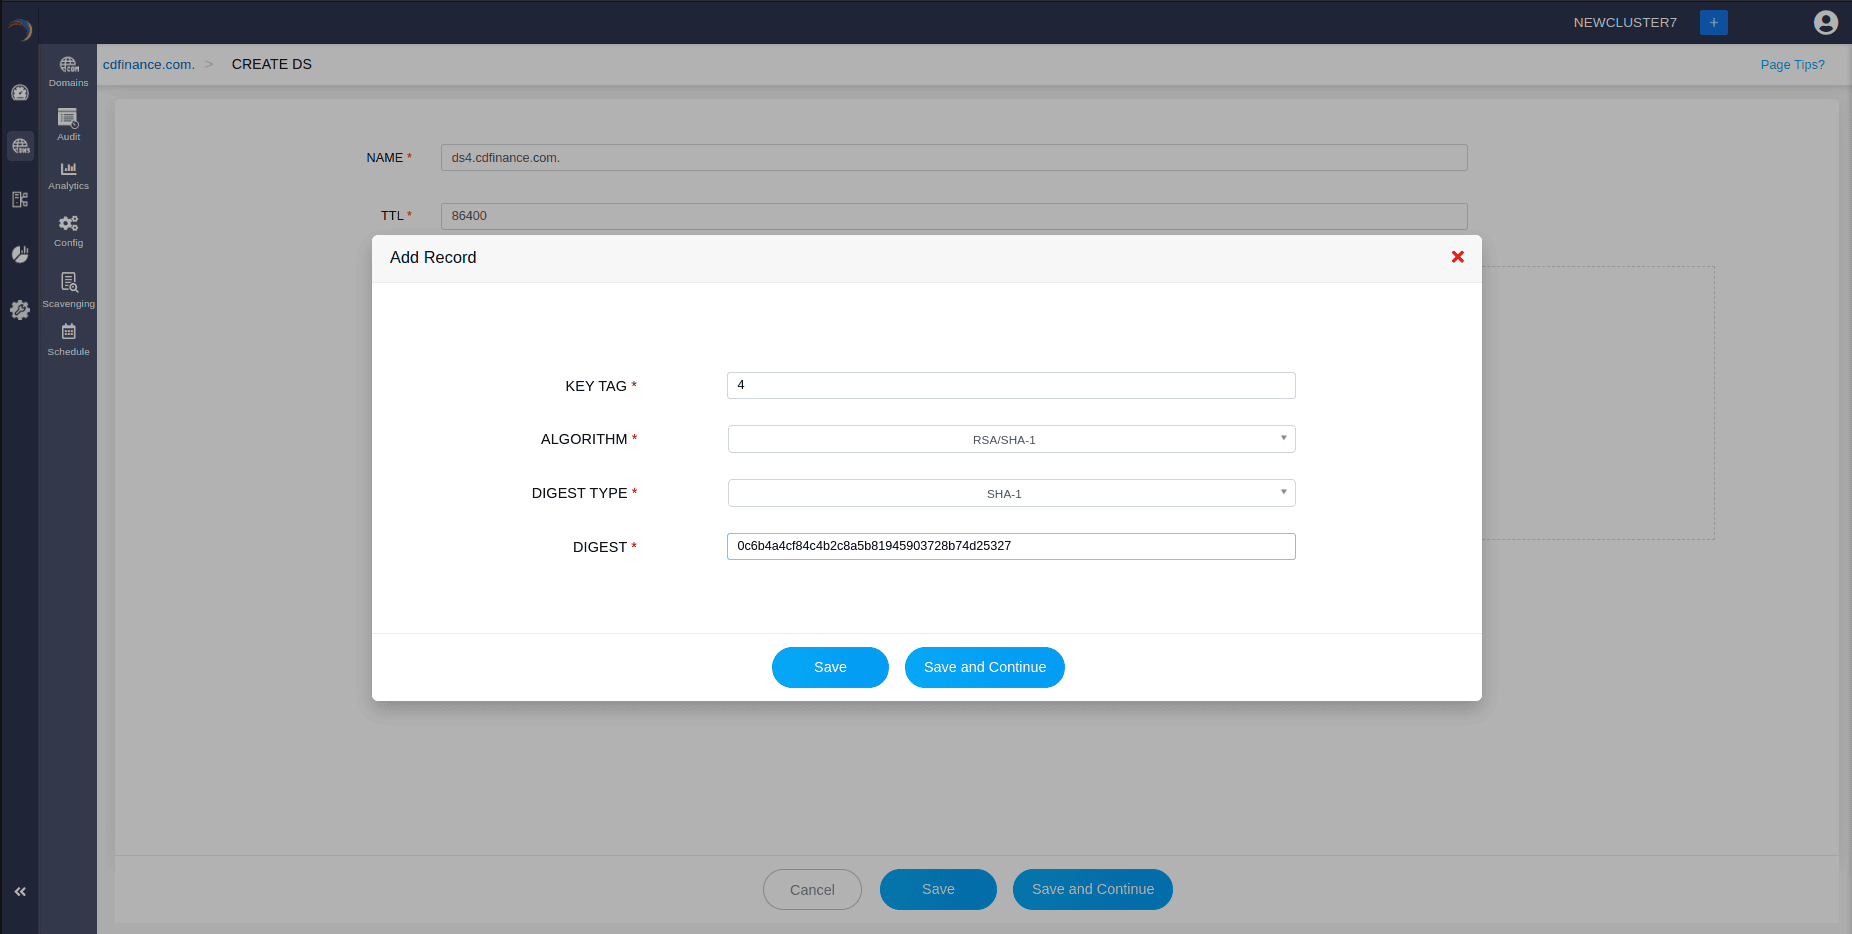
Step 3: Provide the details of the new DS record, such as name, TTL, date and time. There are four fields in the Add Record section.
- Key Tag: This field contains a short numeric identifier for the DNSKEY record to which the DS record is pointed
- Algorithm: This field specifies the algorithm used by the DNSKEY record and each algorithm is assigned a number. The common algorithms are: 1: RSA/MD5 5: RSA/SHA-1 8: RSA/SHA-256 13: ECDSA Curve P-256 with SHA-256
- Digest type: This field specifies the algorithm used to create the digest (hash) of the DNSKEY record. Each digest type is assigned a number. Common digest types include: 1: SHA-1 2: SHA-256 4: SHA-384
- Digest: This field contains the actual cryptographic hash of the DNSKEY record. It ensures that the DNSKEY record has not been tampered with.
Step 4: Proceed to save the record by clicking on "Save" or "Save and Continue".
What is a MX record
MX records are primarily used in the mail servers for routing specific mail servers to handle mails of a specific domain and directing mail to the right mail servers.
When mail is sent to an address of a domain, the mail server will query the nearby DNS resolver for MX record of the recipient's domain. The MX record will provide the address of the recipient's mail server, and the mail will be directed.
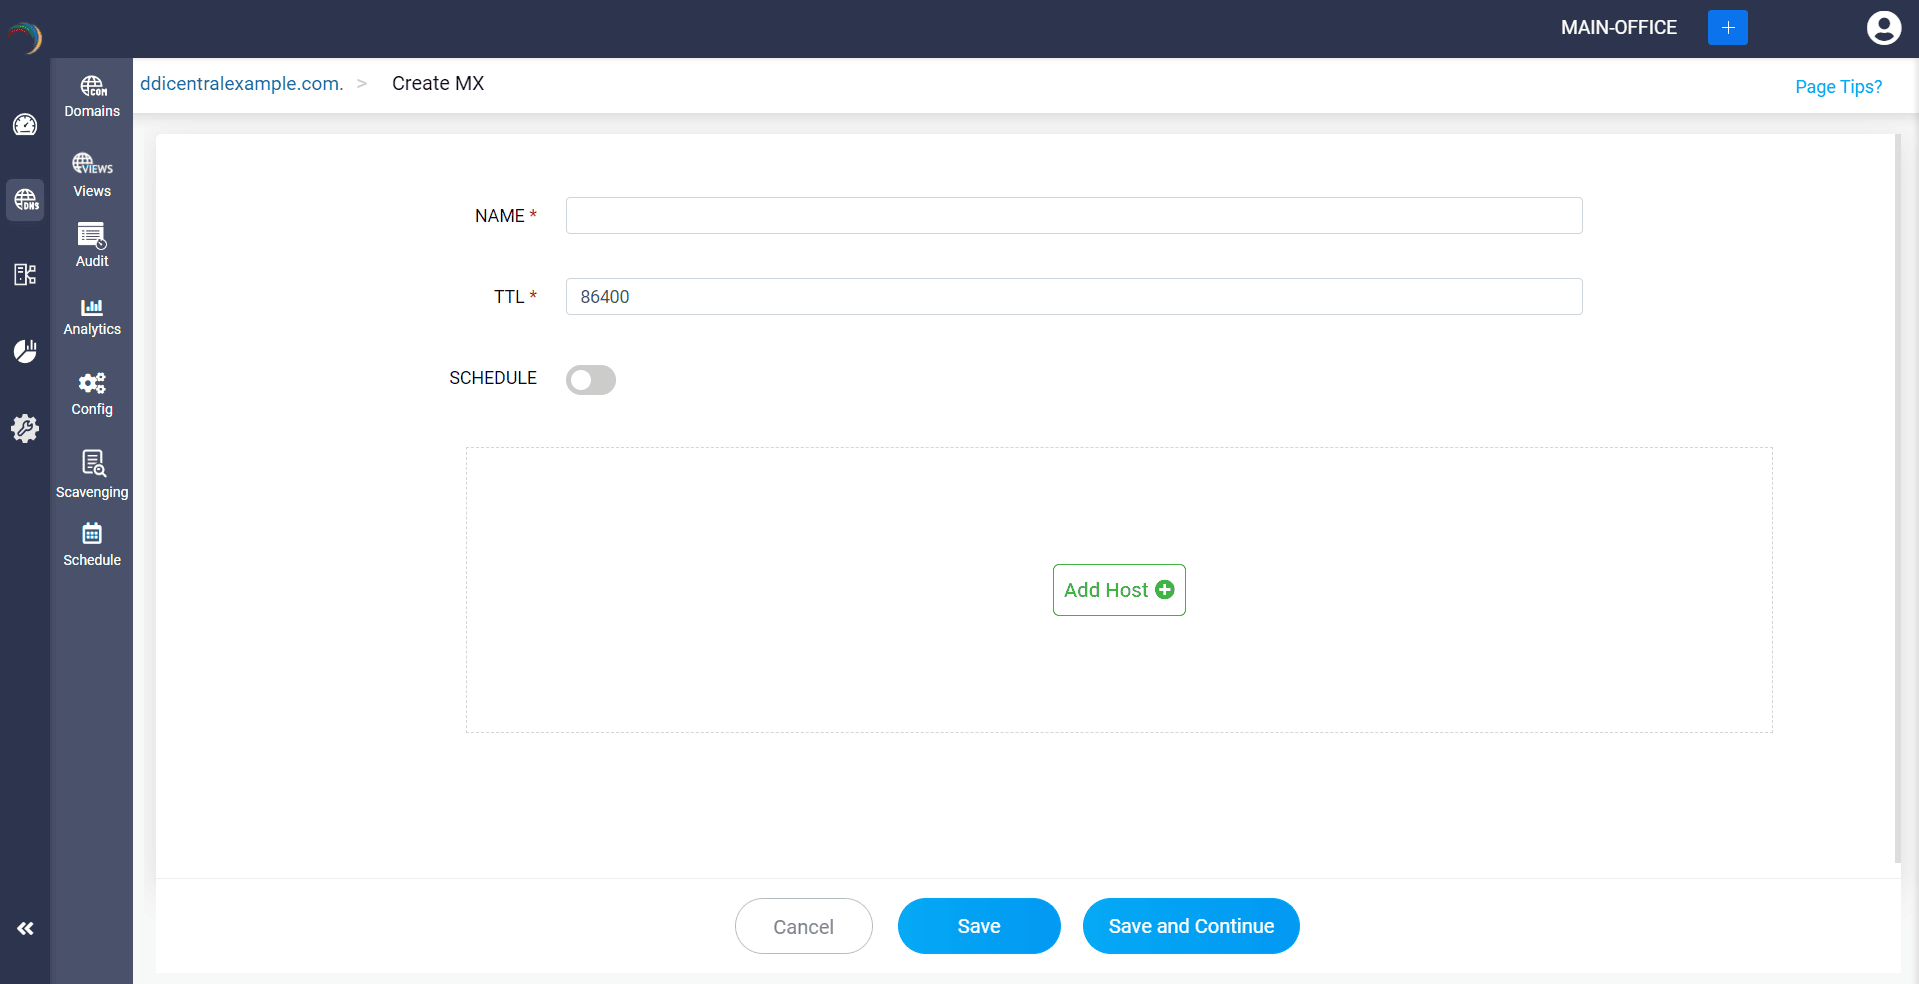
How do you create a MX record?
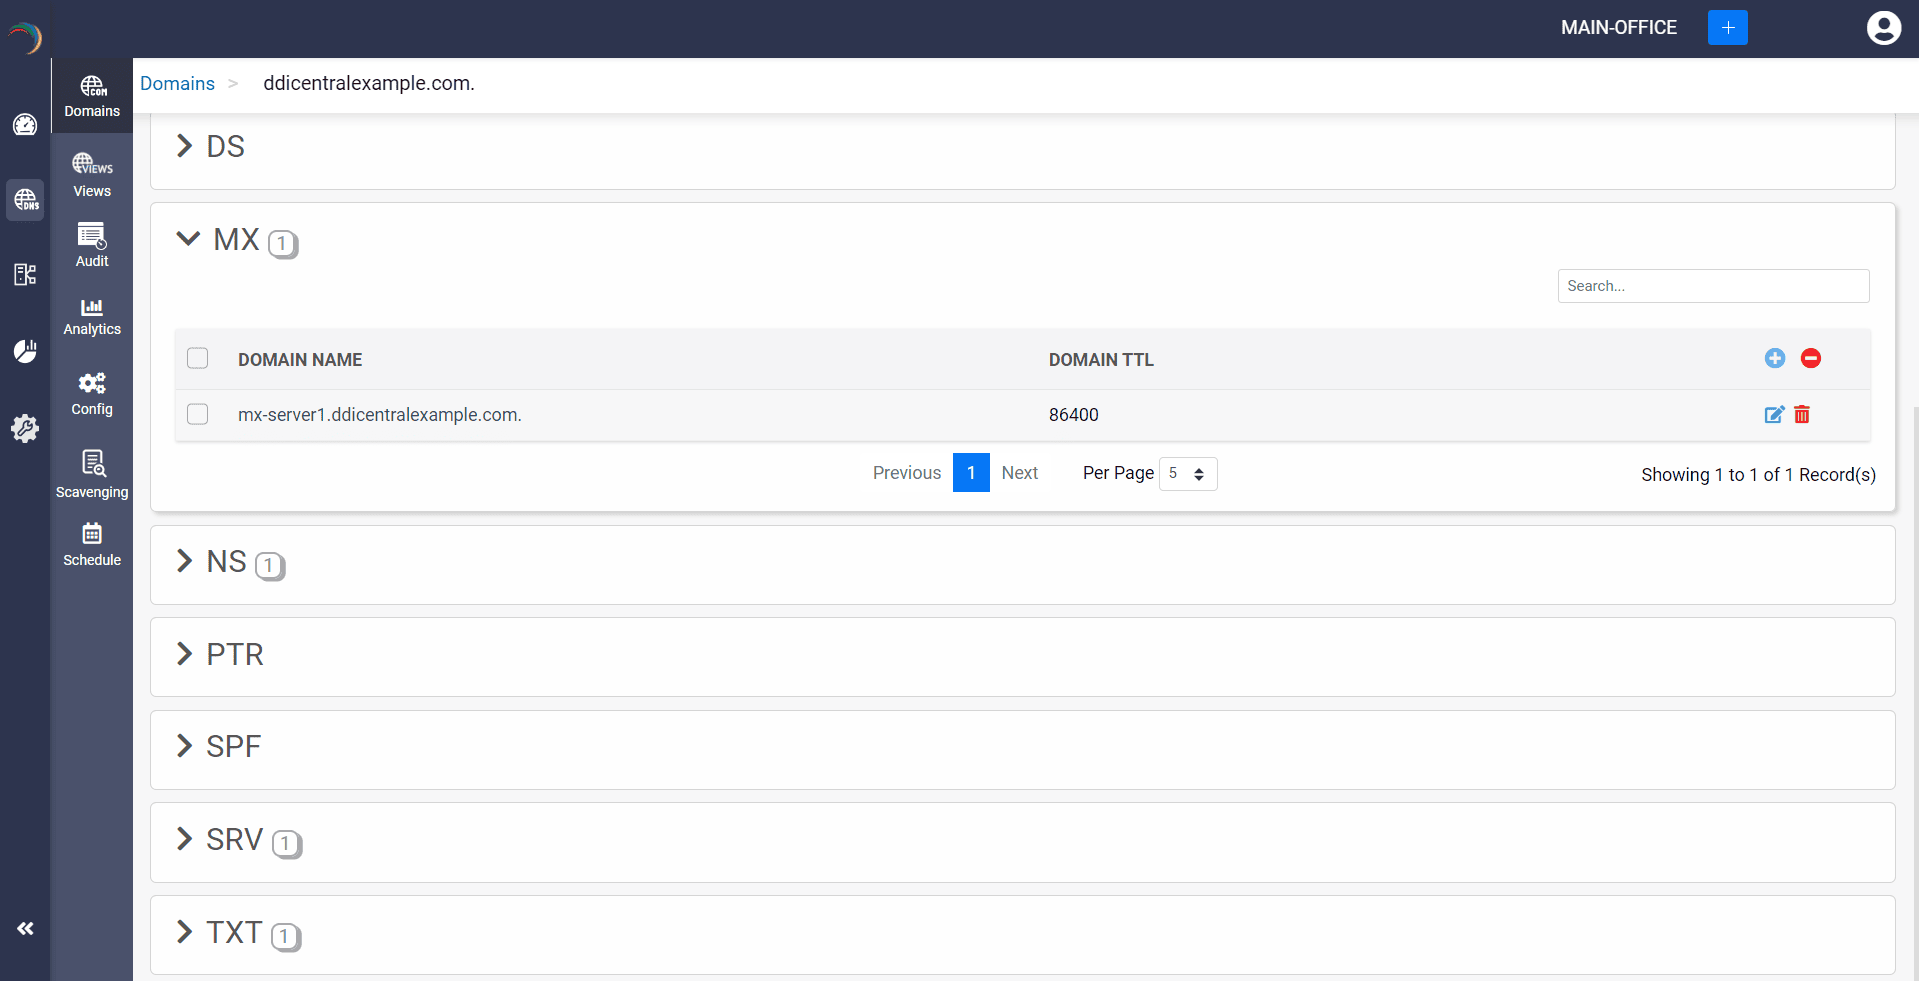
Step 1: Click on the MX record of the DNS zone for a domain.
Step 2: On the right side, you can view a "+" sign for adding a record, and a "-" sign for deleting a record. Click the "+" sign to add a new MX record.
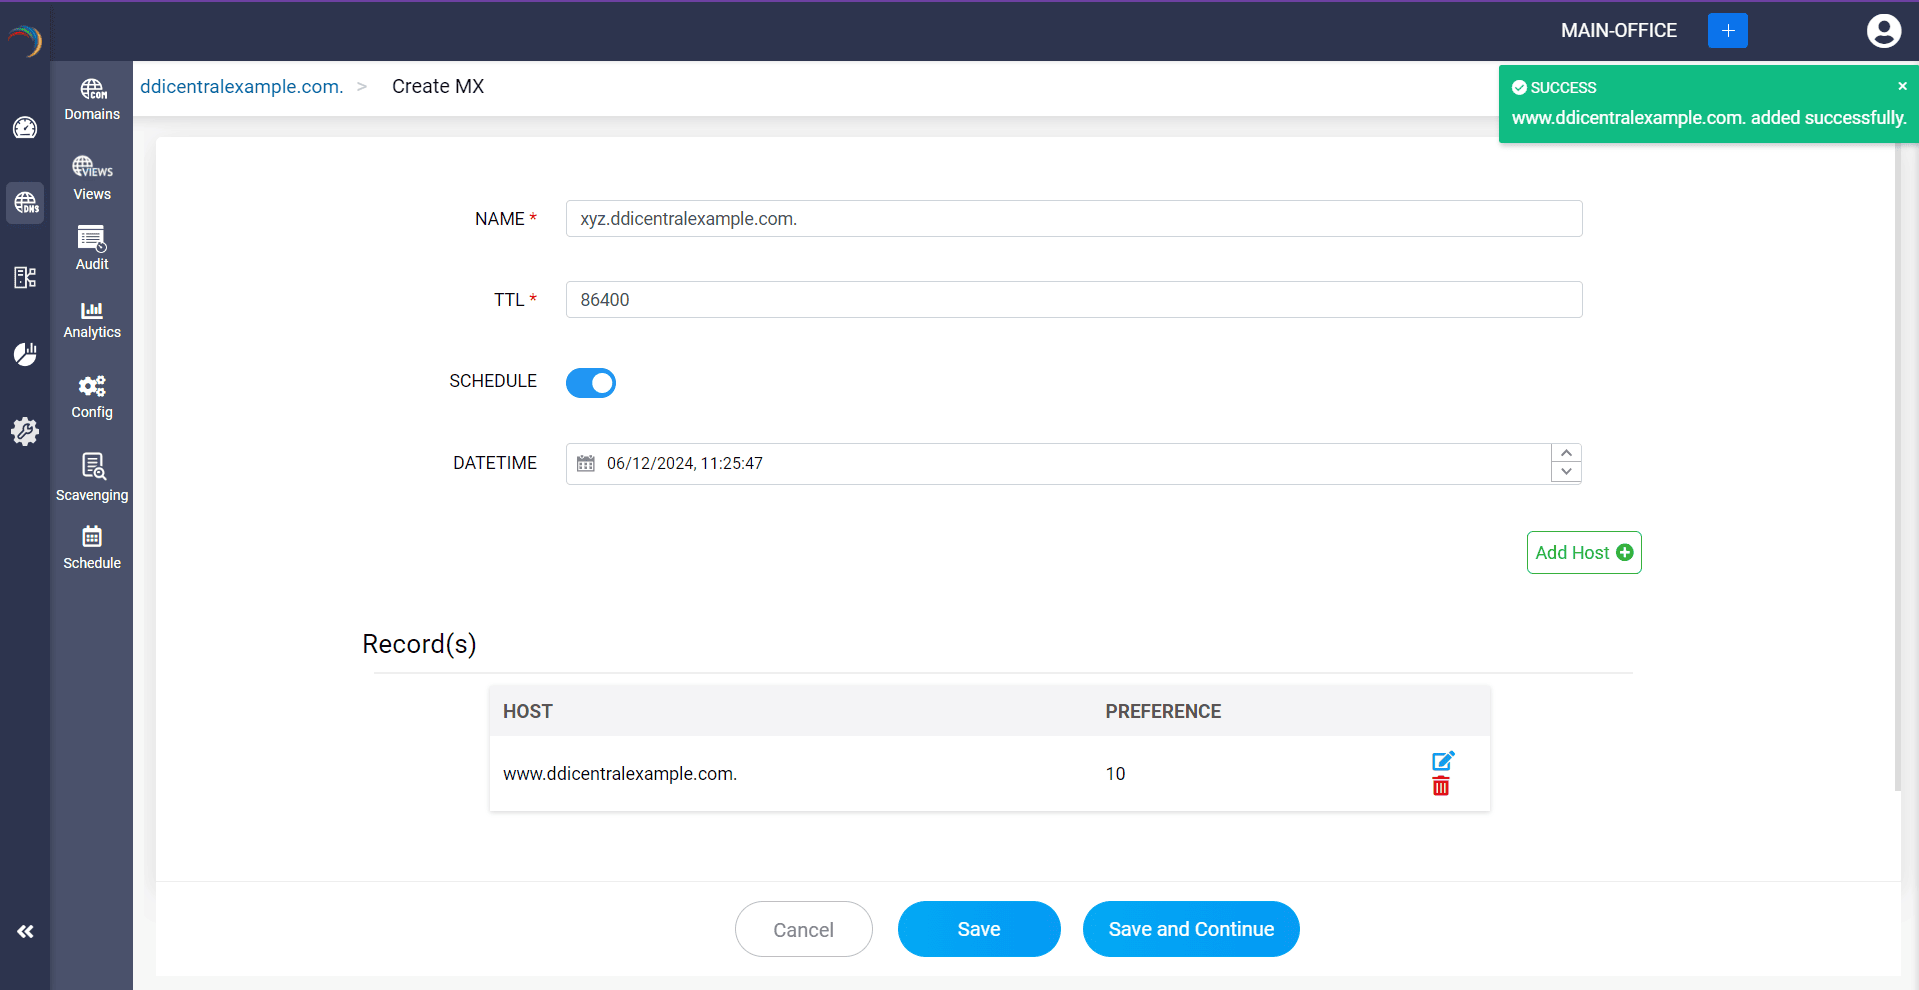
Step 3: Provide the details of the new MX record, such as name, TTL, date and time. There are two fields in the Add Host section.
Host: This field contains the Full Qualified Domain Name (FQDN) of the mail server.
Preference: This field is an integer value that indicates the priority of the mail server. Lower values have higher priority. If multiple MX records exist for a domain, the mail server with the lowest preference value is tried first.
Step 4: Proceed to save the record by clicking on "Save" or "Save and Continue".
What is a NS record
Name Server (NS) records are responsible for indicating which servers should be answering DNS queries from a specific domain. They identify the name servers holding DNS records of that domain, and basically direct DNS queries to the appropriate authoritative name servers, thus enhancing the network services of an organization.
How do you create a NS record?
Step 1: Click on the NS record of the DNS zone for a domain.
Step 2: On the right side, you can view a "+" sign for adding a record, and a "-" sign for deleting a record. Click the "+" sign to add a new NS record.
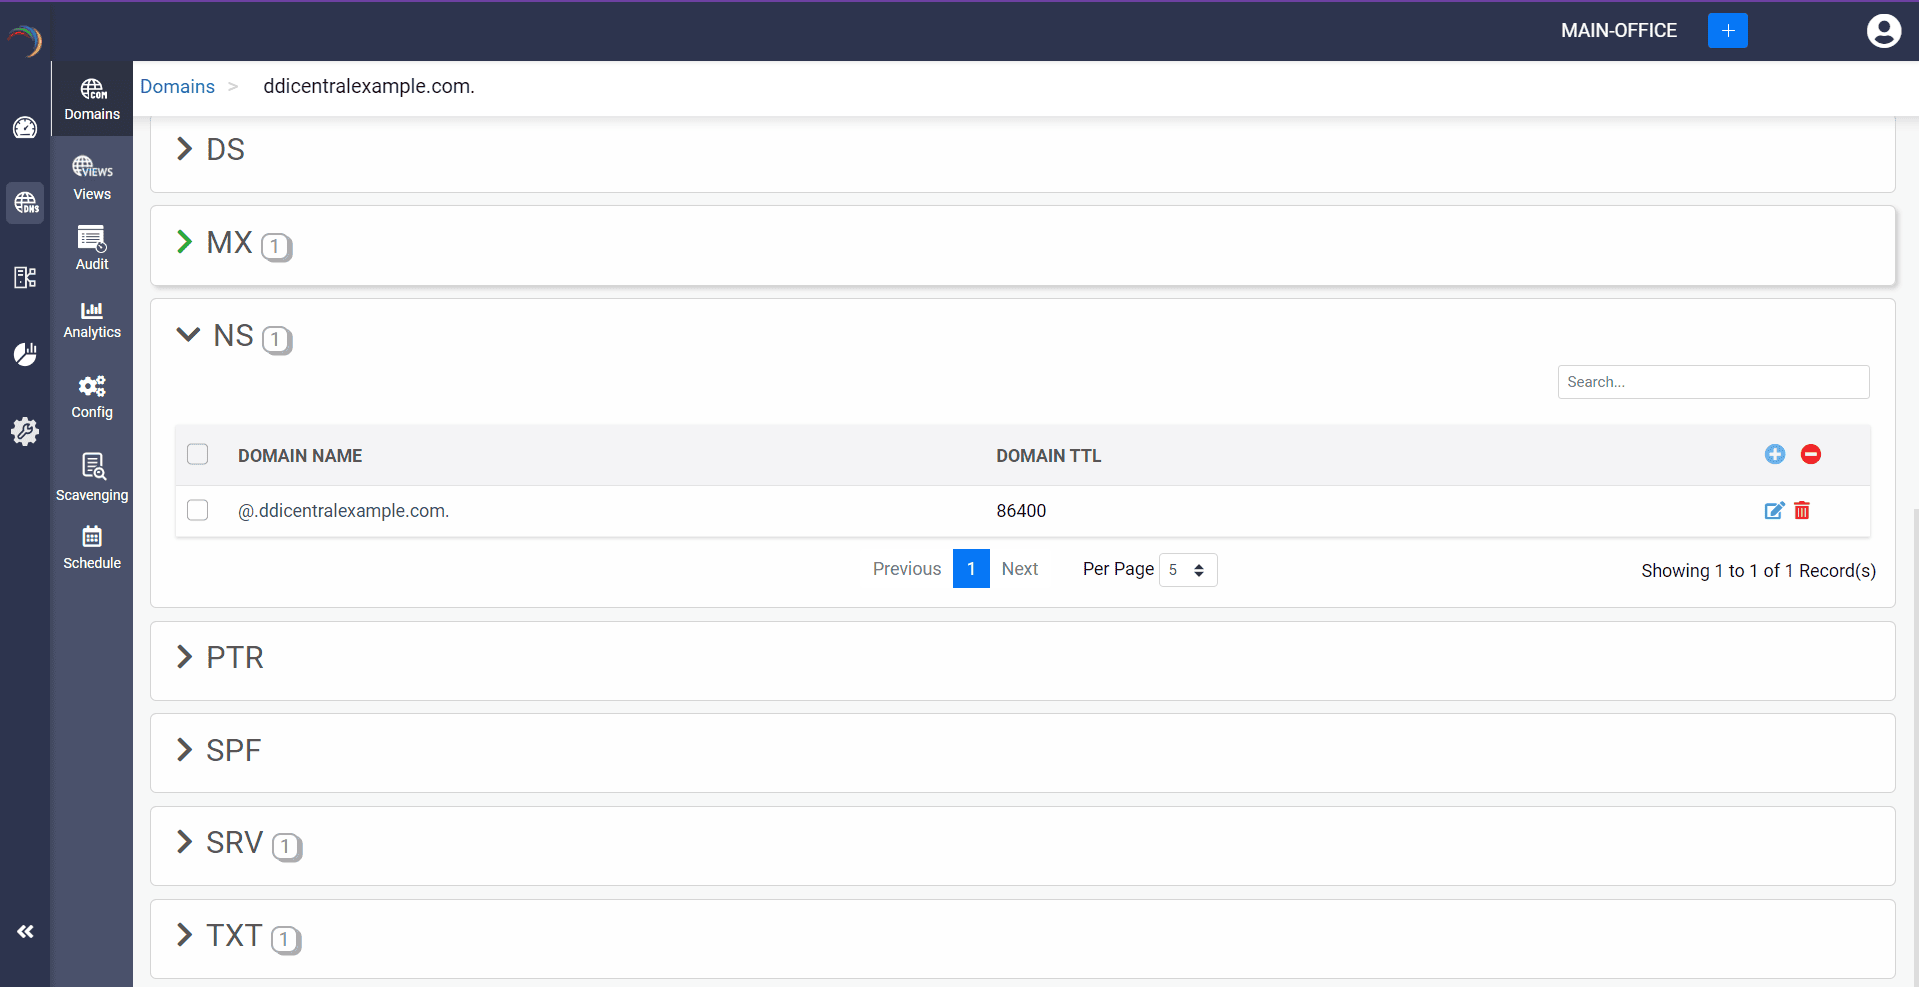
Step 3: Provide the details of the new NS record, such as name, TTL, date and time.
Provide the domain name of the authoritative name server in the Host field.

Step 4: Proceed to save the record by clicking on "Save" or "Save and Continue".

What is a PTR record
Pointer (PTR) records function in the opposite way compared to the A records. They map IP addresses to the respective domain names. PTR records are primarily used in the reverse DNS lookups for email verification, host and device identification, security and authentication purposes. This ensures that an IP address is associated with the right domain name.
How do you create a PTR record?
Step 1: Click on the PTR record of the DNS zone for a domain.
Step 2: On the right side, you can view a "+" sign for adding a record, and a "-" sign for deleting a record. Click the "+" sign to add a new PTR record.
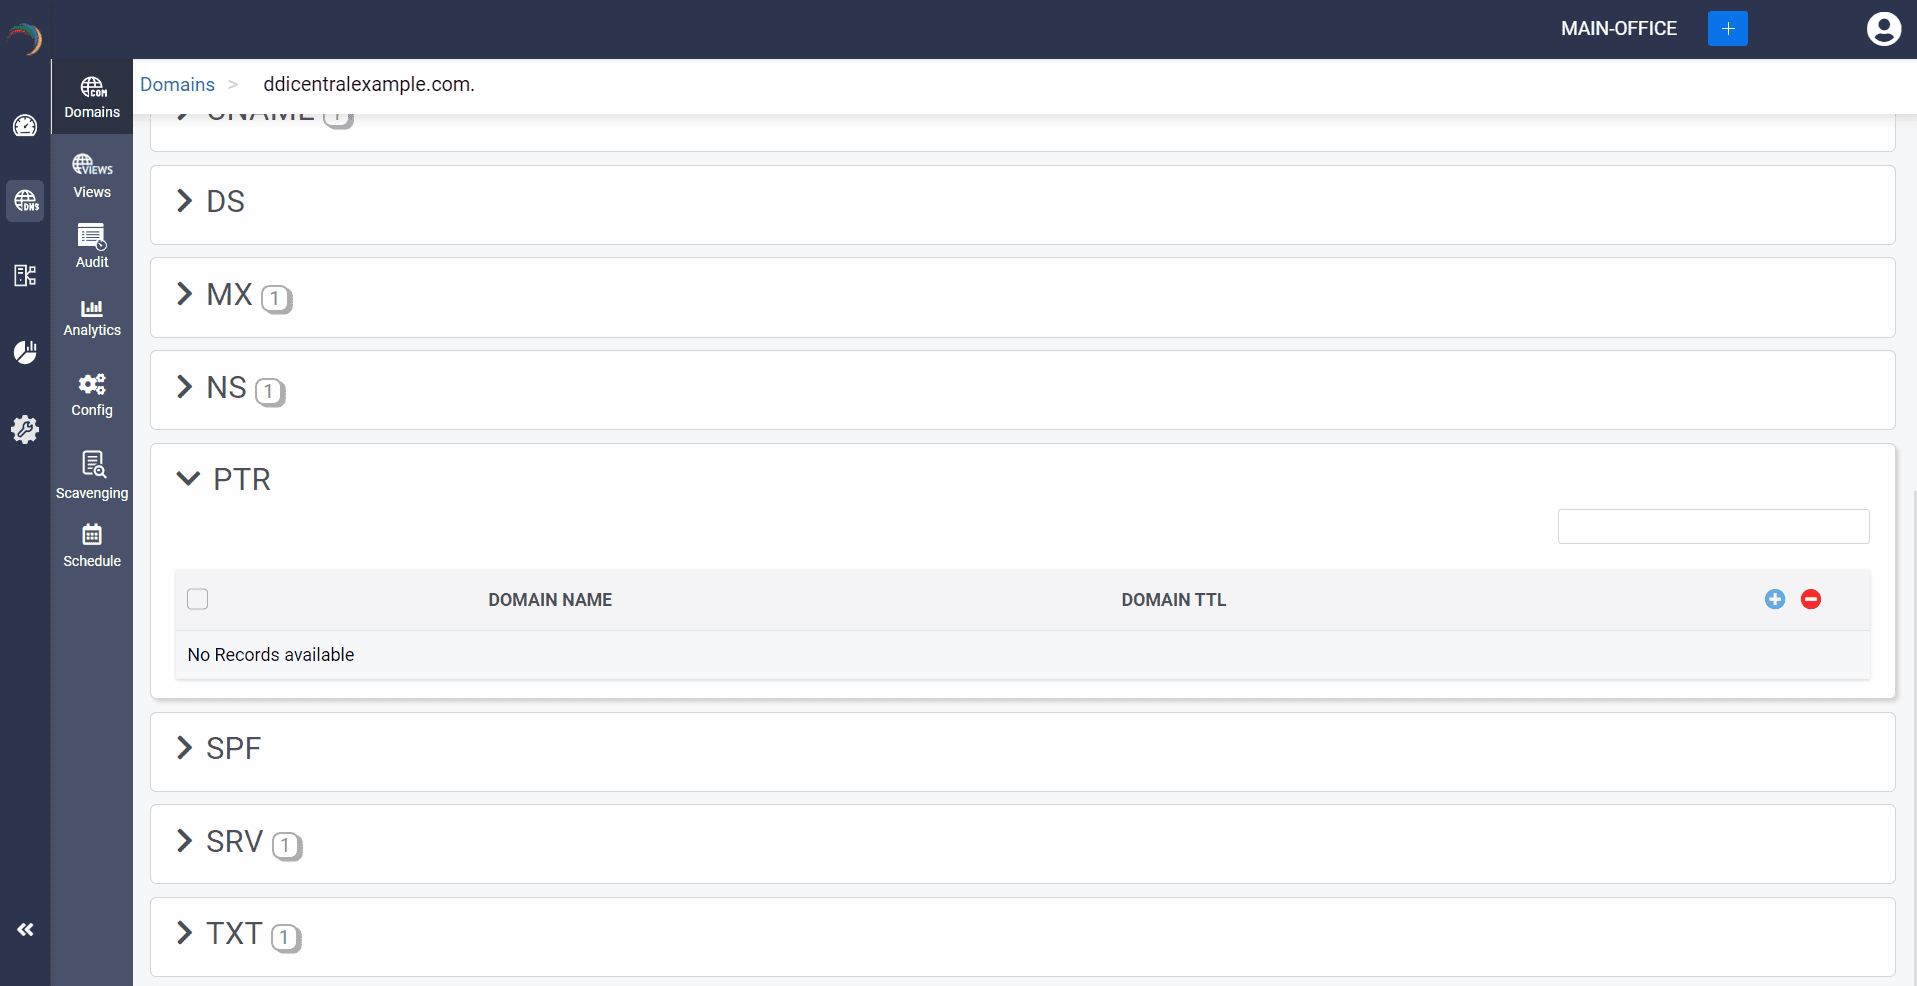
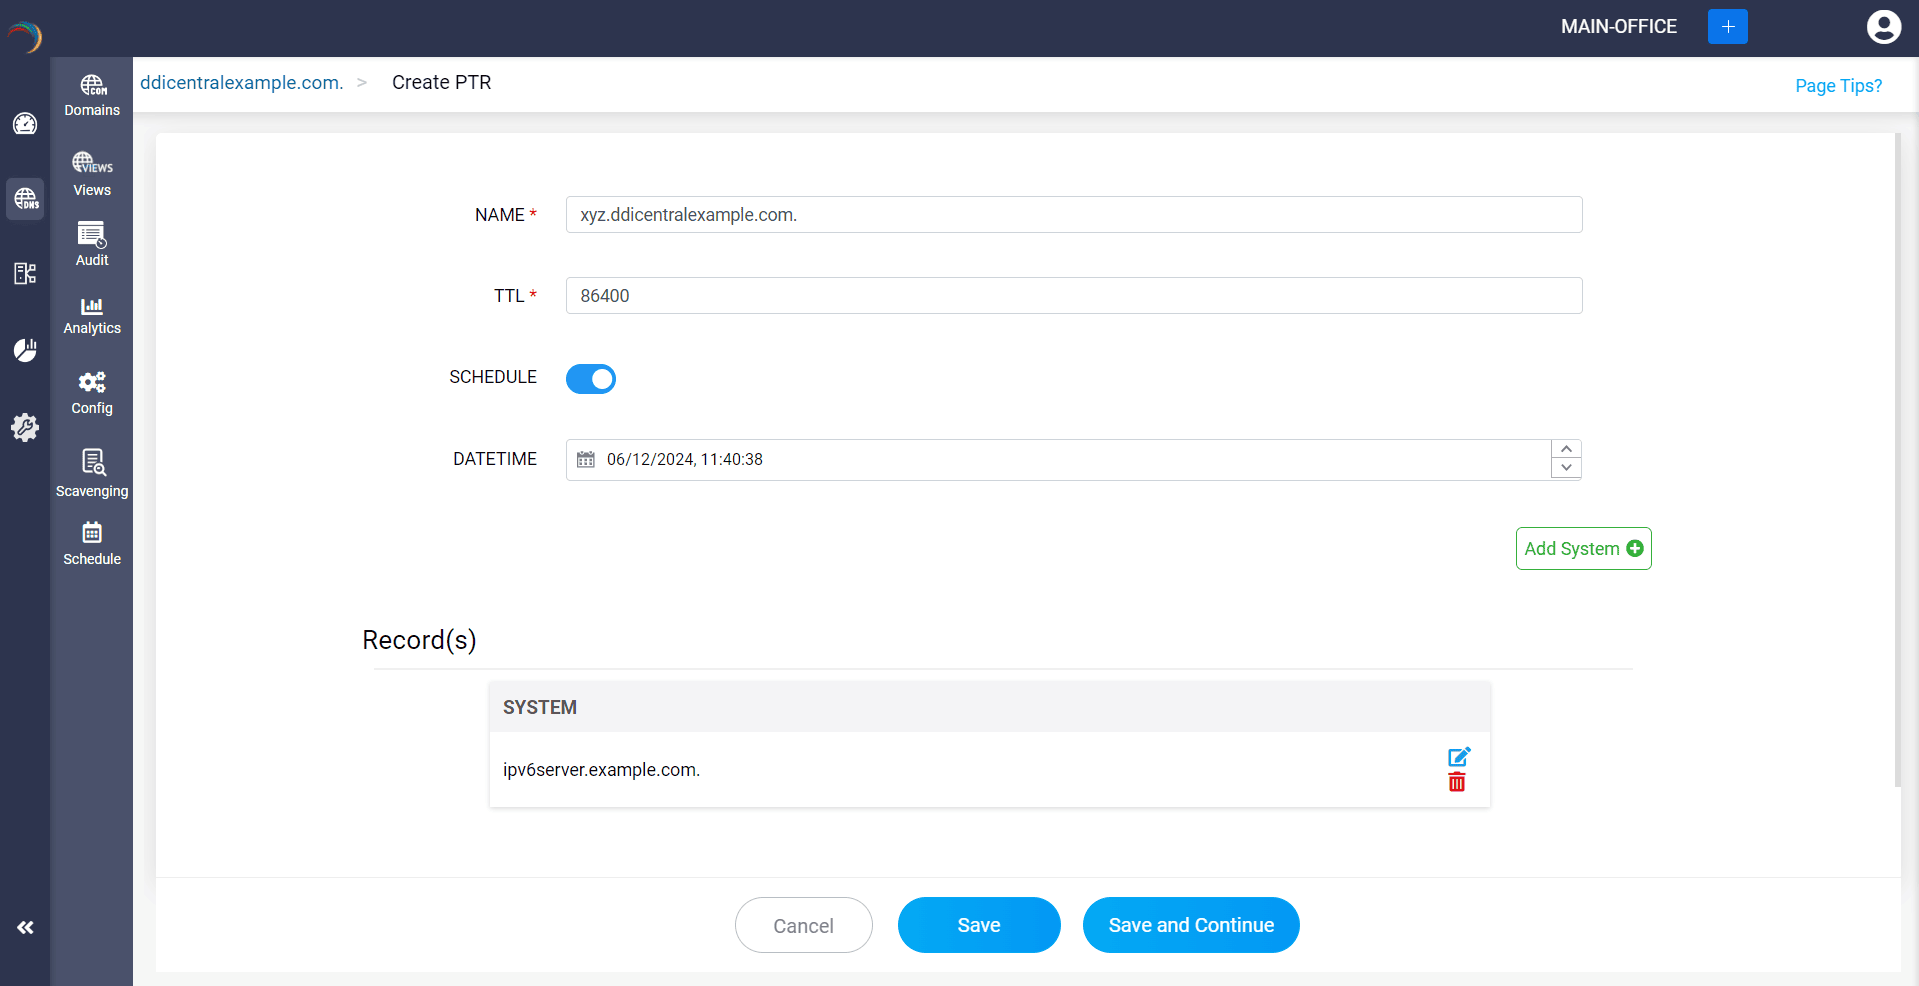
Step 3: Provide the details of the new PTR record, such as name, TTL, date and time.
Provide the domain name the IP address should map to in the System field.

Step 4: Proceed to save the record by clicking on "Save" or "Save and Continue".
What is a SRV record
Service (SRV) records are used to locate the right servers for specific queries. They provide the details of the hostname and port numbers of the servers, allowing clients to connect with specific services easily. SRV records facilitate service discovery and seamless connection for clients, thus offering flexibility, load balancing, and failover management.
How do you create a SRV record?
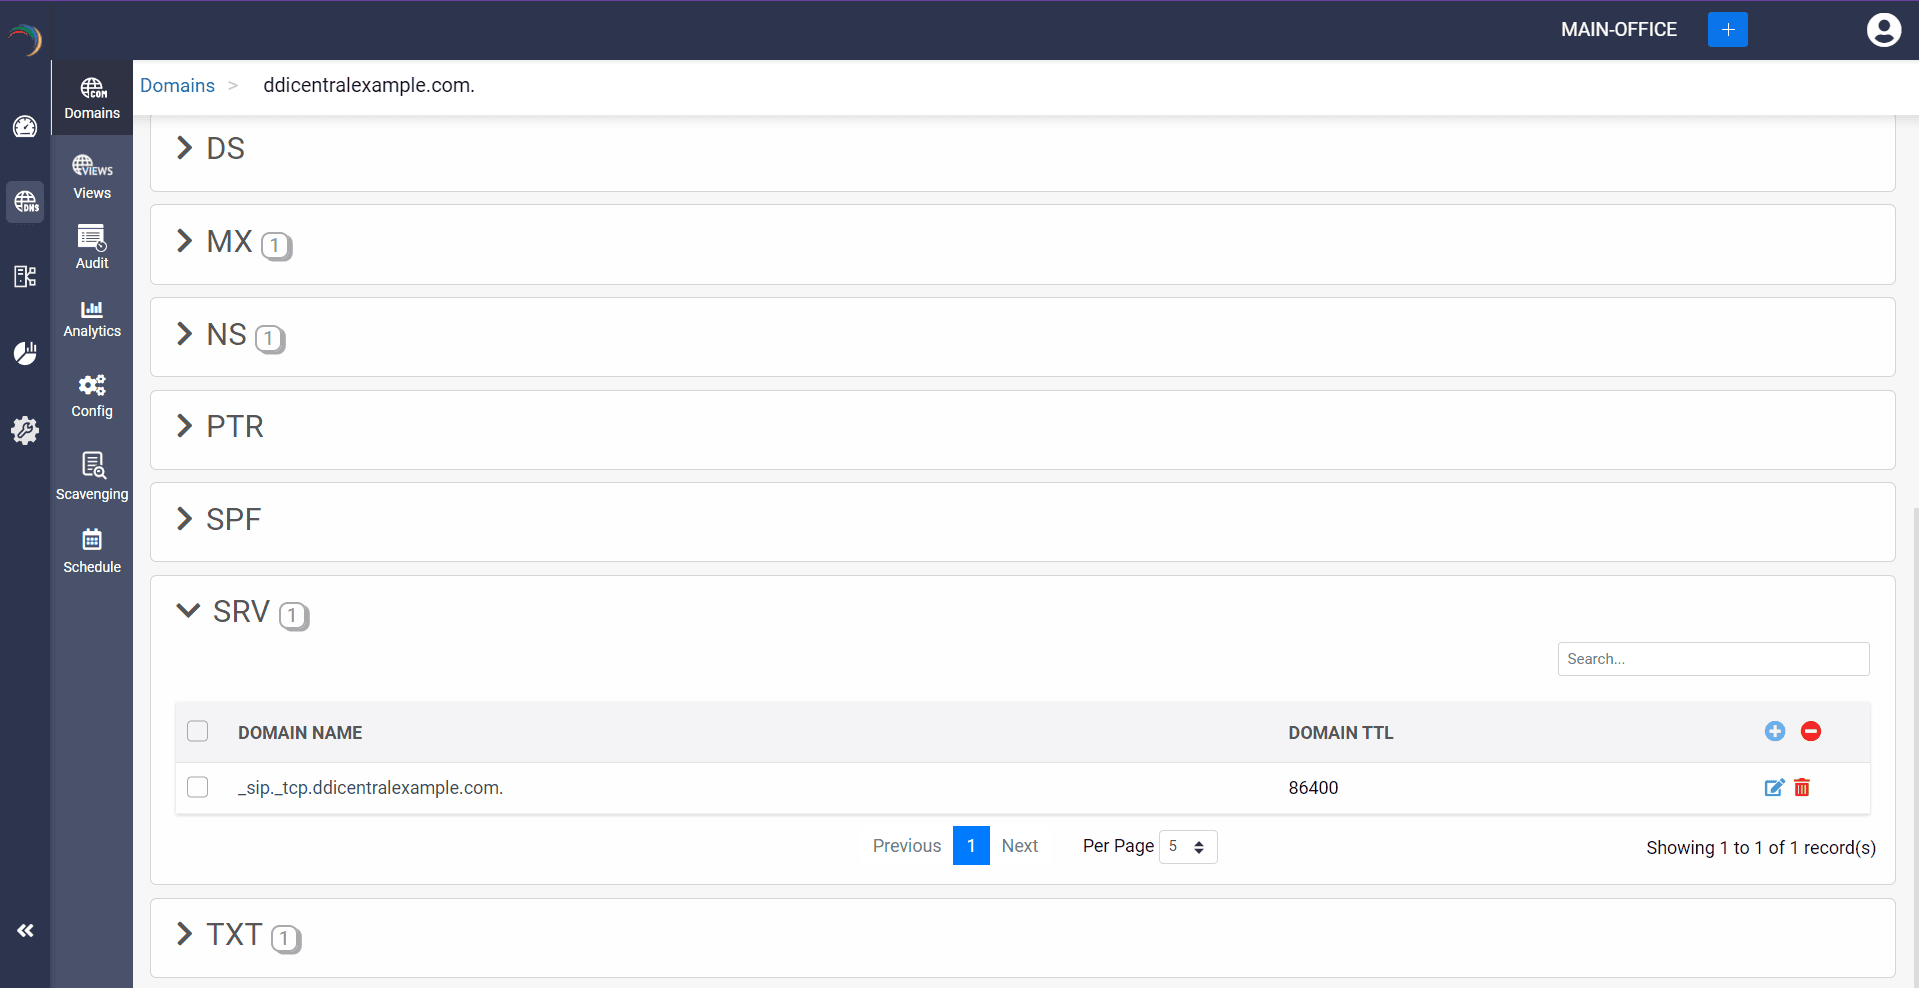
Step 1: Click on the SRV record of the DNS zone for a domain.
Step 2: On the right side, you can view a "+" sign for adding a record, and a "-" sign for deleting a record. Click the "+" sign to add a new SRV record.
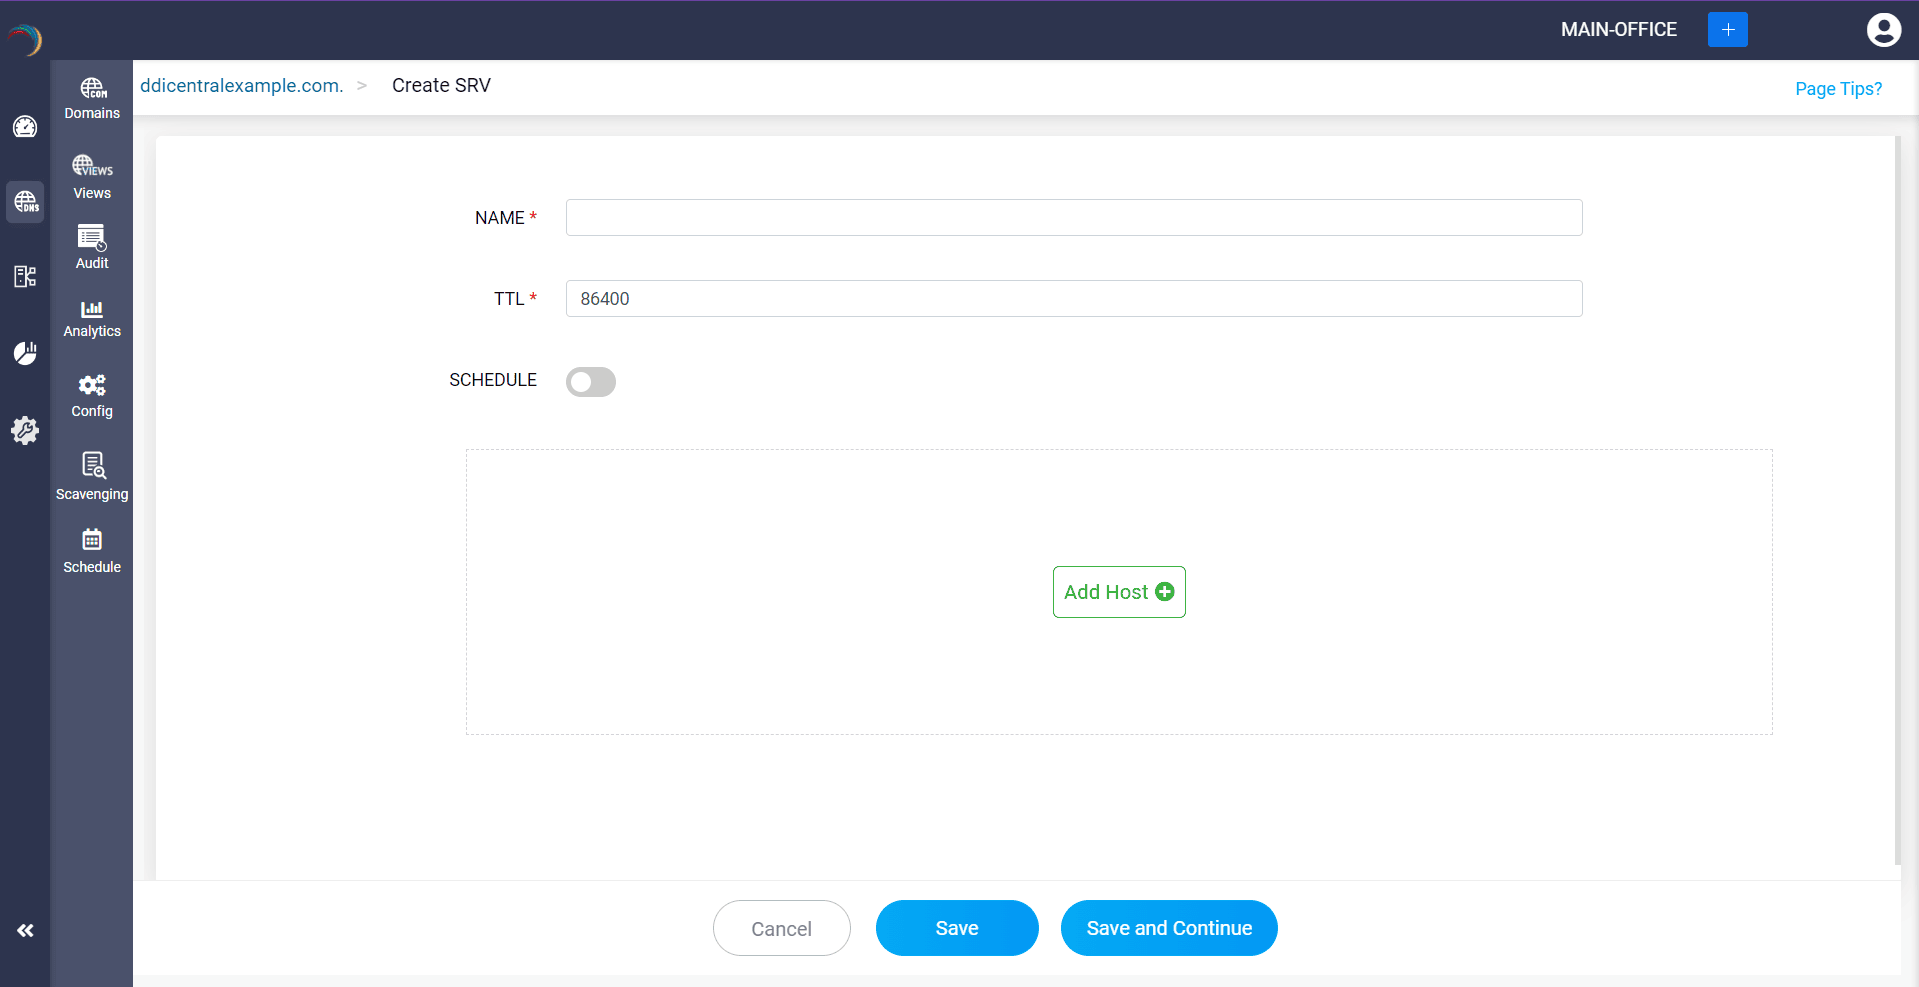
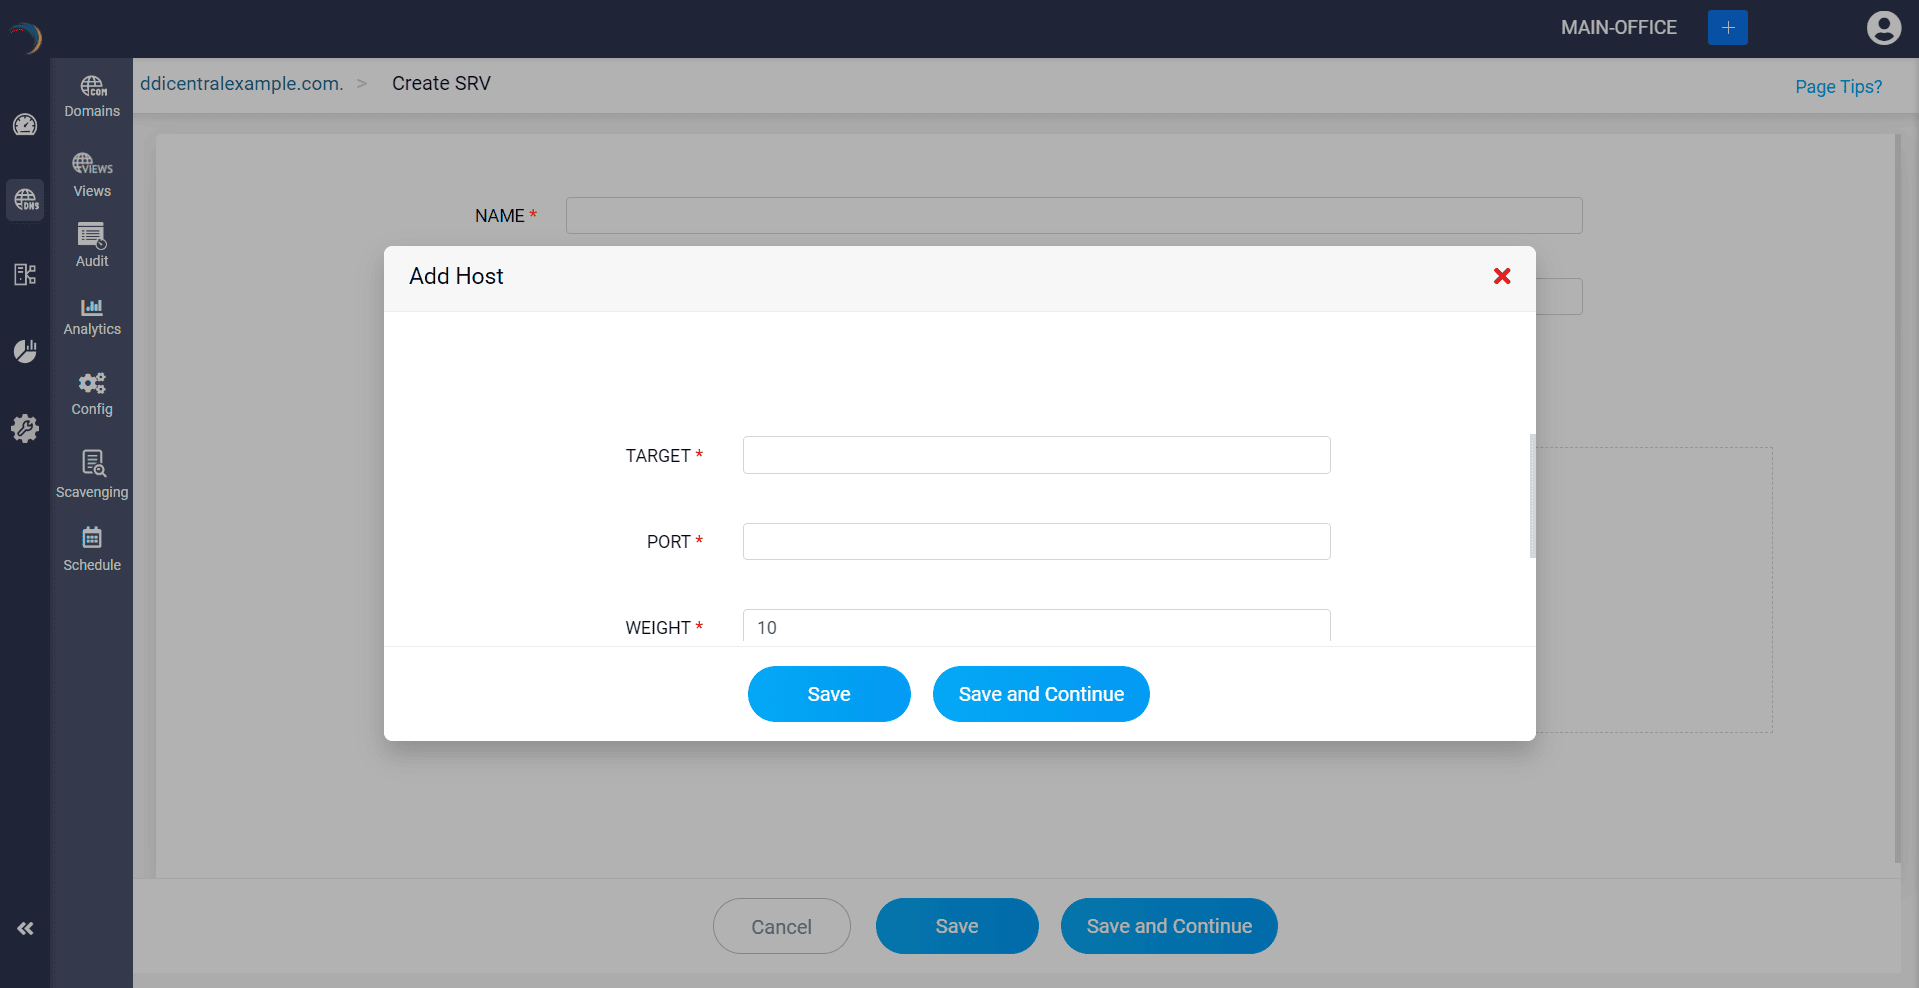
Step 3: Provide the details of the new SRV record, such as name, TTL, date and time. There are three fields in the Add Host field.
- Target: This field contains the domain name of the target host providing the service. The target must point to a domain name with an A or an AAAA record, not directly to an IP address.
- Port: This field specifies the port number on which the target server is listening for the service.
- Weight: This field is an integer value used to distribute the load between servers with the same priority. Higher values are given proportionately more traffic. If multiple servers have the same priority, the weight field determines the distribution of requests.
- Priority: This field is an integer value that indicates the priority of the target server. Lower values have higher priority. Clients try to contact the server with the lowest priority first.
Step 4: Proceed to save the record by clicking on "Save" or "Save and Continue".

What is a TXT record
Text (TXT) records allows network administrators to insert text information into any DNS response. These records contain various types of data and are mostly used for email security and domain ownership verification. For email security, TXT records are used to store public keys in the mail server and are used to digitally sign an email as well as define policies for handling mails that fail Sender Policy Framework (SPF) checks. For domain ownership verification, TXT records are used to prove domain ownership by adding specific value provided by the service into the domain's DNS record.
How do you create a TXT record?
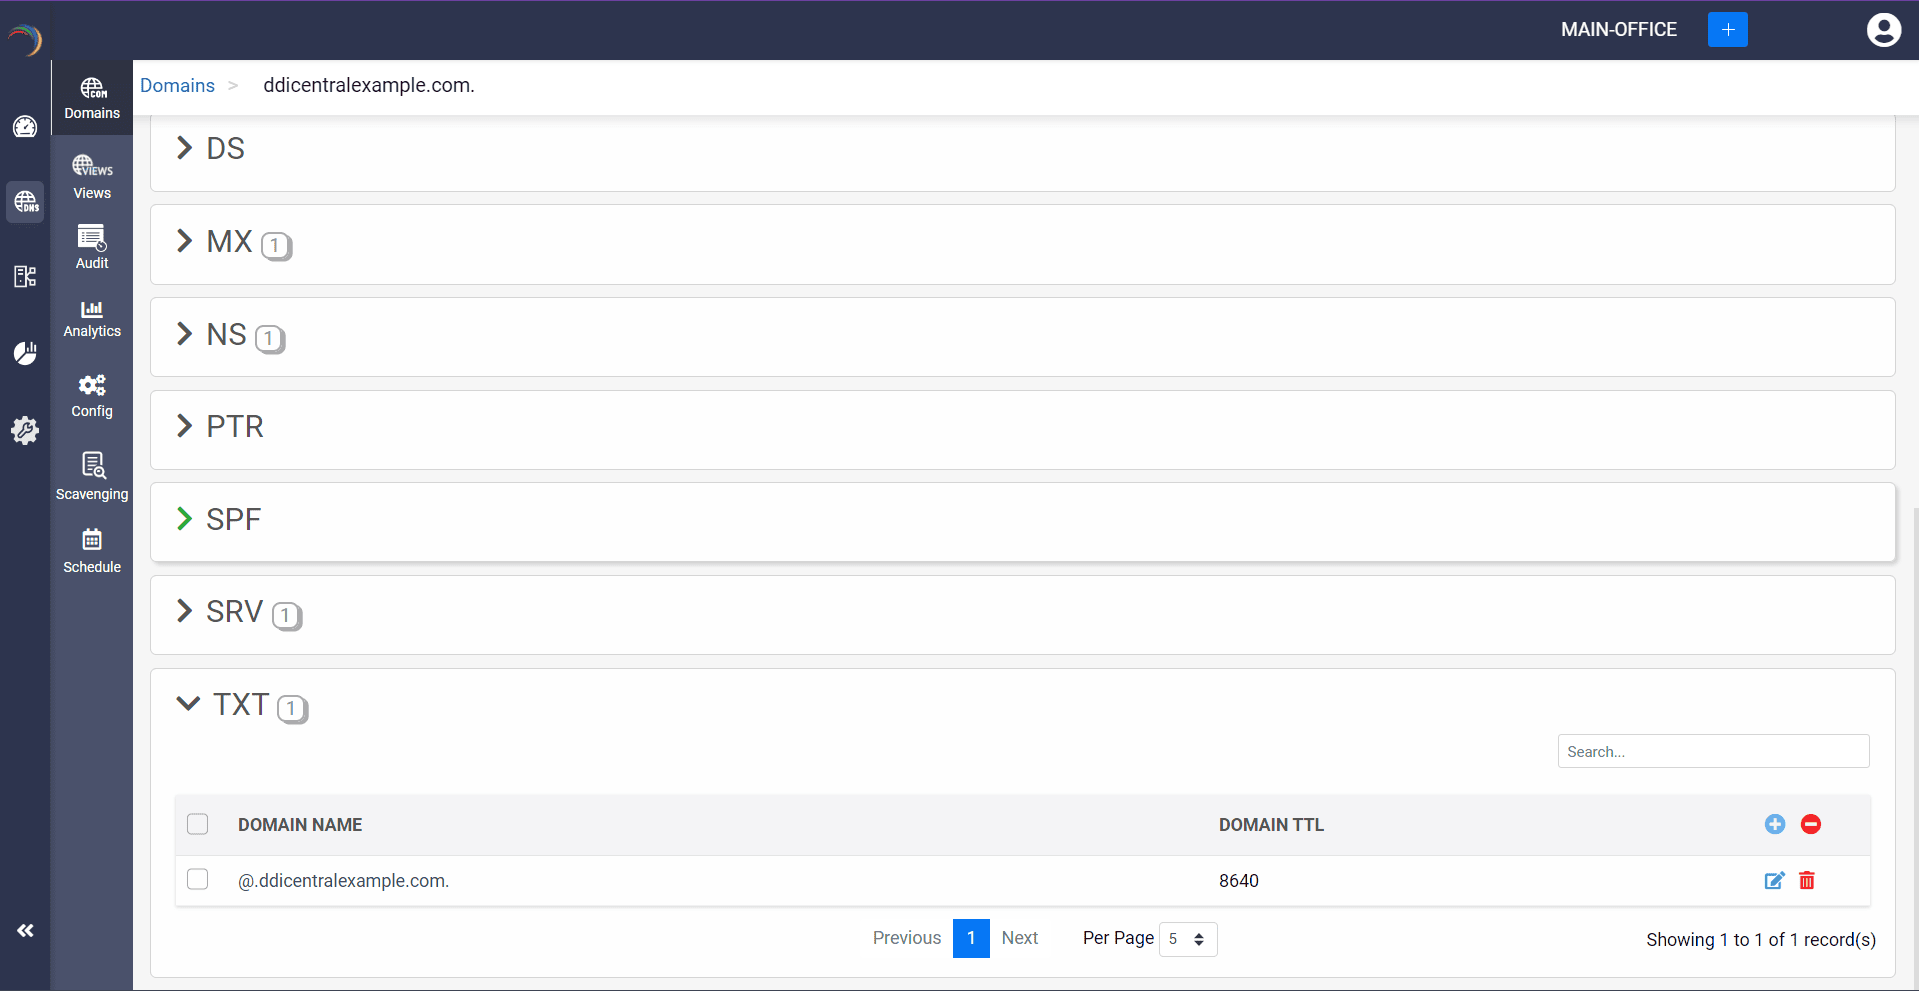
Step 1: Click on the TXT record of the DNS zone for a domain.
Step 2: On the right side, you can view a "+" sign for adding a record, and a "-" sign for deleting a record. Click the "+" sign to add a new TXT record.
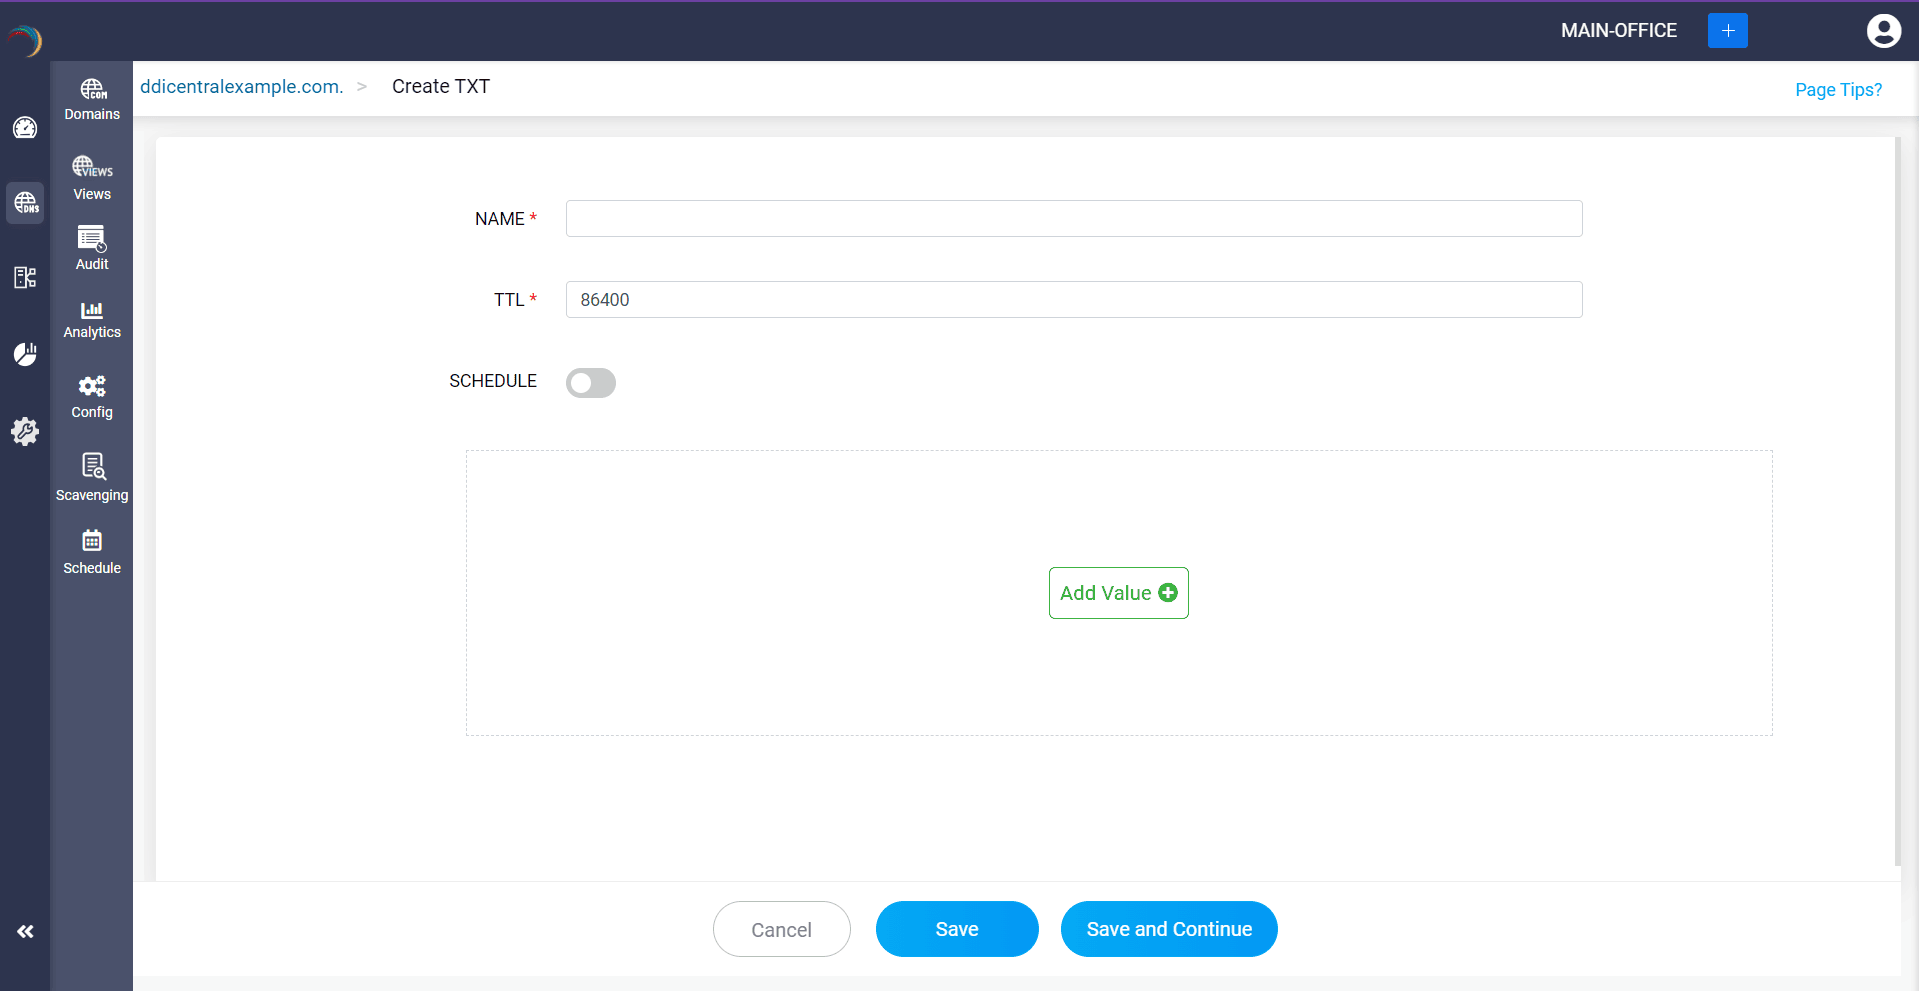
Step 3: Provide the details of the new TXT record, such as name, TTL, date and time. There are two fields in the Add Value section.
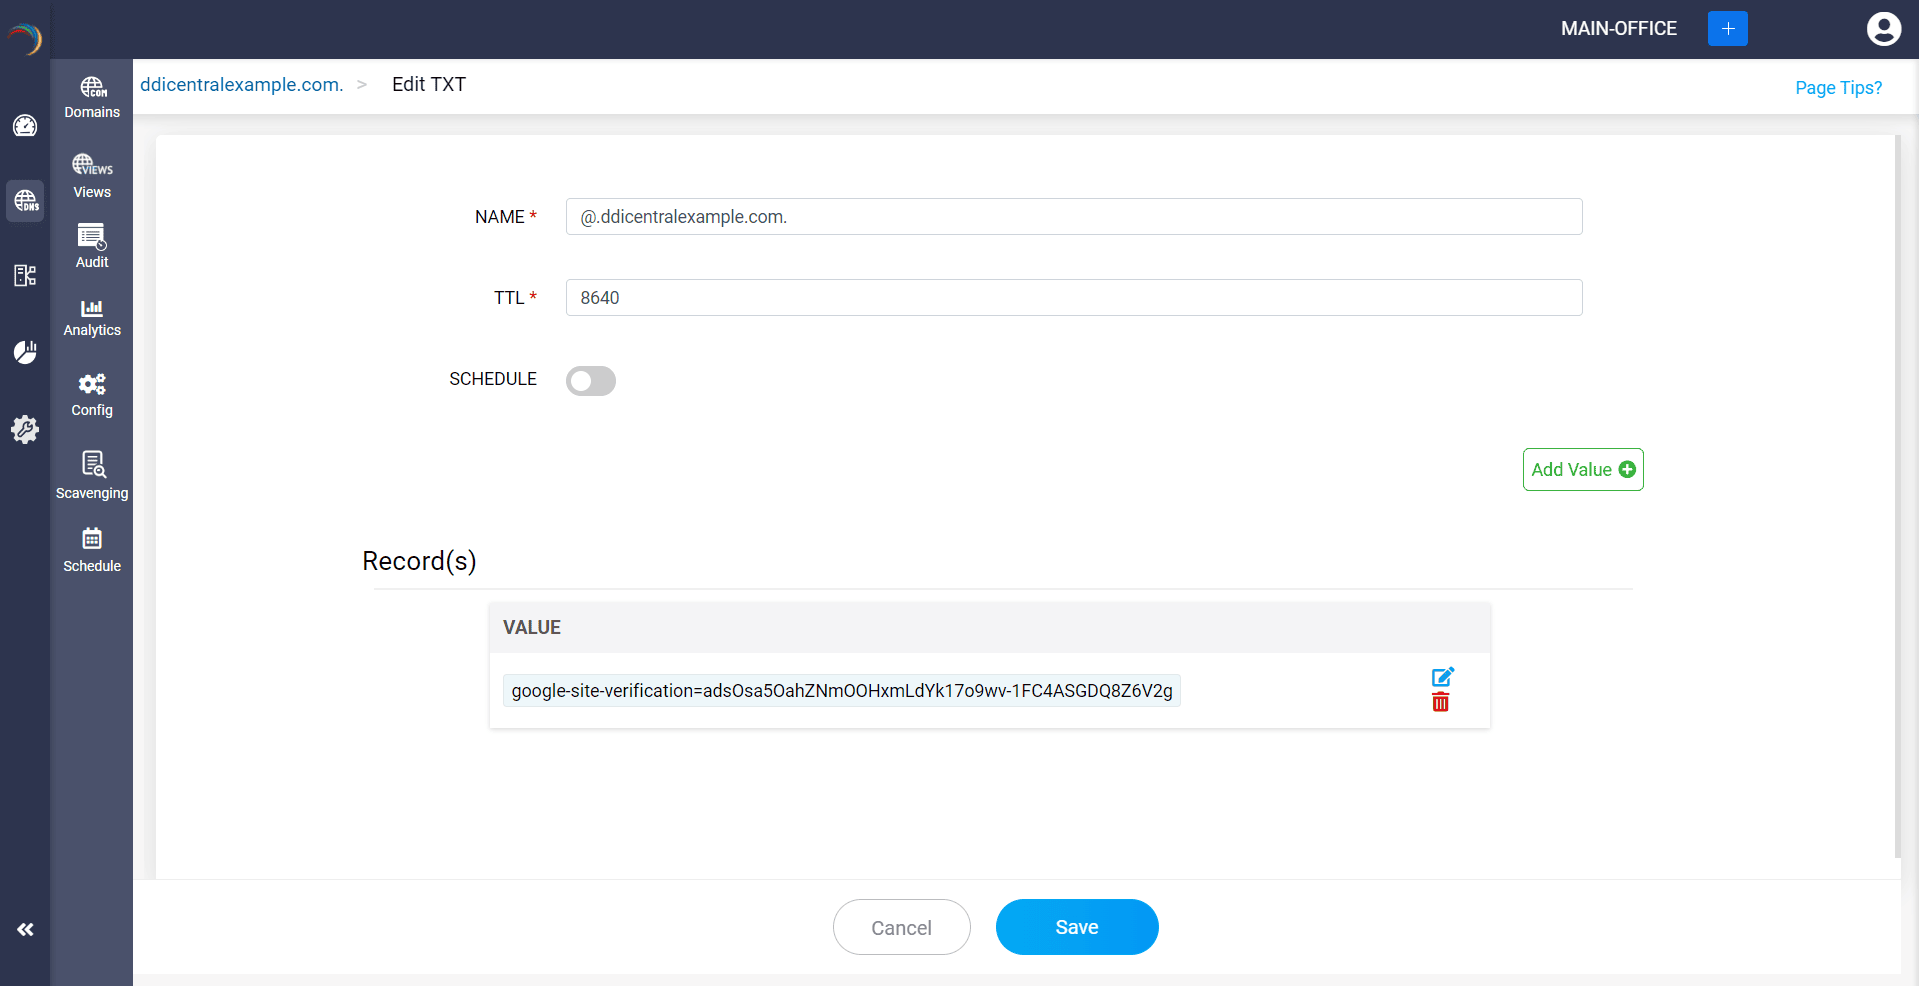
Value: This field contains the actual text data associated with the record. The content of the value field is arbitrary text, often used for various purposes such as verification, authentication, or informational text.
The value you've given will be listed in the Entered Value dropdown field.

Step 4: Proceed to save the record by clicking on "Save" or "Save and Continue".
What is a HINFO Record
The HINFO (Host Information) record provides information about the hardware type and operating system of a host. It is used for documentation or network management purposes, but it is rarely used in modern DNS implementations due to potential security risks.
How do you create an HINFO record?
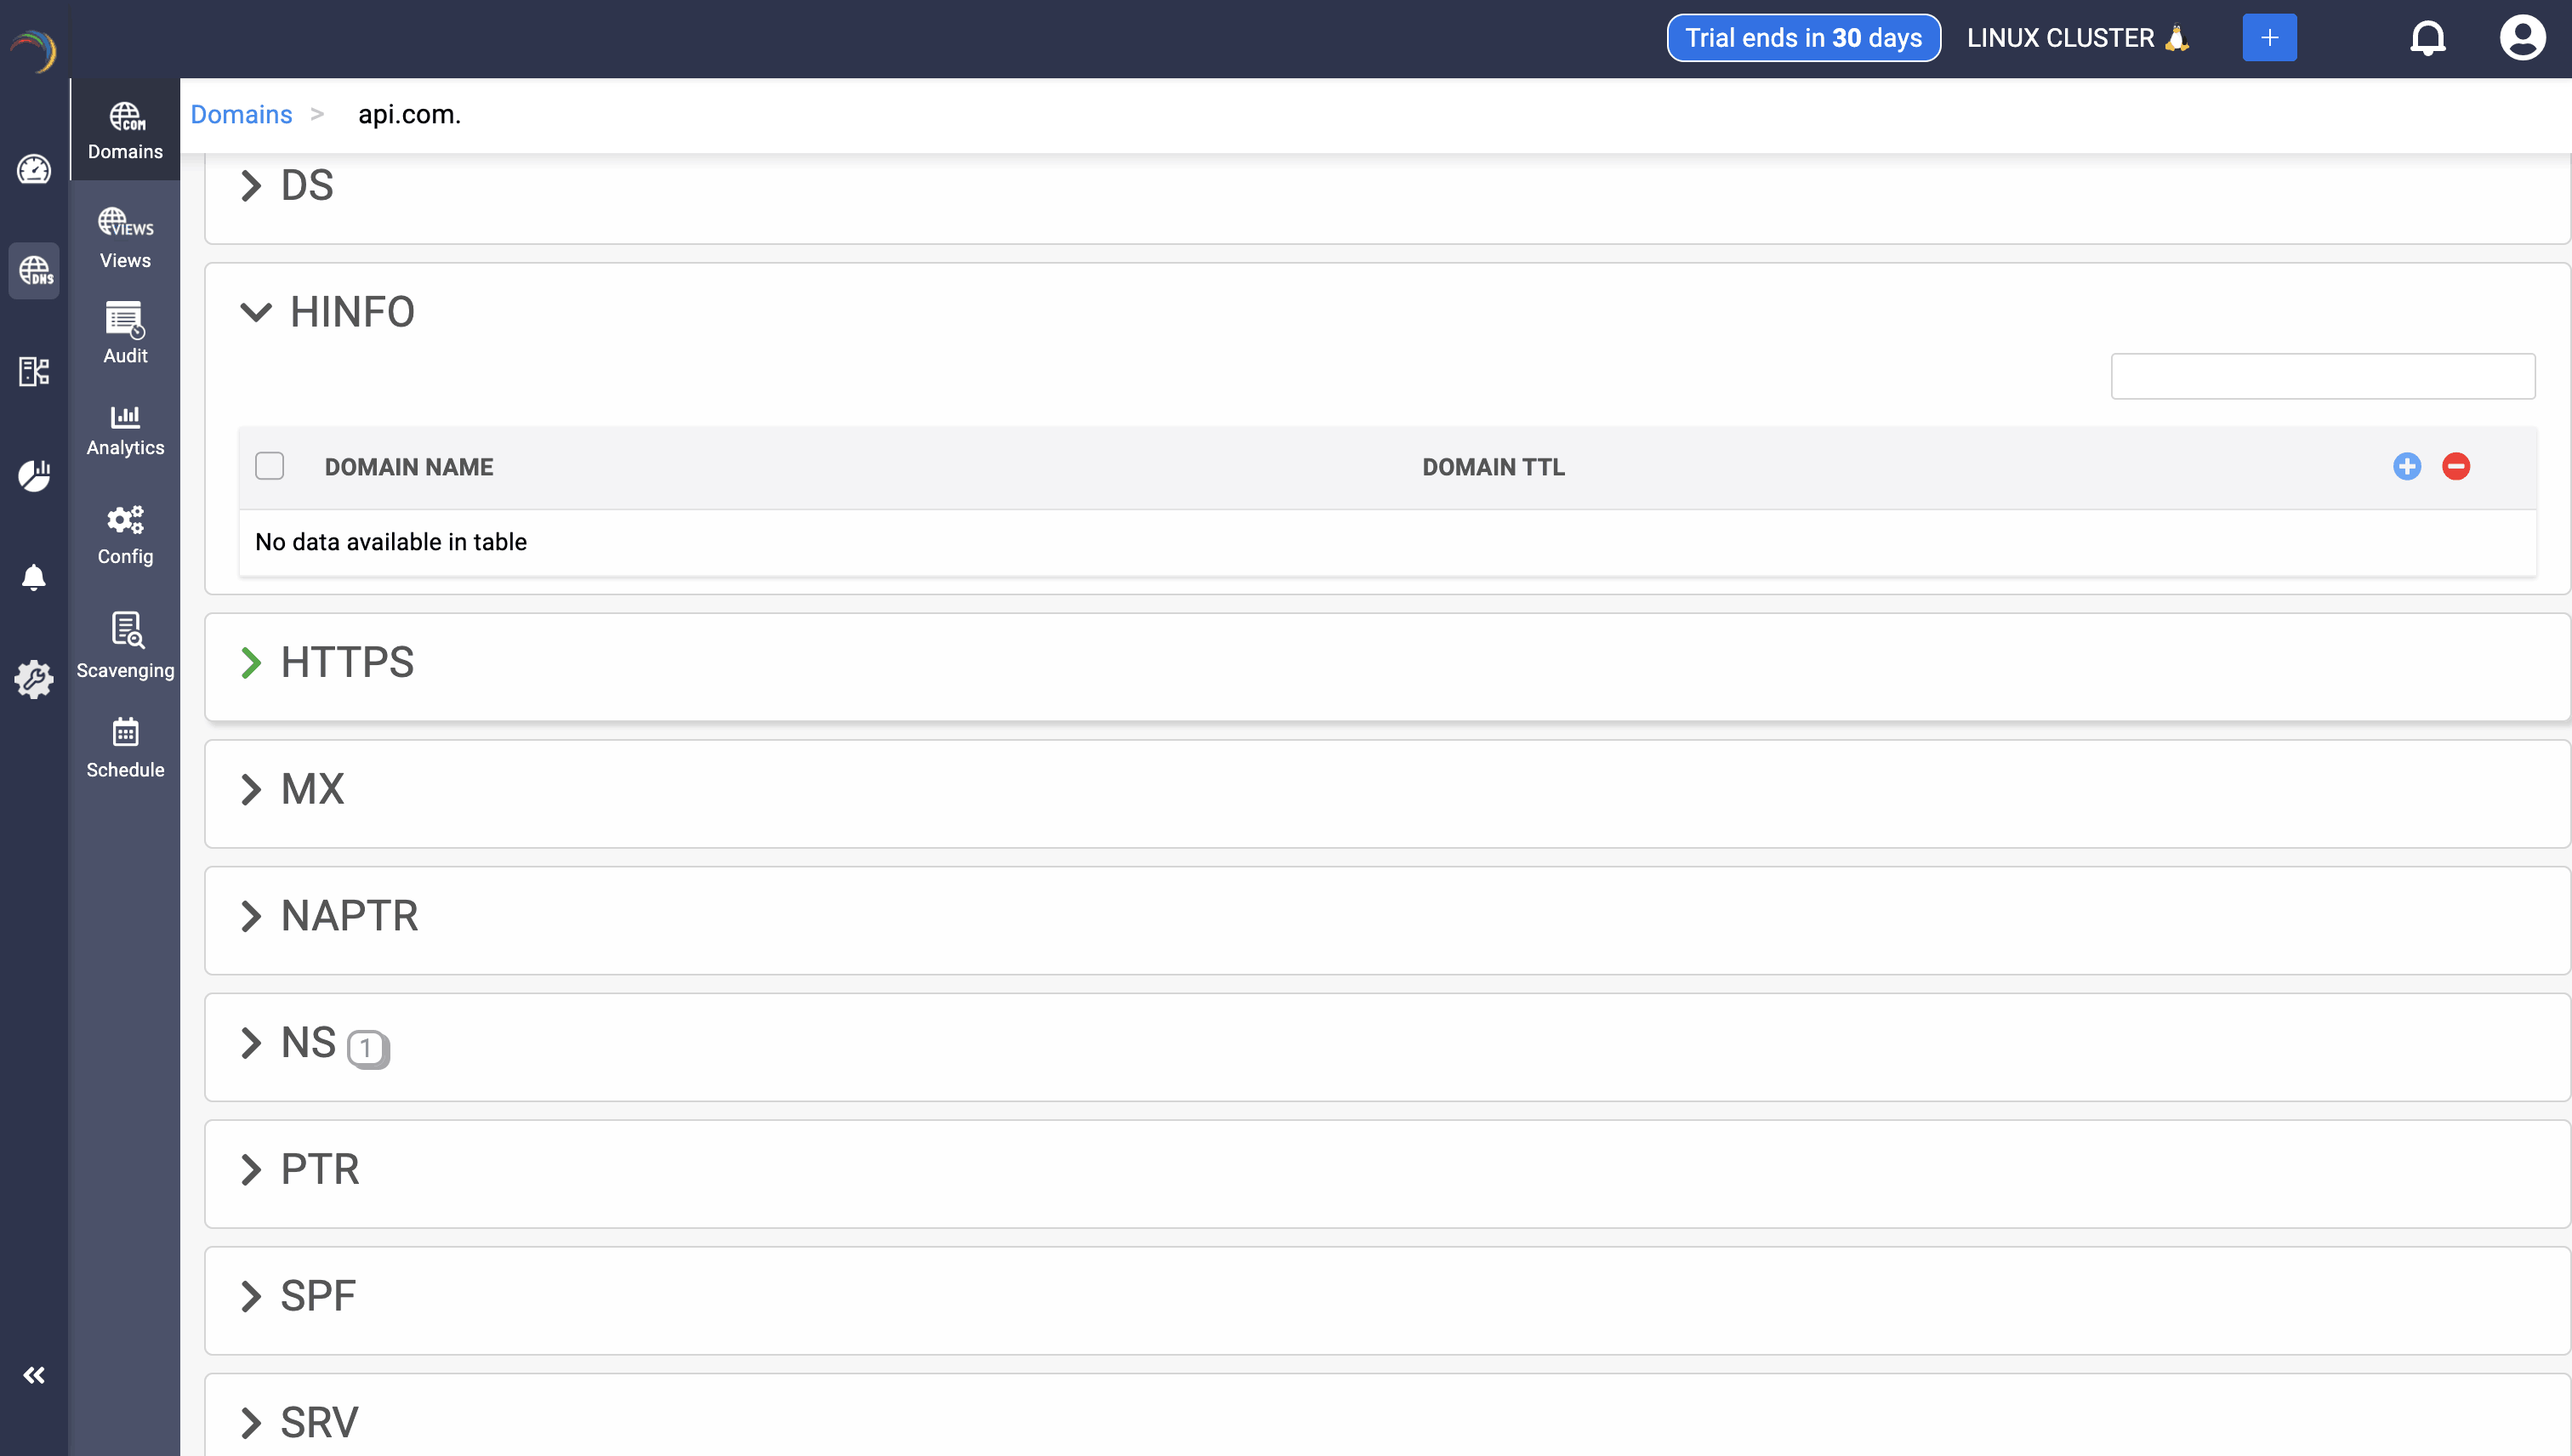
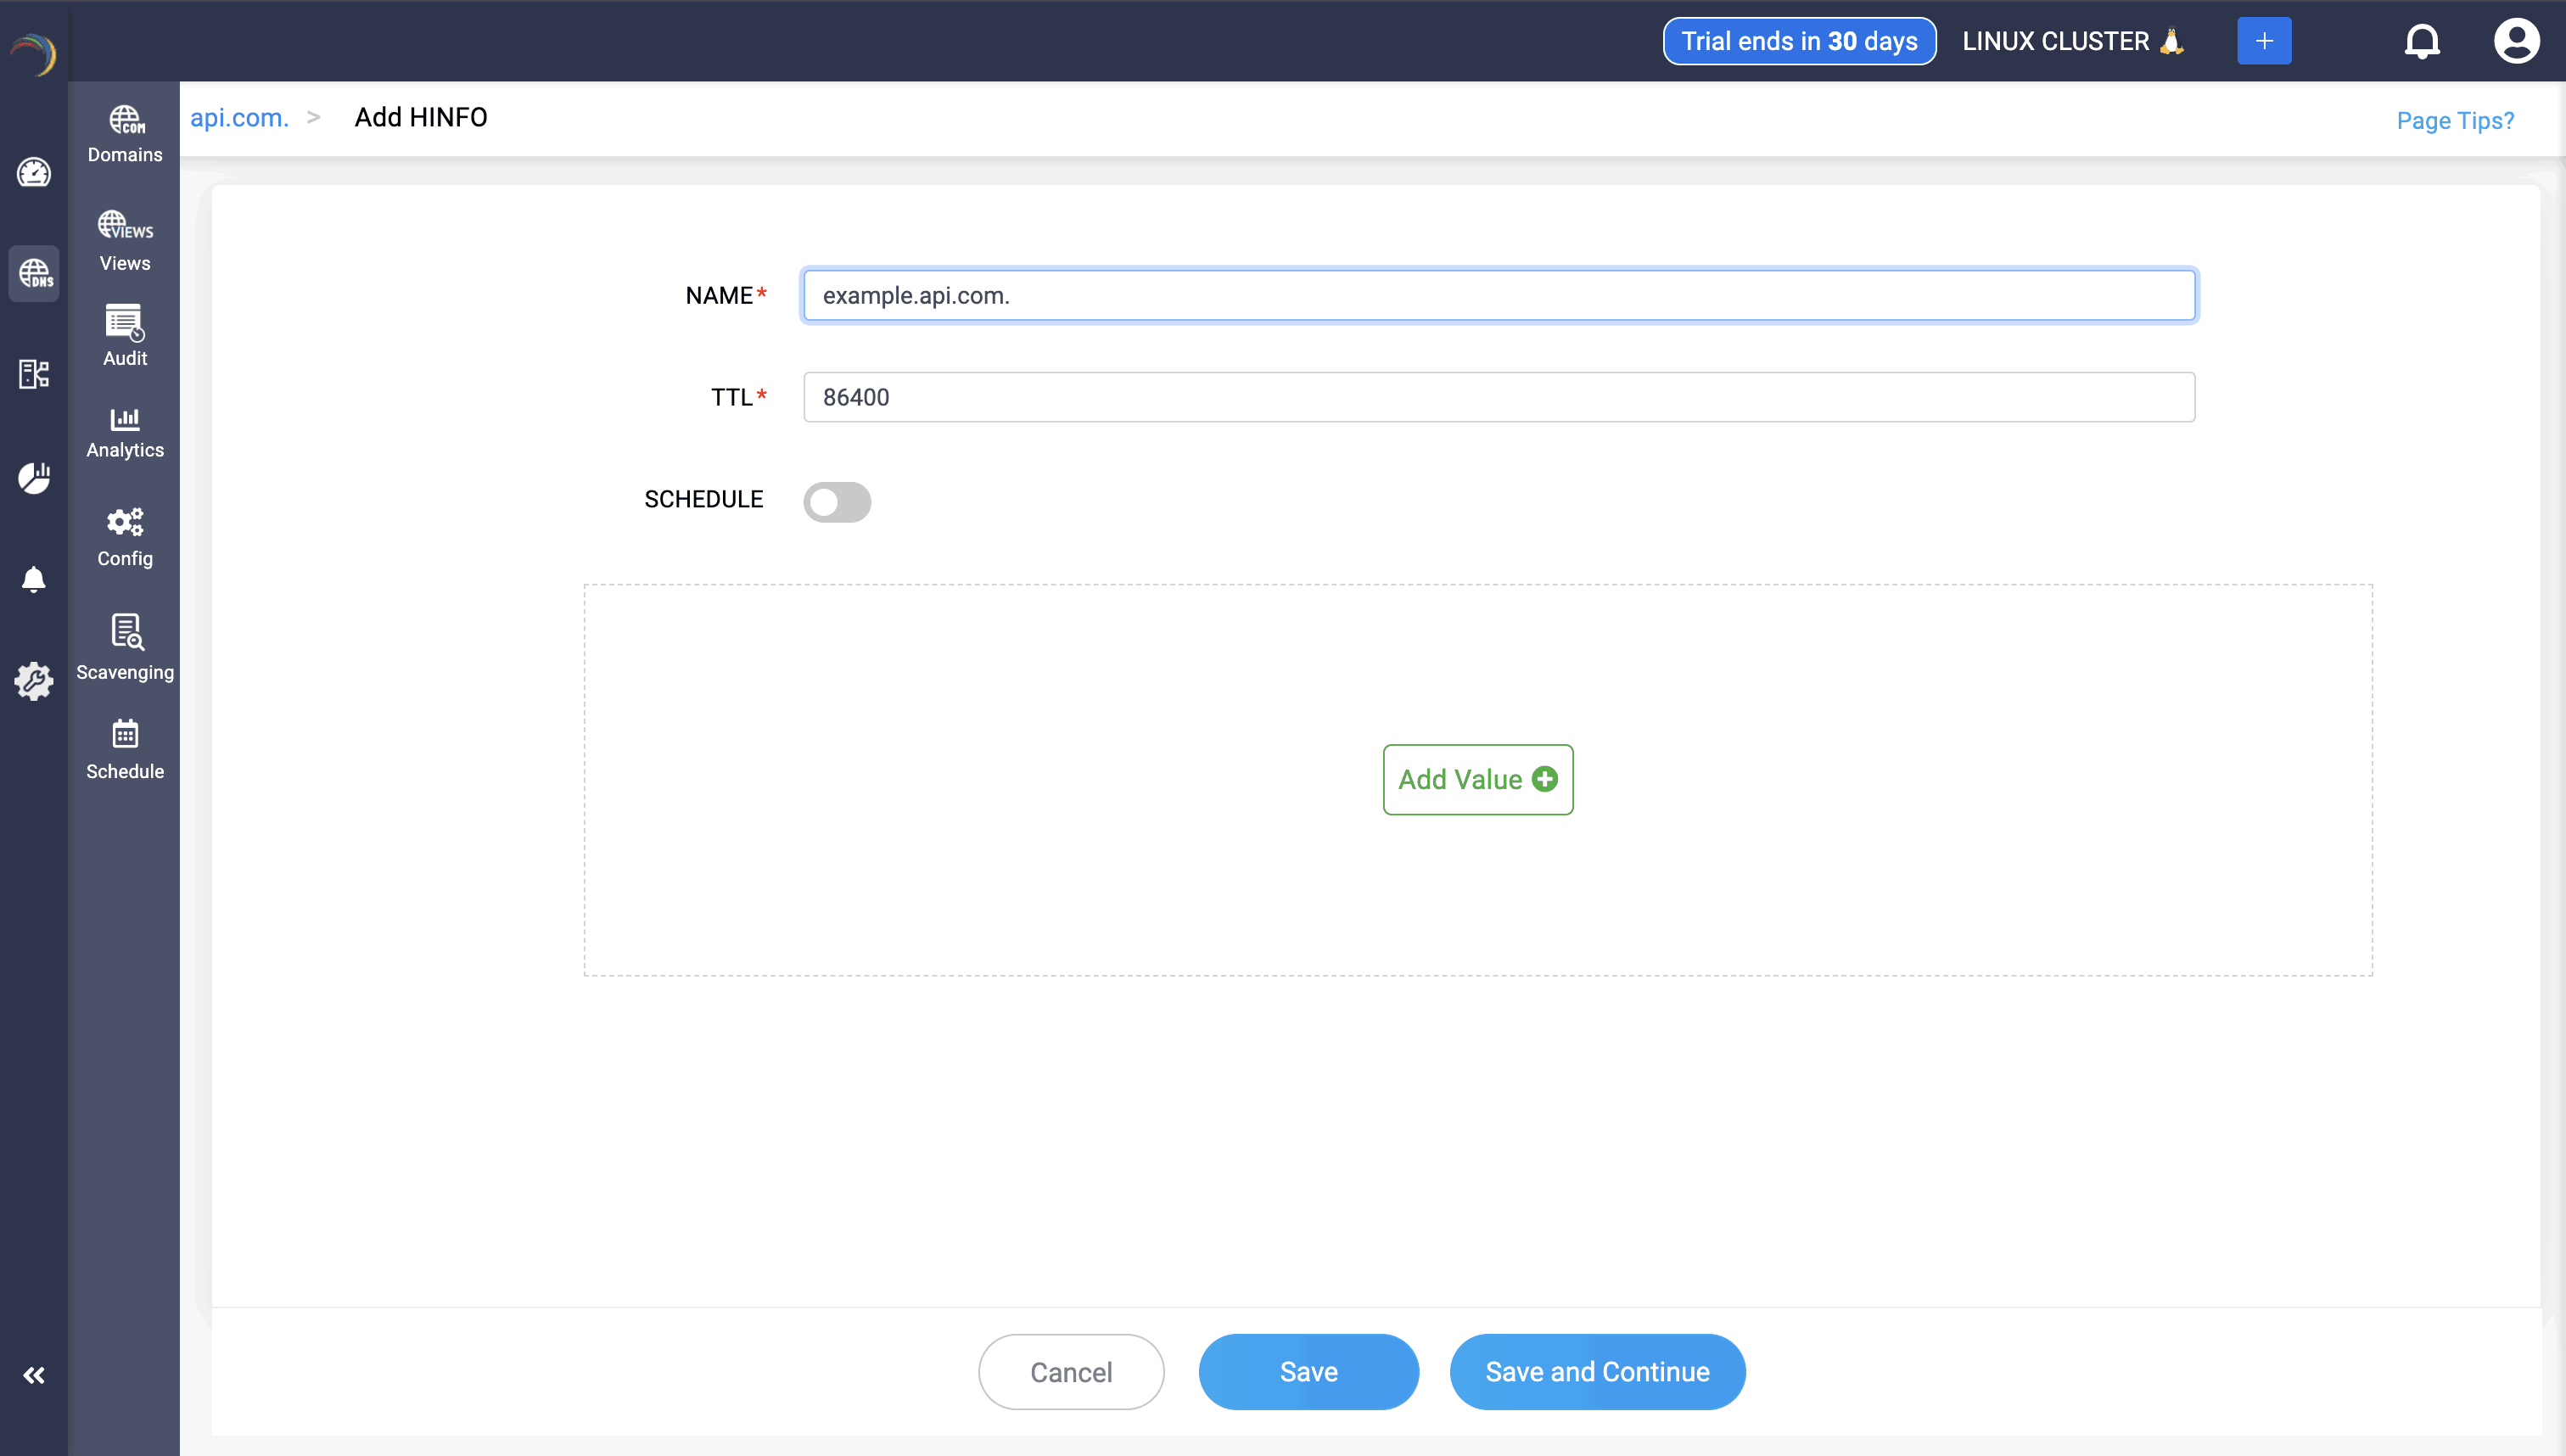
Step 1: Click on the HINFO record of the DNS zone for a domain.
Step 2: On the right side, you can view a "+" sign for adding a record, and a "-" sign for deleting a record. Click the "+" sign to add a new HINFO record.
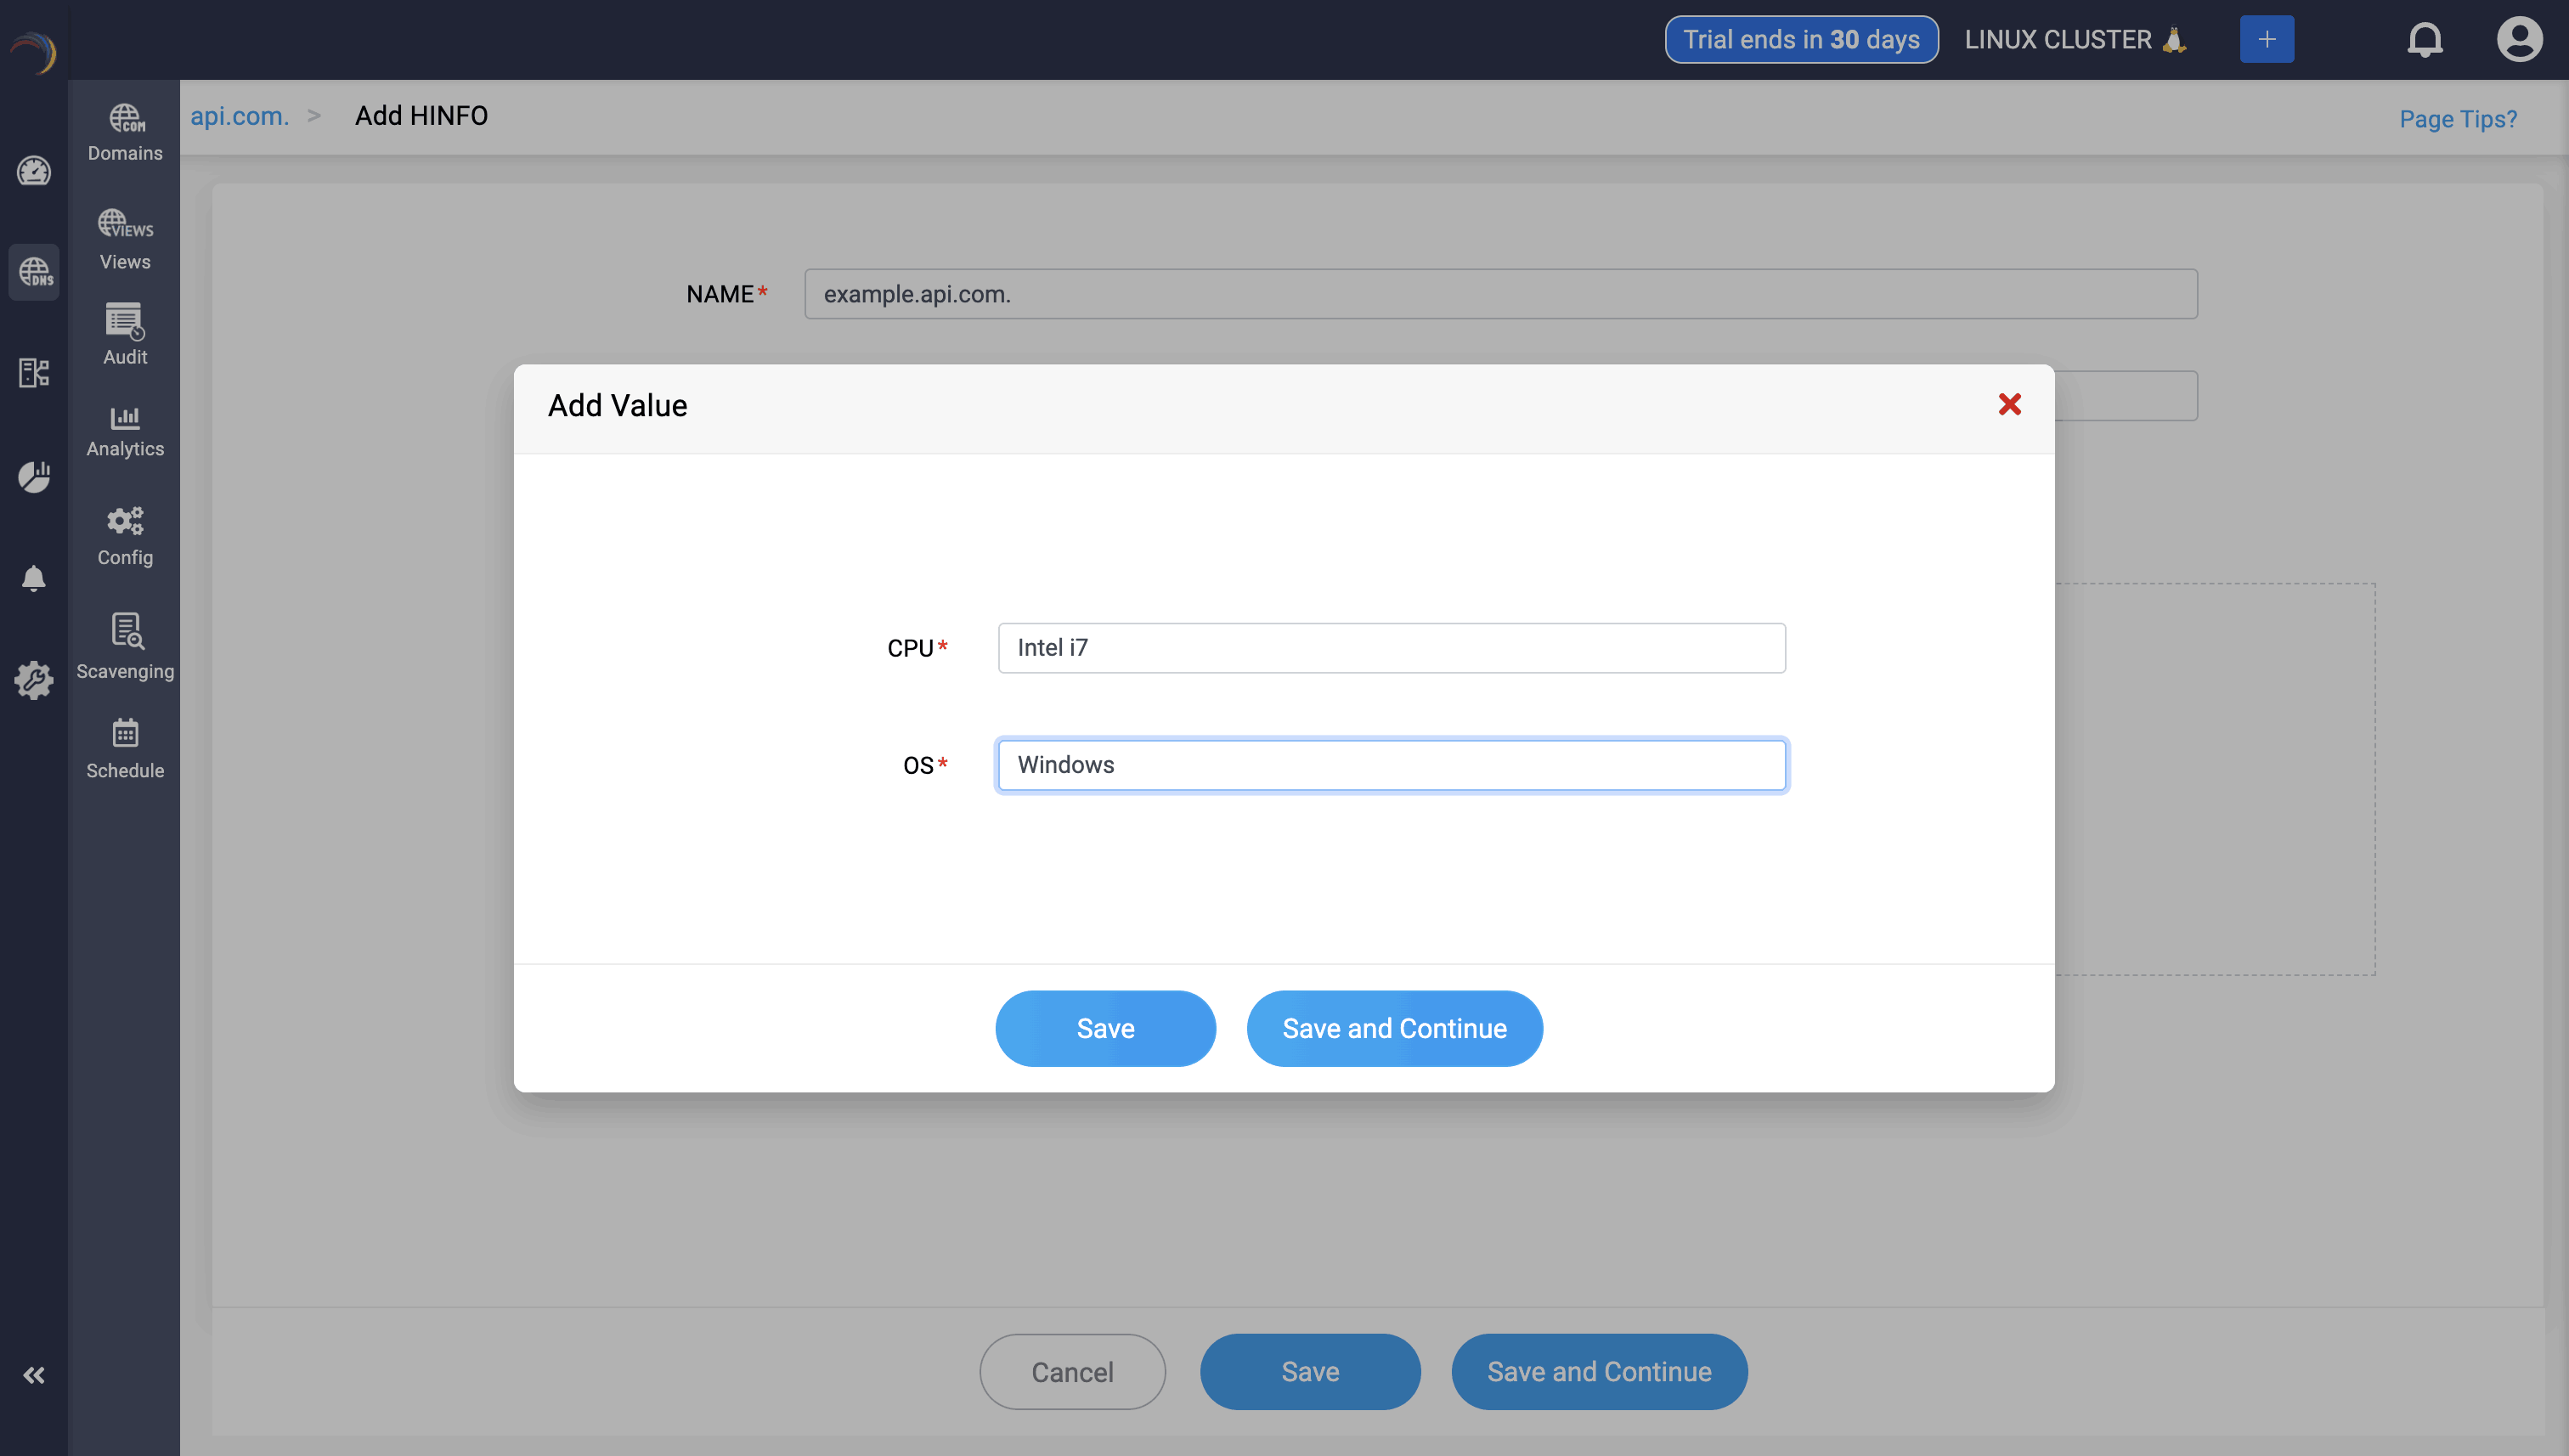
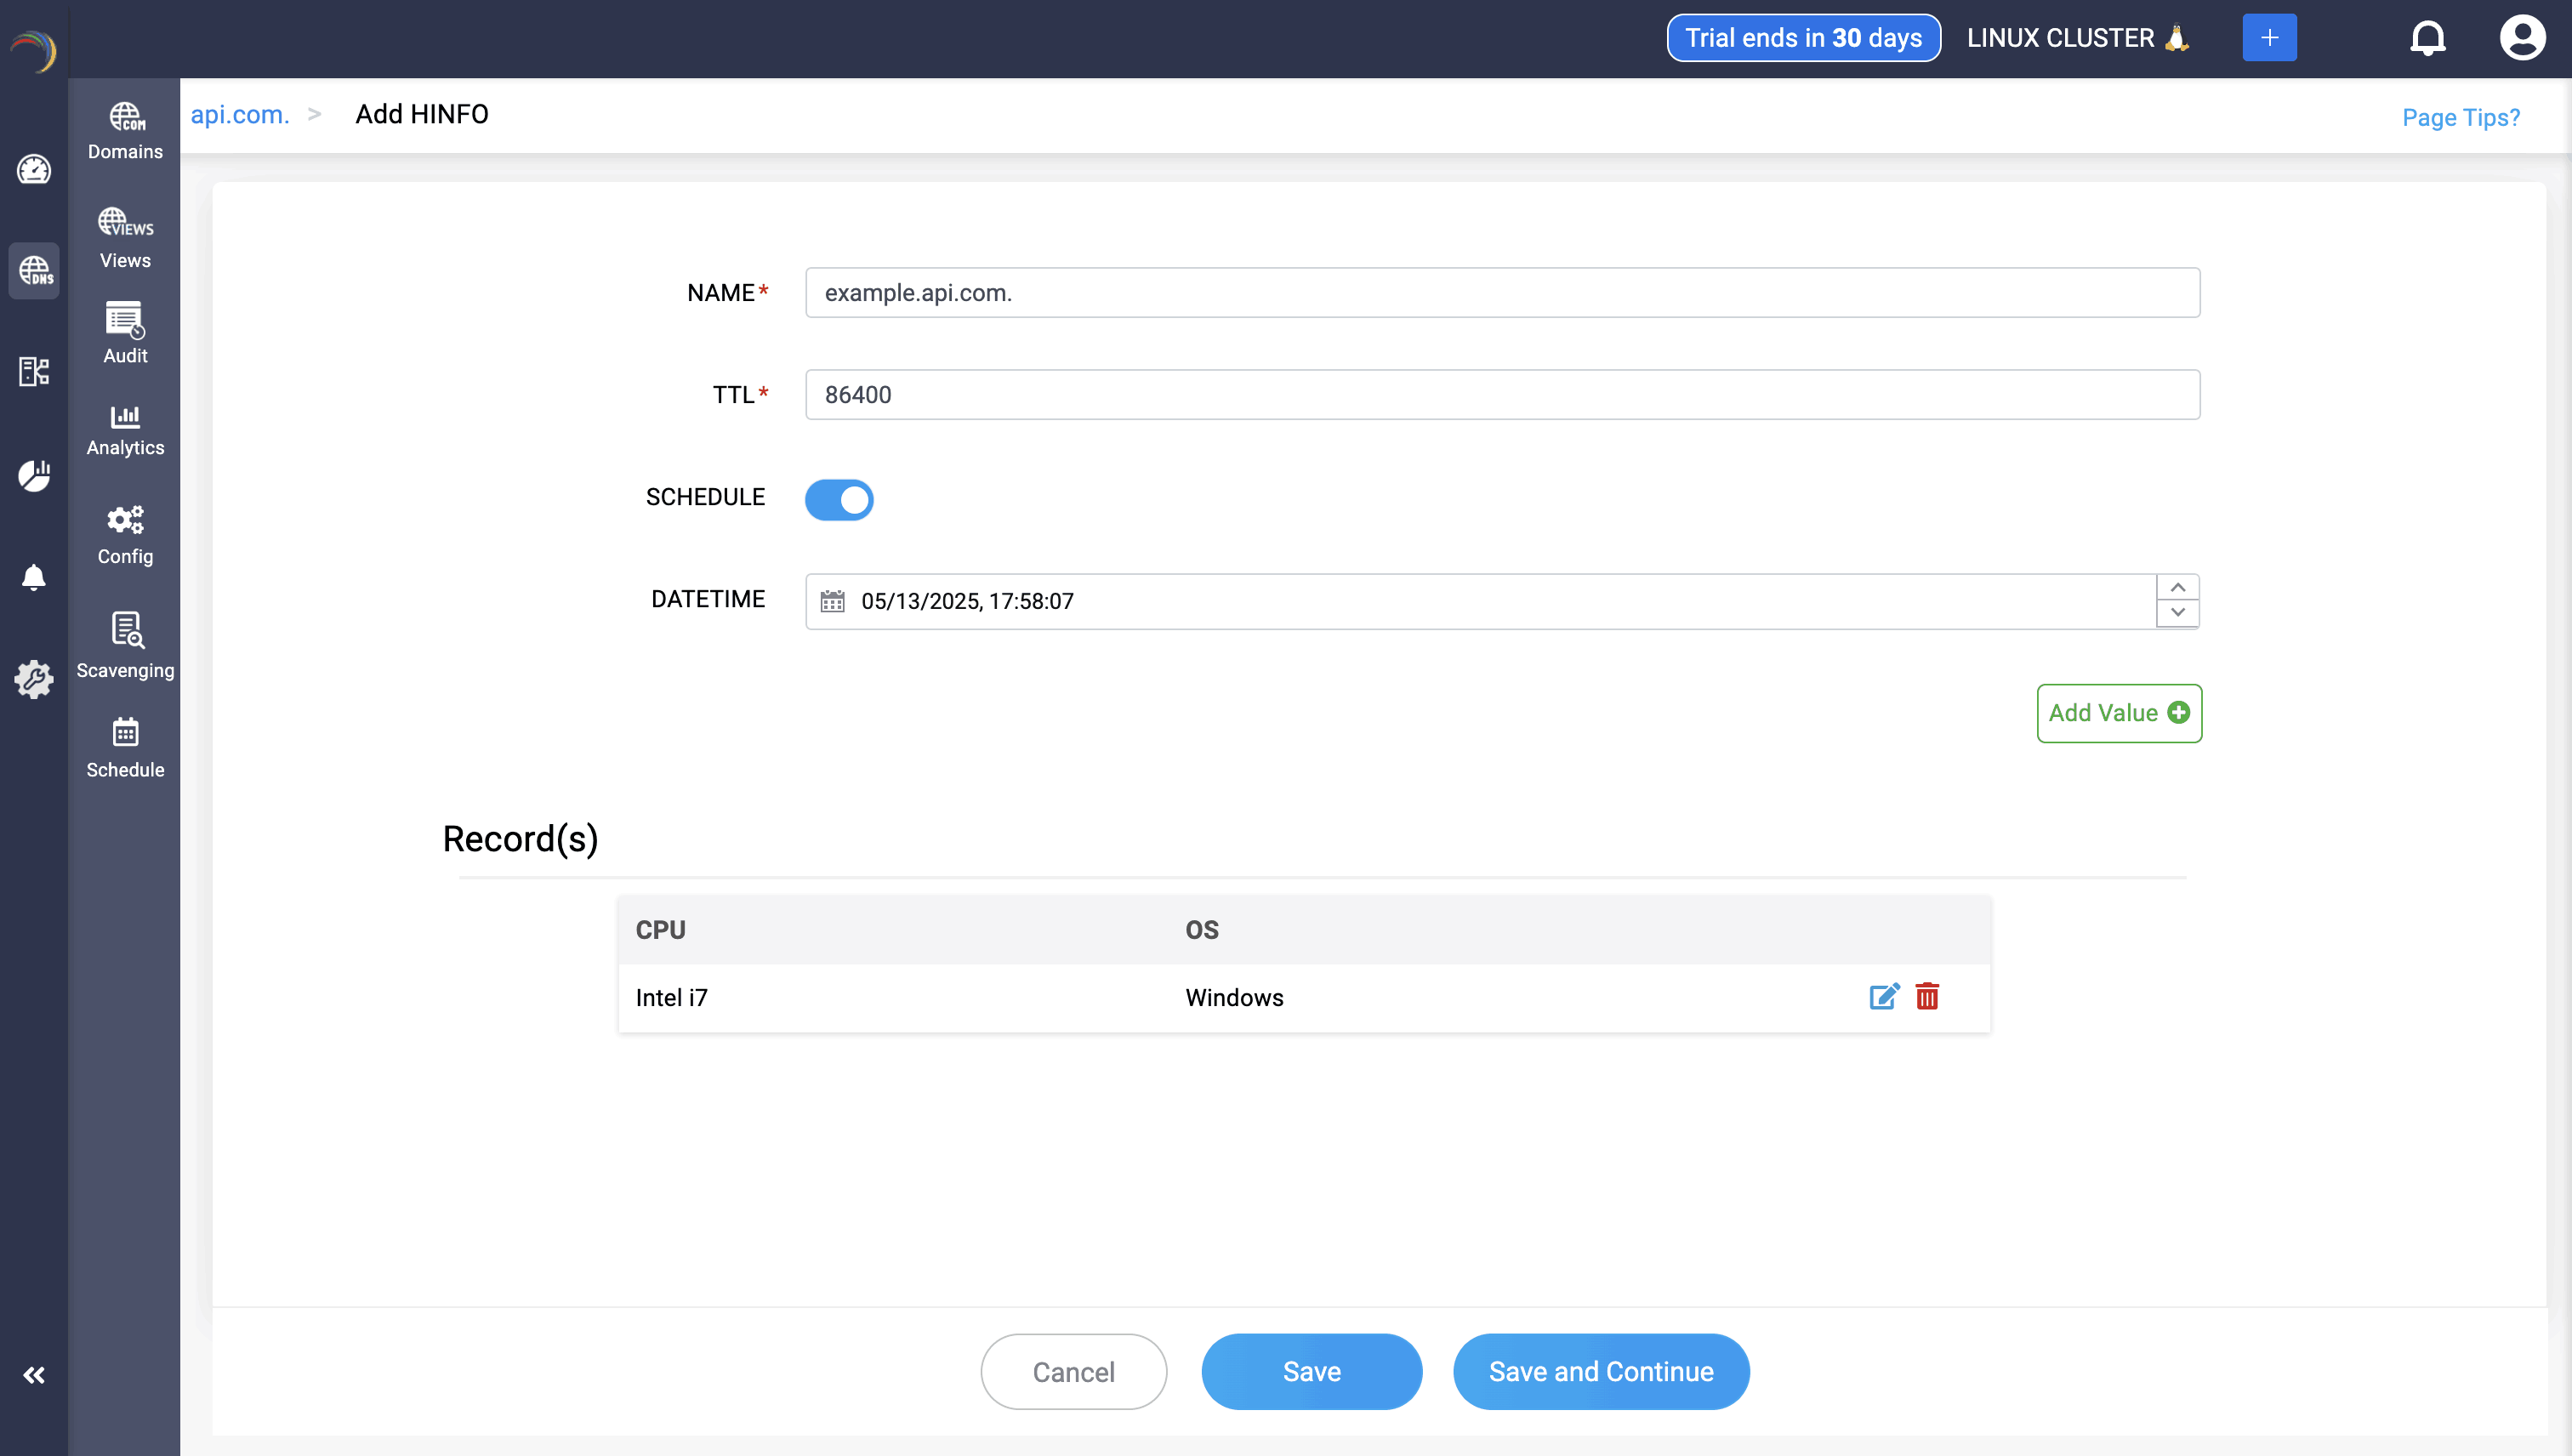
Step 3: Provide the details of the new HINFO record, such as name, TTL, date and time. There are two field in the Add Value section.
- CPU: Specifies the CPU type of the host.
- OS: Specifies the operating system type.
Step 4: Proceed to save the record by clicking on "Save" or "Save and Continue".

New to ADSelfService Plus?
Related Articles
Configuring DNS cache settings for Microsoft DNS infrastructure
Configuring DNS Cache settings for Microsoft DNS infrastructure What is DNS Cache? DNS cache is a temporary storage mechanism on a DNS server or client that stores the results of DNS query resolutions. When a device or DNS server resolves a domain ...48. DNS options
Option Name Option Description Data Type Block Tags Supported Versions Example Grammar allow-new-zones Controls whether zones can be added to the BIND nameserver at runtime using rndc addzone. The default value is no. If set to "yes," the BIND server ...Managing Microsoft DNS Resource Records
Managing DNS Resource Records(RR) What are domain Resource Records (RR)? Resource Records (RRs) are the fundamental information elements of the Domain Name System (DNS). Each RR defines a specific piece of information about the domain. Here are the ...Configuring Linux DNS Resource Records
Configuring DNS Records DNS records hold information about domain names, and their associated IP addresses. They are stored in authoritative DNS servers and consist of a series of text files written in DNS syntax, a string of characters that directs ...Microsoft Domain scavenging
Domain scavenging Domain scavenging, more commonly known as DNS scavenging, refers to the process of cleaning up stale DNS records that dynamically register themselves over time in the DNS database. This mechanism is typically used in conjunction ...