Configuring MFA for FTD VPN using RADIUS
This guide provides steps for enabling multi-factor authentication (MFA) using RADIUS for Cisco's Firepower Threat Defense (FTD) product using ManageEngine ADSelfService Plus' MFA for VPN feature.
To enable RADIUS-based authentication for Cisco FTD, the MFA for VPN supports the following authentication methods in addition to the default username and password-based authentication:
- Push Notification Authentication
- Fingerprint/Face ID Authentication
- ADSelfService Plus TOTP Authentication
- Google Authenticator
- Microsoft Authenticator
- Yubico OTP (hardware key authentication)
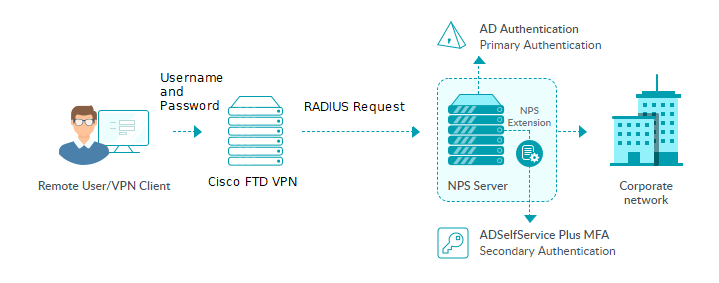
The RADIUS-based MFA process for Cisco FTD using ADSelfService Plus
Configuration process
Prerequisites:
- Your ADSelfService Plus license must include Endpoint MFA. Purchase it from the store.
- Configure your Cisco Firepower Threat Defense (FTD) VPN to use RADIUS authentication.
- For the RADIUS server, you must use a Windows server (Windows Server 2008 R2 and above) with the Network Policy Server (NPS) role enabled.
- Enable HTTPS in ADSelfService Plus (Admin → Product Settings → Connection).Note: If you are using an untrusted certificate in ADSelfService Plus to enable HTTPS, you must disable the Restrict user access when there is an invalid SSL certificate option in Configuration → Administrative Tools → GINA/Mac/Linux (Ctrl+Alt+Del) → GINA/Mac/Linux Customization → Advanced.
- In Active Directory, set users’ Network Access Permission to Control access through NPS Network Policy in their Dial-in properties.
- The Access URL you have configured in Admin → Product Settings → Connection → Configure Access URL will be used by the NPS extension to communicate with the ADSelfService Plus server. Make sure you have updated the Access URL before installing the NPS extension.
- In the Windows NPS server, where the NPS extension is going to be installed, set the Authentication settings of the Connection Request Policy to Authenticate requests on this server.
Step 1. Configuring MFA in ADSelfService Plus
- Log in to ADSelfService Plus as an admin.
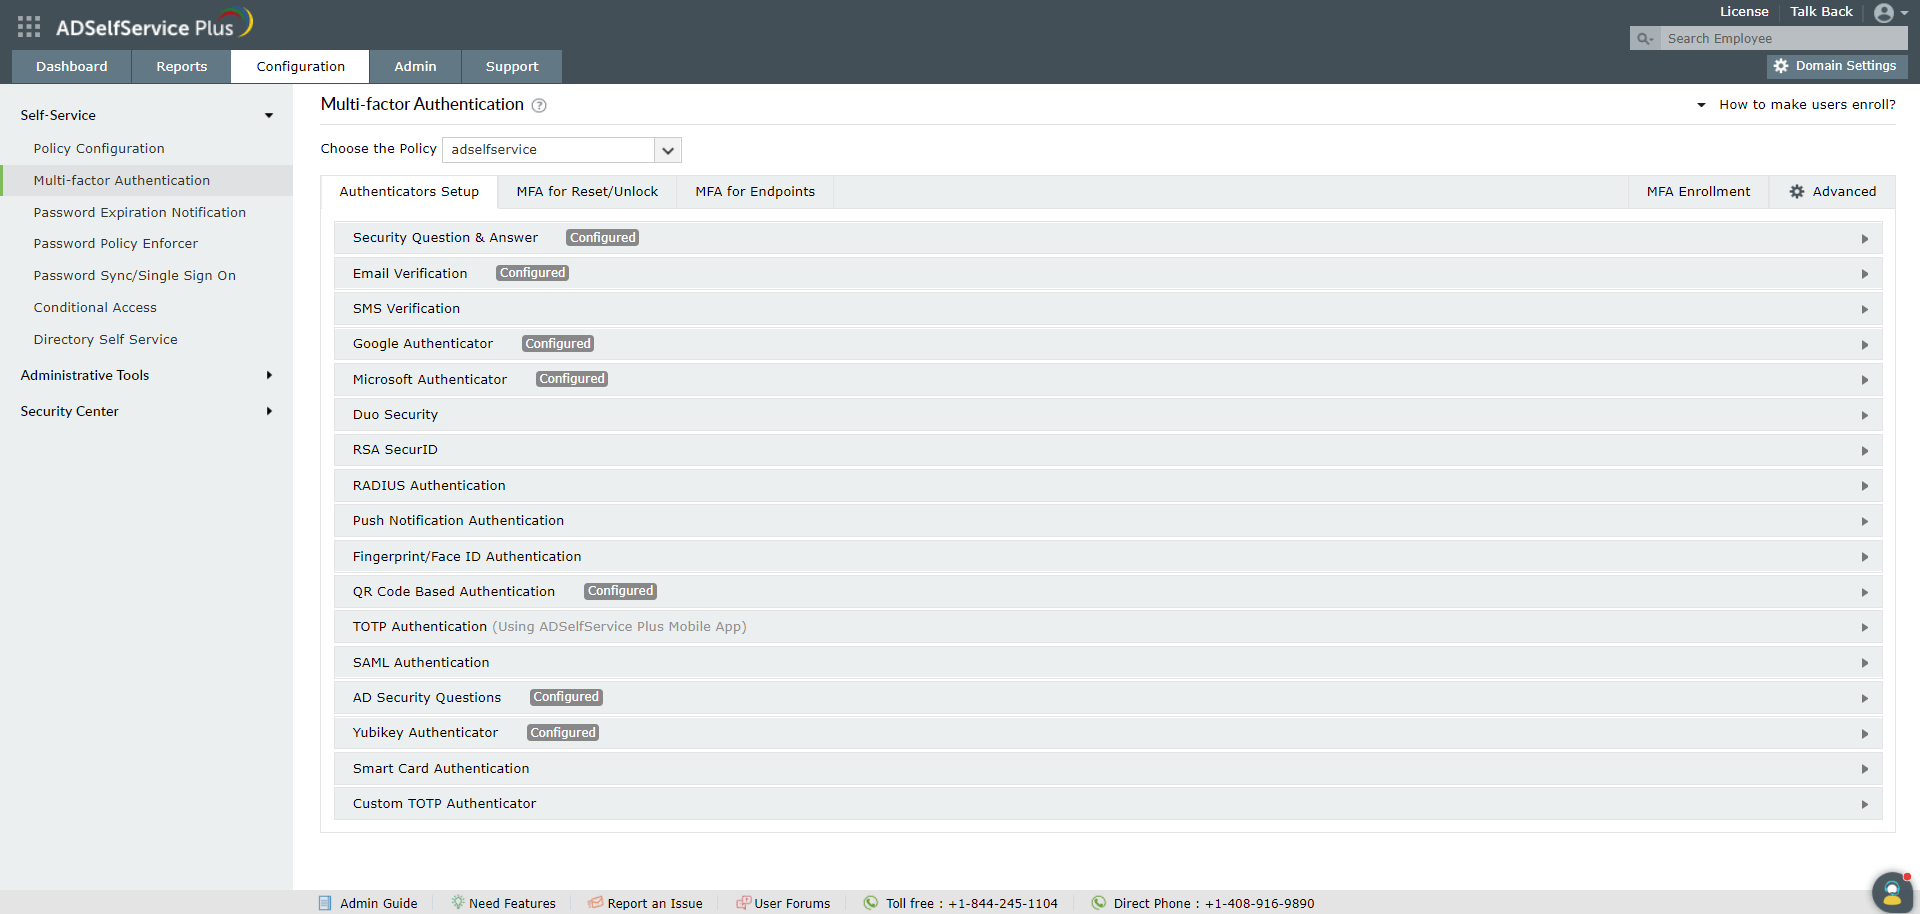
- Go to Configuration → Self-Service → Multi-Factor Authentication → Authenticators.
- Configure the authentication methods required.
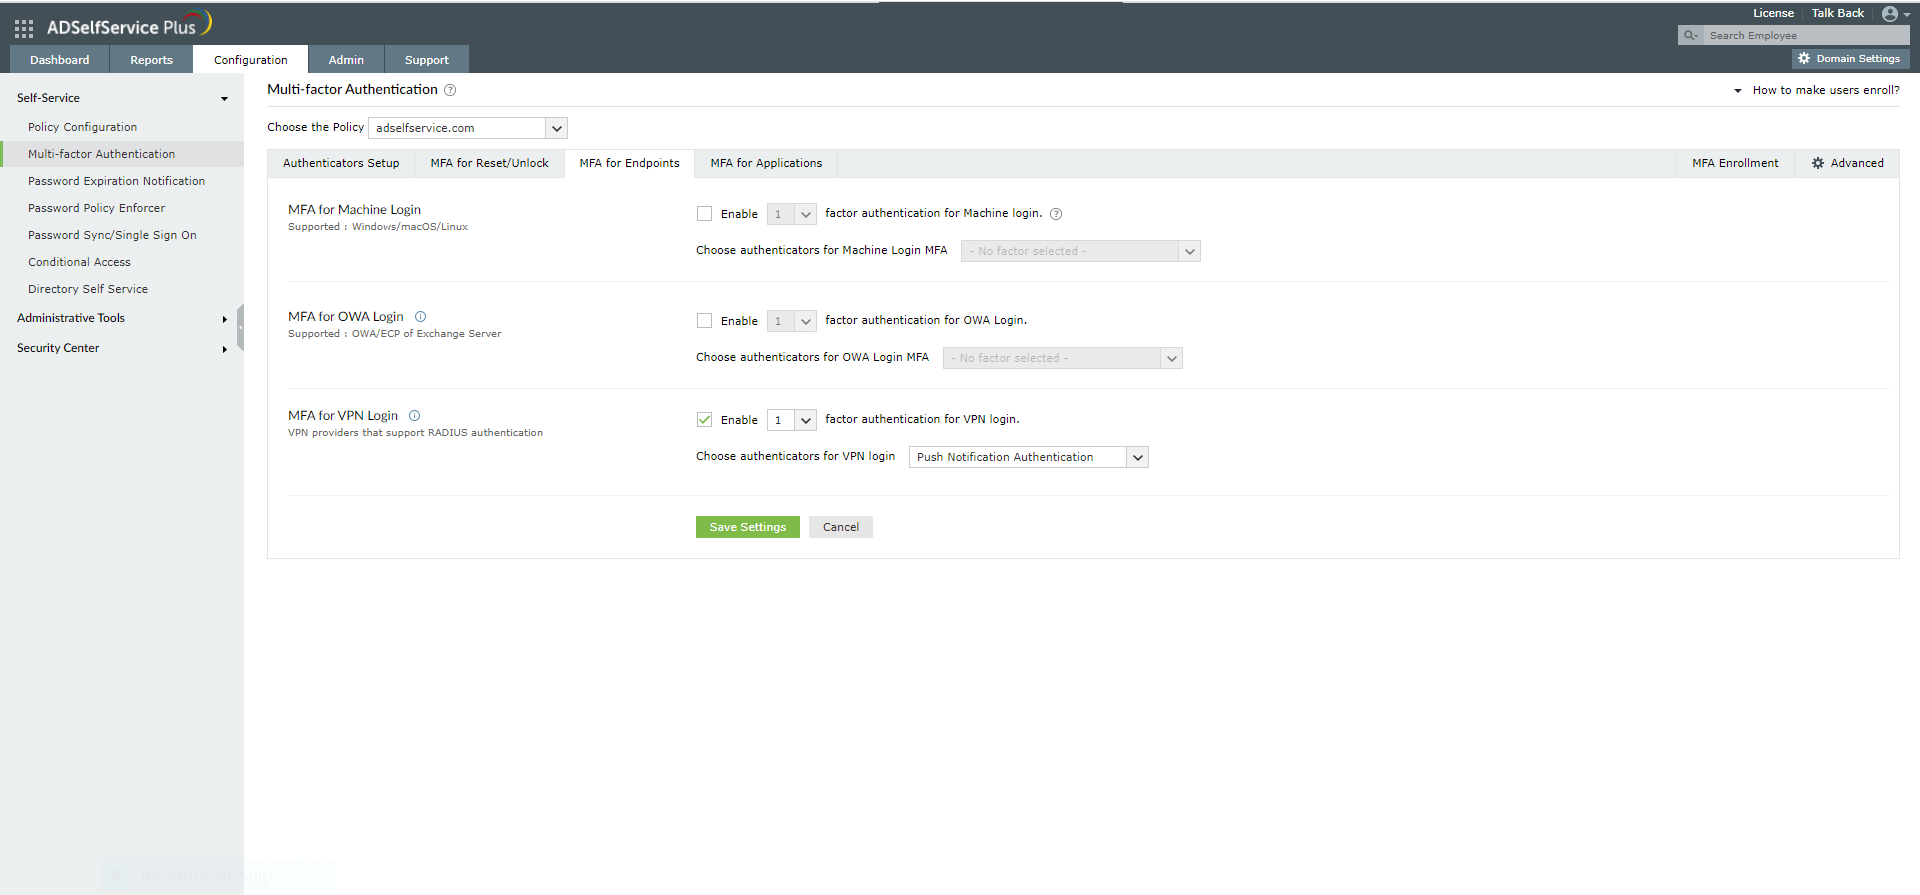
- Go to MFA for Endpoints.
- Select a policy from the Choose the Policy drop-down. This policy will determine the users for whom MFA for VPN and endpoint login will be enabled. To learn more about creating an organizational unit or a group-based policy, click here.
- In the MFA for VPN Login section, select the checkbox next to Select the authenticators required. Choose the number of authentication factors to be enforced. Select the authentication methods to be used. The authentication methods listed can also be rearranged by dragging and dropping at the necessary position.
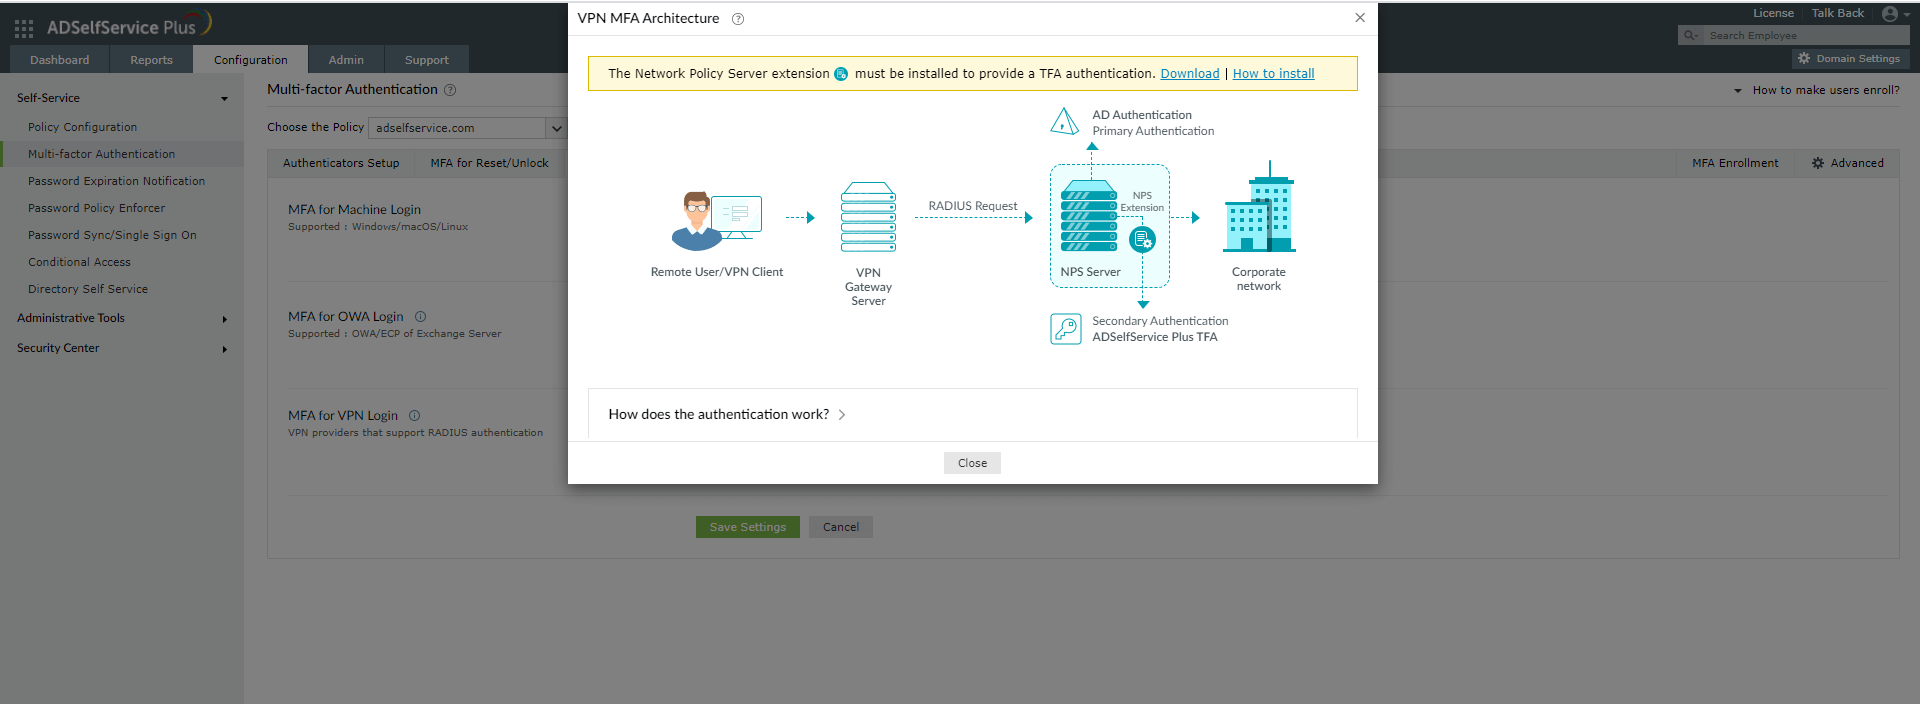
- Click the help icon next to MFA for VPN.
- Download the NPS extension using the Download link provided in the pop-up that appears.
Step 2. Install the NPS Extension
- Copy the extension file (ADSSPNPSExtension.zip) to the Windows server, which you have configured as the RADIUS server. Extract the ZIP file’s content and save it in a location.
- Open Windows PowerShell (x64) as administrator and navigate to the folder where the extension files content is located.
- Execute the following command:
PS C:\> .\setupNpsExtension.ps1 InstallNote: If the NPS extension plug-in has to be uninstalled or updated to newer versions and configuration data, enter Uninstall and Updated respectively instead of Install. - After installation, you will be prompted to restart the NPS Windows service. Proceed with the restart.
- Configure a RADIUS client in the NPS service for ADSelfService Plus. Set a shared secret during configuration for future use.
Step 3. Configure the Cisco FTD using FMC
- Log in to the Firepower Management Center (FMC) console that manages your FTD SSL VPN devices.
- Go to Objects → Object Management → RADIUS Server Group and click Add RADIUS Server Group.
- Enter the following information under Add RADIUS Server Group:
- Name: Enter any name without any spaces.
- Description: ADSelfServicePlus RADIUS server group.
- Group Accounting Mode: Leave as Single.
- Retry Interval: Leave as 10.
- Realms: There is no need to select a realm.
- Under RADIUS Servers, click the green plus sign to add an NPS server.
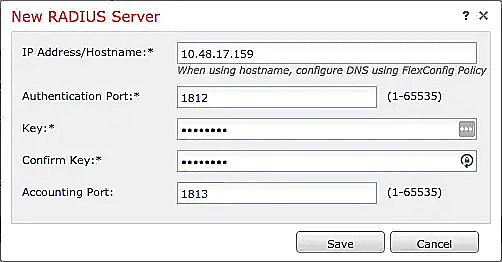
- Enter the information below under New RADIUS Server:
- Once you have added the NPS server to the group, click Save to create the new RADIUS server group.
- Go to Devices → VPN → Remote Access.
- Click on the VPN configuration for which MFA should be configured.
- Under Connection Profiles, click the pencil icon on the far right to select the connection profile that you want to start using the RADIUS server group.
- Under Edit Connection Profile, click AAA.
- Modify the Authentication Server value to the RADIUS server group created earlier.
- The Authorization Server or Accounting Server does not have to be selected.
- Do not configure the Password Management settings.
- Click Save under Edit Connection Profile.
- Click Save next to You have unsaved changes.
- Click Deploy.
- Select the FTD device(s) to which you want to push the new Remote Access VPN configuration with MFA.
- Click Deploy.
- Upon deployment completion, the status Deployment to device successful will be displayed.
IP Address/Hostname: The hostname or IP address of your NPS server.
Authentication Port: 1812 (or whichever port you specified in your authproxy.cfg file).
Key: The exact shared secret set during RADIUS client configuration.
Confirm Key: Reenter the shared secret.
Server Accounting Port: Defaults to 1813 (this value does not matter because the NPS Extension does not support RADIUS Accounting).
Timeout: Set a minimum of 60 seconds.
Connect using: Depending on connectivity from the FTD to the NPS server, elect either Routed or Specific Interface.
Redirect ACL: Select or add the redirect ACL (only if using FTD with ISE).
New to ADSelfService Plus?
Related Articles
Configuring MFA for ISE with RADIUS
This guide provides steps for enabling multi-factor authentication (MFA) using RADIUS for Cisco's Identity Services Engine (ISE) product using ManageEngine ADSelfService Plus' MFA for VPN feature. To enable RADIUS-based authentication for Cisco ISE, ...Configuring MFA for Cisco ASA SSL VPN using RADIUS
This guide provides steps for enabling multi-factor authentication (MFA) using RADIUS for Cisco's Adaptive Security Appliance (ASA) product using ManageEngine ADSelfService Plus' MFA for VPN feature. To enable RADIUS-based authentication for VPN ...Common VPN and RADIUS-based endpoints and the ADSelfService Plus authenticators they support
ADSelfService Plus supports the following types of authenticators for VPN MFA: One-way authenticators Push Notification Authentication Fingerprint/Face ID Authentication These authenticators are automatically applicable for all the endpoints ...Multi-factor authentication techniques in ADSelfService Plus
Let's take a look into the various authentication methods supported by ADSelfService Plus for enterprise multi-factor authentication (MFA). Why should you use MFA? Authentication based solely on usernames and passwords is no longer considered secure. ...Updating cached credentials in ADSelfService Plus through a custom VPN
ADSelfService Plus can automatically update the locally cached credentials on remote user machines as and when users reset their passwords. To update cached credentials, ADSelfService Plus requires the Windows login agent bundled with the product and ...
