Use-case 26: What Accounts Work Best For Contract Employees In Your Active Directory
To begin with, let's bring out some differences between your regular employees and your contract employees.
1. Regular employees do not come with an end-of-contract date, whereas contract employee do.
2. Regular employees would require an account on the domain to provide access over resources, whereas contract employees may not.
3. Regular employees would require a dedicated mailbox to send, receive and store emails that are exchanged within the organization, whereas an external mailbox would suffice for contract employees.
Now that we have a few ground rules on the contract employees, what AD account might be appropriate for contract employees?
Active Directory mail-enabled objects are users and contacts to which emails can be sent to communicate. Their email repository, i.e., their mailbox is not available within the organization.
Mail-enabled users are Active Directory users who can login to the domain and be provided access resources like file servers, documents, etc.
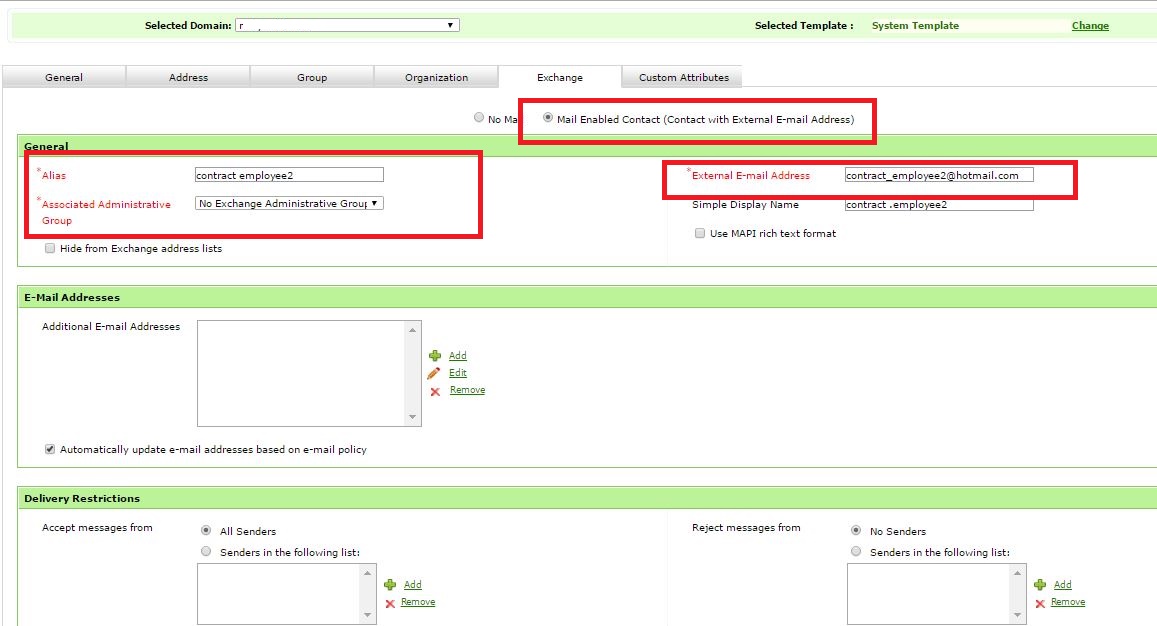
Mail-enabled contacts are Active Directory objects that do not have any access on the domain. They can neither login nor access AD resources by any means. Contacts can receive emails on their mailbox outside the organization.
Depending on your requirement, you can provision accounts for contract employees through ADManager Plus which gives you the upper hand of provisioning users accounts and their mail accounts simultaneously.
Step 1: If you are going to create a mail-enabled user account for your contract employee,
Kindly go to AD Mgmt --> User Management --> Create Single User.
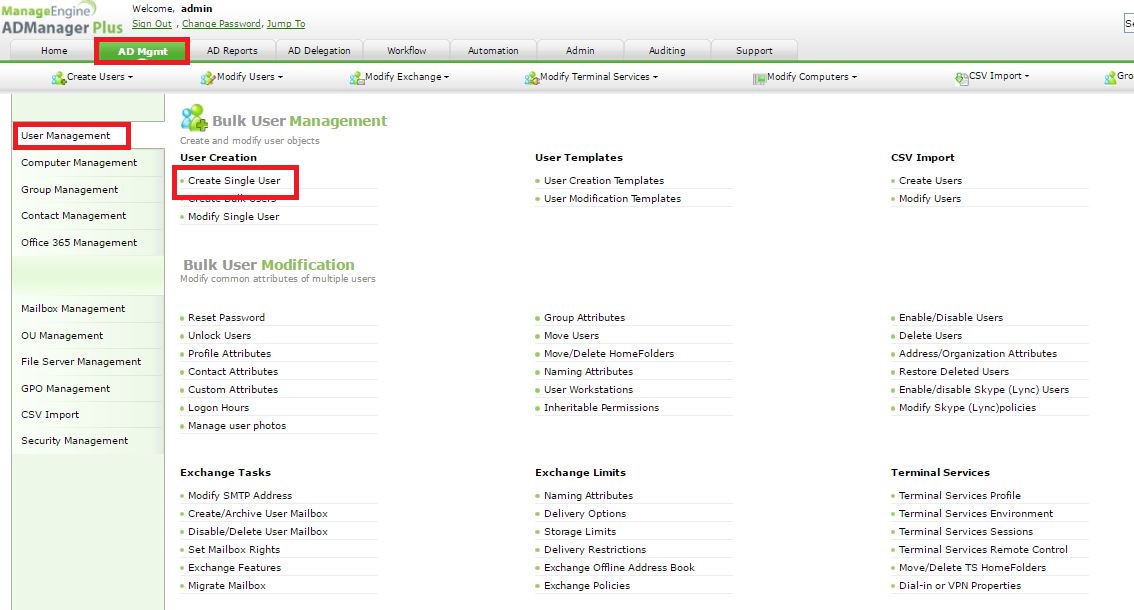
Step 2: Fill the contract employees information on General tab --> provide a password on Account tab --> click on Exchange tab to specify information pertaining to Exchange --> Finally, click on Create.
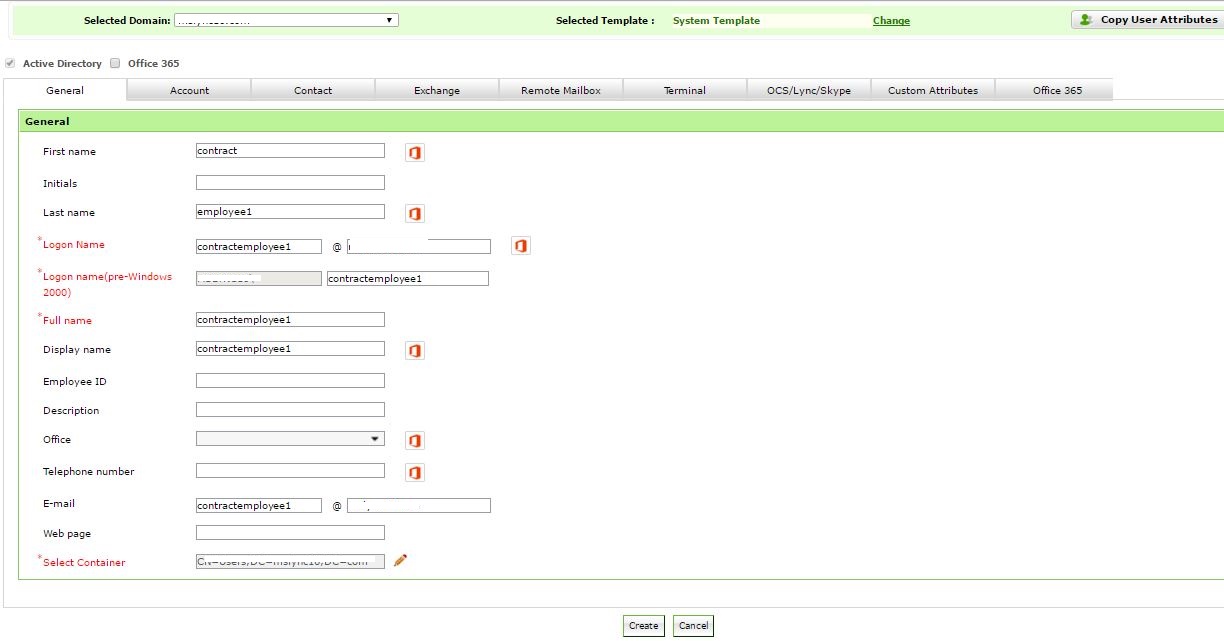
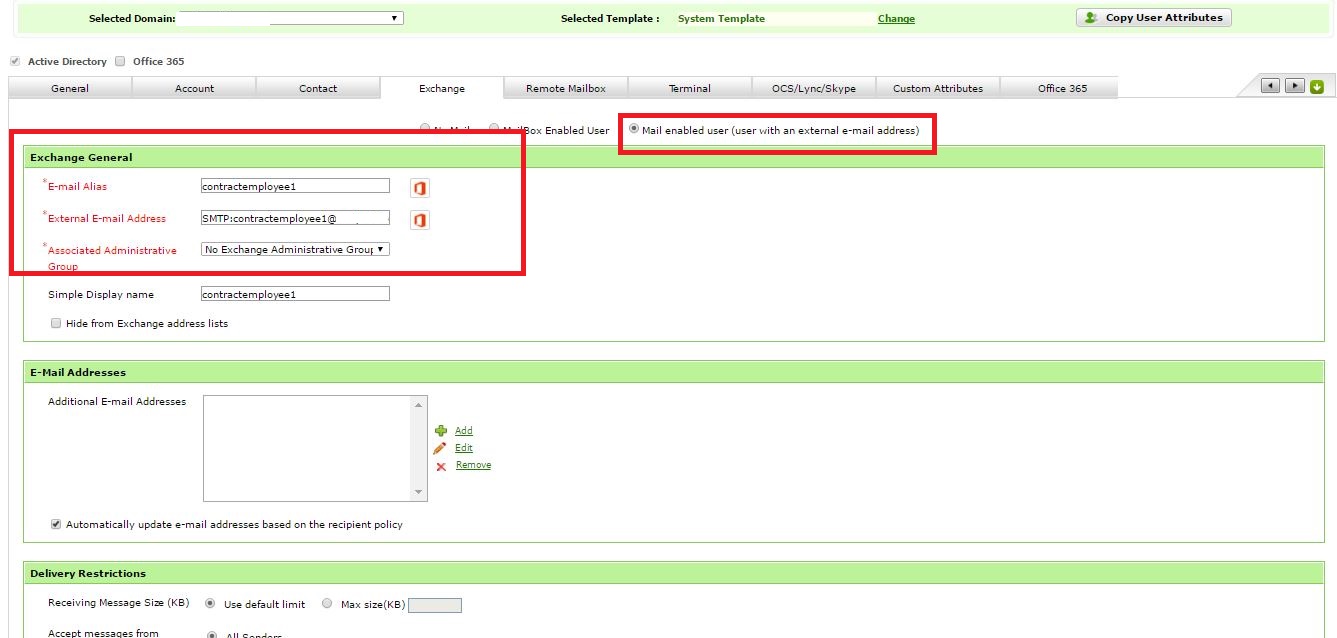

Step 3: If you are going to create a mail-enabled contact account for your contract employee,
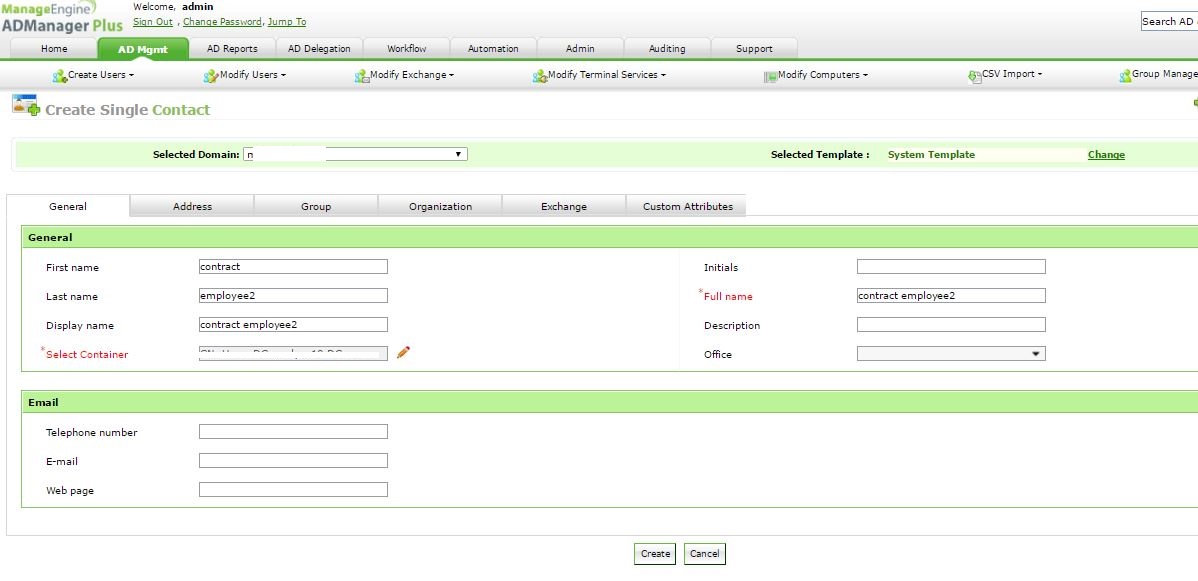
Kindly go to AD Mgmt --> Contact Management --> Create Single Contact.
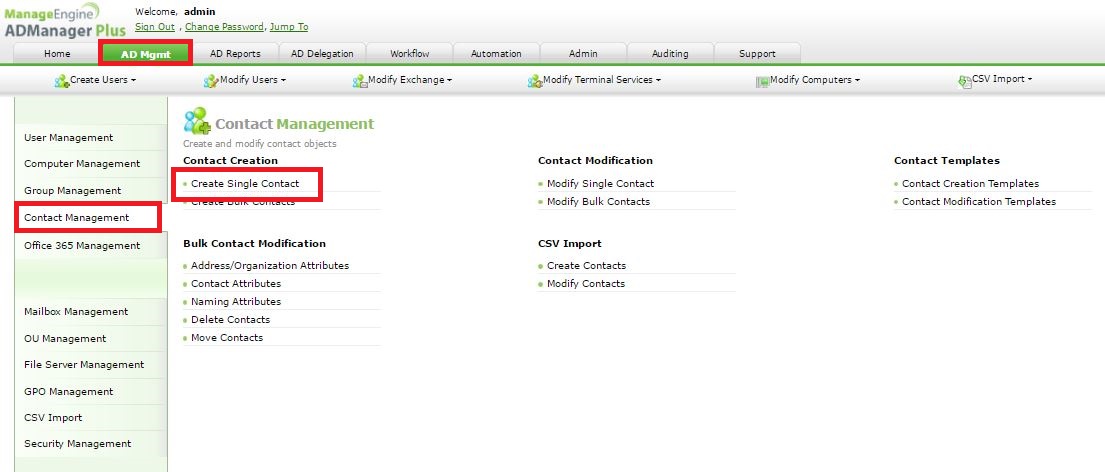
Step 4: Fill the contract employees information on General tab --> click on Exchange tab to specify information pertaining to Exchange --> Finally, click on Create.

#TheAD+Experience
| Shane Clinton |
||||||
| ManageEngine ADSolutions Team |
||||||
|
||||||
| How To | Forum | File Permission Management |
|
|||||
| ADManager Plus | ADAudit Plus | ADSelfService Plus | Exchange Reporter Plus | Recovery Manager Plus | AD360 |
||||||
Topic Participants
Shane Clinton
New to M365 Manager Plus?
New to M365 Manager Plus?
New to RecoveryManager Plus?
New to RecoveryManager Plus?
New to Exchange Reporter Plus?
New to Exchange Reporter Plus?
New to SharePoint Manager Plus?
New to SharePoint Manager Plus?
New to ADManager Plus?