request onhold scheduler
When a request is placed On Hold and a time is scheduled for it to resume or change its status, technicians may need an easy way to see when the request is expected to become active again. Displaying the Scheduled Reopen Time directly in the request list would provide this information at a glance without requiring technicians to open each request.
This can be especially helpful when working with On-Hold requests as it allows technicians to:
- Quickly see when an on-hold request is scheduled to resume.
- Prioritize requests based on their scheduled action time.
- Check scheduler details without opening individual requests.
- Keep track of requests that are waiting for customer responses, approvals or other dependencies.
The Scheduled Reopen Time may not need to be displayed by default for every request. However, making it available as an optional column and displaying it by default could make request monitoring easier and help prevent delayed follow-ups.
Add a "Scheduled Reopen Time" column to the request list view. The column can display the scheduled date and time when a scheduler is configured for the request and remain blank when no schedule is set.
Follow the steps outlined below to configure the same.
1. Go to Admin > Customization > Additional Field > Request. Create Date type additional field. Once created, make a note of the API field name from the list view.

2. Go to Admin > Developer space > Custom Functions > Global function > New > Paste the content from the attachment configuration.txt and save it with a name.

Update the URL and technician key in the global function as per your environment. Refer to the below link for details about Integration key.
3. Go to Admin > Developer space > Custom Functions > Request > Paste the content from the attachment Update additional field and save it with a name.
4. Modify the global function name and additional field API name in the script. Refer to the attached screenshot.
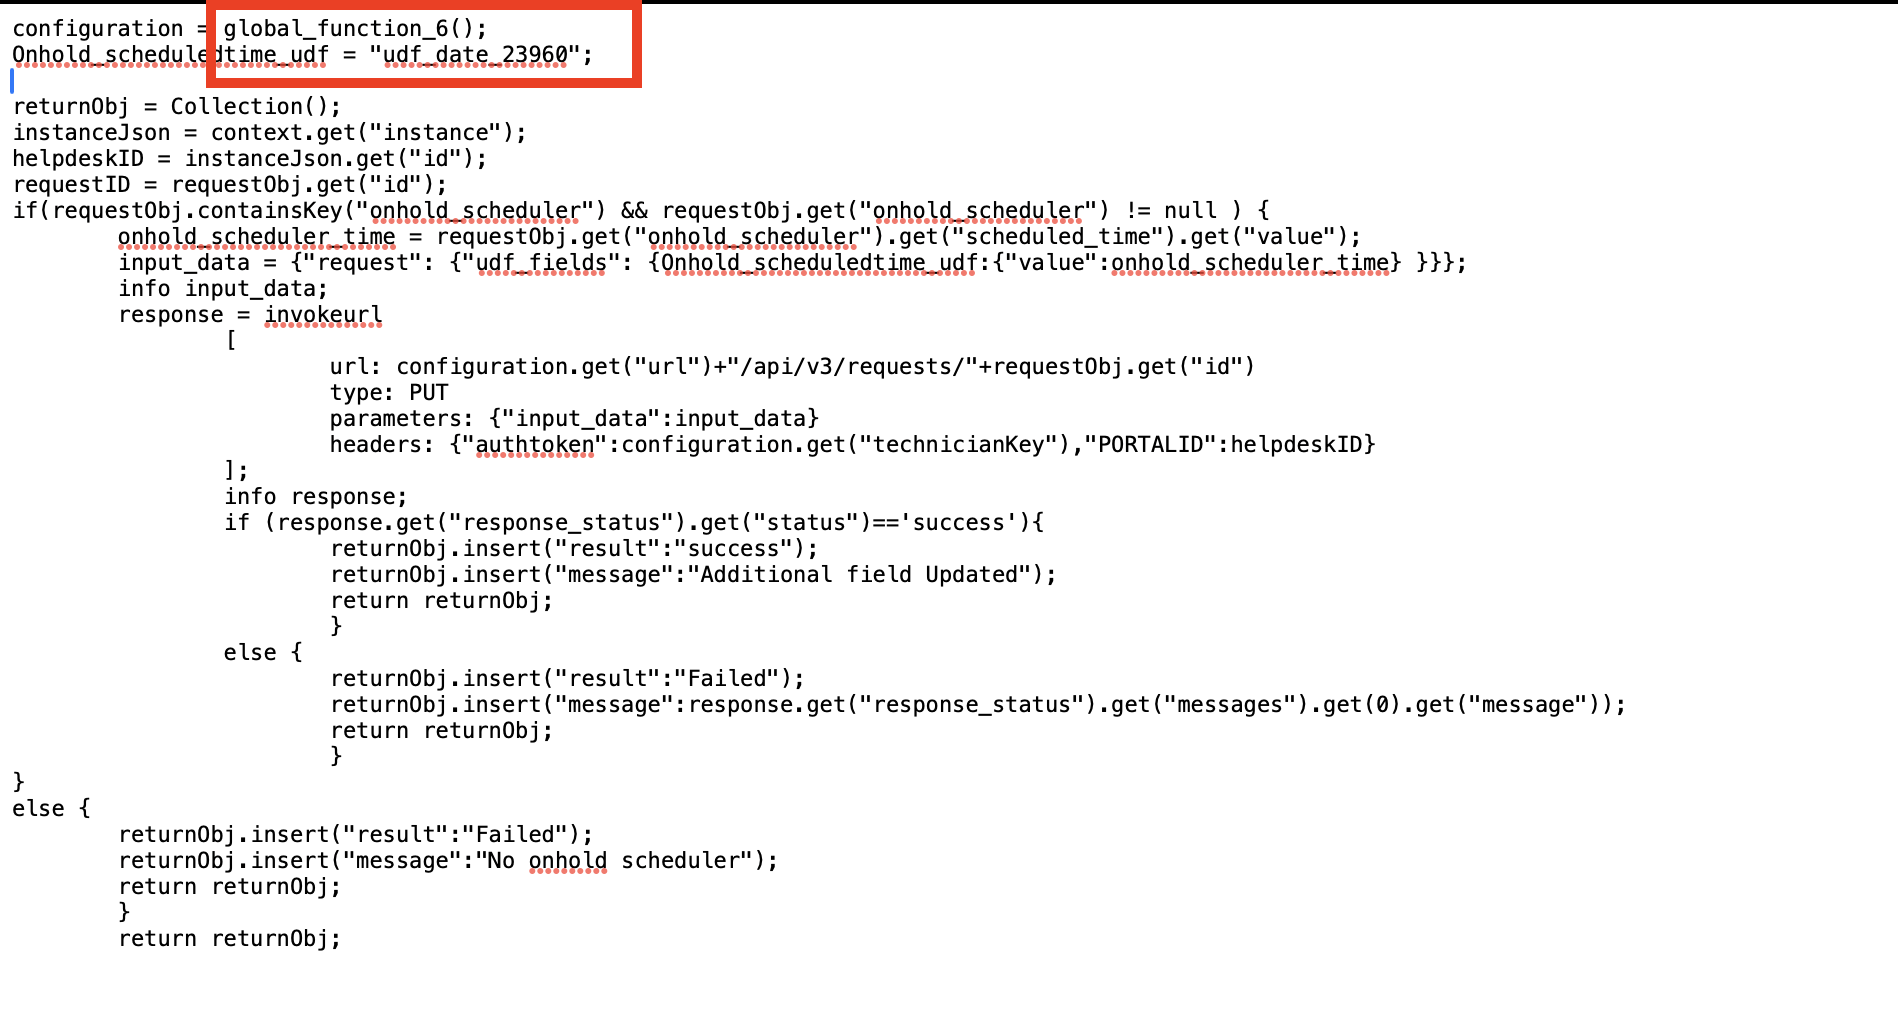
4. Modify the global function name and additional field API name in the script. Refer to the attached screenshot.
5. Go to Admin > Automation > Custom Triggers > Request and configure Request custom trigger as in the screenshot below.
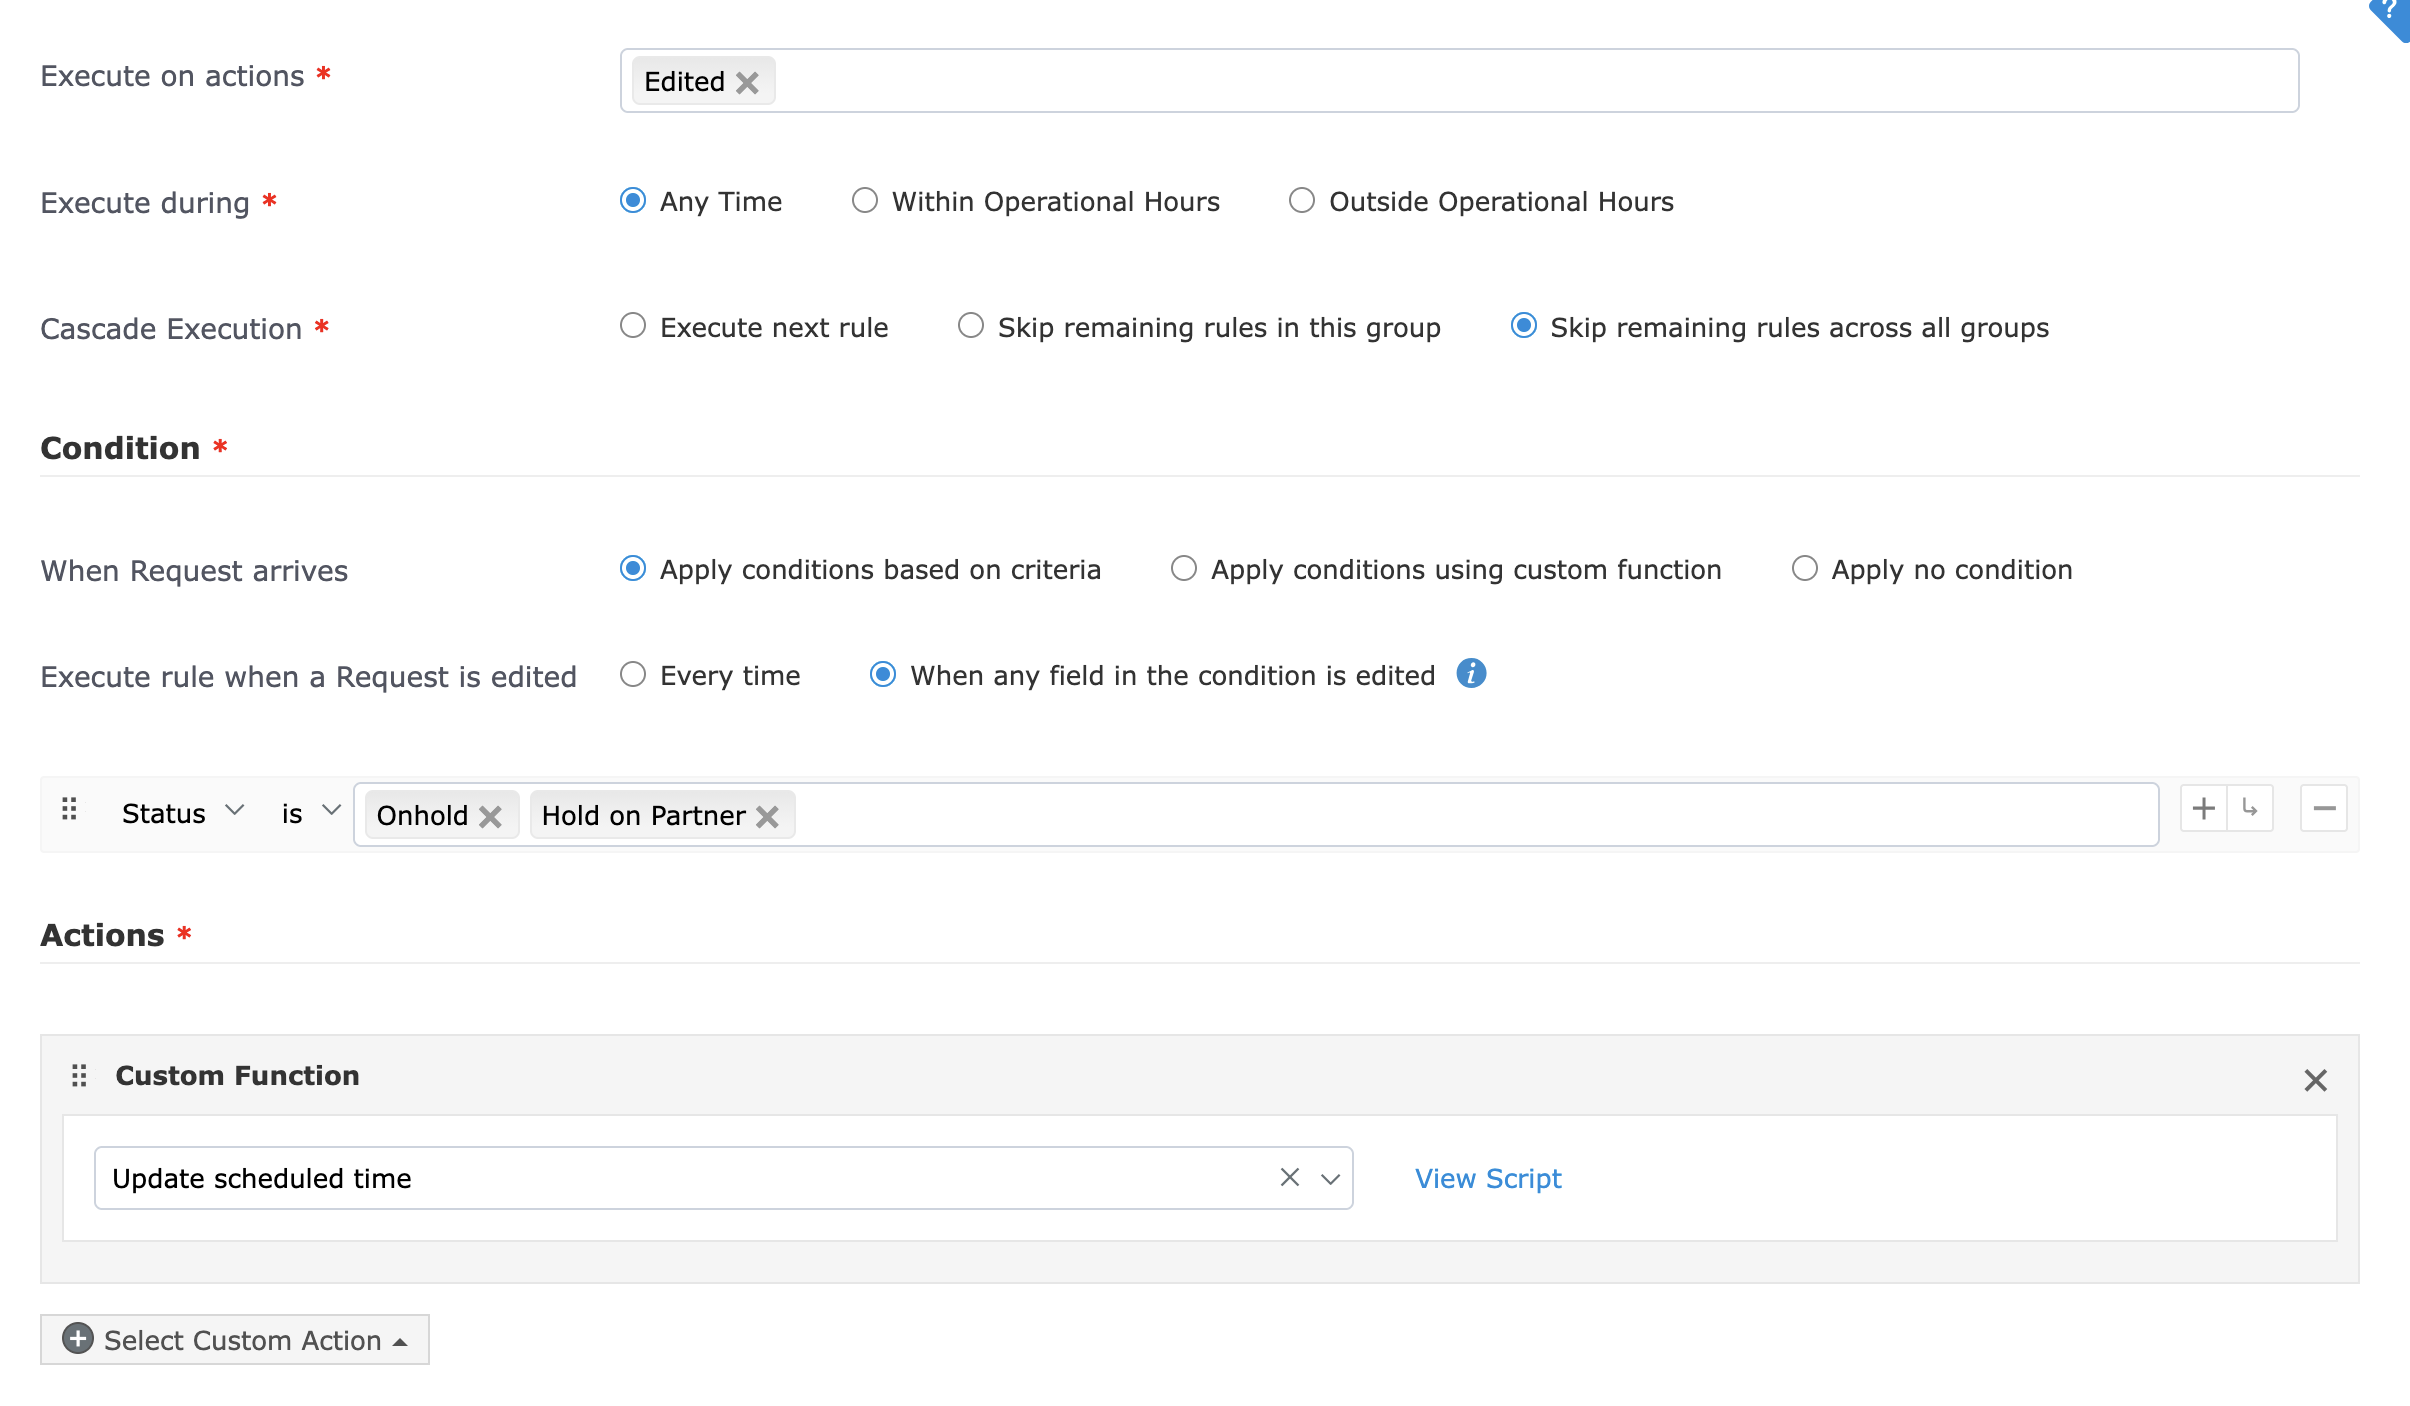
Note: You can add the required onhold type status to the condition.
6. Ensure the additional field is added to request templates. Then, add the additional field to the request list view. Once everything is configured as outlined above, you will have the scheduled reopen time displayed in the request list as in the screenshot below.

We hope you find this helpful.