[Tips & Tricks] Updating cached credentials by configuring custom VPN providers in ADSelfService Plus.
To update cached credentials, ADSelfService Plus requires the Windows logon agent, bundled with the product, and a command line VPN client to be installed in the users' machines. It supports these VPN clients: Fortinet, Cisco IPSec, Cisco AnyConnect, Windows Native VPN, SonicWall NetExtender, Checkpoint EndPoint Connect, and SonicWall Global VPN. You can also configure custom VPN clients to update the cached credentials. This article will give you step-by-step instructions to configure a custom VPN client with ADSelfService Plus for cached credentials update.
Configuration steps
1. Log in to ADSelfService Plus with admin credentials.
2. Navigate to Configuration > Administrative Tools > GINA/Mac (Ctrl+Alt+Del).
3. Click Updating Cached Credentials over VPN.
4. Select Enable VPN settings.
5. Choose Custom VPN from the VPN Provider drop-down list.
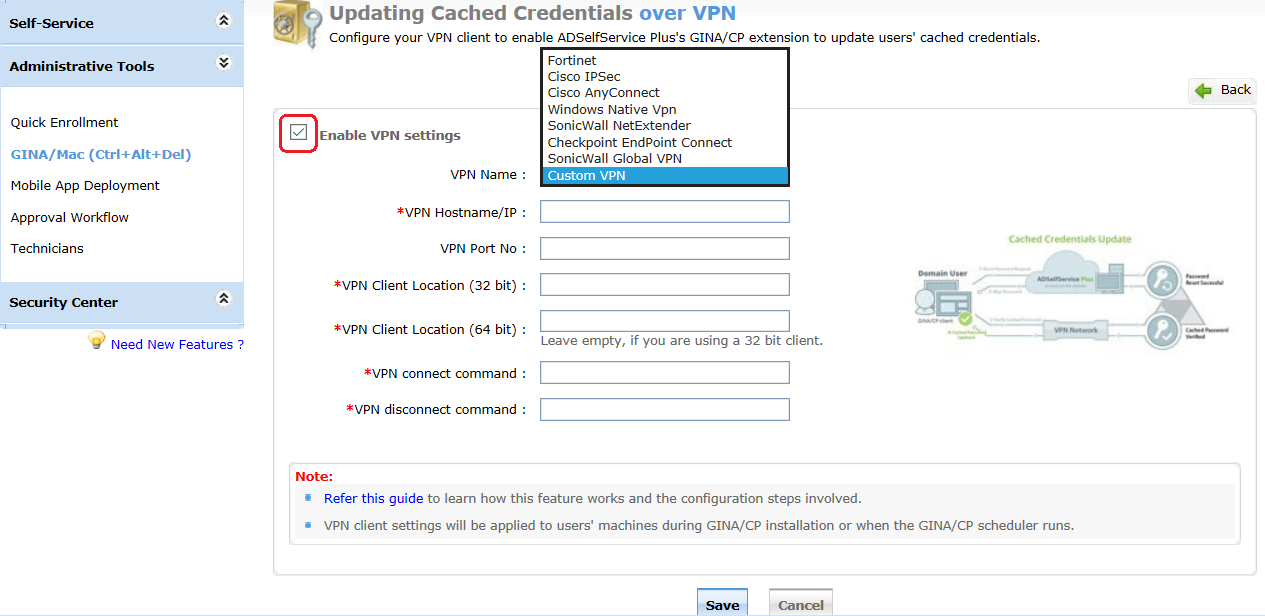
6. Enter the VPN Hostname/IP and VPN Port No in their respective fields.
7. Enter the VPN Client Location on users' machines. Example: C:\Program Files (x86)\Fortinet\FortiClient.
8. Use macros (%username%, %password%, etc.) in the VPN connect/disconnect command fields. Example: connect -s adsspvpn -h %servername%:%portno% -u %user_name%:%password%
8. Click Save.
Note: The VPN configurations will be reflected on the users’ machines either during the GINA/CP client installation, or when the GINA/CP scheduler runs.
Like this tip? Get the most out of ADSelfService Plus by checking out more tips and tricks here.
