[Tips & Tricks] Verify users' identities using SAML-based identity providers during self-service password reset and account unlock
When SAML Authentication is enabled in ADSelfService Plus, users are routed to their identity provider login URL for authentication, during password self-service operations.
After successful authentication in the identity provider, users are redirected back to the ADSelfService Plus portal where they can reset their password or unlock their account. To use this feature, users do not have to enroll in ADSelfService Plus.
Note: This option will work only if the identity providers have SAML 2.0 enabled.
Prerequisites:
1. Log in to your identity provider application web-console with admin credentials and navigate to ADSelfService Plus from the list of applications provided. If ADSelfService Plus is not supported by default, configure a new application for ADSelfService Plus in your identity provider application.
2. Either download the Metadata in XML format, or copy the Issuer URL/Entity ID, IdP Login URL, and the X.509 certificate.
Steps to be followed:
1. Log in to ADSelfService Plus web-console with admin credentials.
2. Navigate to Configuration tab > Self-Service > Multi-factor Authentication.
3. Click SAML Authentication tab.
4. Select the Enable SAML Authentication option.
5. Choose custom SAML from the Identity Provider (IdP) drop-down list.
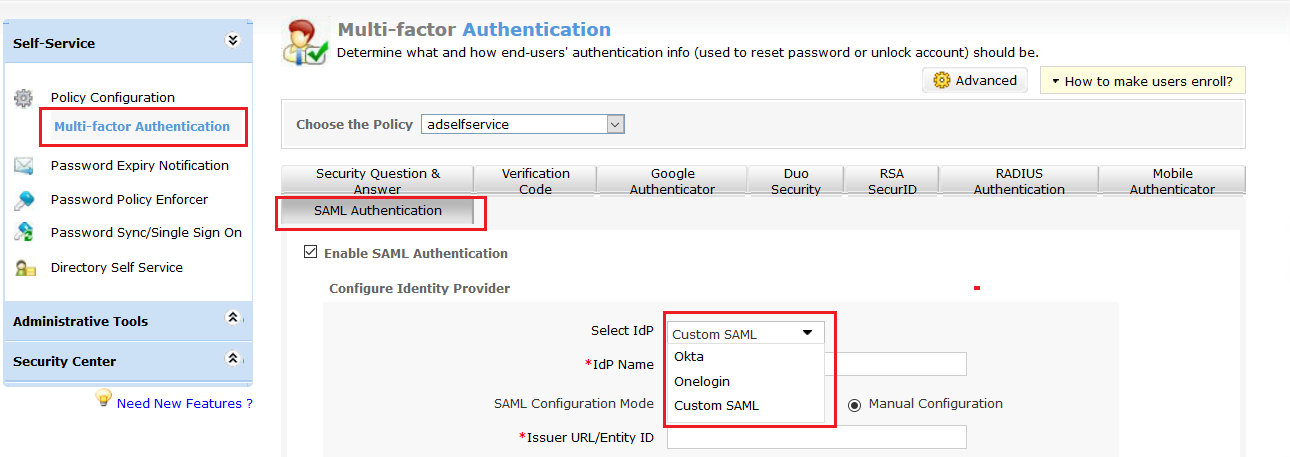
6. Provide an appropriate IdP Name.
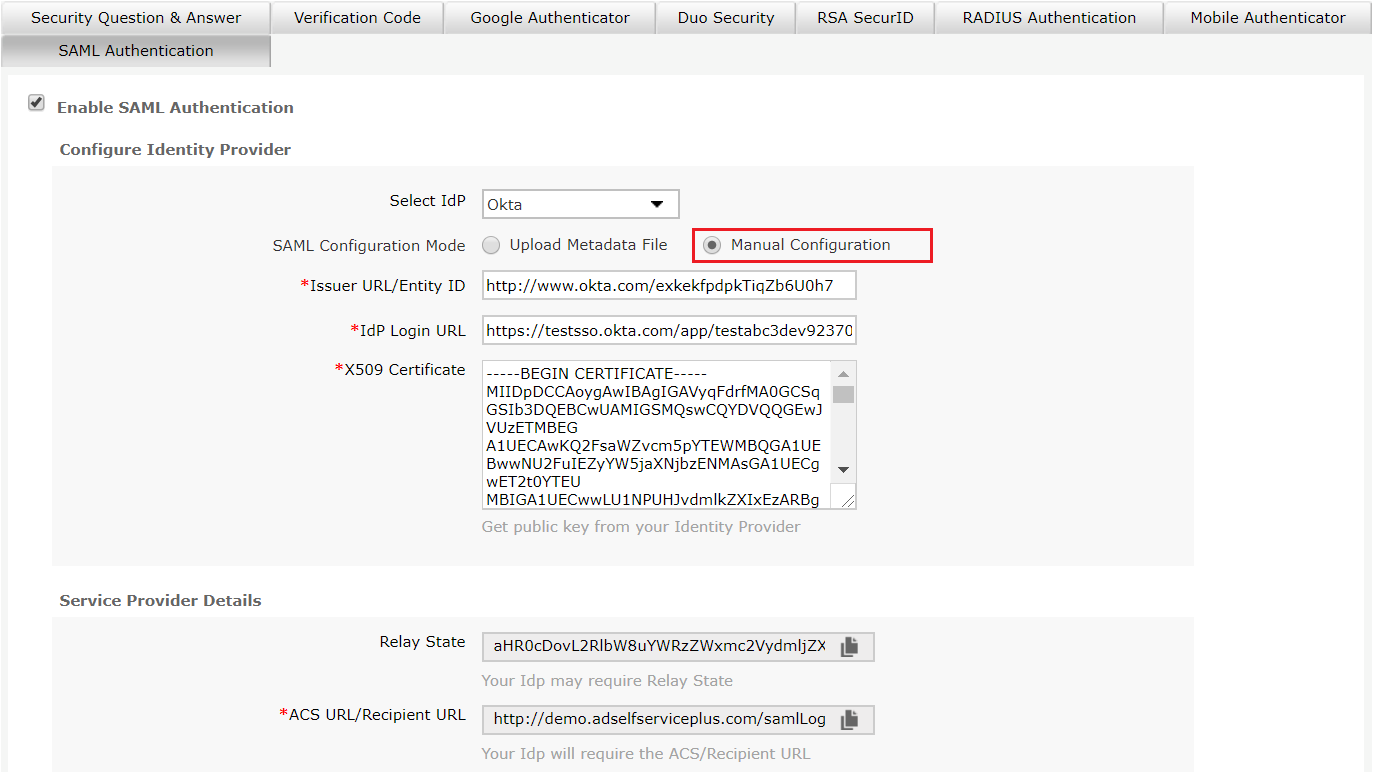
7. There are two SAML Config Modes: Upload Metadata File and Manual Configuration.
1. Select Upload Metadata File to manually upload the IdP metadata file (Refer step 2 of the Prerequisites).
· Click Browse to upload the IdP metadata file.
2. Select Manual Configuration to manually configure the URLs and certificates.
· Enter the Issuer URL/Entity ID obtained from the identity provider in the respective field. (Refer step 2 of the Prerequisites).
· In the IdP Login URL, enter the login URL obtained from the identity provider (Refer step 2 of Prerequisites).
§ In the space provided for X.509 Certificate, enter the public certificate key fetched from the identity provider (Refer step 2 of Prerequisites).
8. Click Save.
That's it! You are all set to authenticate users through SAML-based identity providers for self-service password reset and self-service account unlock.
Like this tip? Get the most out of ADSelfService Plus by checking out more tips and tricks here.
