[Tips & Tricks] Configuring SAML with Azure AD
This guide will help us configure SAML for those who want to use
Azure AD as their IdP and also give you insights on a few issues that
you might run into while configuring SAML in an Azure Environment.
In an ideal environment, we will have an On Premises AD which
will Sync users to their O365 Portal or Azure Portal. The sync is
carried out with the help of a tool called Azure AD Connect, and the
admins can download this tool either from the Azure Portal (https://portal.azure.com/#blade/Microsoft_AAD_IAM/ActiveDirectoryMenuBlade/AzureADConnect) or from Microsoft's Download Center (https://www.microsoft.com/en-us/download/details.aspx?id=47594).
Once
the tool is downloaded, the tool will be installed in the On-Premises
AD and configured in such a manner that it syncs up the users in the OP
AD to Azure AD.
Now that we have the Azure AD populated with users, the next step is to configure SAML for ServiceDesk Plus.
The Prerequisites that need to be met to configure SAML in SDP using Azure are listed below:
1. Access to SDP Application with SDAdmin privilege
2. Access to DC with Domain Admin Account
3. Access to Azure Portal with Global Admin Privilege
Step - 1:
The
first step in the configuration part should be done on Azure front. We
will need to create an Enterprise Application called
ServiceDesk/ServiceDesk Plus/any name of your choice. If the application
exists already in Azure, then the same can also be used. If the
application already exists, please jump to Step - 2.
To create the Enterprise Application, login into the Azure Portal (https://portal.azure.com/#home)
with Global Admin privilege and click on "View" button against "Manage
Azure Active Directory". This will load the Azure Active Directory(AAD)
Overview section.
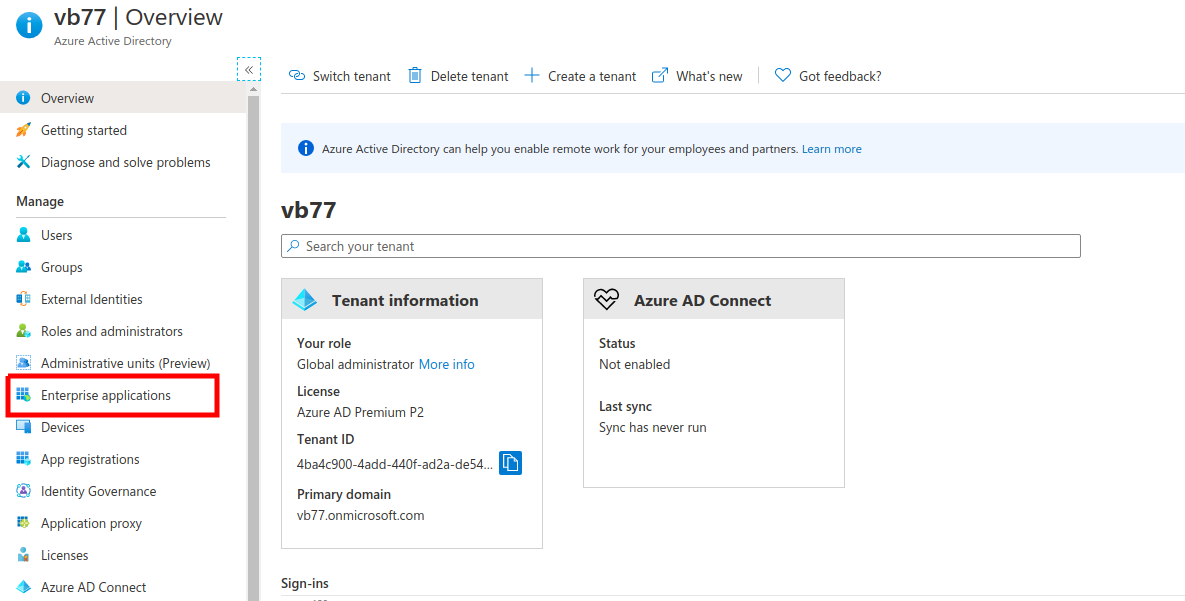
In this section, choose Enterprise
Application from the Left Pane. The following Screen will list all the
applications that are connected to Azure AD. As ServiceDesk Plus does
not have a direct integration to Azure Services, we will need to
manually create it as an Enterprise Application.
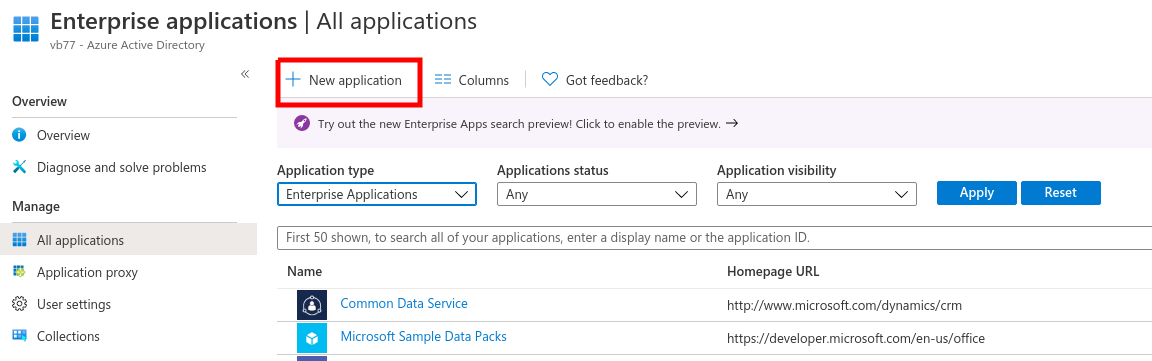
Click on the New Application Button and choose Non-gallery Application in the following screen.
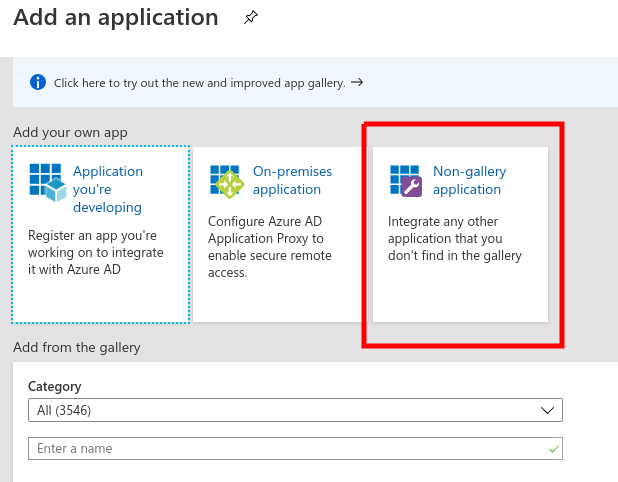
Now,
provide a name for the Application (in our case ServiceDesk Plus) and
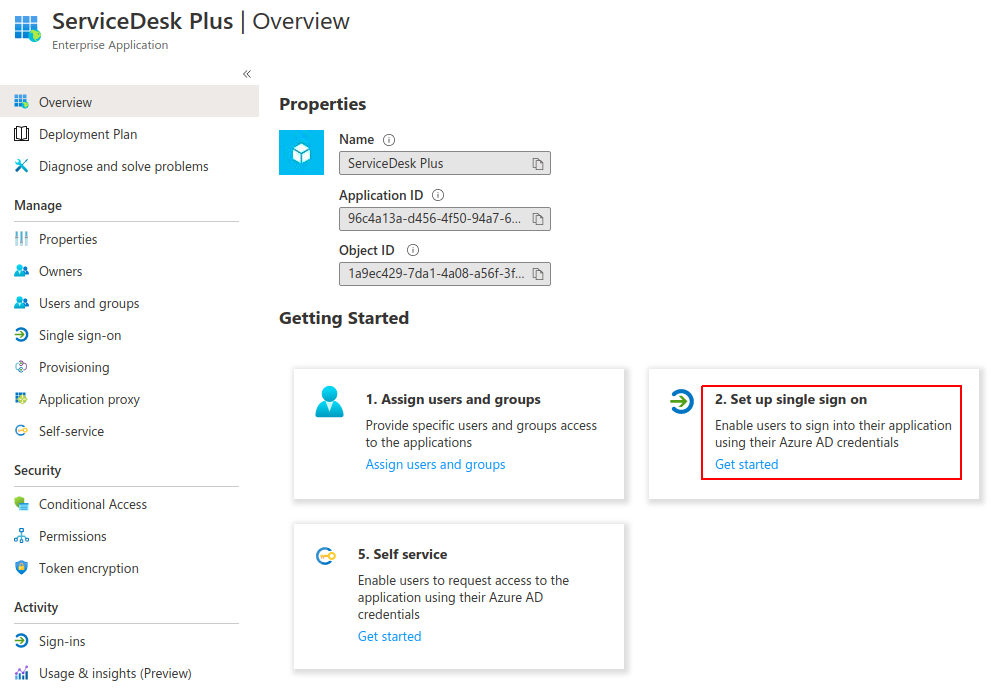
click on Save. This will create the application and will show all the
properties of the application.
Step - 2:
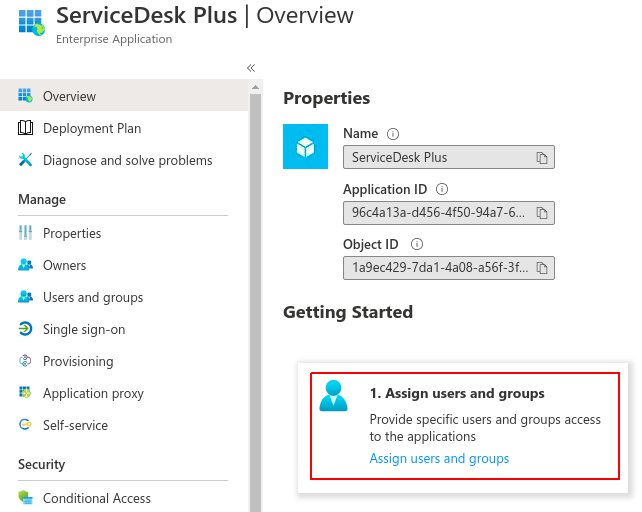
Once
the Application is Created, the first step will be to add Users to the
Application. Click on Assign Users and groups and then click on Add
Users. This will give you the list of Users in Azure AD. Now, select all
the users who should be able to access ServiceDesk Plus via Azure SAML
and add them to the Application by clicking on the Assign button.
Step - 3:
Now
that the Application is Created and Users are configured, we can
proceed with configuring SAML. Click on "Setup single sign-on" and
choose SAML in the following Page.
Step - 4:
Configuring
Basic SAML Configuration section. In this section, we need to update
the "Identifier (Entity ID)", "Reply URL (Assertion Consumer Service
URL)" and "Logout Url". All the above 3 needs to be fetched from
ServiceDesk Plus Application's SAML Configuration Page available under
Admin / ESM Directory (If ESM is configured).
Step - 5:
Configuring
User Attributes & Claims. As SDP expects the NameID value in SAML
response in the format Domain\username, we need to set a custom
attribute in Azure AD as the source attribute for the Claim. Under the
User Attributes & Claims section, click on Edit to update the
identifier.
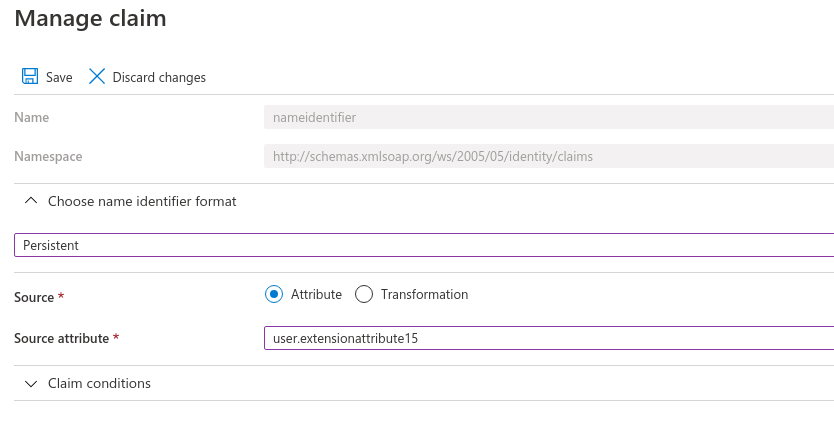
Edit the Unique User Identifier ( NameID ) claim
in Azure portal by double clicking on the " Unique User Identifier (Name
ID)" and get to the edit mode. The name identifier format should be
Persistent and the source attribute should be user.extensionattribute15.
Then save the settings.
Step - 6:
Configuring
SAML Signing Certificate and Setting up ServiceDesk Plus. From the SAML
Signing Certificate section, download the SAML Certificate in Base64
format. Now, login into ServiceDesk Plus and navigate to the SAML
Configuration Page available under Admin / ESM Directory (If ESM is
configured). Once there, update the Login URL, Logout URL and
Certificate obtained from Azure AD under the "Configure Identity
Provider Details"
Step - 7:
Now, that
we've updated the necessary fields, we need to set the value
DOMAIN\sAMAccountName against any extension attribute aka custom
attribute in the on-Prem AD. This needs to be done as ServiceDesk
expects the NameID value in SAML response in the format Domain\username
format.
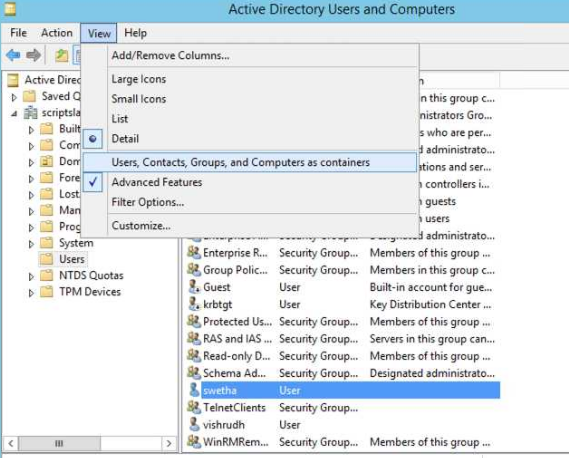
Now to do this, we need to first check if there are
any custom attributes available in AD that we can use. This can be
validated by enabling Advanced Features from the View menu of Active
Directory Users and Computers
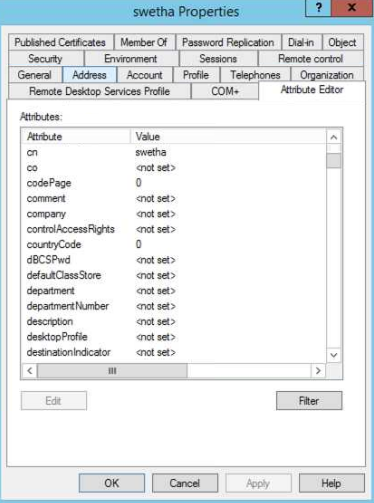
Once
enabled, please right click on any User Account and click on
properties. This will open up the User's properties which will have a
tab called "Attribute Editor". Please navigate to this Attribute Editor
tab and check if there are any custom attributes with the name
extensionAttributeX.
If there aren't any, then you will need to create an custom attribute
in AD first. To create a custom attribute in AD, you will need access to
the On-Prem AD as a Domain Admin.
Once logged in using Domain Admin Account, follow the steps available here to create a custom attribute and associate it to users in the domain.
Once done, please get the PowerShell script file from this KB
and execute the same to set the desired NameID(DOMAIN\sAMAccountName)
format which will be synced with Azure AD for SAML to work.
Once
the script completes execution, verify if the new attribute is updated
with the correct value in AD. You can check this using the Attribute
Editor. If the correct value is set for the custom attribute, then you
are all good to initiate the sync from On-Prem AD to Azure AD.
Step - 8:
The
last and the final step is to enable the custom attribute sync to Azure
AD using Azure Connect. To configre the extension attribute to be
synced to Azure, we can follow the steps available here
to sync the data. After successful sync, you can enable SAML and users
should be able to login using SAML Authentication via Azure AD.
