Performing item level restoration in an Exchange Online mailbox
Exchange Online doesn't have any provision to restore items such as calendar entries, contacts, journals, notes, posts, and tasks to a previous version.
Also, when any item, including email, is deleted, the item is moved to the Deleted Items folder. Even if the contents of the deleted items folder is emptied, you can still recover the item if you restore it within 30 days, beyond which the items cannot be recovered, except for calendar entries can be retained for a maximum of 120 days.
This post will explain how you can use RecoveryManager Plus to restore an Exchange Online mailbox item to a previous version or recover an item that has been deleted for more than 30 days.
Note: You’ll need a valid backup before your perform a restoration. To learn how to backup your Exchange Online environment, click here.
- Log into RecoveryManager Plus as an administrator.
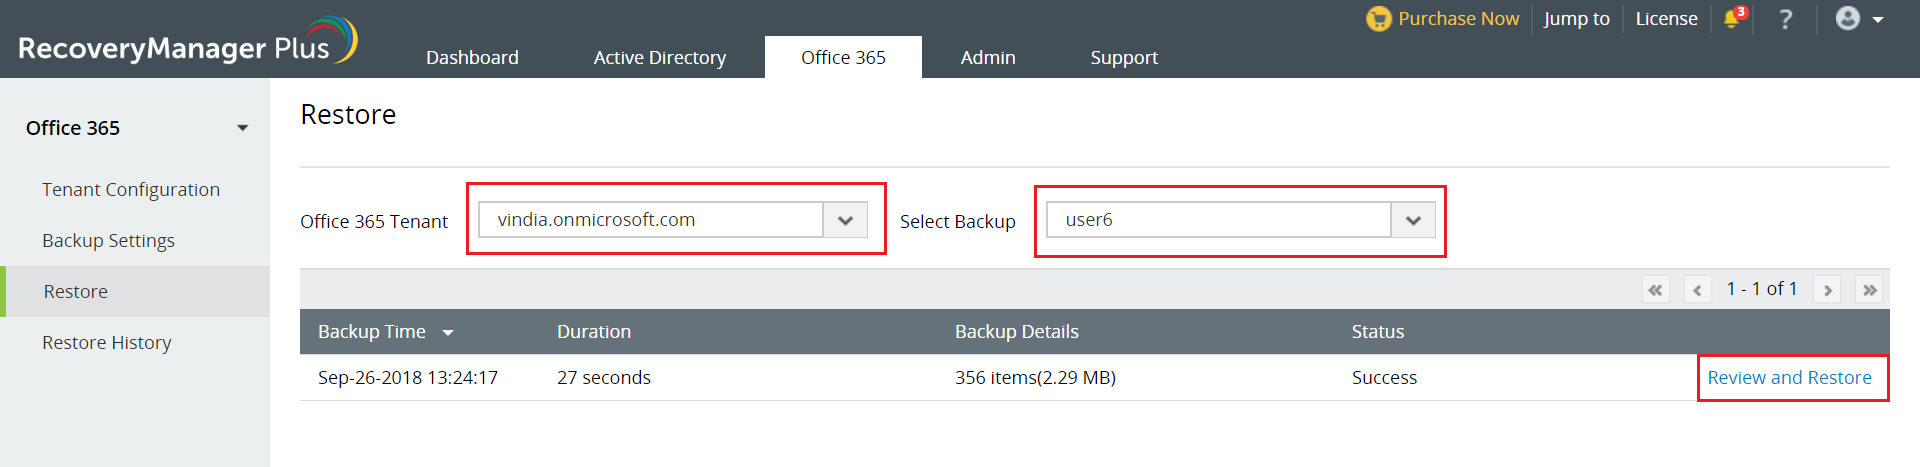
- Navigate to Office 365 tab > Restore.
- Select the tenant in which you’d like to perform the restoration from the Office 365 Tenant drop-down box.
- Select the backup schedule that backs up the mailbox to be restored from the Select Backup drop-down box.
- Once you’ve selected the schedule, a list of all the backups that have been taken by the scheduler will be displayed. The result will also contain information such as the duration taken to complete the backup process, the number of items backed up when the schedule was executed, and the status (success/failure) of the backup process.
- To initiate a restoration, click on the Review and Restore link against the backup that contains the mailbox to be restored.
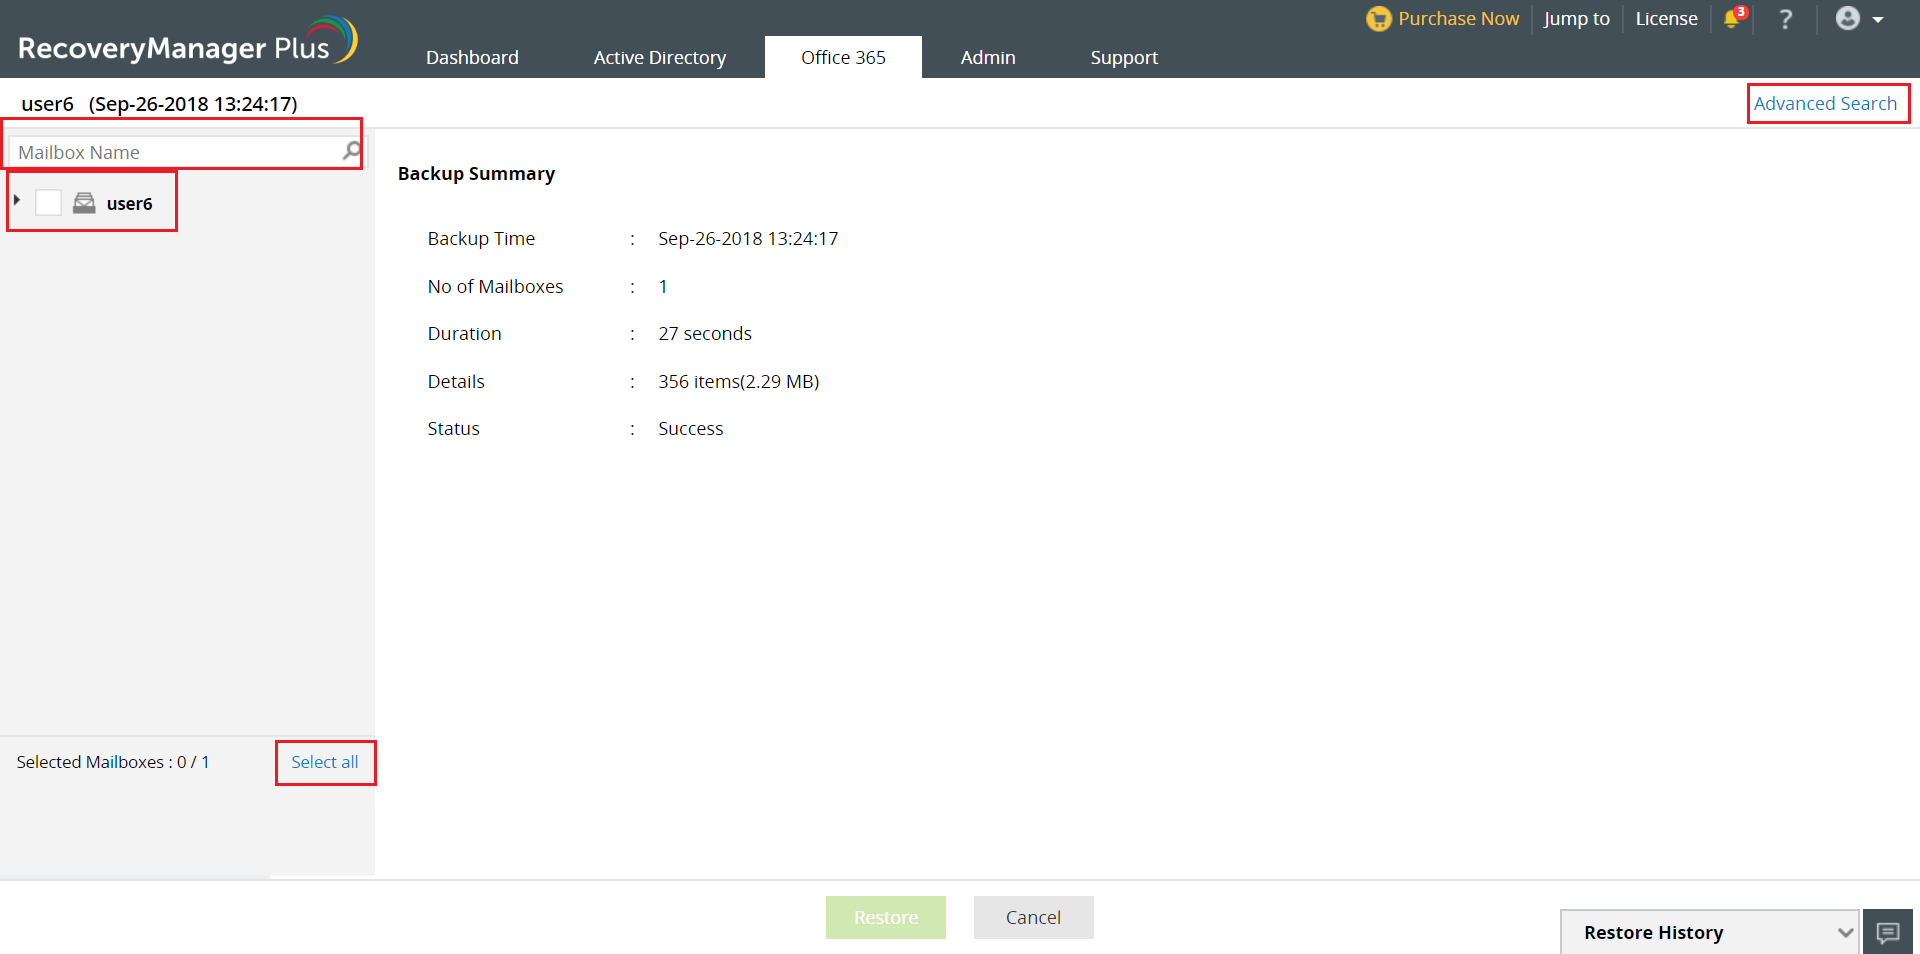
- In the screen that appears, the left-pane provides a list of all mailboxes that have been backed up.
To restore all mailboxes in the backup, use the Select all link located at the bottom of the left-pane.
Use the search bar at the top of the left-pane to search for a particular mailbox.
To restore a mailbox to the selected backup version, mark the checkbox against the mailbox’s name.
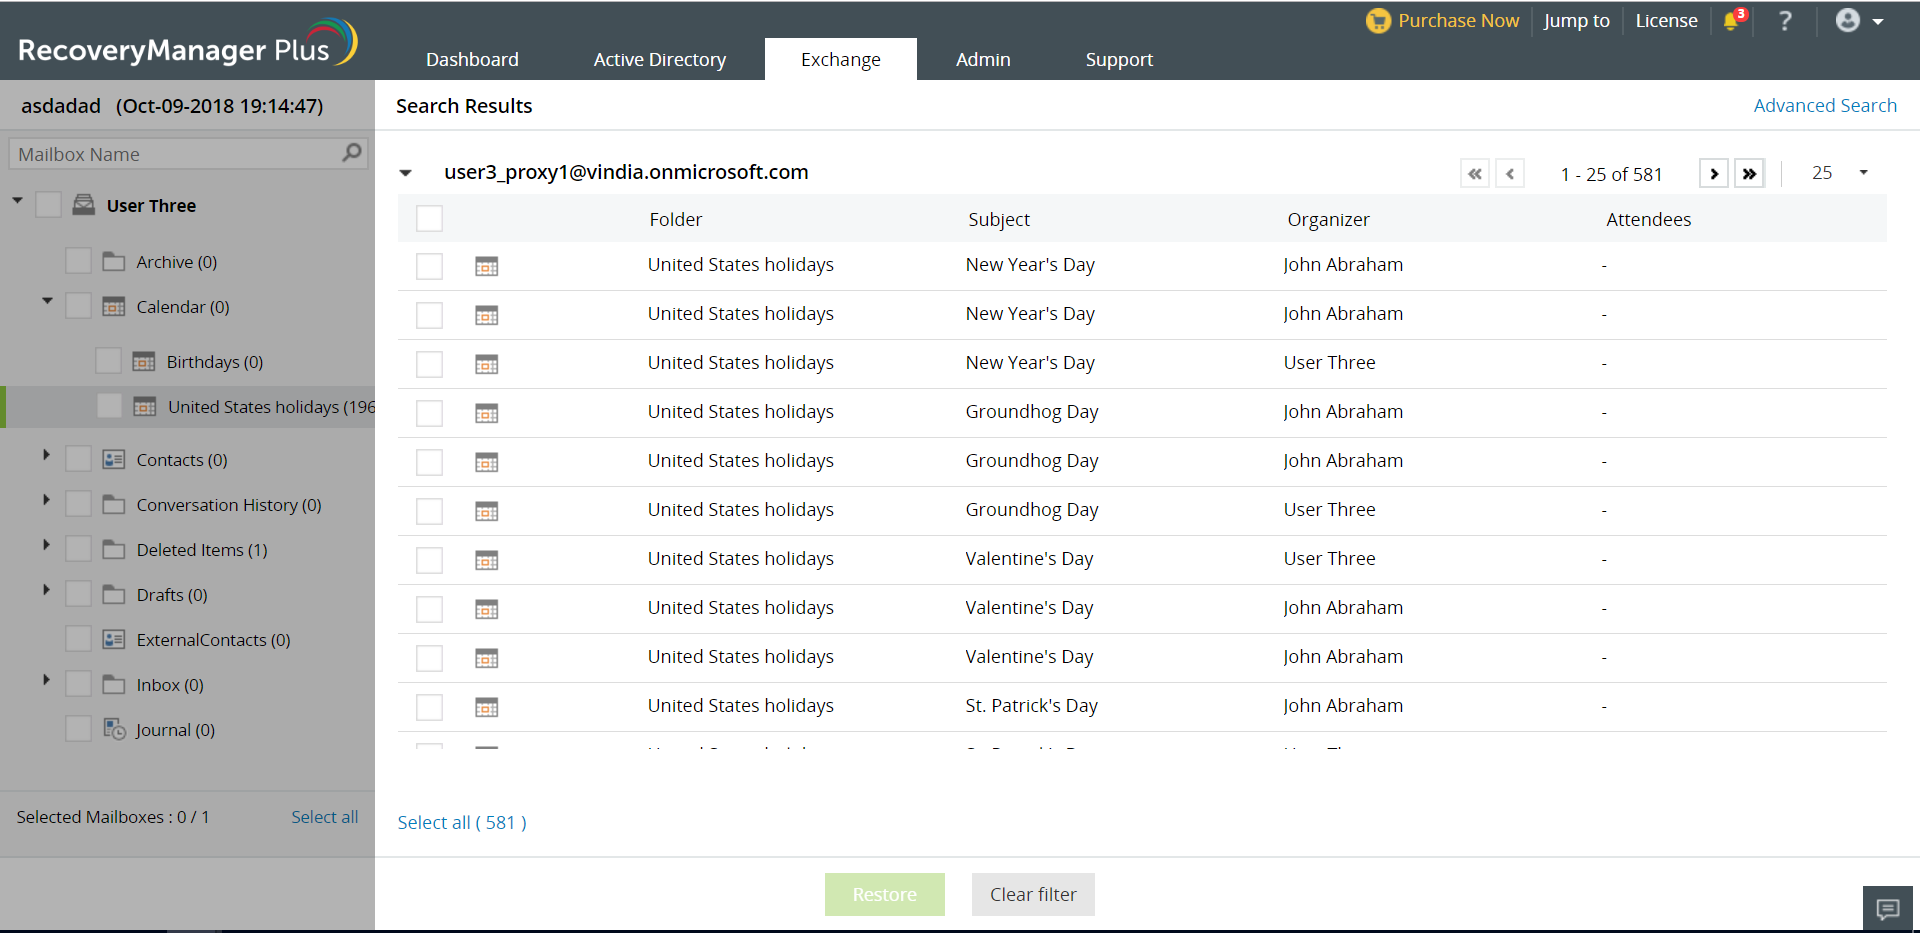
To restore individual items like contacts, notes, individual mailbox folders, etc., click on the Mailbox name to display all folders, and select the items that you wish to restore.
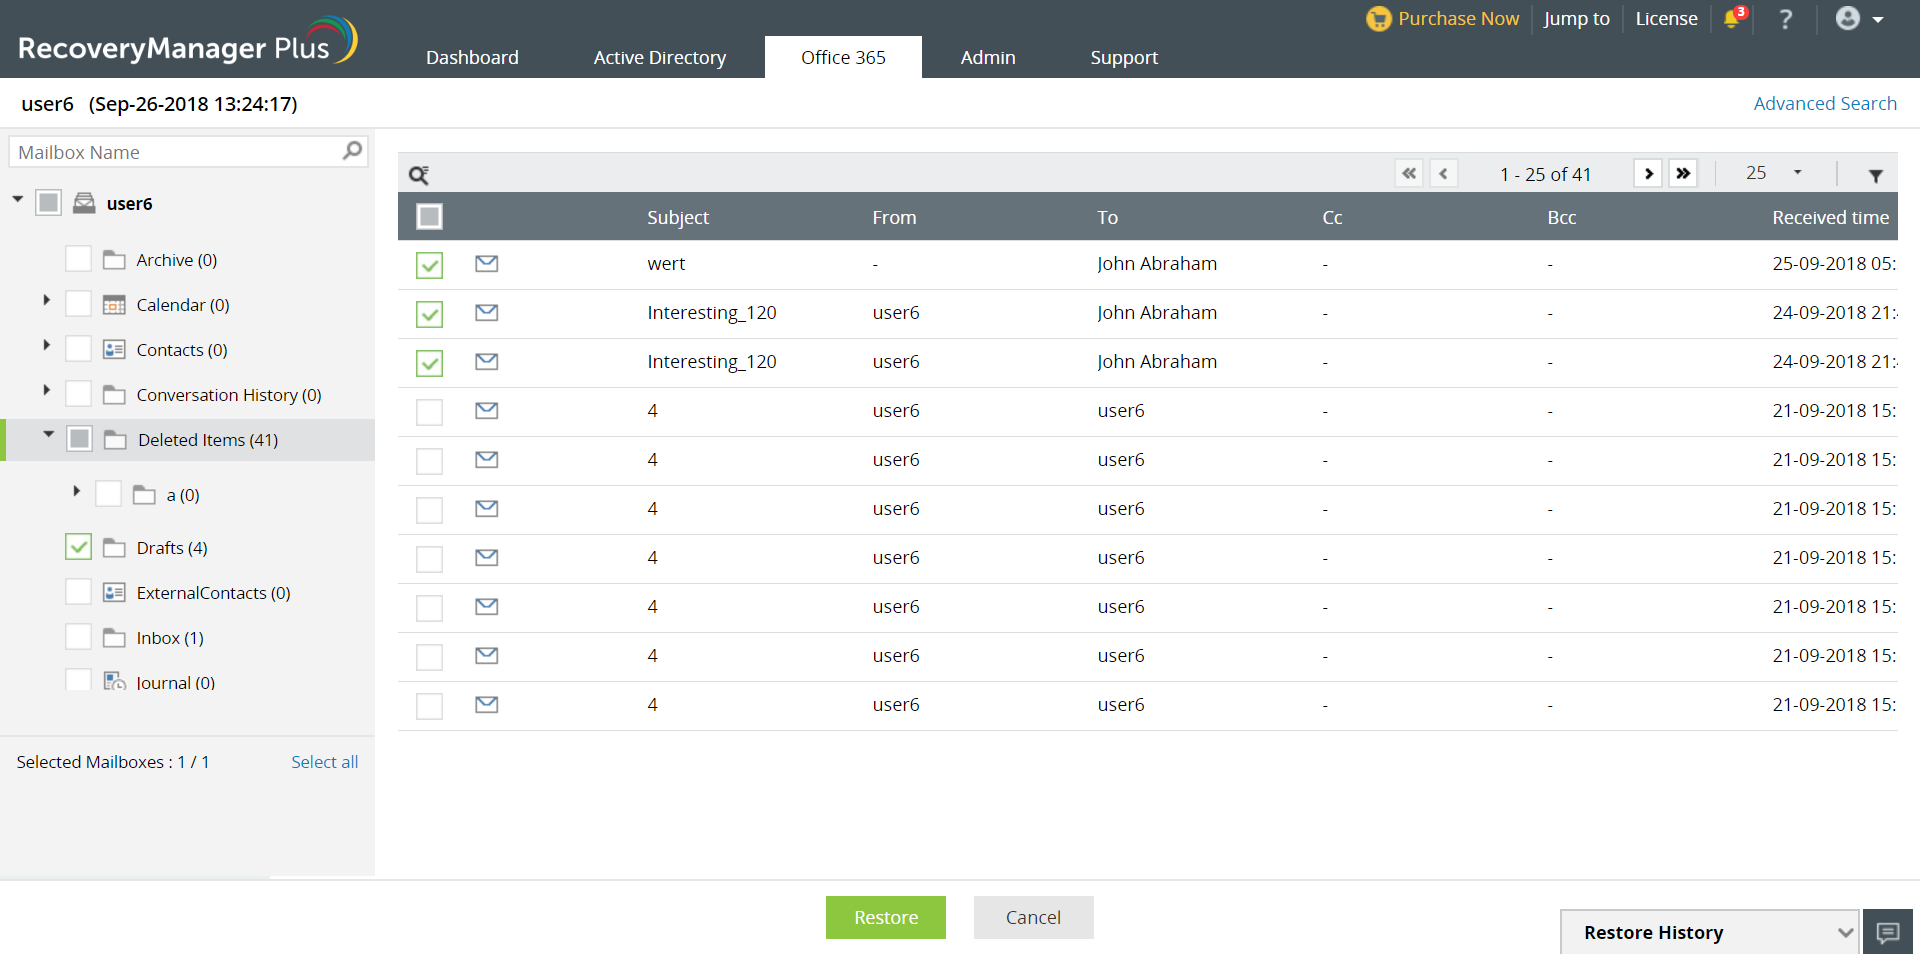
Note: Once you've selected a mailbox folder, you can further limit your search to items that match specific criteria by clicking the
 icon at the top-left corner of the result screen. Depending on the folder that you've selected, you'll be provided with a list of filters.
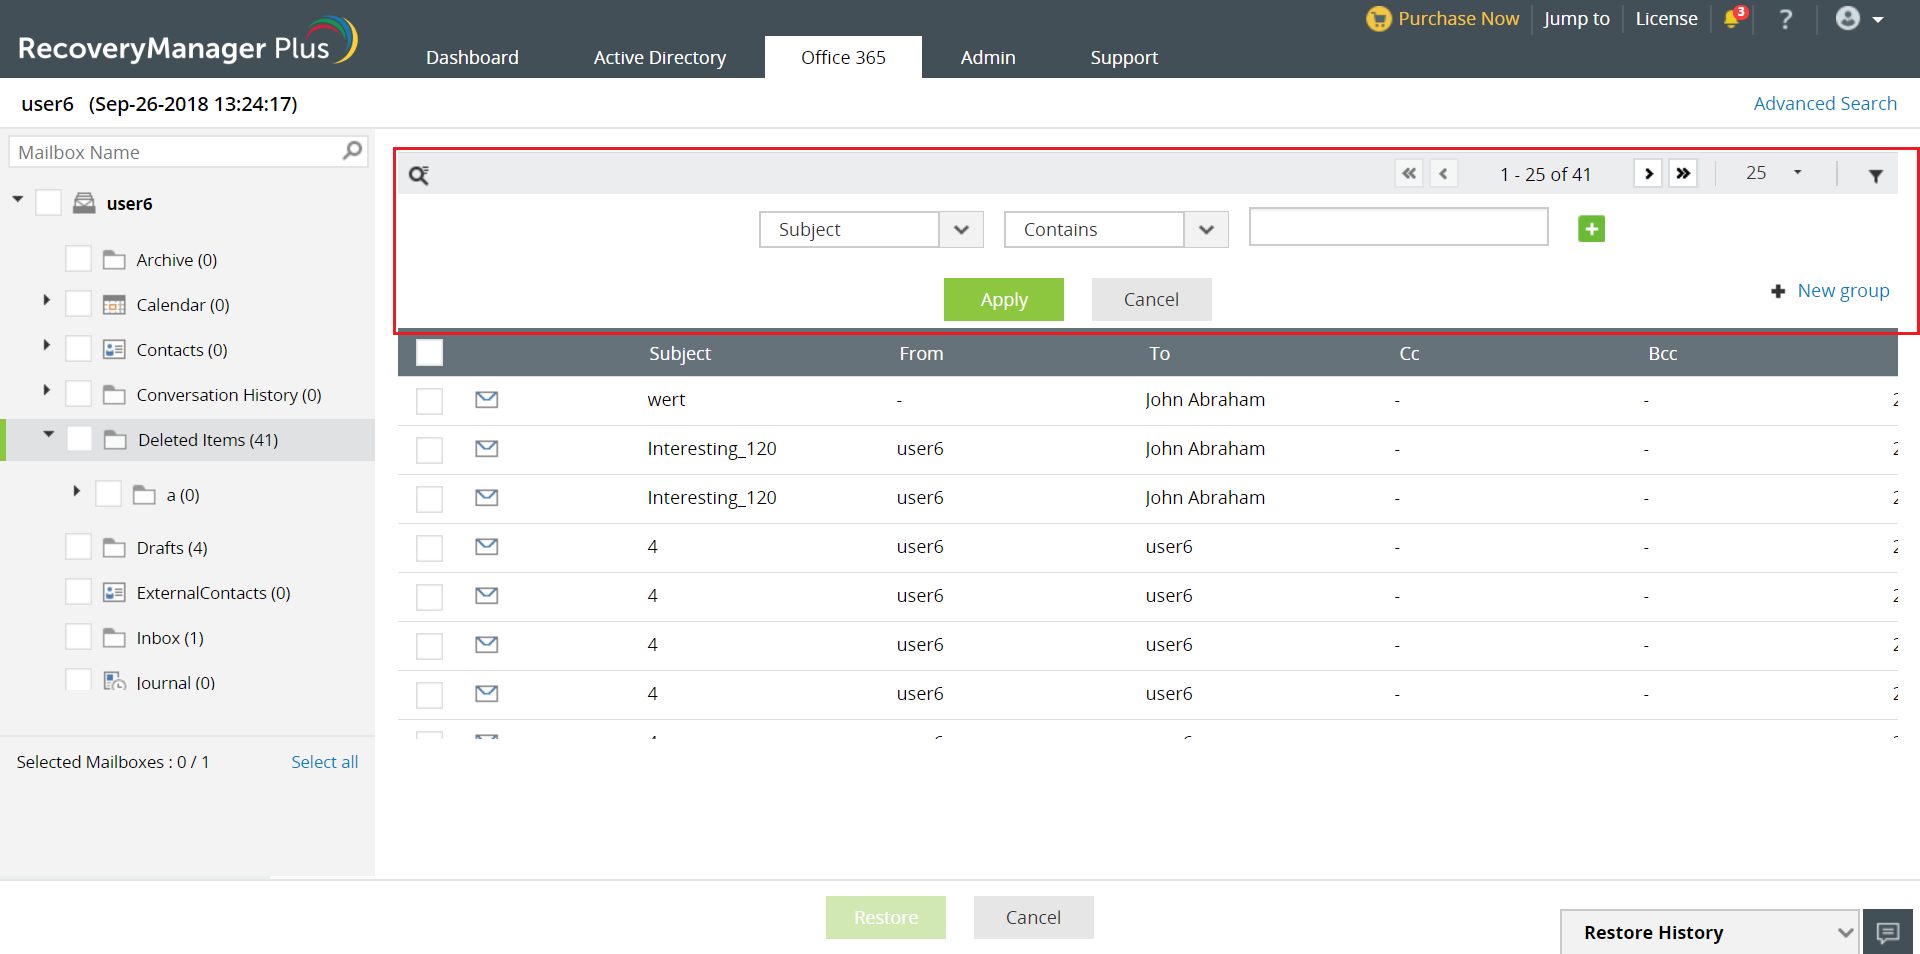
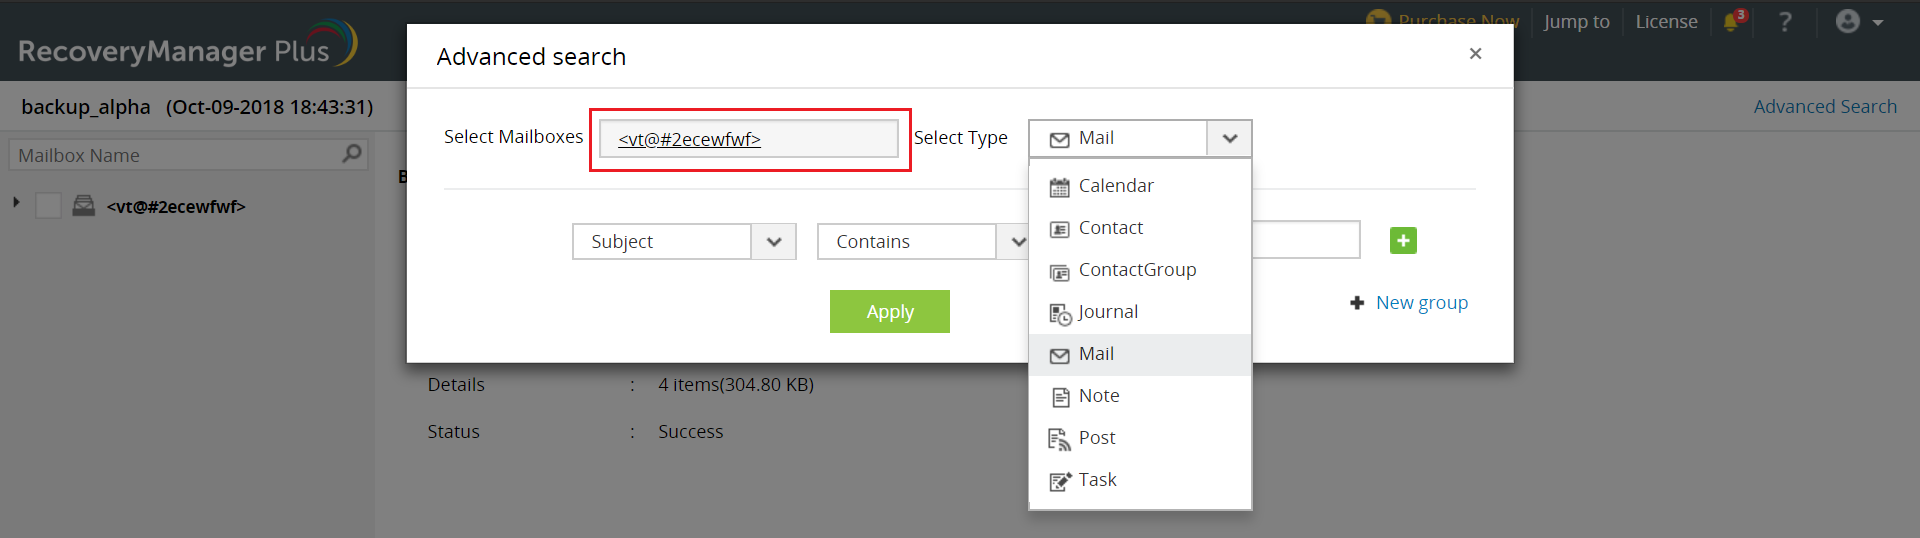
You can also use the Advanced search option to search the entire backup for items that match specific criteria.
Click the Advanced Search link located at the top-right corner of the screen.
In the pop-up that appears, select the mailboxes in which you wish to search by clicking on the Select Mailboxes field. You’ll be provided with a list of all mailboxes backed up in the scheduler.
Select the type of item that you want to search from the list of available options: calendar, contact, journal, mail, note, post and task.
Provide the criteria with which you wish to search and select the item that you wish to restore.
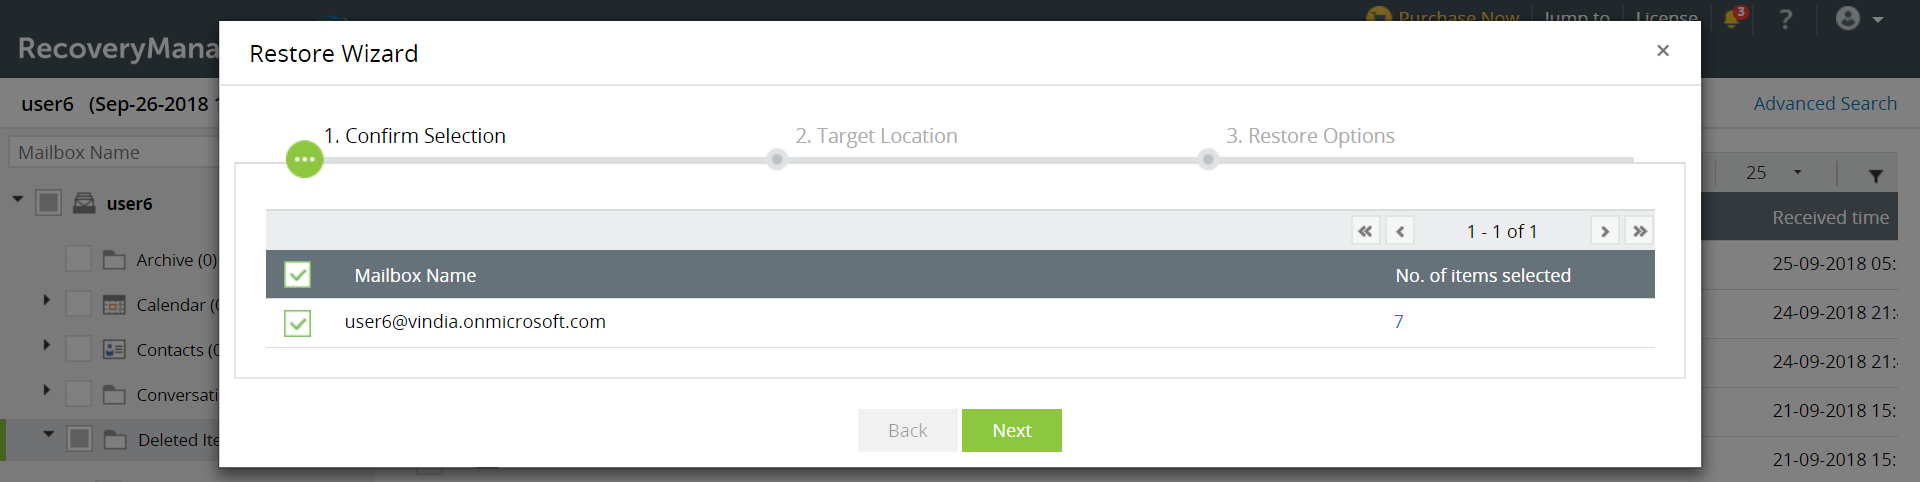
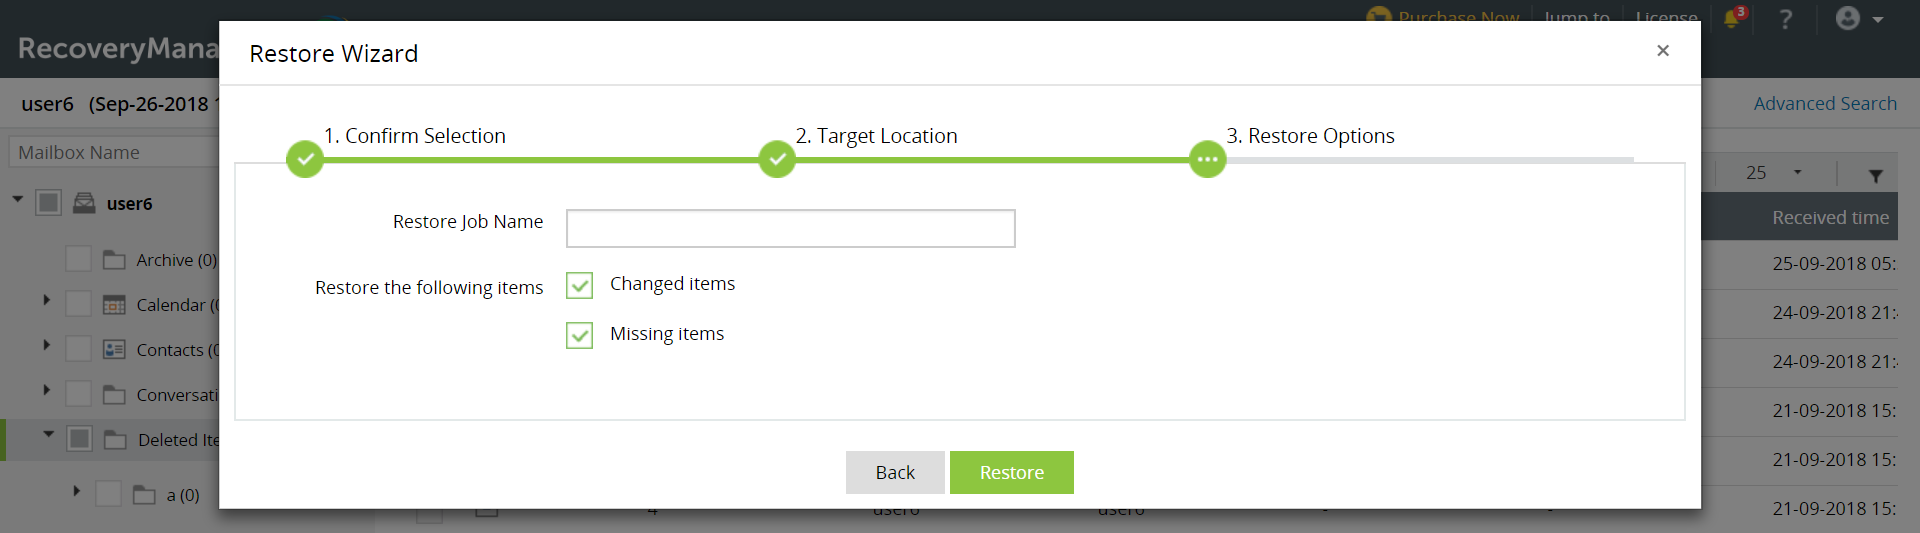
Click the Restore button located at the bottom of the page once you've marked all the items that you wish to restore. The Restore Wizard pop-up will appear.
The first screen shows the mailboxes that you selected for restoration and the number of items that will be restored for each mailbox. Click Next after verifying the selection.
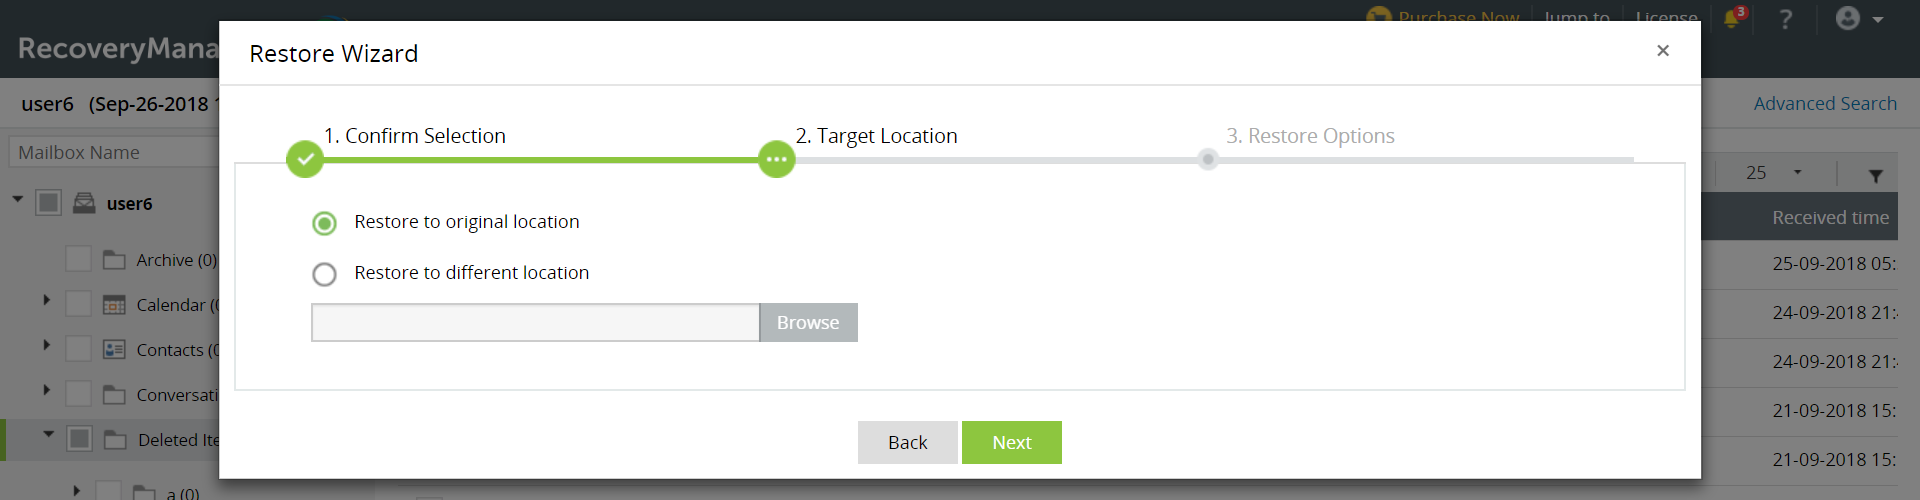
Select if the contents should be restored to the original or a different location. If you wish to restore the contents to a different location, click Browse. Select the mailbox to which you wish to restore. Click Select Target Folder to provide the folder in which the items are to be restored and click Next.
Provide a name for the restore operation. You can choose to restore just the modified items or missing items by selecting the appropriate option. Click Restore to begin the restoration process.
With RecoveryManager Plus, you can back up all changes made to your Exchange Online items on a daily basis. You can also restore any item to any pervious version and recover deleted items, no matter when they were deleted, thereby overcoming two of Exchange Online's glaring drawbacks. To see how item-level restoration in Exchange Online works, head to our web-hosted online demo, or download your free 30-day trial of RecoveryManager Plus and try it out yourself.
