How to fight password theft using the multi-factor authentication techniques available in ADSelfService Plus
Issue: One of the main intrusion techniques used by hackers is password theft. In fact, stolen credentials ranked first in the top 20 data breach action varieties in 2018.
Use
case: Most organizations rely heavily on passwords to
secure their network resources. However, users deal with their password
saturated lives by often creating weak passwords and reuse them across critical
business accounts. This makes stealing passwords the easiest way to get hold of
network resources. Hackers only need to crack one user's password to gain entry
into an organization's network and cause havoc.
Solution: ADSelfService Plus makes
stolen passwords ineffective by mandating a second layer of authentication
(2FA) for:
- Windows/macOS
remote access.
- Windows/macOS
local access.
- Cloud application
access.
Prerequisites for enabling
Windows/macOS 2FA:
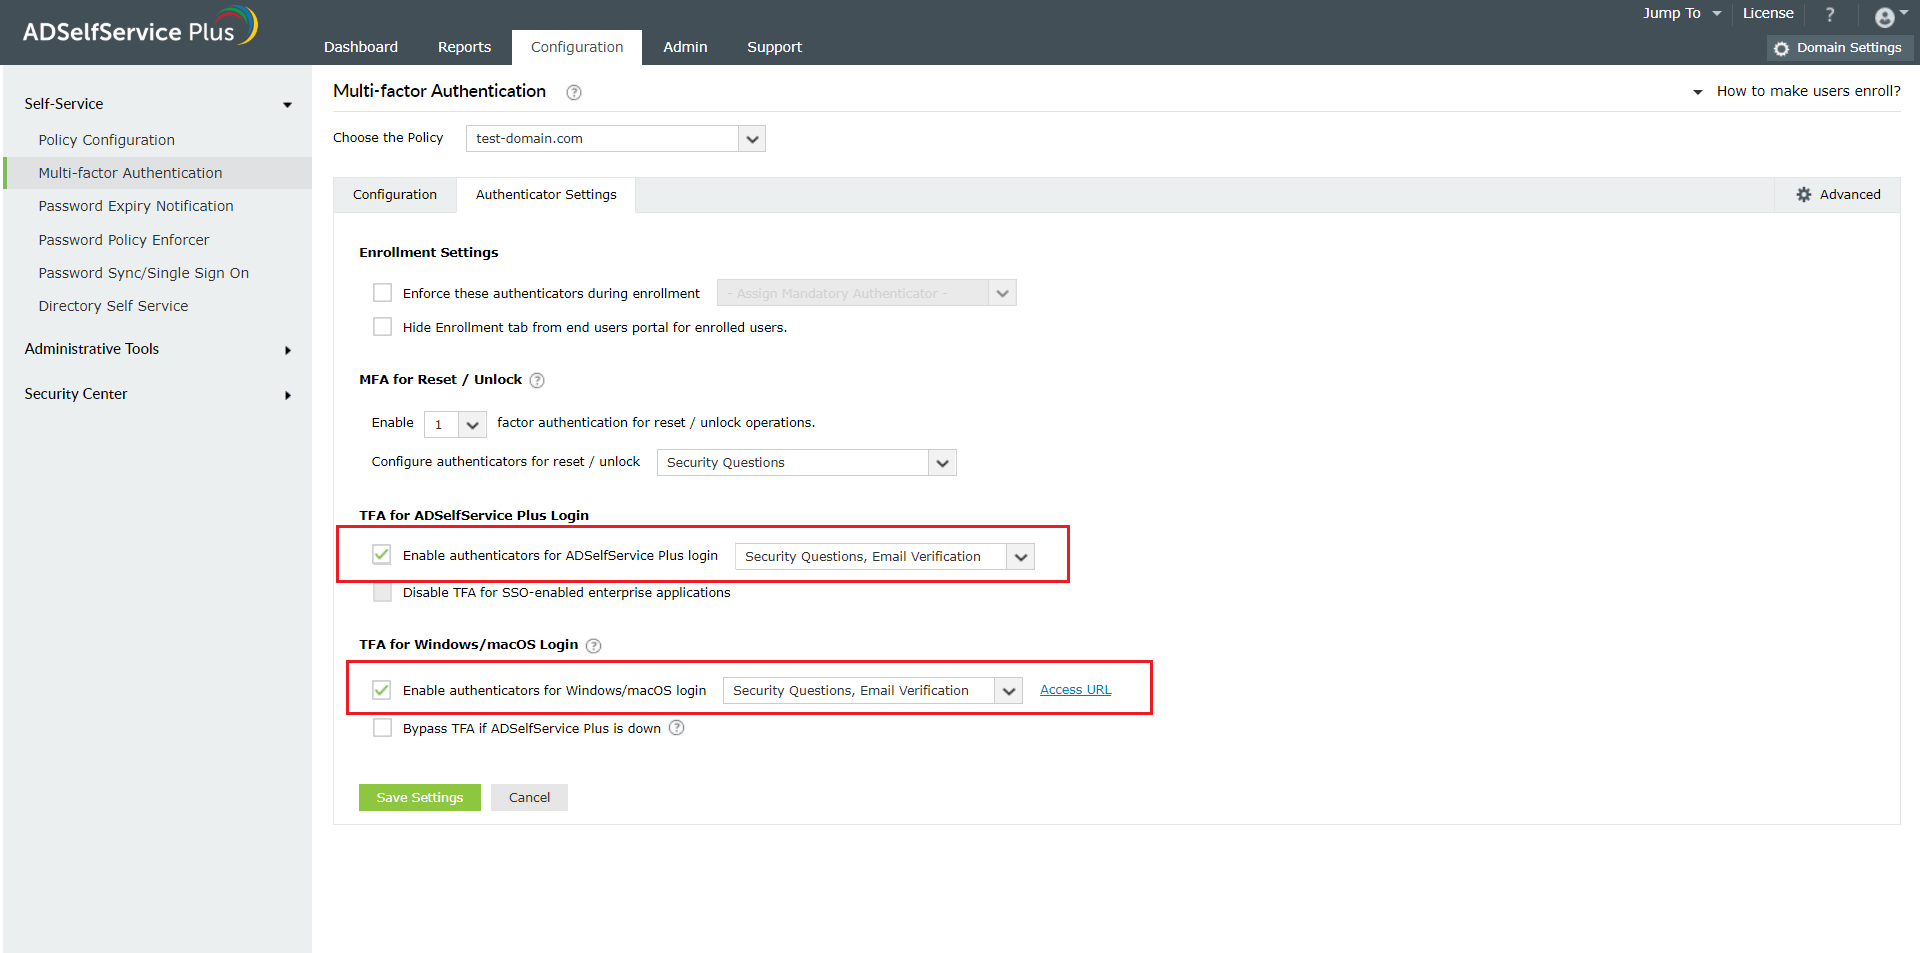
1. SSL and TFA must be enabled in ADSelfService Plus.
2. The Windows and macOS logon agents, which come
bundled with ADSelfService Plus, must be installed through the GINA/Mac Installation option available in the admin console.
3. The authentication techniques you'd like to enforce for users to prove their
identity need to be configured in ADSelfService Plus.
Steps involved:
1. Go to ADSelfService
Plus' admin console.
2. Navigate
to Configuration → Multi-factor Authentication → Authenticator
Settings tab.
3. In the Choose the
Policy field, click the drop-down
box and select the policies for which you wish to enable TFA.
Note: ADSelfService Plus allows you
to create OU and group-based policies. To create a policy, go to Configuration
→ Self-Service → Policy Configuration → Add New Policy. Click Select
OUs/Groups, and make
the selection based on your requirements. Select at least one self-service
feature. Finally, click Save Policy.

To
enforce 2FA for Windows/macOS logons
4. Select Enable
Authenticators for Windows/macOS logins, and mandate the authenticator of your choice from the drop-down.
To enforce 2FA for SAML-enabled cloud
applications
5. If you
also want to enforce 2FA when users attempt to utilize SSO via ADSelfService
Plus, select Enable
Authenticators for ADSelfService Plus logins, and configure the authenticator of your choice from the
drop-down.
6. Keep the Disable TFA for
SSO enabled enterprise applications option unchecked.
7. Select Save Settings.
Topic Participants
Vaishnavidevi