How to back up your Exchange Online environment?
Description
Microsoft Exchange Online allows users to communicate and work from anywhere and at anytime, without organizations having to expend resources to maintain an on-premises Exchange environment. While Microsoft provides extensive archiving capabilities, it does not provide the option to perform a traditional backup of Exchange Online data.
Accidentally deleted emails, contacts, or other Exchange Online items are stored in the deleted items folder for a set period ( 14 days by default but it can be increased to 30 days) beyond which they will be deleted permanently and cannot be restored. Unless the deleted items folder or the mailbox is placed in hold, they cannot be restored. This is why you need a way to restore your Exchange Online items from a backup.
This post will show how you can use RecoveryManager Plus to back up all the items in your Exchange Online environment.
Solution
Before you configure a backup scheduler, you’ll have to add the Exchange Online tenant to RecoveryManager Plus.
Step 1: Adding an Exchange Online tenant to RecoveryManager Plus.
- Open RecoveryManager Plus and log in as the administrator.
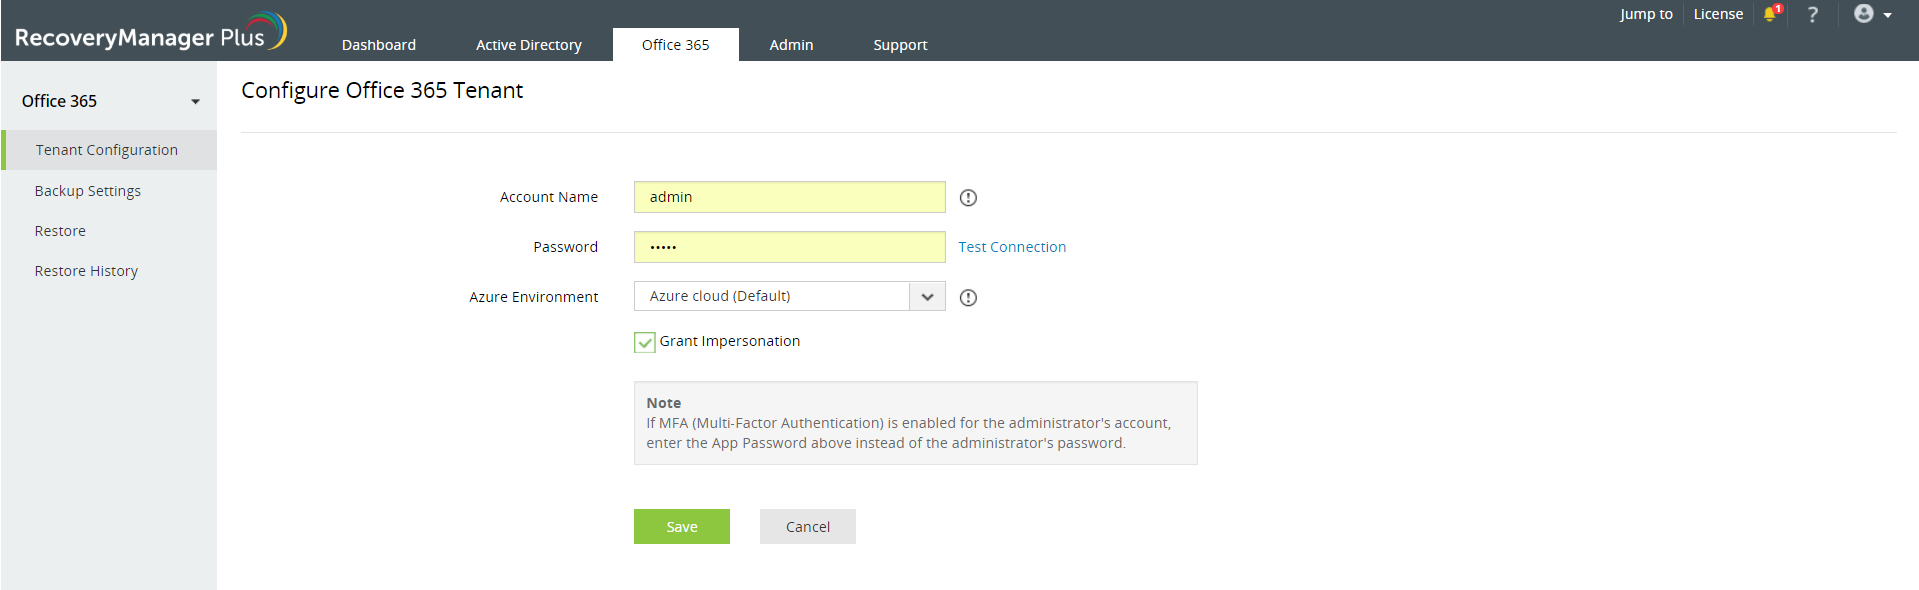
- Navigate to Office 365 tab > Tenant Configuration.
Note: If you have already added a tenant to RecoveryManager Plus, the screen shown above will not appear. Add a new tenant by clicking the
Add New Tenant button on the top-right corner of the screen.

- Enter the Account Name and Password of the Office 365 tenant. Use the credentials of an administrator with the global admin role. The account name should be entered in the format "account@company.onmicrosoft.com".
You can also use a service account that is a member of the Office 365 global admin role to configure your tenant with RecoveryManager Plus.
Click the
Test Connection link to check if the provided credentials are sufficient to establish a connection with the tenant.
Note: If multi-factor authentication is enabled for the account used, provide the app password in the Password field.
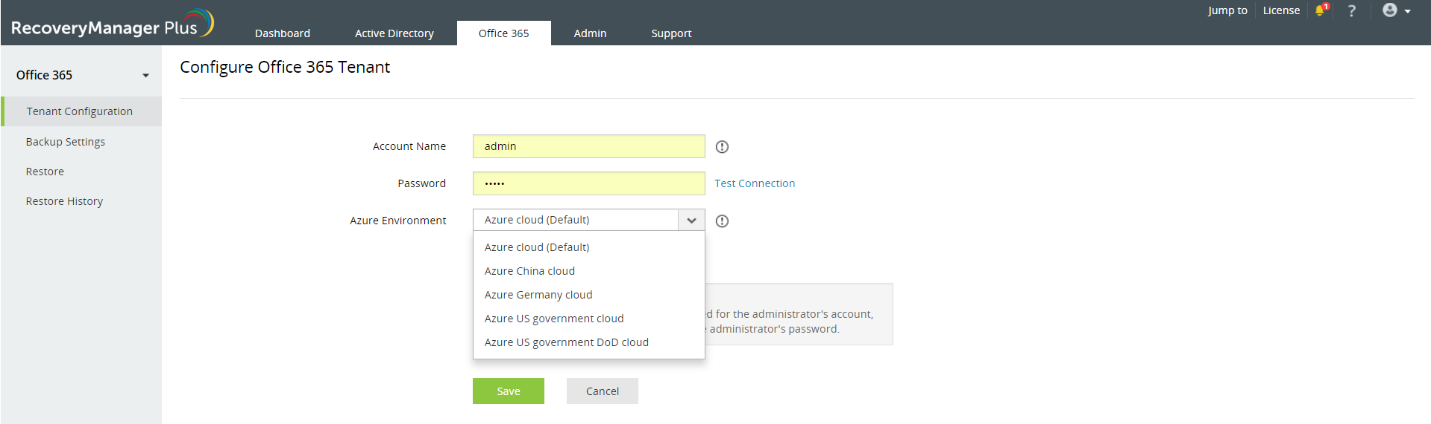
- Choose the Azure Environment in which the tenant was created from the drop-down box.
- Global administrators must have appropriate impersonation rights to backup and restore Office 365 Exchange mailboxes. Select Grant Impersonation to provide the global admin this privilege.
Note: If this option is not selected, you can only backup and restore the mailbox of the global admin whose email address has been used to configure the tenant.
- Click Save to add the tenant.
Step 2: Creating a backup schedule for your Exchange Online environment.
- Navigate to Office 365 > Backup Settings.
- Click the Create Backup button in the top-right corner of the page.
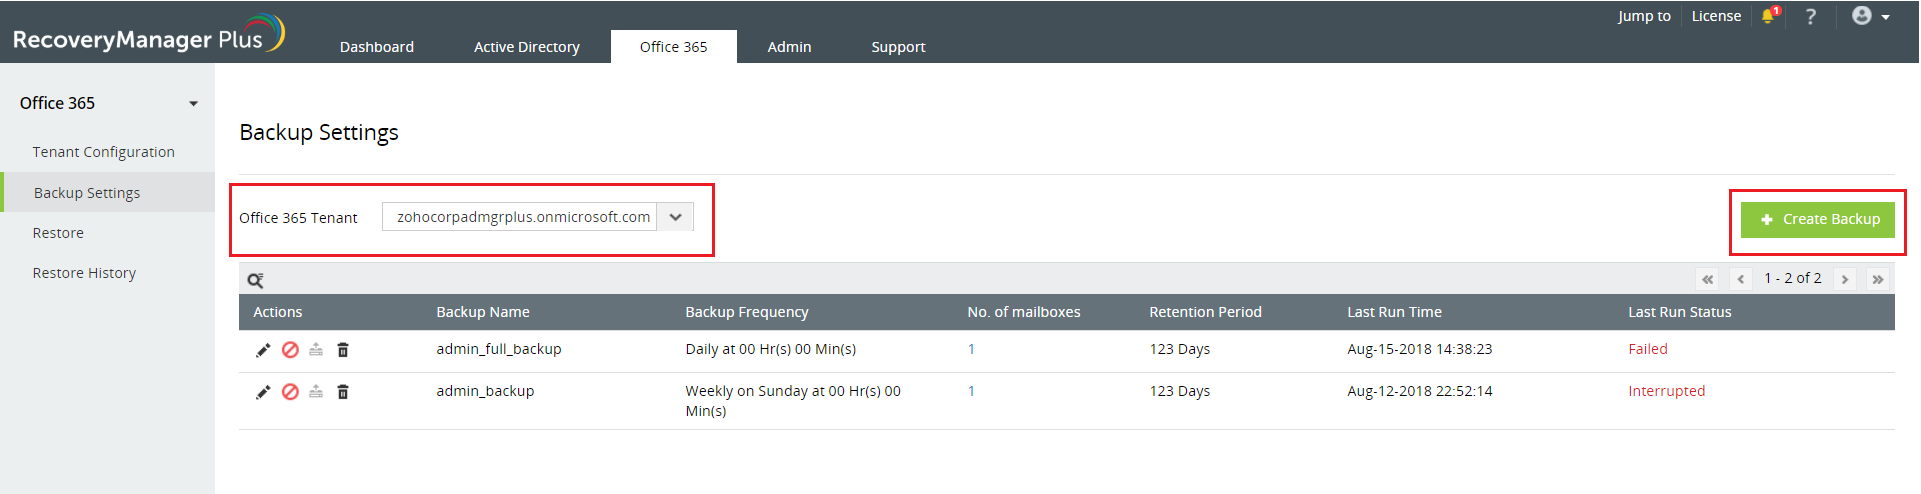
- If you’ve configured multiple Office 365 tenants, choose the tenant for which you wish to create a backup schedule from the Office 365 Tenant drop-down box.
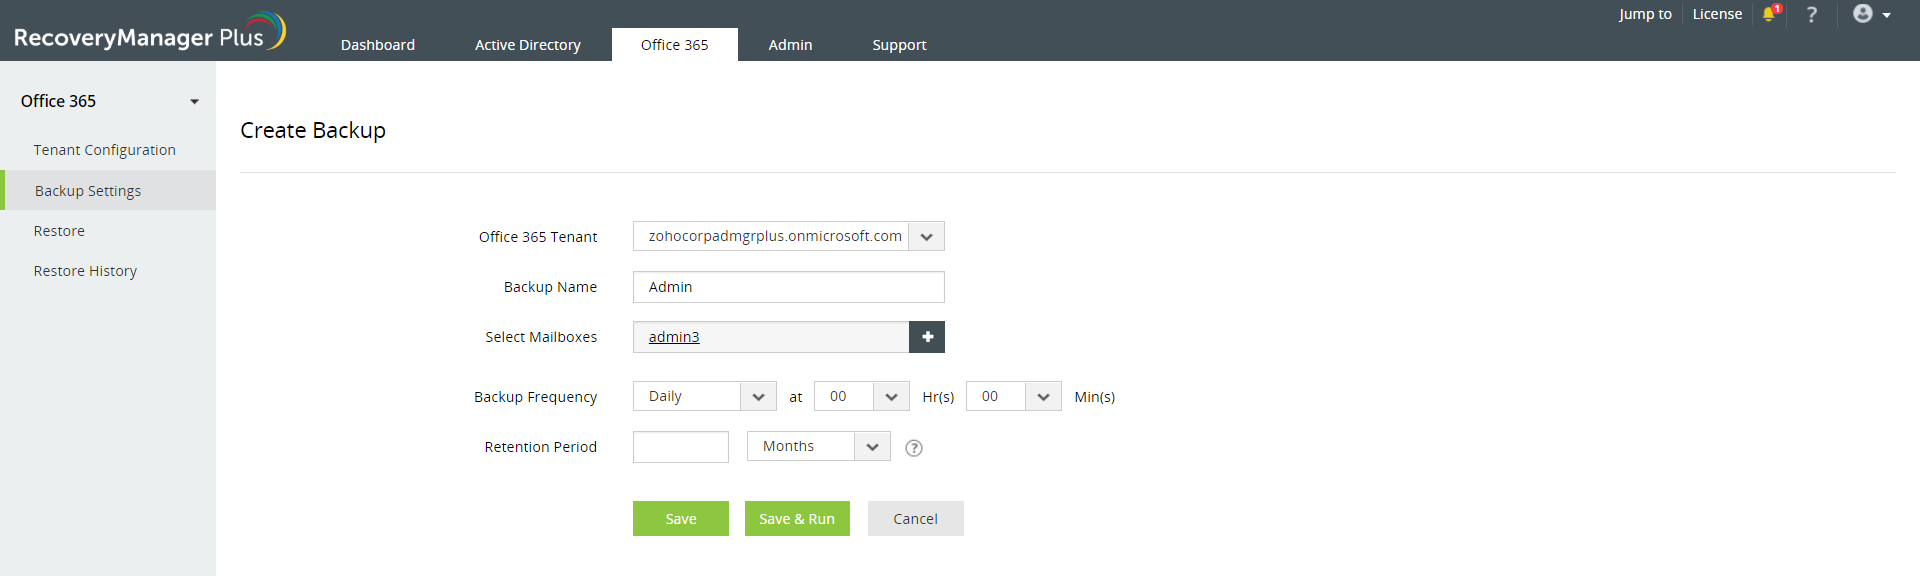
- Provide a name for the backup schedule.
- Select the mailboxes that you wish to back up by clicking the
 icon in the Select Mailboxes field. Only mailboxes licensed for RecoveryManager Plus can be backed up using the product. For detailed instructions on managing mailbox licenses, click here.
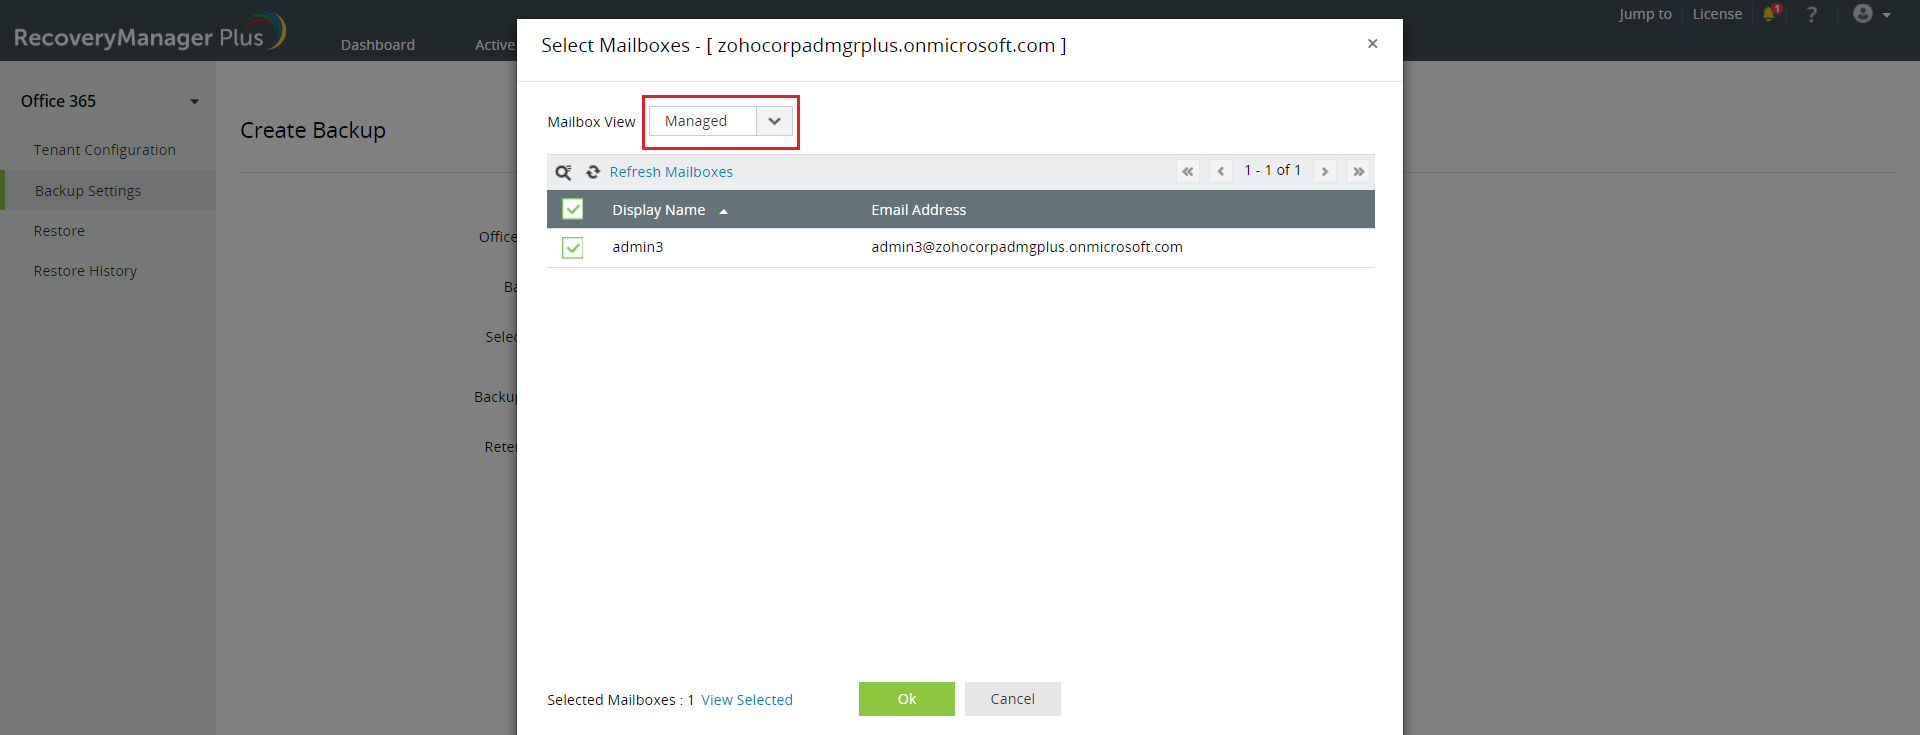
 - In the pop-up that appears, use the Mailbox View drop-down box located at the top-left to limit the mailboxes that are shown. The different views available are:
- All – This view shows all mailboxes in the selected Office 365 tenant.
- Managed – This view shows the mailboxes that are licensed for RecoveryManager Plus.
- Unmanaged – This view shows the mailboxes that are not licensed for RecoveryManager Plus.
Note: You can configure a mailbox for backup irrespective of whether the mailbox is licensed or not, but the backup of unlicensed mailboxes will fail. So, make sure that all selected mailboxes are licensed.
- To search for individual mailboxes, use the
 icon. After you’ve selected all mailboxes that you wish to backup, click OK.
 - Select the desired frequency at which the schedule must run from the options available.
- Daily - Scheduler will run once every day at the scheduled time.
- Weekly - Scheduler will run once every week on the specified day and time.
- Monthly – Scheduler will run once a month on the specified date and time.
- In the Retention Period field, enter the number of days/months/years for which Exchange Online backups should be stored. Backups older than the specified age will be discarded. For example, if you've set the retention period to be 30 days, when the backup schedule runs on the 31st day, the backups taken on the first day will be discarded. To learn more about how RecoveryManager Plus processes retention period, click here.
- You can also configure RecoveryManager Plus to store your Exchange Online backups forever, in which case backups will not be discarded.
Note: Minimum retention period for Exchange Online backups is 30 days.
- Click Save to save the scheduler and the backup will run at the specified time.
- Click Save & Run to save the scheduler and trigger the first backup process immediately.
Your Exchange Online environment will now be periodically backed up, providing you with an option to restore them to any of their backed up states.
For a hands-on experience in handling RecoveryManager Plus’s Exchange Online backup capabilities, try our
web-hosted version.
To download RecoveryManager Plus, click
here.
