Did you know - How to identify and prevent brute force attack?
Passwords are the most targeted points of attack to gain access to your critical resources. Hence you must ensure that stringent password policies are in effect to avoid dire consequences. With healthy password practices evolving, ways to break them are also on-the-grow, which indicates that it is high time that you adopt proper tools to survive such unknown threats.
ADSelfService Plus provides means to identify and prevent password related issues. This week we will learn how to prevent brute force attack. Brute force attack is a trial-and-error method to identify the user passwords, which is mostly automated.
Identify the attack
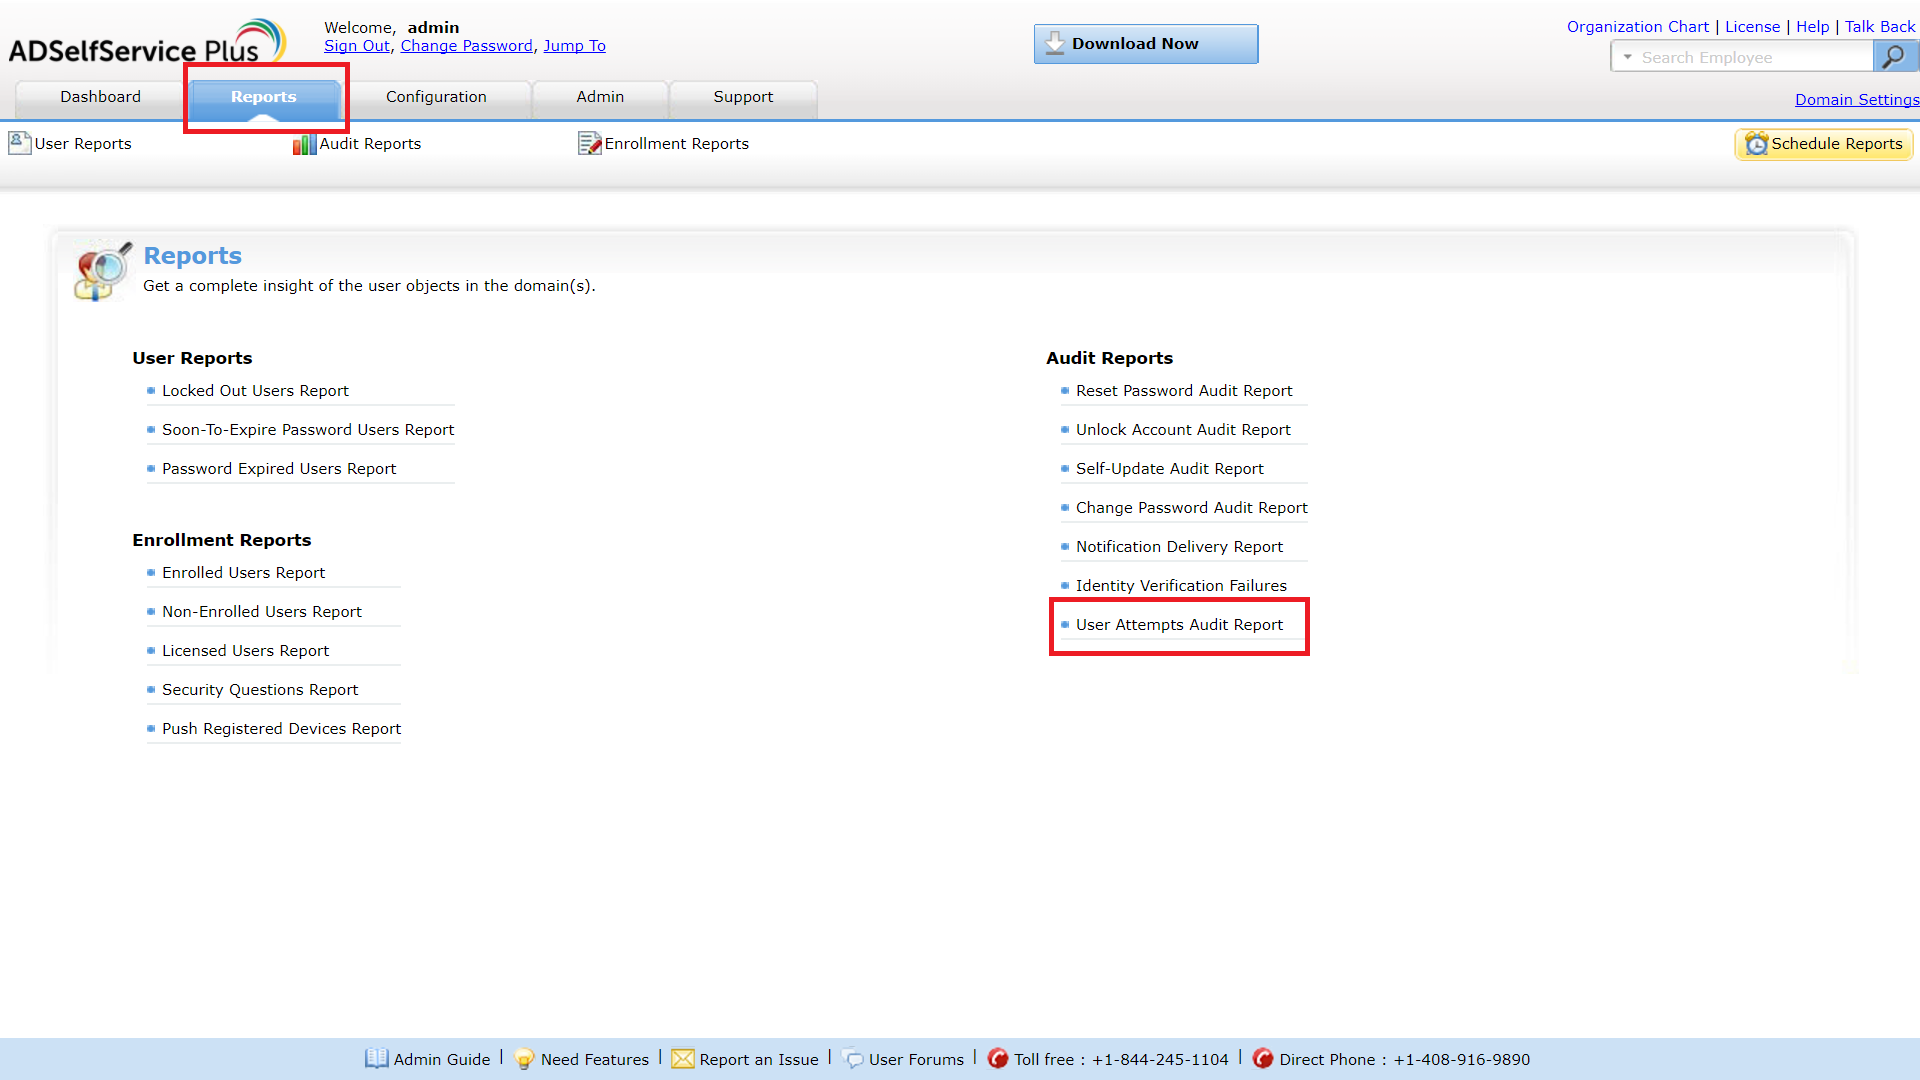
Continuous login failures is the sign of brute force attack. ADSelfService provides you User Attempts Audit Report which gives you details on login attempts of users. You can filter the failed login attempts to identify if an attacker is trying to gain access into your system.
Steps to generate User Attempts Audit Report
1. Login to ADSelfService Plus' Admin portal.
2. Select the Reports tab.
3. Under Audit Reports, select User Attempts Audit Report.

4. Select the Filter option found at the right corner.
5. Uncheck Success and select Apply Filter.

6. You will get a list of failed logon attempts. If the failed attempts are from a single Username, you are under a possible brute force attack.

This report can be exported to PDF, CSV, HTML or XLS format. It can also be emailed to the appropriate person using the Send Mail option.
Prevent the attack
Enabling CAPTCHA is the most common way of preventing an automated brute force attack. ADSelfService Plus allows you to enable image and audio CAPTCHA. As an added advantage you can also configure when and where the CAPTCHA must be used.
Steps to enable CAPTCHA
1. Login to ADSelfService Plus' Admin portal.
2. Select Admin tab.
3. Select Customize --> Logon Settings in the left pane.
4. Under General tab select Show CAPTCHA (Word Verification Image) on Login Page.
5. Once you select the option, you will see two more options to configure. These options determine in which page the CAPTCHA must appear. (On 'Admin' & 'Domain User' Login Page. / On 'Reset Password' & 'Unlock Account' Login Page.)
6. Select the page(s) in which the CAPTCHA must appear based on your choice.

7. Select CAPTCHA settings to configure when the CAPTCHA must appear.

8. Configure the settings in the pop-up.
9. Click Save.
Click here to know how to configure an audio CAPTCHA.
Topic Participants
Anupriya T