[Tips and Tricks] - How to bulk enroll Duo Security-enabled users for password self-service?
Enrollment is the only task that has to be completed before users can start enjoying the benefits of ADSelfService Plus password self-service. But many a time, administrators might have to constantly shoot out reminders urging users to enroll. Or much worse, they could be pushed to the extent of taking it head-on by enrolling all their users themselves, one at a time!
The glad news is that we’ve got just what is needed to wade through all this trouble. ADSelfService Plus allows administrators the convenience of performing bulk enrollment of their hitherto unenrolled users so that they can avail password self-service.
Today, we will look at the ways to bulk enroll Duo Security-enabled users for password self-service. Duo Security is a trusted access platform that organizations employ to verify user identities, ensuring secure access.
Administrators can choose between two options to perform bulk enrollment. They are:
- Import enrollment data from CSV file
- Import enrollment data from external database
Method 1: Bulk enrollment by importing Duo Security users from CSV file
- Log into ADSelfService Plus as an administrator.
- Navigate to Admin > Configuration > Quick Enrollment.
- From the list of features, select Import Enrollment Data from CSV File.
- Select the required policy from the drop-down list.
- Select Duo Security from the Import field and upload the CSV file containing user details.
- Click Enroll.
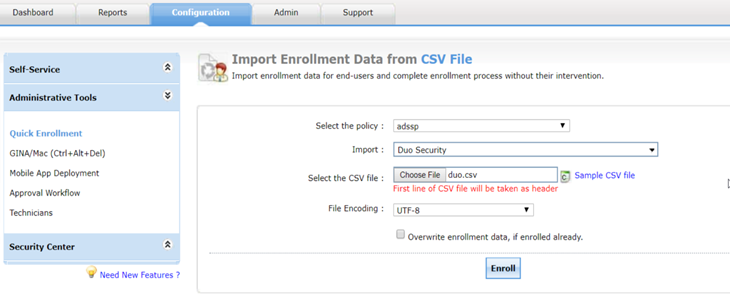
CSV enrollment
Method 2: Bulk enrollment by importing Duo Security users from external database
- Log into ADSelfService Plus as an administrator.
- Navigate to Admin > Configuration > Quick Enrollment.
- From the list of features, select Import Enrollment Data from External database.
- Click Add New Data Source. Enter the details and click Create to establish a connection with your in-house database.
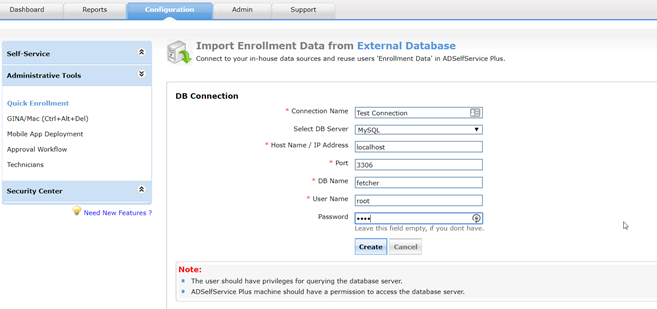
Connection configuration
- Click Add Data Fetcher.
- Specify the name, connection, and the required policy.
- Select Duo Security from the Import field.
- Type in the SQL query and click Save.
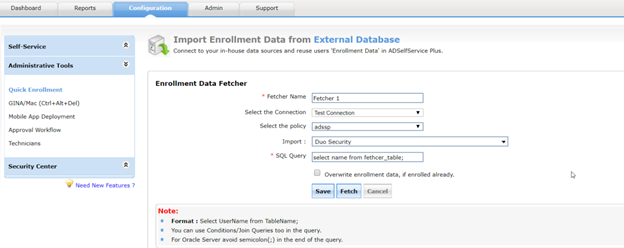
- Click Fetch to get the data from the external database.
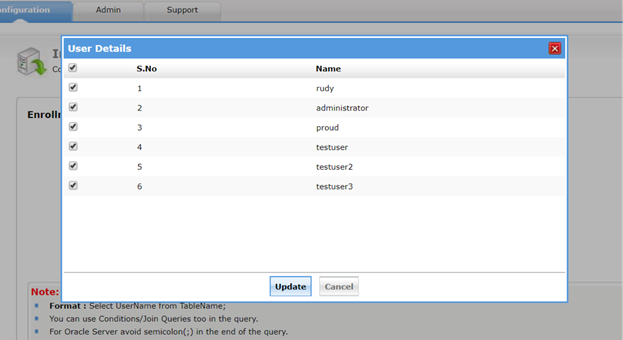
- In the User Details window that appears, click Update.
