Add an Office 365 tenant to RecoveryManager Plus using an MFA enabled account
Problem
When you use a multi-factor `authentication (MFA) enabled global admin account to add your Office 365 tenant with RecoveryManager Plus, using the password of the account during configuration will throw the error "Authentication failed".
In such cases, you’ll have to provide the app password of the MFA enabled account. However, the app password is displayed when you enable MFA for the first time and cannot be retrieved again.
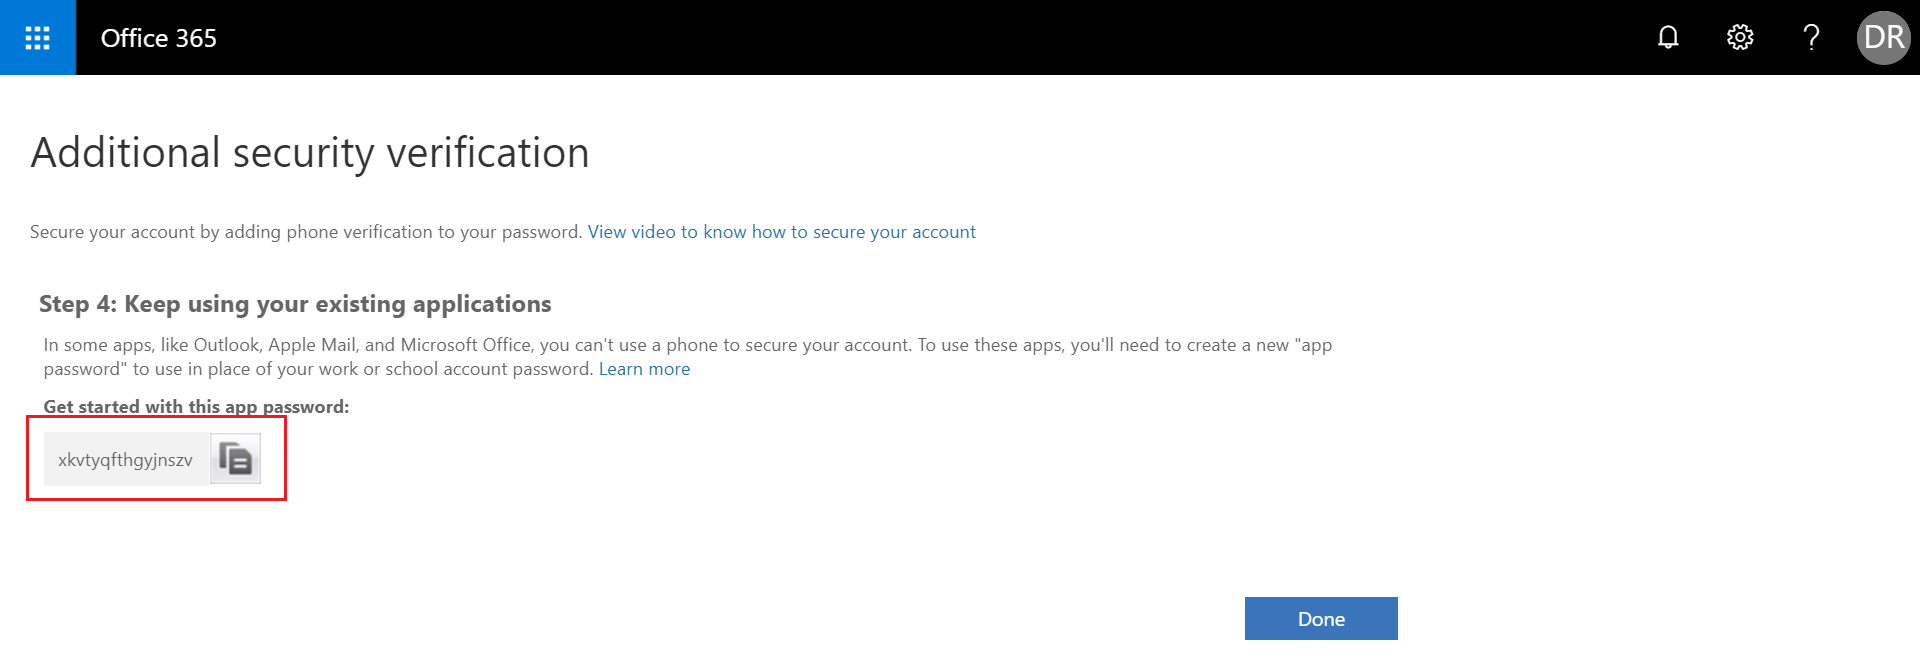
If you do not have the app password, you’ll have to create a new app password.
Solution
This post will explain how you can create a new app password and use that to add the Office 365 tenant to RecoveryManager Plus.
To generate a new app password in Office 365, follow the steps listed below.
- Log in to the Office 365 portal.
- Select your name at the top right, and choose My account.

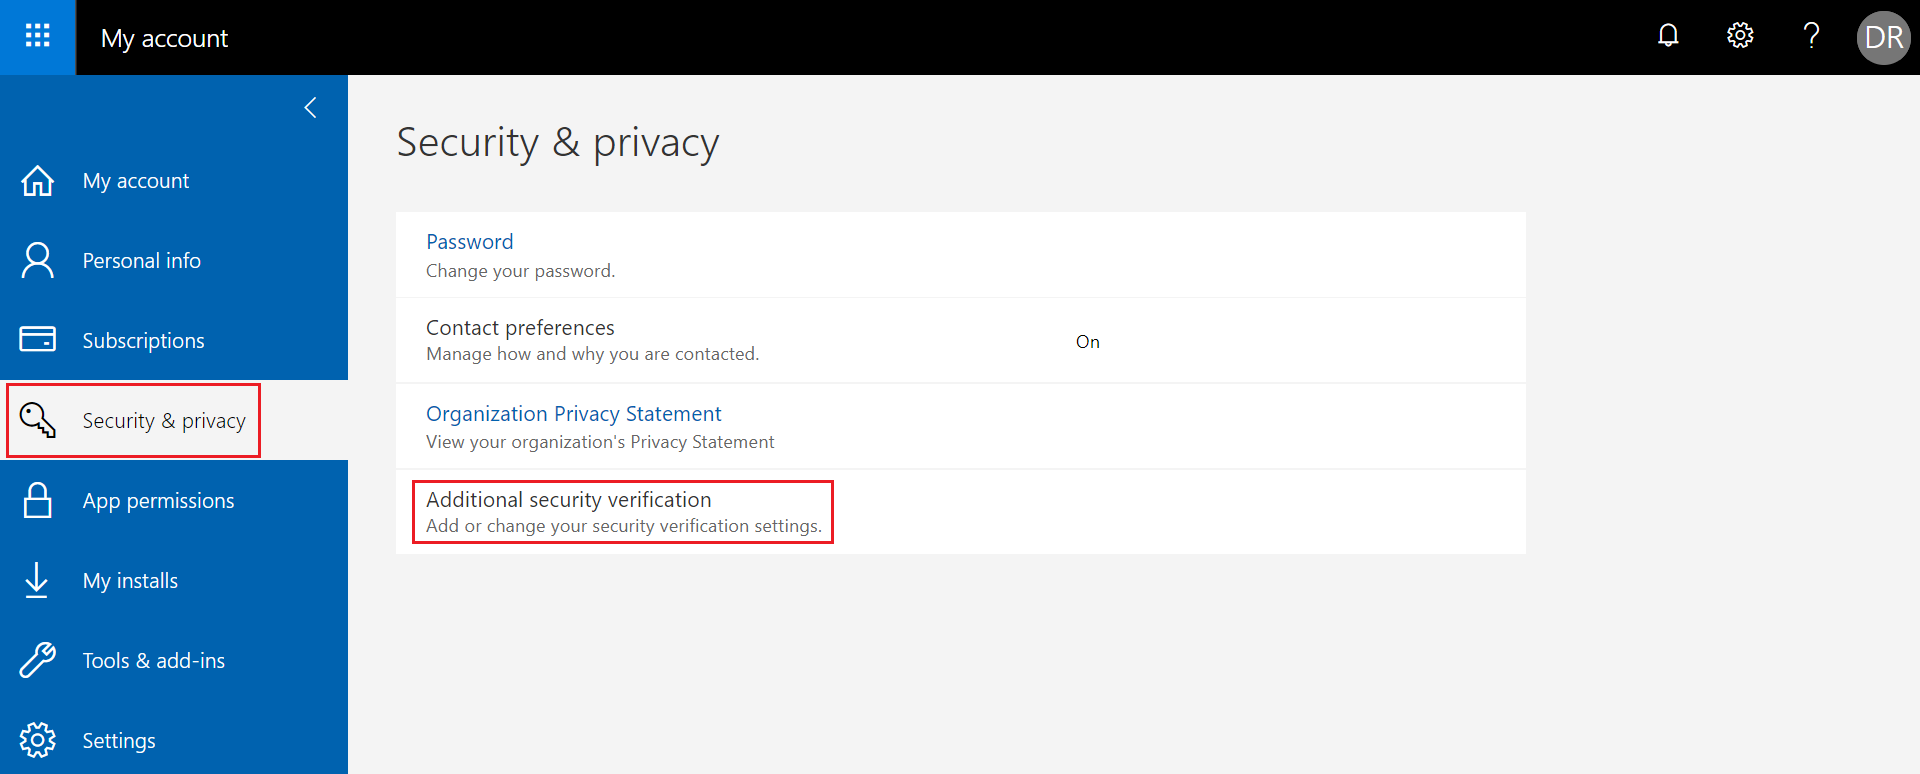
- Click Security & privacy > Additional security verification.
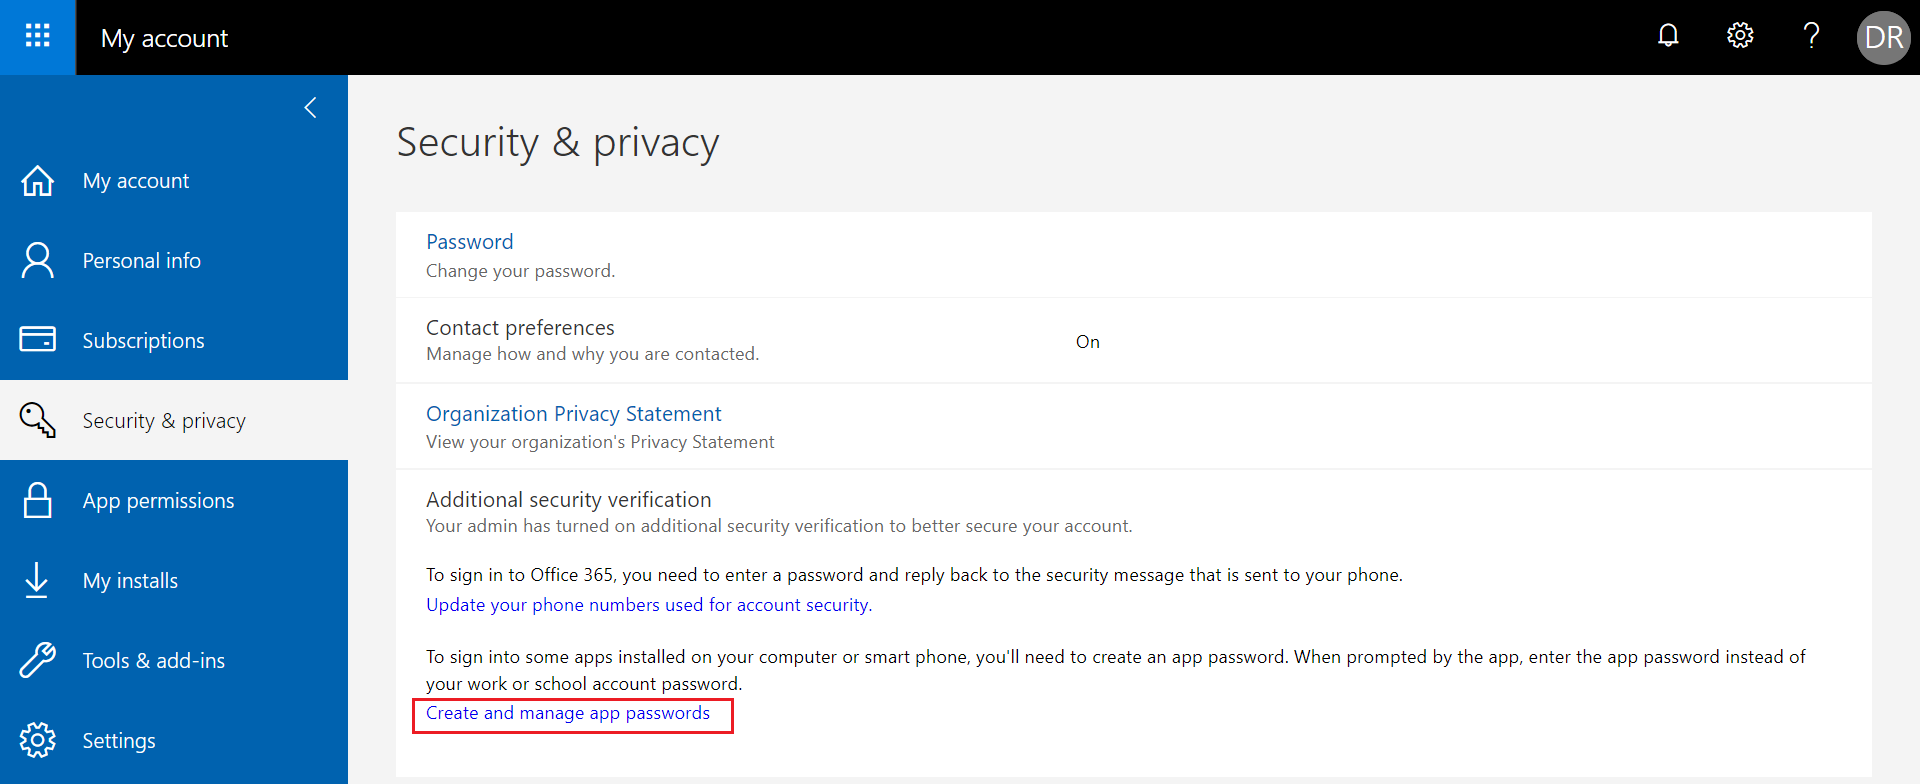
- Click Create and manage app passwords.
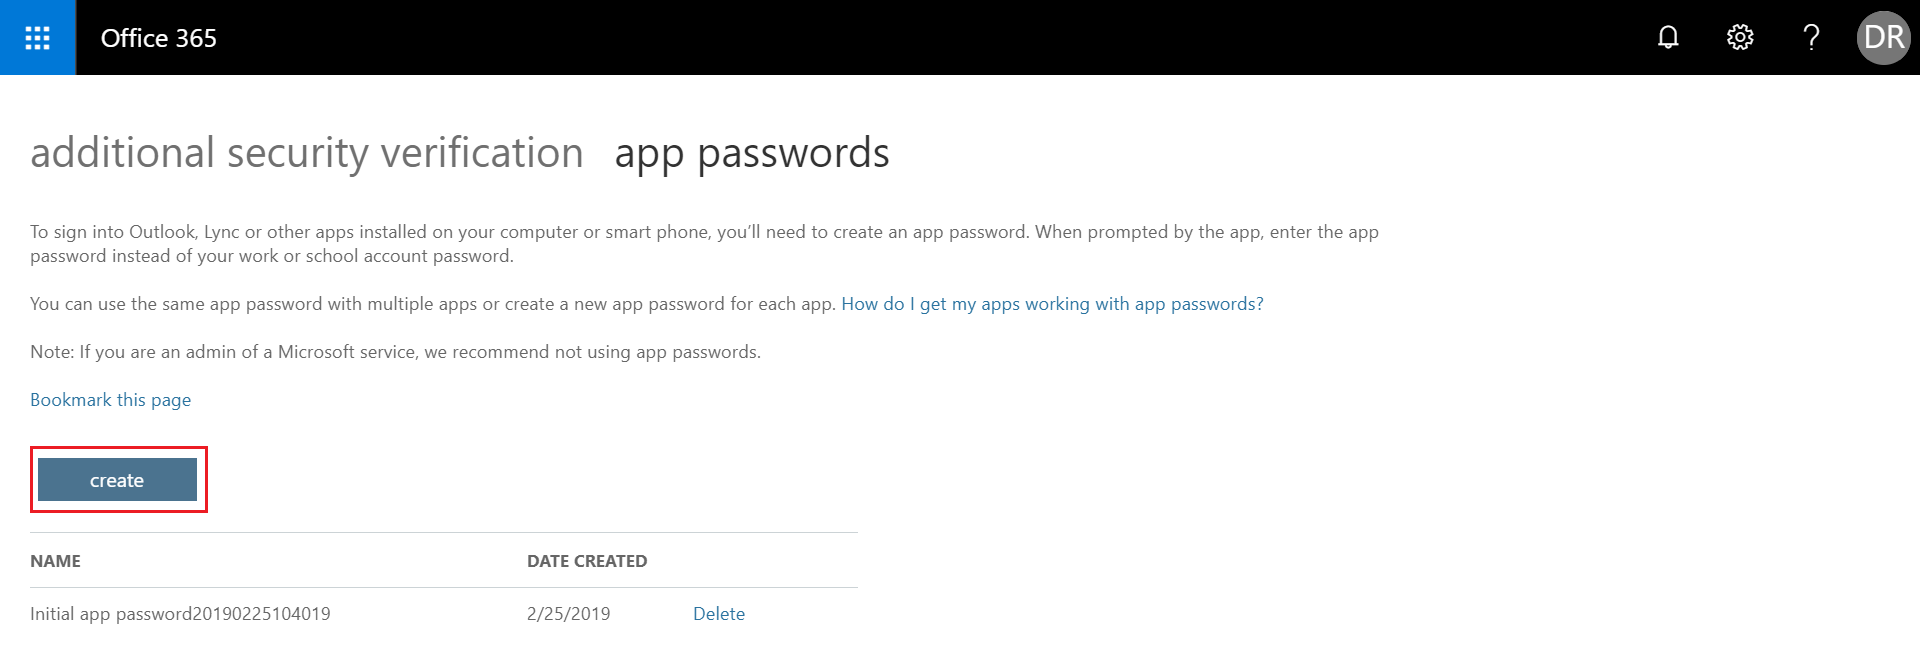
- In the App passwords page that appears, click create.
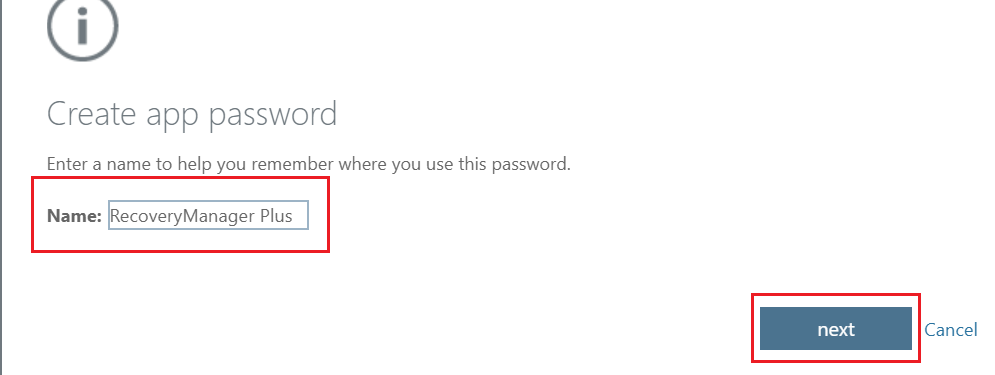
- Type a name for the app that needs the app password and click next.
- Click copy password to clipboard.
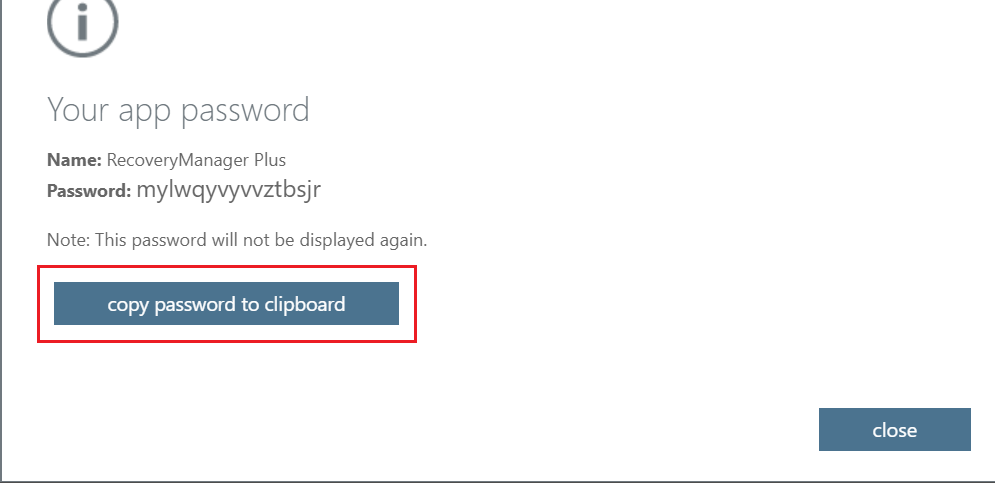
The copied app password can now be used to add the tenant to RecoveryManager Plus.
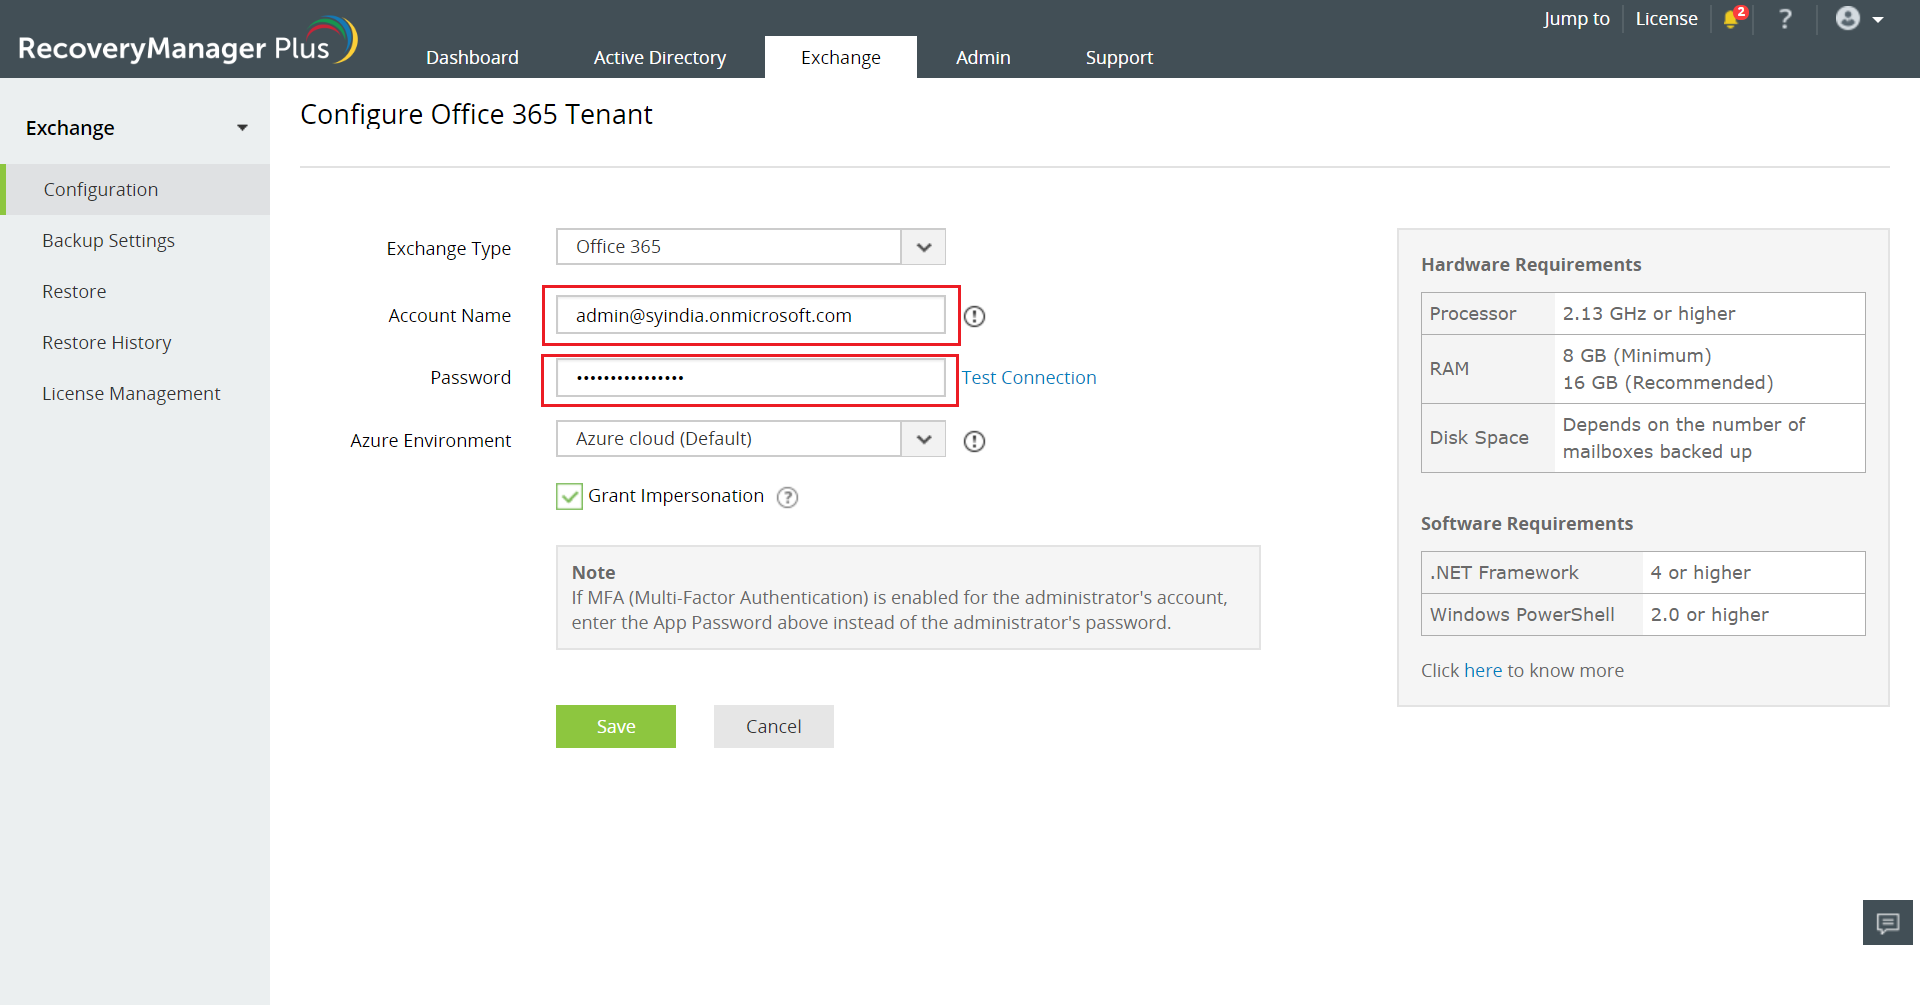
- Log in to RecoveryManager Plus as the administrator.
- Navigate to Exchange tab → Configuration.
- Select Office 365 in the Exchange Type drop-down.
- Enter the account name and the copied app password in the Account Name and Password fields.
- Choose the Azure environment in which the tenant was created from the drop-down box.
- Global administrators must have appropriate impersonation rights to backup and restore Office 365 Exchange mailboxes. Select the Grant Impersonation checkbox to provide the global admin this privilege.
Note: If this option is not selected, you can only backup and restore the mailbox of the global admin whose email address has been used to configure the tenant.
- Click Save to add the tenant.
Topic Participants
Dhilip R
New to M365 Manager Plus?
New to M365 Manager Plus?
New to RecoveryManager Plus?
New to RecoveryManager Plus?
New to Exchange Reporter Plus?
New to Exchange Reporter Plus?
New to SharePoint Manager Plus?
New to SharePoint Manager Plus?
New to ADManager Plus?