Steps to secure MSSQL database connection
Hello folks,
This post explains you the steps that need to be followed to secure the database connection in ServiceDesk Plus.
Summary of Steps:
1. Create SSL certificate
2. Import the SSL certificate to SDP setup.
3. Enable SSL Encryption in SQL Server
Step 1 & 2:
To start this process, we need to create an "SSL Certificate" it could be either self-signed or third party certificate.
Do follow the below steps in MS SQL server installed machine to create self-signed ssl certificate.
1.Open IIS manager.
2. Click on host name of the connection and click the "Server Certificates" from the right pane.
2. Click on host name of the connection and click the "Server Certificates" from the right pane.

3. Under the right pane action menu, there is an option to import the verified certificate authority like verisign or click on "Create self-signed certificate" and provide valid information.

4. The generated self-signed certificate valid for one year.
How to Import the self-signed/third party ssl certificate into SDP setup?
How to Import the self-signed/third party ssl certificate into SDP setup?
To do this, first we need to export the generated self-signed SSL certificate from IIS server. Do follow the below steps export the SSL certificate.
1. open the Certificate in IIS Manger.
2. Click on details tab
3. Click on copy to file option.
4. "Certificate Export wizard" page will get opened and click "next" button.
5. Under the "Export private key" window, please select 'NO, do not export the private key' option and click next
6. Under the "Export file format" window, we need to choose either DER encoded binary X.509 (.CER) or Base-64 encoded X.509 (.CER) and then click "Next" button.
7. Locate the directory to export the certificate file (Eg : <SDP Installation Folder>/jre directory)
8 Click next, and then click Finish to export the certificate.
( OR )
Copy and paste the exported certificate to <SDP Installation Folder>/jre directory.
Execute the following command under <SDP Installation Folder>/jre directory
"%JAVA_HOME%\bin\keytool" -import -v -trustcacerts -alias myserver -file <name of the server certificate>.cer -keystore "%JAVA_HOME%\lib\security\cacerts" -keypass changeit -storepass changeit -noprompt
The above command will install the self signed certificate in your local store.
Step 3:
How to enable SSL encryption in MS SQL Server,
1. Open the "SQL Server Configuration Manager".
2. Expand "SQL Server Network Configuration", choose the right sql server intance and right click and choose "Properties".
3. Under the "Certificate" tab, associate the created/imported SSL certificateand then click "Apply" button.

4. Under the "Flags" tab, change the ForceEncryption option value as "Yes".

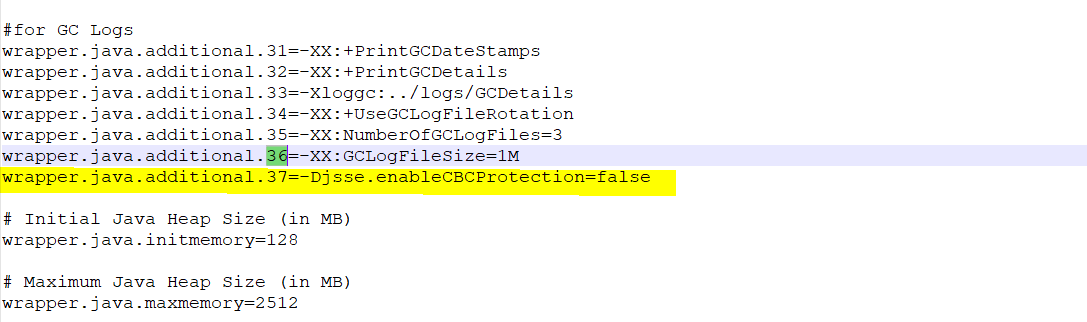
Add the following syntax -Djsse.enableCBCProtection=false to the files run.bat that can be located in the directory ../ManageEngine/ServiceDesk/bin and in wrapper.conf file present in the directory ../ManageEngine/ServiceDesk/conf.
Add the following syntax ssl\=require in the database_params.conf file present in the directory ../ManageEngine/ServiceDesk/conf
Refer to images below.
run.bat:

wrapper.conf:
database_params.conf:

Once the syntaxes are added, To take effect the changes, we should restart the MSSQL and ServiceDesk Plus application services.
To confirm whether the connection is encrypted, run the below query.
select * from sys.dm_exec_connections where client_net_address='<IP address of SDP server>';
In the resulting columns check for encrypt_option column. If the values are 'TRUE' then the connection is encrypted.
